CSS:
-
css-引入方式
-
css-选择器
高级选择器
属性选择器
伪类选择器
伪元素选择器
-
css-继承性和层叠性
层叠性权重相同处理
-
css-盒模型
padding(内边距)
border(边框)
margin(外边距)
-
css-标准文档流
块级元素和行内元素
css-浮动
一、css-引入方式
1.css介绍
现在的互联网前端分为三层:
HTML:超文本标记语言。从语义的角度描述页面结构;
CSS:层叠样式。从审美的角度负责页面样式;
JS:JavaScript。从交互的角度描述页面行为;
CSS:Cascading Style Sheet,层叠样式表。CSS的作用就是给HTML页面标签添加各种样式,定义网页的显示效果。简单一句话:CSS将网页内容和显示样式进行分离,提高了显示功能。
2.HTML的缺陷
不能适应多种设备;要求浏览器必须只能足够庞大;数据和显示没有分开;功能不够强大;
3.CSS优点
使数据和显示分开;降低网络流量;使整个网站视觉效果一致;是开发效率提高(耦合性降低)
比如说,有一个样式需要在一百个页面上显示,如果是html来实现,那要写一百遍,现在有了css,只要写一遍。现在,html只提供数据和一些控件,完全交给css提供各种各样的样式。
4.四种方式
4.1行内样式
<div>
    <p style="color: green">我是一个段落</p>
</div>
4.2内接样式
<style type="text/css">
    /*写我们的css代码*/

    span{
    color: yellow;
    }

</style>
4.3外接样式-链接式
<head>
    <link rel="stylesheet" href="./index.css">
</head>
4.4外接样式-导入式
<style type="text/css">
        @import url('./index.css');
</style>
二、css-选择器
1.基本选择器
1.1标签选择器
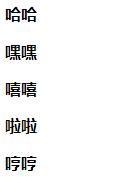
标签选择器可以选中所有的标签元素,比如div,ul,li ,p等等,不管标签藏的多深,都能选中,选中的是所有的,而不是某一个,所以说 "共性" 而不是 ”特性“


<!DOCTYPE html>
<html lang="en">
<head>
    <meta charset="UTF-8">
    <title>Title</title>
    <!--在样式里将所有p标签的内容字体全部加粗-->
    <style>
        p{
            font-weight: bolder;
        }
    </style>
</head>
<body>
    <p>哈哈</p>
    <p>嘿嘿</p>
    <p>嘻嘻</p>
    <p>啦啦</p>
    <p>哼哼</p>
</body>
</html>
网页显示:
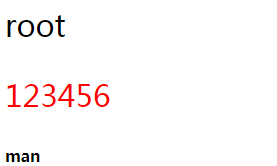
1.2 id选择器
#id值,表示选择的ID
同一个页面中id不能重复;任何的标签都可以设置id;
id命名规范和python变量命名一样;
<!DOCTYPE html>
<html>
<head>
    <meta charset="UTF-8">
    <title>Title</title>
    <!--分别设置各id内的样式-->
    <style>
        #user{
            font-size: 30px;
        }
        #pass{
            color: red;
        }
        #gender{
            font-weight: bolder;
        }
    </style>
</head>
<body>
    <div id="user">
        root
        <p id="pass">123456</p>
    </div>
    <span id="gender">man</span>
</body>
</html>
网页显示:
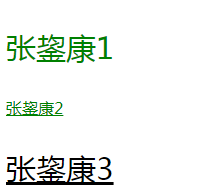
1.3类选择器
所谓类:就是class . class与id非常相似 任何的标签都可以加类,但是类是可以重复,属于归类的概念。同一个标签中可以携带多个类,用空格隔开。
类的使用,能够决定前端工程师的css水平到底有多厉害,玩类,一定要有”公共类“的概念;
<!DOCTYPE html>
<html>
<head>
    <meta charset="UTF-8">
    <title>Title</title>
    <!--分别设置各id内的样式-->
    <style>
        .lg{
            font-size: 30px;
        }
        .lv{
            color: green;
        }
        .un{
            text-decoration: underline;
        }
    </style>
</head>
<body>
    <!-- 要求:
        张鋆康1 30px green
        张鋆康2 green text-decoration:underline;
        张鋆康3    30px 下划线
     -->
     <!-- 公共类 -->
    <p id="p1" class="lg lv">张鋆康1</p>
    <p id="p2" class="lv un">张鋆康2</p>
    <p id="p3" class="lg un">张鋆康3</p>

</body>
</html>
网页显示:
类小结:
不要去试图用一个类将所有的页面写完,这个标签要带多个类,共同设置样式;
每个类要尽可能的小,有公共的概念,能够让更多的标签使用;
到底使用id还是class?
尽量使用class,除非一些特殊情况下可以使用id;因为id一般用在js的,也就是说,js是通过id来获取标签的;
2.高级选择器
高级选择器又分为:后代选择器、子代选择器、并集选择器、交集选择器;
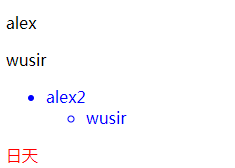
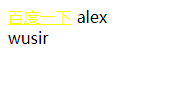
2.1后代选择器
使用空格表示后代选择器。故名思议,父元素的后代(包括儿子、孙子、重孙子)
<!DOCTYPE html>
<html>
<head>
    <meta charset="UTF-8">
    <title>Document</title>
    <style>
        .father p{
            color: red;
        }

    </style>
</head>
<body>

    <div class="father">
        <p>alex</p>
        <ul>
            <li>
                <p class="wu">wusir</p>
            </li>
        </ul>
    </div>

    <p class="wu">日天</p>

</body>
</html>
网页显示:

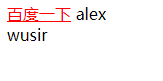
<!DOCTYPE html>
<html>
<head>
    <meta charset="UTF-8">
    <title>Document</title>
    <style>
        .father p{
            color: red;
        }
        .father .wu{
            color: green;
        }

    </style>
</head>
<body>

    <div class="father">
        <p>alex</p>
        <ul>
            <li>
                <p class="wu">wusir</p>
            </li>
        </ul>
    </div>

    <p class="wu">日天</p>

</body>
</html>
网页显示:

这是怎么回事呢?如果遇到这种情况我们怎么去判断呢?下面会讲到标签的“优先级”
2.2子代选择器
使用>表示子代选择器,比如div>p,仅仅表示的是当前div元素选中的子代(不包含孙子)元素p
<!DOCTYPE html>
<html>
<head>
    <meta charset="UTF-8">
    <title>Document</title>
    <style>
        .father>ul>li{
            color: blue;
        }
        .container{
            color: red;
        }
    </style>
</head>
<body>
    <div class="father">
        <p>alex</p>
        <div class="content">
            <p>wusir</p>
        </div>
        <ul>
            <li>
                alex2
                <ul>
                    <li>wusir</li>
                </ul>
            </li>
        </ul>
    </div>

    <div class="container">
        <p>日天</p>
    </div>

</body>
</html>
网页显示:
有没有发现一个问题,为什么我们只是想改alex2,怎么连带wusir也更改了呢??,这是因为继承的问题,我们下文在说此问题。
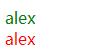
2.3并集选择器(也称组合选择器)
多个选择器之间使用逗号隔开,表示选中的页面中的多个标签。一些共性的元素,可以使用并集选择器;
<!DOCTYPE html>
<html>
<head>
    <meta charset="UTF-8">
    <title>Document</title>
    <style>
        body,div,p,a,span{
            padding: 0;
            margin: 0;
        }

    </style>
</head>
<body>
    <div>
        alex
    </div>
    <p>alex2</p>
    <a href="#">日天</a>
    <span>wusir</span>

</body>
</html>
网页显示:

比如百度首页使用的就是并集选择器:
 body,h1,h2,h3,h4,h5,h6,hr,p,blockquote,dl,dt,dd,ul,ol,li,pre,form,fieldset,legend,button,input,textarea,th,td {
      margin: 0;
      padding: 0
   }
/*使用此并集选择器选中页面中所有的标签,页面布局的时候会使用*/
2.4交集选择器
使用.表示交集选择器。第一个标签必须是一个标签选择器,第二个标签必须是一个类选择器,比如:div.active
<!DOCTYPE html>
<html>
<head>
    <meta charset="UTF-8">
    <title></title>
    <style>
        div{
            color: red;
        }
        div.active{
            color: green;
        }
    </style>

</head>
<body>
    <div class="active">alex</div>
    <div class="username">alex</div>

</body>
</html>
网页显示:
3.属性选择器
属性选择器,字面意思就是根据标签中的属性,选中当前的标签;
/*根据属性查找*/
            /*[for]{
                color: red;
            }*/

            /*找到for属性的等于username的元素 字体颜色设为红色*/
            /*[for='username']{
                color: yellow;
            }*/

            /*以....开头  ^*/
            /*[for^='user']{
                color: #008000;
            }*/

            /*以....结尾   $*/
            /*[for$='vvip']{
                color: red;
            }*/

            /*包含某元素的标签*/
            /*[for*="vip"]{
                color: #00BFFF;
            }*/

            /**/

            /*指定单词的属性*/
            label[for~='user1']{
                color: red;
            }

            input[type='text']{
                background: red;
            }
<!DOCTYPE html>
<html>
<head>
    <meta charset="UTF-8">
    <title></title>
    <style>
        form input[type='text']{
            background-color: red;
        }
        form input[type='password']{
            background-color: yellow;
        }
        form #user{
            background-color: green;
        }
    </style>
</head>
<body>

    <form action="">
        <input type="text" id="user">
        <input type="password">
    </form>
</body>
</html>
网页显示:

4.伪类选择器
伪类选择器一般会使用在超链接a标签中,使用a标签的伪类选择器,我们一定要遵循“爱恨准则” LoVe HAte
/*没有被访问的a标签的样式*/
        .box ul li.item1 a:link{

            color: #666;
        }
        /*访问过后的a标签的样式*/
        .box ul li.item2 a:visited{

            color: yellow;
        }
        /*鼠标悬停时a标签的样式*/
        .box ul li.item3 a:hover{

            color: green;
        }
        /*鼠标摁住的时候a标签的样式*/
        .box ul li.item4 a:active{

            color: yellowgreen;
        }
/*选中第一个元素*/
        div ul li:first-child{
            font-size: 20px;
            color: red;
        }
        /*选中最后一个元素*/
        div ul li:last-child{
            font-size: 20px;
            color: yellow;
        }

        /*选中当前指定的元素  数值从1开始*/
        div ul li:nth-child(3){
            font-size: 30px;
            color: purple;
        }

        /*n表示选中所有,这里面必须是n, 从0开始的  0的时候表示没有选中*/
        div ul li:nth-child(n){
            font-size: 40px;
            color: red;
        }

        /*偶数*/
        div ul li:nth-child(2n){
            font-size: 50px;
            color: gold;
        }
        /*奇数*/
        div ul li:nth-child(2n-1){
            font-size: 50px;
            color: yellow;
        }
        /*隔几换色  隔行换色
             隔4换色 就是5n+1,隔3换色就是4n+1
            */

        div ul li:nth-child(5n+1){
            font-size: 50px;
            color: red;
        }
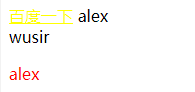
<!DOCTYPE html>
<html>
<head>
    <meta charset="UTF-8">
    <title></title>
    <style>
        /*爱恨准则 LoVe HAte*/
        /*没有被访问的a标签的颜色*/
        a:link{
            color: green;
        }
        /*访问过后的a标签的颜色*/
        a:visited{
            color: yellow;
        }
        /*鼠标悬停的时候a标签的颜色*/
        a:hover{
            color: red;
        }

        /*鼠标点击时的颜色*/
        a:active{
            color: blue;
        }

        /*鼠标悬停时字体的变化,可以变颜色,可以变大小,可以加下划线等等*/
        span:hover{
            color: red;
            font-size: 24px;
            text-decoration: underline;
        }

        /*设置child类默认为隐藏属性,当鼠标停留在父类时则显示出子类child*/
        .child{
            display: none;
        }
        .father:hover .child{
            color: red;
            display: block;
        }

    </style>
</head>
<body>
    <a href="#">百度一下</a>

    <span>alex</span>

    <div class="father">
        wusir
        <p class="child">alex</p>
    </div>

</body>
</html>
网页显示:
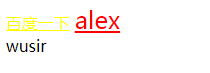
5.伪元素选择器
/*设置第一个首字母的样式*/
        p:first-letter{
            color: red;
            font-size: 30px;

        }

/* 在....之前 添加内容   这个属性使用不是很频繁 了解  使用此伪元素选择器一定要结合content属性*/
        p:before{
            content:'alex';
        }


/*在....之后 添加内容,使用非常频繁 通常与咱们后面要讲到布局 有很大的关联(清除浮动)*/
        p:after{
            content:'&';
            color: red;
            font-size: 40px;
        }
<!DOCTYPE html>
<html lang="en">
<head>
    <meta charset="UTF-8">
    <title>Document</title>
    <style>
        p:first-letter{
            color: red;
            font-size: 26px;
        }
        /*用伪元素 属性一定是content*/

        /*伪元素选择器与后面的布局有很大关系*/
        p:before{
            content: '$'
        }
        p:after{
            content: '.'
        }
        .box2{

            /*需求:这个盒子一定是块级标签  span==>块 并且不再页面中占位置。未来与布局有很大关系 */

            /*隐藏元素 不占位置*/
            /*display: none;*/
            display: block;

            /*display: none;*/
            /*隐藏元素 占位置*/
            visibility: hidden;
            height: 0;

        }

    </style>
</head>
<body>
    <p class="box">
        <span>alex</span>
    </p>

    <span class="box2">alex</span>
    <div>wusir</div>

</body>
</html>
网页显示:

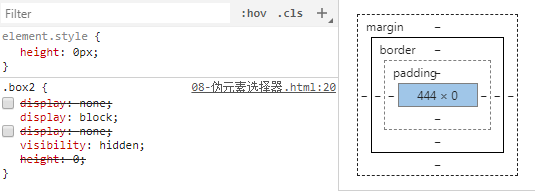
说明元素被隐藏了但是还占用着位置呢,444*0
三、css-继承性和层叠性
css有两大特性:继承性和层叠性
1.继承性
面向对象语言都会存在继承的概念,在面向对象语言中,继承的特点:继承了父类的属性和方法。那么我们现在主要研究css,css就是在设置属性的。不会牵扯到方法的层面;
继承:给父级设置一些属性,子级继承了父级的该属性,这就是我们的css中的继承;
记住:有一些属性是可以继承下来 : color 、 font-*、 text-*、line-* 。主要是文本级的标签元素;
但是像一些盒子元素属性,定位的元素(浮动,绝对定位,固定定位)不能继承;
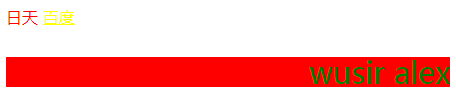
<!DOCTYPE html>
<html lang="en">
<head>
    <meta charset="UTF-8">
    <title>Document</title>
    <style>
        .box{
            color: red;
        }
        .box a{
            color: yellow;
        }
        .box p{
            color: green;
            font-size: 30px;
            line-height: 30px;
            background-color: red;
            text-align: right;
        }
        span{
            background-color: transparent;
        }
    </style>
</head>
<body>

    <div class="box">
        日天
        <a href="#">百度</a>
        <p>
            wusir
            <span>alex</span>
        </p>
    </div>

</body>
</html>
网页显示:

2.层叠性
层叠性: 权重的标签覆盖掉了权重小的标签,说白了 ,就是被干掉了;
权重: 谁的权重大,浏览器就会显示谁的属性;
谁的权重大? 非常简单就是小学的数数。
顺序:id > class > 标签
先来看一个简单的例子:
<!DOCTYPE html>
<html lang="en">
<head>
    <meta charset="UTF-8">
    <title>Document</title>
    <style>

    /*css层叠性  权重 谁的权重大就会显示谁的样式*/

    /*如何看权重  数数选择器  id  class 标签*/
        /*id class 标签*/

        /*1    0     0*/
        #box{
            color: yellow;
        }

        /*0    1     0*/
        .box{
            color: green;
        }

        /*0    0     1*/
        div{
            color: red;
        }

        /*优先级:  id > 类 > 标签*/


    </style>
</head>
<body>
    <div class="box" id="box">猜猜我是什么颜色</div>

</body>
</html>
网页显示:

是不是感觉明白了?在来点有难度的
<!DOCTYPE html>
<html lang="en">
<head>
    <meta charset="UTF-8">
    <title>

    </title>
    <style>
        /*1 3 0 */
        #father1 .box2 #father3 p{
            color: yellow;
        }

        /*0 4 0*/
        /*.box1 .box2 .box3 .box4{
            color: red;
        }*/
        /*2 1 1*/
        #father1 #father2 .box3 p{
            color: green;
        }

    </style>
</head>
<body>
    <div class="box1" id="father1">
        <ul class="box2" id="father2">
            <li class="box3" id="father3">
                <p class="box4" id="child">猜猜我的颜色</p>
            </li>
        </ul>
    </div>
</body>
</html>
网页显示:

是不是更加明白了,再继续深入一下;
<!DOCTYPE html>
<html lang="en">
<head>
    <meta charset="UTF-8">
    <title>

    </title>
    <style>
    /*继承来的属性 它的权重为0,跟选中的标签没有可比性*/
        #father1 #father2 #father3{
            color: red;
        }
        #father1 .box2 .box3 p{
            color: green;
        }

    </style>
</head>
<body>
    <div class="box1" id="father1">
        <ul class="box2" id="father2">
            <li class="box3" id="father3">
                <p class="box4" id="child">猜猜我的颜色</p>
            </li>
        </ul>
    </div>
</body>
</html>
网页显示:

这回感觉怎么样?有没有明白这其中的道理?接着来看例子
<!DOCTYPE html>
<html lang="en">
<head>
    <meta charset="UTF-8">
    <title>

    </title>
    <style>
    /*继承来的属性 权重为0*/

    /*如果是继承来的熟悉,就近原则,谁更深入谁厉害*/
        #father1 .box2{
            color: red;
        }
        .box1{
            color: blue;
        }

    </style>
</head>
<body>
    <div class="box1" id="father1">
        <ul class="box2" id="father2">
            <li class="box3" id="father3">
                <p class="box4" id="child">猜猜我的颜色</p>
            </li>
        </ul>
    </div>
</body>
</html>
网页显示:

最后在来看看一个例子;
<!DOCTYPE html>
<html lang="en">
<head>
    <meta charset="UTF-8">
    <title>

    </title>
    <style>
    /*继承来的属性 权重为0*/

        /*都是继承来的 ,都一样深*/

        #father1 #father2 .box3{
            color: blue;
        }
        #father1 .box2 .box3{
            color: green;
        }

    </style>
</head>
<body>
    <div class="box1" id="father1">
        <ul class="box2" id="father2">
            <li class="box3" id="father3">
                <p class="box4" id="child">猜猜我的颜色</p>
            </li>
        </ul>
    </div>
</body>
</html>
网页显示:

层叠性小结:
a.首先看一下我们要修改的标签有没有在style样式里被选中,如果被选中,则此标签样式权重最大;(本身最大)
b.如果要修改的标签没有在style样式里则表示要修改的标签要继承他的父类了,这时就开始比父类,谁里要修改的标签越近谁的权重越大;(就近原则)
c.如果在style里出现了父类里要修改的标签一样进,那么开始比这两个父类的权重(id、class、标签),谁权重大谁能遗传给要修改的标签;(权重比较)
d.如果此时要修改的标签的两个父类权重,举例都是一样的,那么就按先来后到(从上到下)来定了,最后一个胜;(先来后到)
注意:
!important 的使用;!important:设置权重为无限大 ;!important 不影响继承来的权重,只影响选中的元素。不要随便使用!important,因为使用它会影响页面的布局。
四、盒模型
1.盒模型说明:
在CSS中,"box model"这一术语是用来设计和布局时使用,然后在网页中基本上都会显示一些方方正正的盒子。我们称为这种盒子叫盒模型。
盒模型有两种:标准模型和IE模型。我们在这里重点讲标准模型。
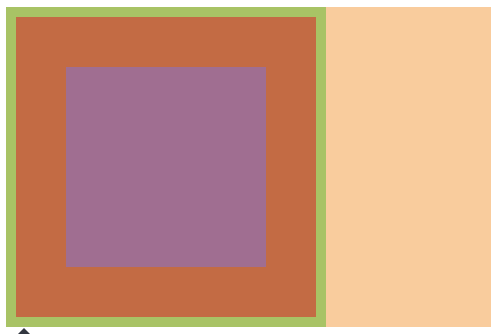
2.盒模型示意图
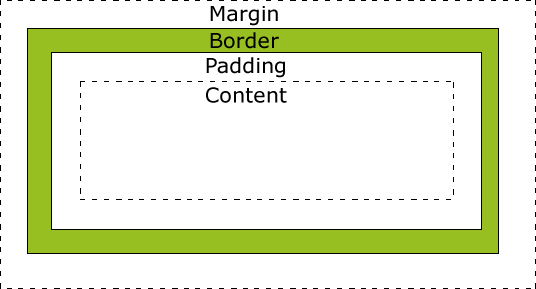
3.盒模型的属性
width:内容的宽度;
height: 内容的高度;
padding:内边距,边框到内容的距离;
border: 边框,就是指的盒子的宽度;
margin:外边距,盒子边框到附近最近盒子的距离;
练习:做一个320*320的盒子
<!DOCTYPE html>
<html lang="en">
<head>
    <meta charset="UTF-8">
    <title>Document</title>
    <style>
        .box{
            width: 200px;
            height: 200px;
            color:blue;
            background-color: red;
            padding: 50px;
            border: 10px solid green;
            /*margin-left: 50px;*/
        }
    </style>
</head>
<body>
    <!--
    width:内容的宽度
    height:内容的高度
    padding:内边距
    border:边框
    margin:外边距
     -->
     <div class="box"></div>

</body>
</html>
网页显示:
4.盒模型的计算
如果一个盒子设置了padding,border,width,height,margin(咱们先不要设置margin,margin有坑,后面课程会讲解)
盒子的真实宽度=width+2*padding+2*border
盒子的真实宽度=height+2*padding+2*border