前面我们初步入门了Spring,接下来我们看下如何搭建一个简单的Spring MVC项目。
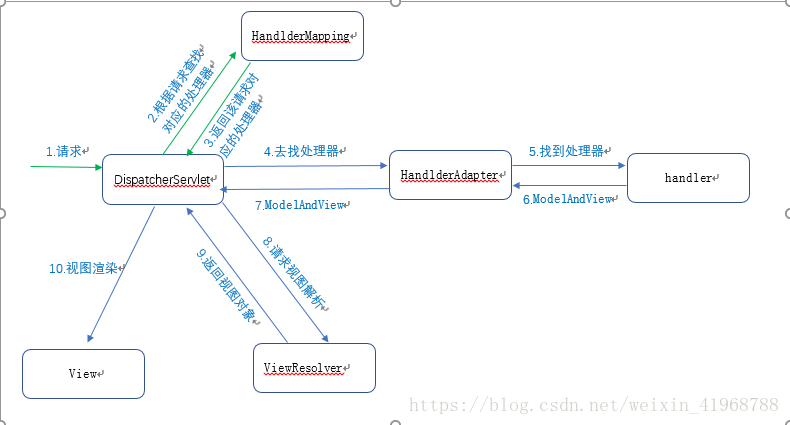
这里我们先来看下Spring MVC 的工作流程,看看它是如何处理一个请求的,如下图所示。
接下来我们进入实战:
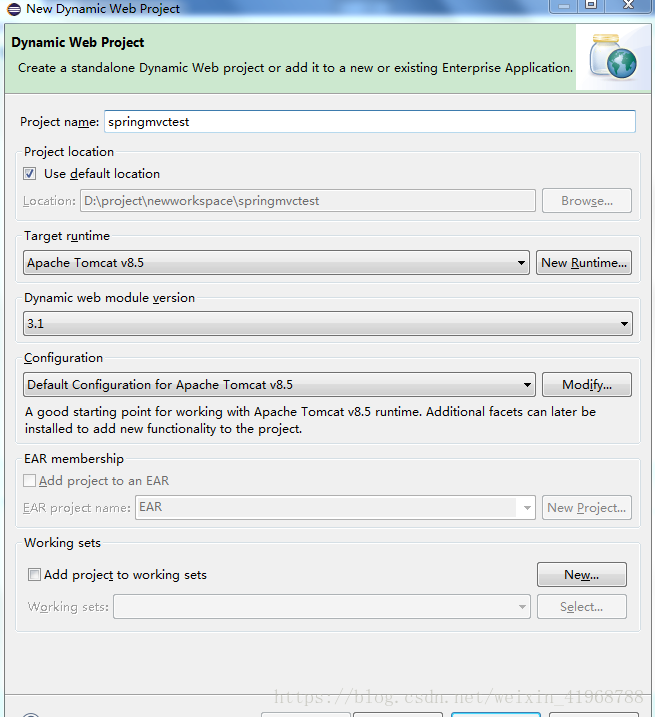
1.新建一个web项目,项目名称为:springmvctest
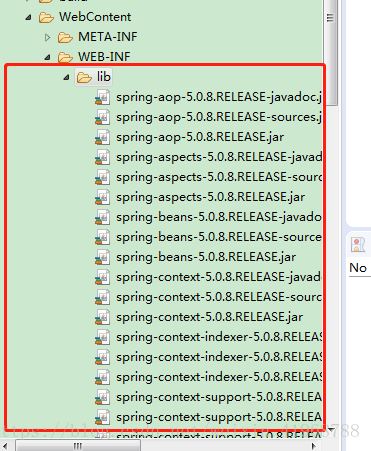
2.给项目中引入相关.jar包,这里引入spring5.0.8.release包(要配合jdk1.8以上版本使用,若用jdk1.7则用spring4.0.release以下版本包)
3.在src目录下引入applicationContext.xml文件
文件内容如下
<?xml version="1.0" encoding="UTF-8"?>
<beans xmlns="http://www.springframework.org/schema/beans" xmlns:xsi="http://www.w3.org/2001/XMLSchema-instance"
	xmlns:context="http://www.springframework.org/schema/context" xmlns:util="http://www.springframework.org/schema/util"
	xmlns:jee="http://www.springframework.org/schema/jee" xmlns:tx="http://www.springframework.org/schema/tx"
	xmlns:jpa="http://www.springframework.org/schema/data/jpa" xmlns:mvc="http://www.springframework.org/schema/mvc"
	xsi:schemaLocation="
		http://www.springframework.org/schema/beans http://www.springframework.org/schema/beans/spring-beans-3.2.xsd
		http://www.springframework.org/schema/context http://www.springframework.org/schema/context/spring-context-3.2.xsd
		http://www.springframework.org/schema/util http://www.springframework.org/schema/util/spring-util-3.2.xsd
		http://www.springframework.org/schema/jee http://www.springframework.org/schema/jee/spring-jee-3.2.xsd
		http://www.springframework.org/schema/tx http://www.springframework.org/schema/tx/spring-tx-3.2.xsd
		http://www.springframework.org/schema/data/jpa http://www.springframework.org/schema/data/jpa/spring-jpa-1.3.xsd
		http://www.springframework.org/schema/mvc http://www.springframework.org/schema/mvc/spring-mvc-3.2.xsd">


</beans>
放置路径如下图

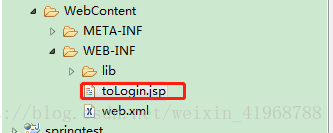
4.给WEB-INF目录下添加一个jsp页面,toLogin.jsp
toLogin.jsp页面内容如下
<%@ page language="java" contentType="text/html; charset=utf-8"
    pageEncoding="utf-8"%>
<!DOCTYPE html PUBLIC "-//W3C//DTD HTML 4.01 Transitional//EN" "http://www.w3.org/TR/html4/loose.dtd">
<html>
<head>
<meta http-equiv="Content-Type" content="text/html; charset=utf-8">
<title>Insert title here</title>
</head>
<body>
	<h2>开始登录</h2>
	<form action="login.do" method="post">
		用户名:<input type="text" name="username"> <br>
		密码:<input type="password" name="password"> <br>
		<input type="submit" value="登录">
	</form>
</body>
</html>
5.在web.xml中配置dispatchServlet,web.xml内容如下
<?xml version="1.0" encoding="UTF-8"?>
<web-app xmlns:xsi="http://www.w3.org/2001/XMLSchema-instance" xmlns="http://xmlns.jcp.org/xml/ns/javaee" xsi:schemaLocation="http://xmlns.jcp.org/xml/ns/javaee http://xmlns.jcp.org/xml/ns/javaee/web-app_3_1.xsd" id="WebApp_ID" version="3.1">
<servlet>
<servlet-name>springmvc</servlet-name>
<servlet-class>org.springframework.web.servlet.DispatcherServlet</servlet-class>
<!-- 初始化参数,即,初始化spring容器 -->
<init-param>
<param-name>contextConfigLocation</param-name>
<param-value>classpath:applicationContext.xml</param-value>
</init-param>
<load-on-startup>1</load-on-startup>
</servlet>
<servlet-mapping>
<servlet-name>springmvc</servlet-name>
<url-pattern>*.do</url-pattern>
</servlet-mapping>
<display-name>springmvctest</display-name>
<welcome-file-list>
<welcome-file>index.html</welcome-file>
<welcome-file>index.htm</welcome-file>
<welcome-file>index.jsp</welcome-file>
<welcome-file>default.html</welcome-file>
<welcome-file>default.htm</welcome-file>
<welcome-file>default.jsp</welcome-file>
</welcome-file-list>
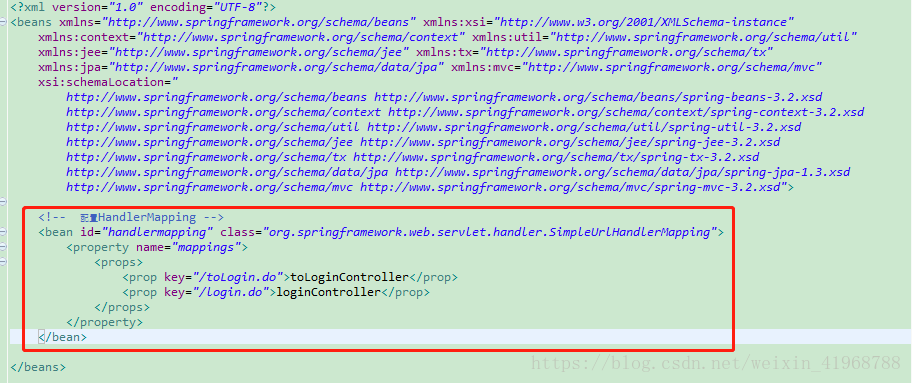
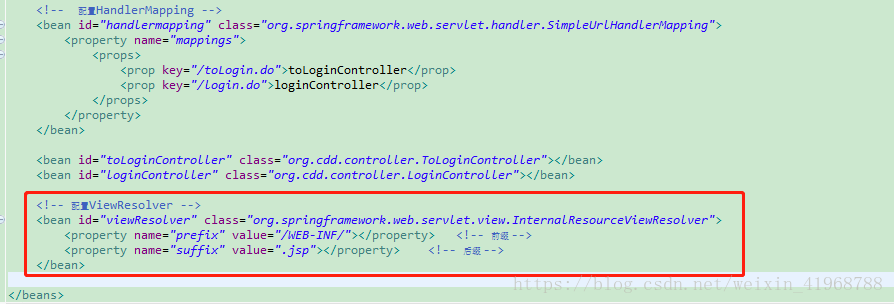
</web-app>6.在applicationContext.xml文件中配置handlerMapping,文件内容如下
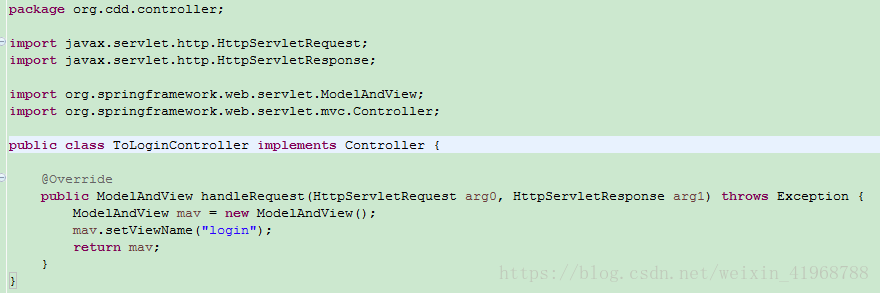
7.现在来编写ToLoginController类,一定要实现Controller接口
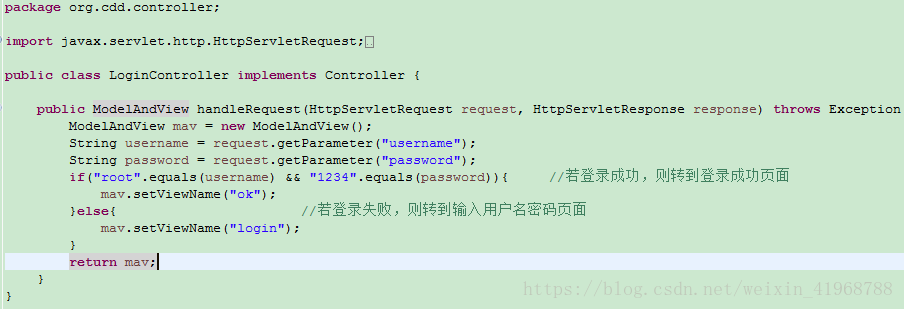
8.再编写LoginController类,一定要实现Controller接口
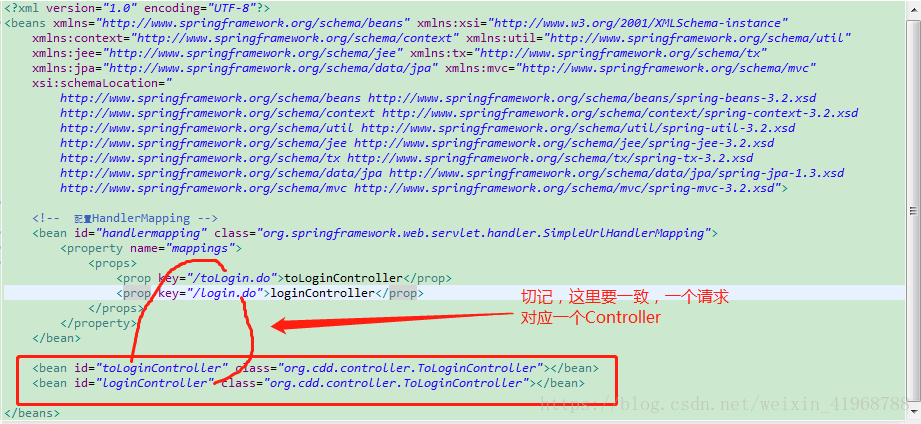
9.把ToLoginController类和LoginController类注册到Spring容器中
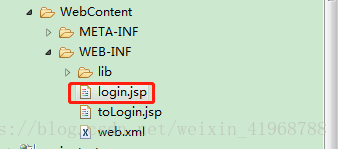
9.在WEB-INF目录下, 编写login.jsp
内容如下
<%@ page language="java" contentType="text/html;utf-8"
	pageEncoding="utf-8"%>
<!DOCTYPE html PUBLIC "-//W3C//DTD HTML 4.01 Transitional//EN" "http://www.w3.org/TR/html4/loose.dtd">
<html>
<head>
<meta http-equiv="Content-Type" content="text/html;utf-8">
<title>first web application</title>
</head>
<body>
	<h2>用户登录</h2>
	<form action="login.do" method="post">
		用户名:<input type="text" name="username"><br />
		密码:<input type="password" name="password"><br/>
		<input type="submit" value="登录">
	</form>
</body>
</html>
10.在applicationContext.xml中配置视图解析器
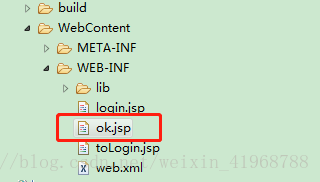
11.在WEB-INF目录下,编写登录成功后要跳转的页面ok.jsp
位置如下
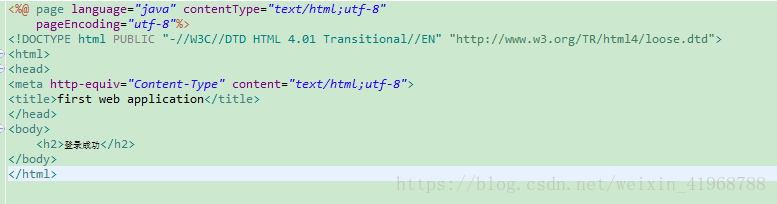
ok.jsp内容如下:
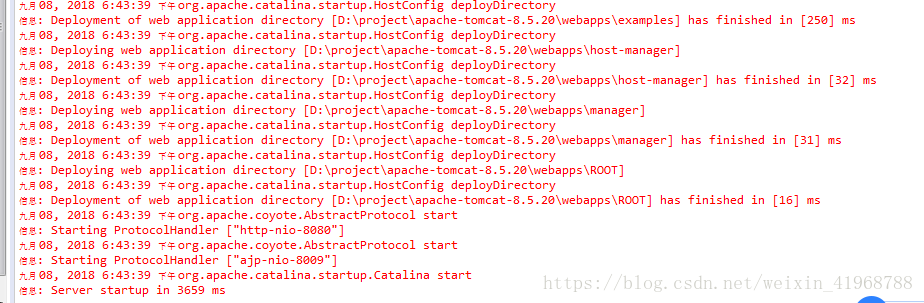
12.现在我们的代码全部编写完成,现在把该项目放进tomcat里,启动tomcat,启动成功如下图:
到这里是不是有点懵,刚才我们编写了那么多代码到底是想要干什么?专业点就是完成了什么业务?
这个Spring MVC项目我实现了一个简单的登录:
(1).首先在页面发出toLogin.do请求,会调到ToLoginController类,该类返回一个login,经过ViewResolver解析就是/WEB-INF/login.jsp页面,然后把这个页面展示到前端;
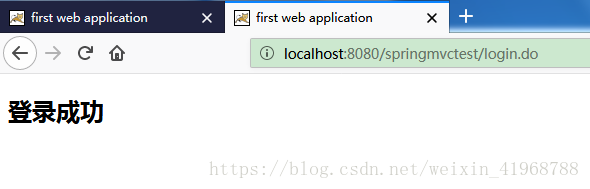
(2).接着我们在login.jsp页面里输入用户名:root ,密码:1234(在代码里是写死的),点击登录,向后台提交一个login.do请求。该请求会调到LoginController类,在该类中校验用户名和密码是否正确,若正确,则返回一个ok,经过ViewResolver解析就是/WEB-INF/ok.jsp页面,展示到前端;若用户名或密码不正确,则返回一个login,经过ViewResolver解析就是/WEB-INF/login.jsp页面,然后把这个页面展示到前端,继续让用户重新输入密码。
接下来我们实际来测下(项目一定要先启动起来,别忘了):
1.浏览器地址栏输入:

2.得到页面
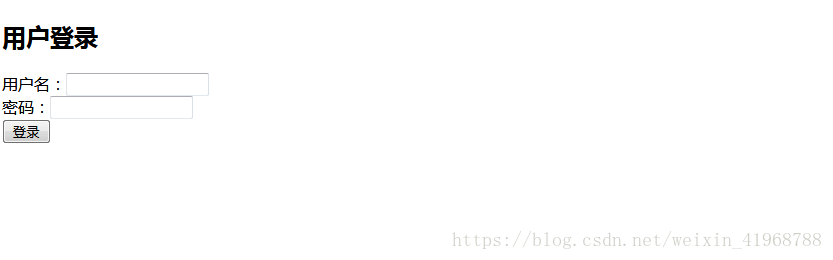
3.输入用户名和密码,分别是 root 和 1234
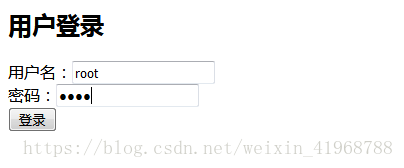
4.点击登录按钮
大家如过把密码和用户名输错,看看是什么情况,这个大家自己去试。大家有没有觉得这个项目非常麻烦呢?有没有简单的方式,答案是肯定的,下次再给大家讲简单。
上面如有任何错误欢迎大家批评指正,当然有什么问题也可以给我留言,我们一起进步!