版权声明:本文为博主原创文章,未经博主允许不得转载。 https://blog.csdn.net/kyle0349/article/details/52094521
此文是关于搭建一个简单的spring-mvc的步骤。spring-mvc基本上是替代掉struts2的功能。为此后搭建SSM做铺垫。
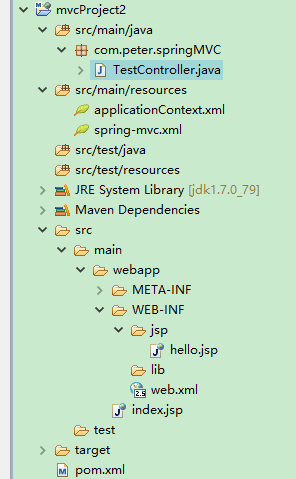
一、创建一个maven工程
参考:http://blog.csdn.net/kyle0349/article/details/52078126
二、添加依赖 pom.xml
引入相关jar包
<project xmlns="http://maven.apache.org/POM/4.0.0" xmlns:xsi="http://www.w3.org/2001/XMLSchema-instance" xsi:schemaLocation="http://maven.apache.org/POM/4.0.0 http://maven.apache.org/xsd/maven-4.0.0.xsd">
  <modelVersion>4.0.0</modelVersion>
  <groupId>com.peter.test</groupId>
  <artifactId>mvcProject2</artifactId>
  <version>0.0.1-SNAPSHOT</version>
  <packaging>war</packaging>

  <!-- 版本控制 -->
  <properties>
  <spring.version>4.0.2.RELEASE</spring.version>
 </properties>

 <!-- 添加实际依赖 -->
 <dependencies>
  <dependency>
   <groupId>org.springframework</groupId>
   <artifactId>spring-webmvc</artifactId>
   <version>${spring.version}</version>
  </dependency>
 </dependencies>
  <build/>
</project>
Maven会自动添加以下依赖包:

三、WEB-ING目录下添加web.xml 并配置监听器和前端控制器
<?xml version="1.0" encoding="UTF-8"?>
<web-app version="2.5" xmlns="http://java.sun.com/xml/ns/javaee"
    xmlns:xsi="http://www.w3.org/2001/XMLSchema-instance"
    xsi:schemaLocation="http://java.sun.com/xml/ns/javaee
    http://java.sun.com/xml/ns/javaee/web-app_2_5.xsd">
    <display-name></display-name>

    <context-param>
        <param-name>contextConfigLocation</param-name>
        <param-value>classpath:applicationContext.xml</param-value>
    </context-param>
    <!-- spring 监听器 -->
    <listener>
        <listener-class>org.springframework.web.context.ContextLoaderListener</listener-class>
    </listener>

    <!-- spring前端控制器配置 -->
    <servlet>
        <servlet-name>springmvc</servlet-name>
        <servlet-class>org.springframework.web.servlet.DispatcherServlet</servlet-class>
        <!-- 这里的参数如果不配置,则默认查找web-inf下的{servlet-name}-servlet.xml文件 -->
        <init-param>
            <param-name>contextConfigLocation</param-name>
            <param-value>classpath:spring-mvc.xml</param-value>
        </init-param>
        <load-on-startup>1</load-on-startup>
    </servlet>
    <servlet-mapping>
        <servlet-name>springmvc</servlet-name>
        <url-pattern>/</url-pattern>
    </servlet-mapping>

    <welcome-file-list>
        <welcome-file>index.jsp</welcome-file>
    </welcome-file-list>
</web-app>
四、在resources目录下创建applicationContext.xml和spring-mvc.xml配置文件 (创建这两个配置文件的路径是根据web.xml具体设置来决定的)
applicationContext.xml配置文件为空,此处不设置数据库连接,不创建bean
<?xml version="1.0" encoding="UTF-8"?>
<beans xmlns="http://www.springframework.org/schema/beans"
    xmlns:xsi="http://www.w3.org/2001/XMLSchema-instance"
    xmlns:context="http://www.springframework.org/schema/context"
    xmlns:mvc="http://www.springframework.org/schema/mvc"
    xsi:schemaLocation="http://www.springframework.org/schema/beans http://www.springframework.org/schema/beans/spring-beans.xsd
        http://www.springframework.org/schema/context http://www.springframework.org/schema/context/spring-context-4.1.xsd
        http://www.springframework.org/schema/mvc http://www.springframework.org/schema/mvc/spring-mvc-4.1.xsd">

</beans>
spring-mvc.xml :
<?xml version="1.0" encoding="UTF-8"?>
<beans xmlns="http://www.springframework.org/schema/beans"
    xmlns:xsi="http://www.w3.org/2001/XMLSchema-instance"
    xmlns:context="http://www.springframework.org/schema/context"
    xmlns:mvc="http://www.springframework.org/schema/mvc"
    xsi:schemaLocation="http://www.springframework.org/schema/beans http://www.springframework.org/schema/beans/spring-beans.xsd
        http://www.springframework.org/schema/context http://www.springframework.org/schema/context/spring-context-4.1.xsd
        http://www.springframework.org/schema/mvc http://www.springframework.org/schema/mvc/spring-mvc-4.1.xsd">

    <!-- spring扫描路径 -->
    <context:component-scan base-package="com.peter.springMVC"></context:component-scan>

    <!-- 开启注解 -->
    <bean class="org.springframework.web.servlet.mvc.annotation.AnnotationMethodHandlerAdapter"></bean>
    <bean class="org.springframework.web.servlet.mvc.annotation.DefaultAnnotationHandlerMapping"></bean>

    <!-- 设置controller跳转到jsp页面的url,就是给return的字段加上指定前后缀,使之成为一个可访问的url -->
    <bean class="org.springframework.web.servlet.view.InternalResourceViewResolver">
        <property name="prefix" value="/WEB-INF/jsp/"></property>
        <property name="suffix" value=".jsp"></property>
    </bean>

</beans>
五、创建一个controller
package com.peter.springMVC;

import org.springframework.stereotype.Controller;
import org.springframework.web.bind.annotation.RequestMapping;
import org.springframework.web.servlet.ModelAndView;

@Controller
@RequestMapping("/mvcController")
public class TestController {

    @RequestMapping("/hello")
    public ModelAndView toHello(){
        return new ModelAndView("hello");
    }

}
六、访问路径
http://localhost:8080/mvcProject2/mvcController/hello