注:本文转载,用作收藏
在Spring MVC 环境搭建(一)中我们知道 spring 的配置是通过 urlmapping 映射到控制器,然后通过实现Controller接口的handlerequest方法转向页面。
但这存在一个问题,当我们项目的页面很多时,这样一个映射对应一个控制器,配置文件将会很臃肿!
其实在新版本的spring中,urlMapping 已经基本不用,而是采用注解机制。
spirng 注解
注解实际上相当于一种标记,它允许你在运行时动态地对拥有该标记的成员进行操作。
实现注解需要三个条件:注解声明、使用注解的元素、操作使用注解元素的代码。
一、注解配置
1、首先在 spring-servlet.xml 配置文件中,修改 context 命名空间的申明。

1 <beans xmlns="http://www.springframework.org/schema/beans"
2       xmlns:context="http://www.springframework.org/schema/context"
3       xmlns:xsi="http://www.w3.org/2001/XMLSchema-instance"
4       xsi:schemaLocation="
5         http://www.springframework.org/schema/beans
6         http://www.springframework.org/schema/beans/spring-beans-4.1.xsd
7         http://www.springframework.org/schema/context
8         http://www.springframework.org/schema/context/spring-context-4.1.xsd">
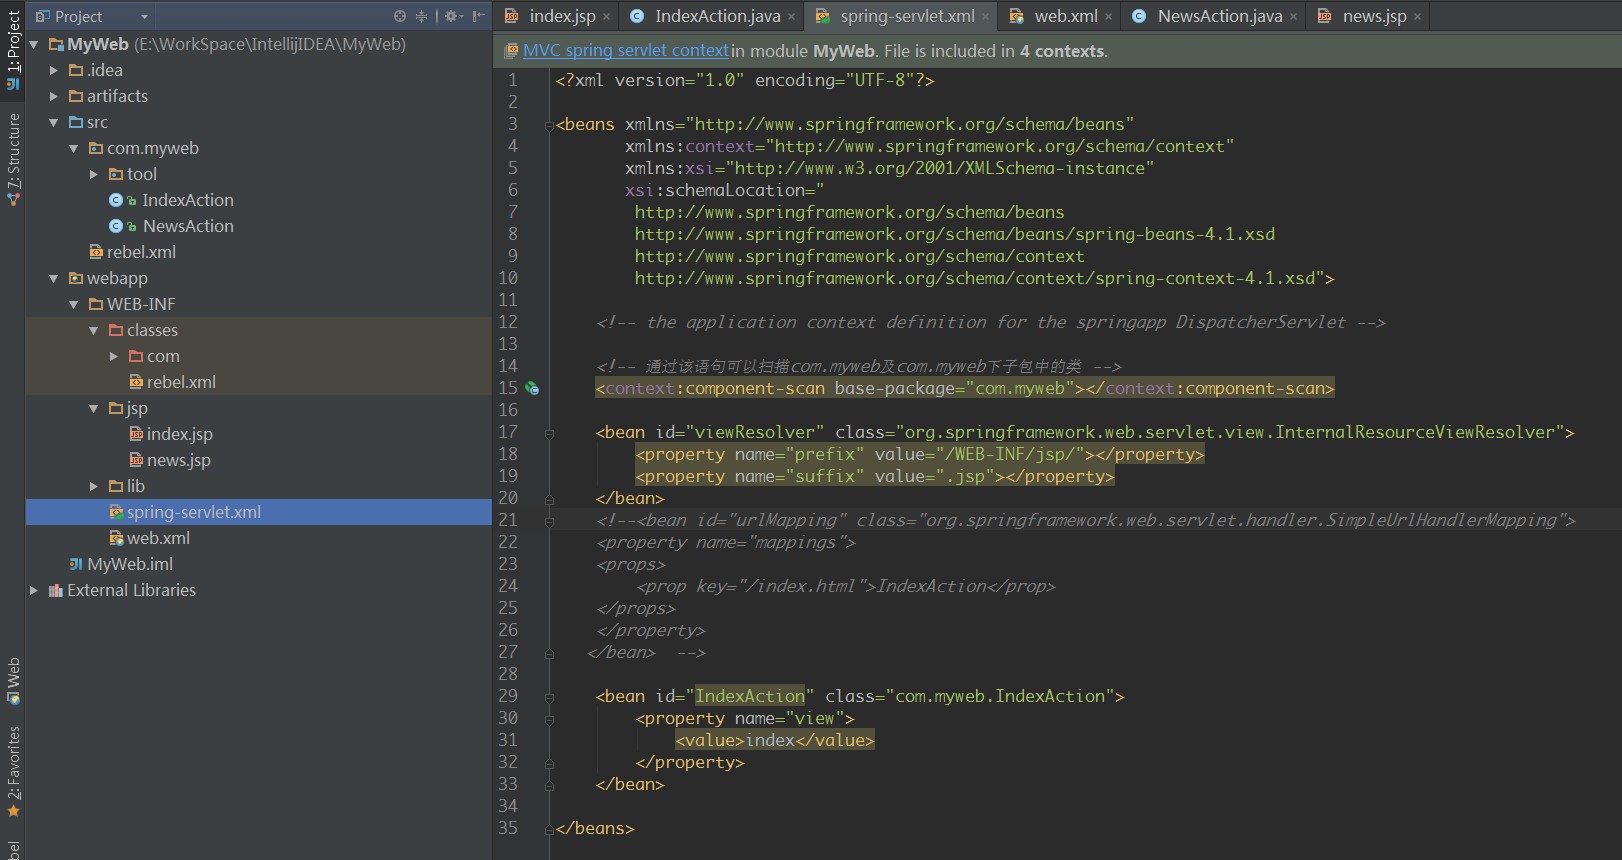
2、在 spring-servlet.xml 注释掉 urlMapping 中添加:
 1     <!-- 通过该语句可以扫描com.myweb及com.myweb下子包中的类 -->
 2     <context:component-scan base-package="com.myweb"></context:component-scan>
 3
 4     <bean id="viewResolver" class="org.springframework.web.servlet.view.InternalResourceViewResolver">
 5         <property name="prefix" value="/WEB-INF/jsp/"></property>
 6         <property name="suffix" value=".jsp"></property>
 7     </bean>
 8     <!--<bean id="urlMapping" class="org.springframework.web.servlet.handler.SimpleUrlHandlerMapping">
 9     <property name="mappings">
10     <props>
11         <prop key="/index.html">IndexAction</prop>
12     </props>
13     </property>
14    </bean>  -->
如下图所示:
二、相关注解说明
1、@Controller
当我们使用注解后,控制器可以不再去实现 Controller 接口,只需在类的头部加上 @Controller,告诉 spring 该类就是控制器,spring 则会帮你自动装配。
2、@RequestMapping
Spring 通过 RequestMapping 来指定访问控制器方法来转向页面。 在老版本的 Spring 中,如果不同的 url 访问同一个控制器,要使用多动作控制器(MultiActionController )。
使用:在控制器中的方法前加上 RequestMapping
三、注解使用
1、假如我们访问 http://localhost:8080/MyWeb/news 就显示新闻页面
 1 package com.myweb;
 2
 3 import org.springframework.stereotype.Controller;
 4 import org.springframework.web.bind.annotation.RequestMapping;
 5 import org.springframework.web.servlet.ModelAndView;
 6
 7 @Controller
 8 public class NewsAction {
 9
10     @RequestMapping("/news")
11     public ModelAndView ShowNews() {
12
13         ModelAndView mv = new ModelAndView("news"); // 默认为 news
14         mv.addObject("content", "这是新闻页面");
15         return mv;
16     }
17
18 }
1.2、修改 web.xml 的 url 拦截配置
1 <servlet-mapping>
2     <servlet-name>spring</servlet-name>
3     <url-pattern>/</url-pattern>
4 </servlet-mapping>
5
6 <servlet-mapping>
7     <servlet-name>spring</servlet-name>
8     <url-pattern>/</url-pattern>
9 </servlet-mapping>
2、假如我们访问 http://localhost:8080/MyWeb/news?id=1 就显示新闻 id=1 的列表页面
 1 package com.myweb;
 2
 3 import com.myweb.tool.BarFactory;
 4 import com.myweb.tool.NavBar;
 5 import org.springframework.stereotype.Controller;
 6 import org.springframework.web.bind.annotation.RequestMapping;
 7 import org.springframework.web.bind.annotation.RequestParam;
 8 import org.springframework.web.servlet.ModelAndView;
 9
10 @Controller
11 public class NewsAction {
12
13     @RequestMapping("/news")
14     public ModelAndView ShowNewsDetail(@RequestParam(value = "id", required = false) String id) {
15
16         // news?id=1 则触发此方法
17         ModelAndView mv = new ModelAndView("news"); // 默认为 news
18
19         NavBar topBar = BarFactory.createBar("top");
20         NavBar bottomBar = BarFactory.createBar("tottom");
21         mv.addObject("top_nav", topBar.getBarContent());
22         mv.addObject("bottom_nav", bottomBar.getBarContent());
23
24         if (id == null) {
25             mv.addObject("content", "这是新闻列表页面, 没有 ID 参数");
26         } else {
27             mv.addObject("content", "这是新闻页面, id 是: " + id);
28         }
29
30         return mv;
31     }
32
33 }
3、假如我们访问 http://localhost:8080/MyWeb/news/1/123456 就显示管理新闻 id=1 的列表页面
 1 package com.myweb;
 2
 3 import com.myweb.tool.BarFactory;
 4 import com.myweb.tool.NavBar;
 5 import org.springframework.stereotype.Controller;
 6 import org.springframework.web.bind.annotation.PathVariable;
 7 import org.springframework.web.bind.annotation.RequestMapping;
 8 import org.springframework.web.servlet.ModelAndView;
 9
10 @Controller
11 public class NewsAction {
12
13     @RequestMapping("/news/{id}/123456")
14     public ModelAndView ShowNewsDetail2(@PathVariable String id) {
15
16         // news/1/123456 则触发此方法
17         ModelAndView mv = new ModelAndView("news"); // 默认为 news
18
19         NavBar topBar = BarFactory.createBar("top");
20         NavBar bottomBar = BarFactory.createBar("tottom");
21         mv.addObject("top_nav", topBar.getBarContent());
22         mv.addObject("bottom_nav", bottomBar.getBarContent());
23
24         mv.addObject("content", "这是新闻列内容页面(用PathVariable的方式), id 是:" + id);
25
26         return mv;
27     }
28
29 }