版权声明:本文为博主原创文章,未经博主允许不得转载。 https://blog.csdn.net/whandgdh/article/details/80815413
一、环境准备
jdk 1.8
编译工具 myeclipse 2017 stable 2.0
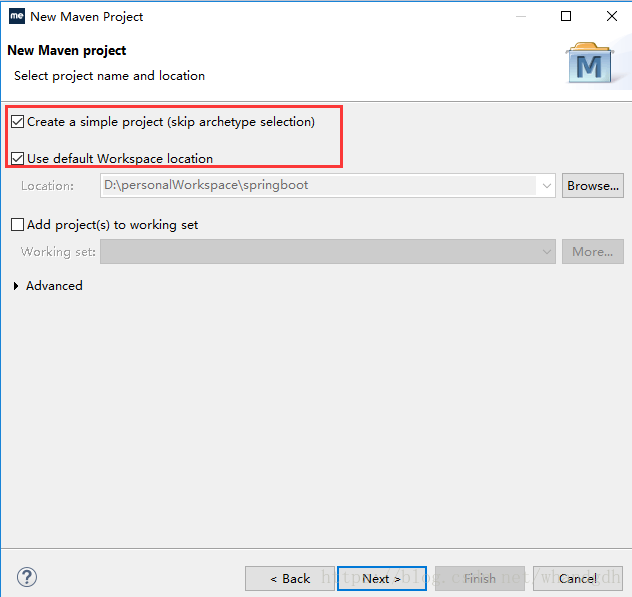
二、新建maven工程

2、配置pom文件,引入maven 依赖
<project xmlns="http://maven.apache.org/POM/4.0.0" xmlns:xsi="http://www.w3.org/2001/XMLSchema-instance" xsi:schemaLocation="http://maven.apache.org/POM/4.0.0 http://maven.apache.org/xsd/maven-4.0.0.xsd">
<modelVersion>4.0.0</modelVersion>
<groupId>com.wh</groupId>
<artifactId>springboot-helloworld</artifactId>
<version>0.0.1-SNAPSHOT</version>
<!-- 引入springboot 父类依赖 基于springboot 1.3.3 -->
<parent>
<groupId>org.springframework.boot</groupId>
<artifactId>spring-boot-starter-parent</artifactId>
<version>1.3.3.RELEASE</version>
</parent>
<dependencies>
<!-- 引入springboot web组件 springMvc+Spring+ Mybatis -->
<dependency>
<groupId>org.springframework.boot</groupId>
<artifactId>spring-boot-starter-web</artifactId>
</dependency>
</dependencies>
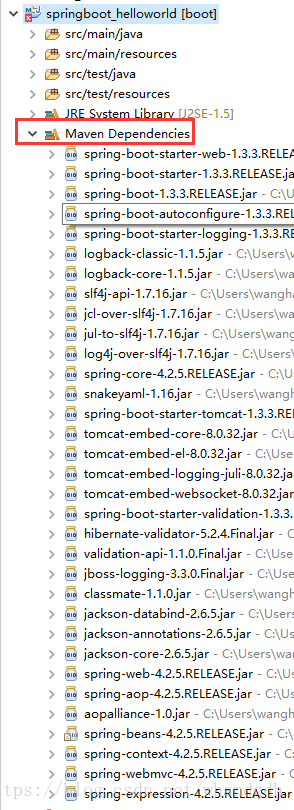
</project>保存配置文件后,可见工程引入了springboot工程所需的jar包
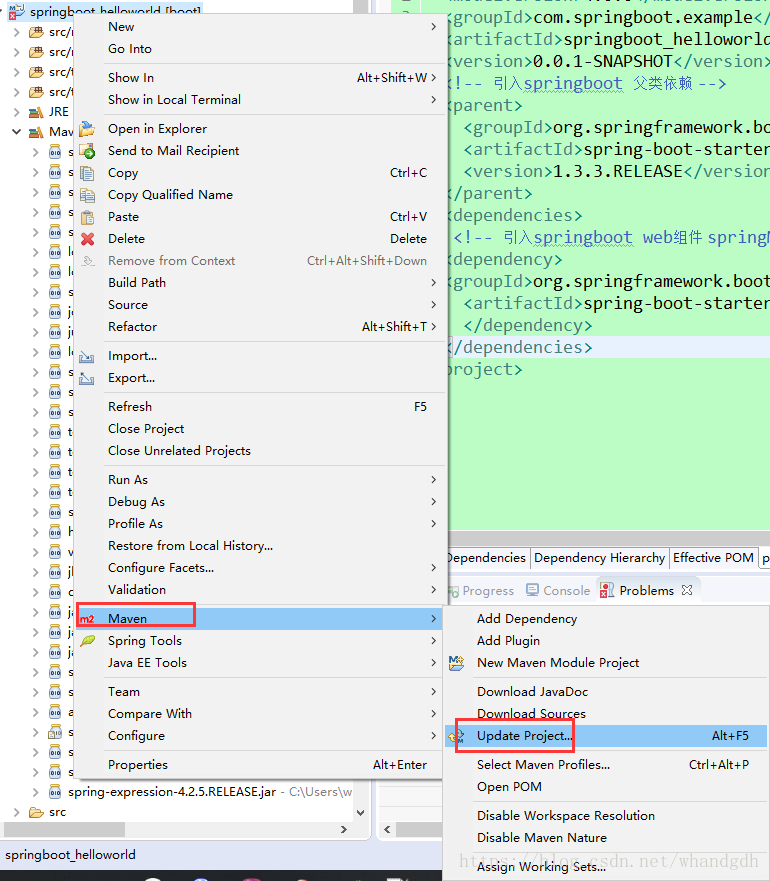
注意此时工程上面有个小红叉,再看错误信息,提示工程需要更新

更新工程
3、新建HelloWorldContontroller类
package com.springboot.demo.controller;

import java.util.HashMap;
import java.util.Map;

import org.springframework.boot.SpringApplication;
import org.springframework.boot.autoconfigure.EnableAutoConfiguration;
import org.springframework.boot.autoconfigure.SpringBootApplication;
import org.springframework.web.bind.annotation.RequestMapping;
import org.springframework.web.bind.annotation.RestController;
@EnableAutoConfiguration
@RestController//标识该接口全部返回json格式
public class HelloWorldController {
 @RequestMapping//不带参数,访问只需到端口号即可,端口默认8080
 public String sayHello(){
     return"HelloWorld!";
 }
 @RequestMapping("/getMap")
 public Map getMap(){//页面返回得到是json格式数据
     Map<String, Object>map=new HashMap<String, Object>();
     map.put("statusCode","200");
     map.put("msg", "success!");
     return map;
 }
 public static void main(String[] args) {
    //启动Spring 项目,内置Tomcat了,不用再部署到tomcat上
    SpringApplication.run(HelloWorldController.class, args);
}
}
三、启动项目
因为springboot内置了Tomcat ,所以无需再部署到Tomcat上面,直接运行main方法就可启动项目了。可以看到控制台打印信息如下:

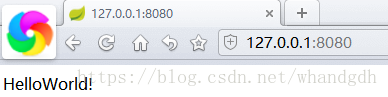
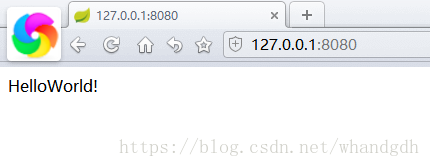
访问项目,得到helloWorld!
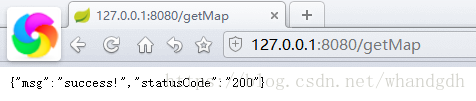
在浏览器中输入http://127.0.0.1:8080/getMap 得到如下json格式数据
我们在同样的包名下再新建一个IndexController类,代码如下
package com.springboot.demo.controller;

import org.springframework.boot.SpringApplication;
import org.springframework.boot.autoconfigure.EnableAutoConfiguration;
import org.springframework.web.bind.annotation.RequestMapping;
import org.springframework.web.bind.annotation.RestController;

@EnableAutoConfiguration
@RestController
public class IndexController {
    @RequestMapping("/index")
    public String getIndex(){
        return"Index.HelloWorld";
    }
    public static void main(String[] args) {
        SpringApplication.run(IndexController.class, args);
    }
}
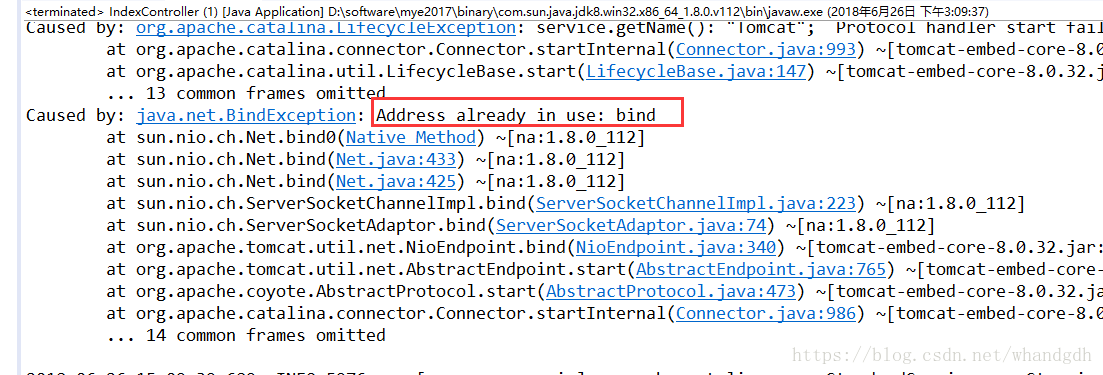
但是当我们启动IndexController 的main方式,程序却报错了,因为Springboot的默认的端口是8080,这里启动会提示端口被占用
那我们在springboot中如何访问不同控制器,
新建一个 App类
package com.springboot.demo.app;

import org.springframework.boot.SpringApplication;
import org.springframework.context.annotation.ComponentScan;
//控制器扫包范围 com.springboot.demo.controller
@ComponentScan(basePackages="com.springboot.demo.controller")
public class App {
public static void main(String[] args) {
    SpringApplication.run(App.class, args);
}
}
注意这里启动时,需要把HelloWorldController的main方法关闭,不然还是会报端口被占用,关闭操作如下:

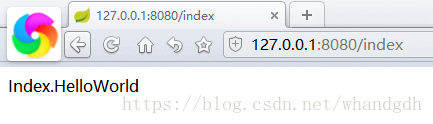
关闭原先的main方法后,再启动App中的main方法,访问 http://127.0.0.1:8080/index
同样我们也能方法HelloWorldController中的getMap(),以及sayHello方法

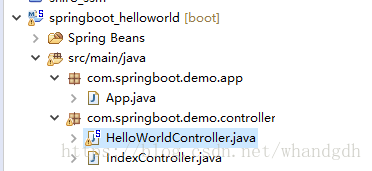
最后再附上java文件的路径结构: