版权声明:本文为博主原创文章,未经博主允许不得转载。 https://blog.csdn.net/needmorecode/article/details/81952538
Surface Shader是Unity为了方便shader编写提供的特殊功能,它对底层的vertex/fragment shader做了封装,省去了一些重复代码编写的工作量。我的理解是它同时具有vertex/fragment shader的功能,只是写法上更加简洁,更容易上手。
Unity的官方manual上就提供了几个最好的学习例子,我在学习的过程中加上了注释。
简单的漫反射(Simple)
  Shader "Example/Diffuse Simple" {
    SubShader {
      Tags { "RenderType" = "Opaque" } // 标签,决定什么时候渲染(对不透明物体渲染)
      CGPROGRAM // //CG语言标记开始
      #pragma surface surf Lambert // 编译指令 surface shader 自定义函数 光照模型[1]
      struct Input {               // 输入的结构体
          float4 color : COLOR;    // 颜色值
      };
      void surf (Input IN, inout SurfaceOutput o) { // surface shader处理函数
          o.Albedo = 1;  // 将基础颜色设为白色[2]
      }
      ENDCG
    }
    Fallback "Diffuse" // 发生异常时回滚成Unity内置的Diffuse shader
  }
带纹理的漫反射(Texture)
  Shader "Example/Diffuse Texture" {
    Properties {
      _MainTex ("Texture", 2D) = "white" {} // 纹理,若没有赋值则默认为全白
    }
    SubShader {
      Tags { "RenderType" = "Opaque" }
      CGPROGRAM
      #pragma surface surf Lambert
      struct Input {
          float2 uv_MainTex; // 纹理uv坐标
      };
      sampler2D _MainTex;
      void surf (Input IN, inout SurfaceOutput o) {
          o.Albedo = tex2D (_MainTex, IN.uv_MainTex).rgb; // 按uv坐标查找纹理上的像素,并获取rgb值
      }
      ENDCG
    }
    Fallback "Diffuse"
  }
带法向贴图的漫反射(Normal mapping)
Shader "Example/Diffuse Bump" {
    Properties {
      _MainTex ("Texture", 2D) = "white" {}
      _BumpMap ("Bumpmap", 2D) = "bump" {} // 法向贴图[3]
    }
    SubShader {
      Tags { "RenderType" = "Opaque" }
      CGPROGRAM
      #pragma surface surf Lambert
      struct Input {
        float2 uv_MainTex;
        float2 uv_BumpMap;
      };
      sampler2D _MainTex;
      sampler2D _BumpMap;
      void surf (Input IN, inout SurfaceOutput o) {
        o.Albedo = tex2D (_MainTex, IN.uv_MainTex).rgb;
        o.Normal = UnpackNormal (tex2D (_BumpMap, IN.uv_BumpMap)); // 将从法向贴图中取得的法向量赋给output
      }
      ENDCG
    }
    Fallback "Diffuse"
  }
边缘光(Rim Lighting)
 Shader "Example/Rim" {
    Properties {
      _MainTex ("Texture", 2D) = "white" {}
      _BumpMap ("Bumpmap", 2D) = "bump" {}
      _RimColor ("Rim Color", Color) = (0.26,0.19,0.16,0.0) // 边缘光的颜色
      _RimPower ("Rim Power", Range(0.5,8.0)) = 3.0 // 边缘光的强度
    }
    SubShader {
      Tags { "RenderType" = "Opaque" }
      CGPROGRAM
      #pragma surface surf Lambert
      struct Input {
          float2 uv_MainTex;
          float2 uv_BumpMap;
          float3 viewDir; // 观察向量
      };
      sampler2D _MainTex;
      sampler2D _BumpMap;
      float4 _RimColor;
      float _RimPower;
      void surf (Input IN, inout SurfaceOutput o) {
          o.Albedo = tex2D (_MainTex, IN.uv_MainTex).rgb;
          o.Normal = UnpackNormal (tex2D (_BumpMap, IN.uv_BumpMap));
          // 对观察向量和法向量求点积,这个值越小,代表这两个方向夹角越接近90度,即为轮廓边缘
          half rim = 1.0 - saturate(dot (normalize(IN.viewDir), o.Normal));
          // 越接近边缘,发出的光越亮
          o.Emission = _RimColor.rgb * pow (rim, _RimPower);
      }
      ENDCG
    }
    Fallback "Diffuse"
  }
细节纹理(Detail Texture)
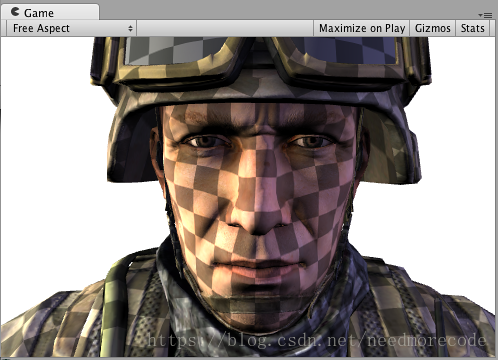
  Shader "Example/Detail" {
    Properties {
      _MainTex ("Texture", 2D) = "white" {}
      _BumpMap ("Bumpmap", 2D) = "bump" {}
      _Detail ("Detail", 2D) = "gray" {} // 细节纹理[4]
    }
    SubShader {
      Tags { "RenderType" = "Opaque" }
      CGPROGRAM
      #pragma surface surf Lambert
      struct Input {
          float2 uv_MainTex;
          float2 uv_BumpMap;
          float2 uv_Detail;
      };
      sampler2D _MainTex;
      sampler2D _BumpMap;
      sampler2D _Detail;
      void surf (Input IN, inout SurfaceOutput o) {
          o.Albedo = tex2D (_MainTex, IN.uv_MainTex).rgb;
          // 将纹理和细节纹理叠加
          o.Albedo *= tex2D (_Detail, IN.uv_Detail).rgb * 2;
          o.Normal = UnpackNormal (tex2D (_BumpMap, IN.uv_BumpMap));
      }
      ENDCG
    }
    Fallback "Diffuse"
  }
屏幕空间下的细节纹理(Detail Texture in Screen Space)
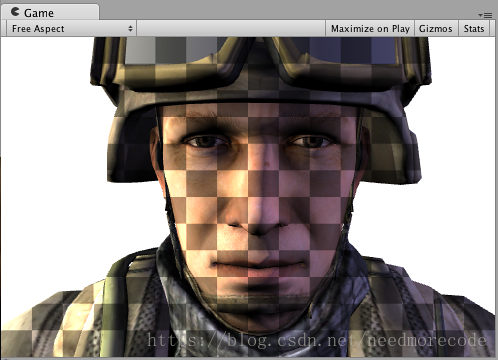
 Shader "Example/ScreenPos" {
    Properties {
      _MainTex ("Texture", 2D) = "white" {}
      _Detail ("Detail", 2D) = "gray" {}
    }
    SubShader {
      Tags { "RenderType" = "Opaque" }
      CGPROGRAM
      #pragma surface surf Lambert
      struct Input {
          float2 uv_MainTex;
          float4 screenPos; // 屏幕坐标
      };
      sampler2D _MainTex;
      sampler2D _Detail;
      void surf (Input IN, inout SurfaceOutput o) {
          o.Albedo = tex2D (_MainTex, IN.uv_MainTex).rgb;
          float2 screenUV = IN.screenPos.xy / IN.screenPos.w;
          screenUV *= float2(8,6);
          // 根据屏幕的uv坐标来叠加细节纹理[5]
          o.Albedo *= tex2D (_Detail, screenUV).rgb * 2;
      }
      ENDCG
    }
    Fallback "Diffuse"
  }
立方体贴图反射(Cubemap Reflection)
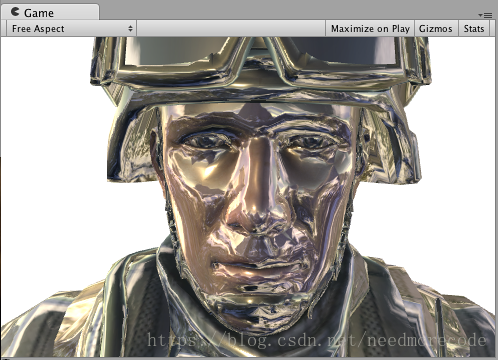
  Shader "Example/WorldRefl" {
    Properties {
      _MainTex ("Texture", 2D) = "white" {}
      _Cube ("Cubemap", CUBE) = "" {} // 立方体贴图[6]
    }
    SubShader {
      Tags { "RenderType" = "Opaque" }
      CGPROGRAM
      #pragma surface surf Lambert
      struct Input {
          float2 uv_MainTex;
          float3 worldRefl; // 世界反射向量
      };
      sampler2D _MainTex;
      samplerCUBE _Cube;
      void surf (Input IN, inout SurfaceOutput o) {
          o.Albedo = tex2D (_MainTex, IN.uv_MainTex).rgb * 0.5;
          // 根据世界反射向量和立方体贴图,反射相应的rgb
          o.Emission = texCUBE (_Cube, IN.worldRefl).rgb;
      }
      ENDCG
    }
    Fallback "Diffuse"
  }
世界坐标下的切片(Slices via World Space Position)
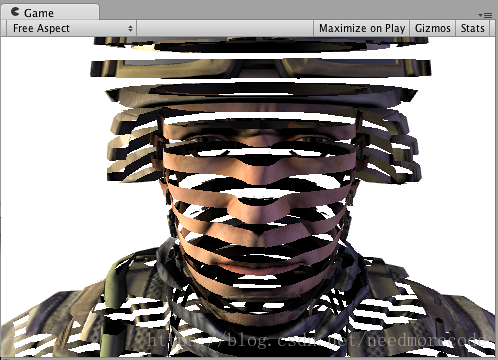
  Shader "Example/Slices" {
    Properties {
      _MainTex ("Texture", 2D) = "white" {}
      _BumpMap ("Bumpmap", 2D) = "bump" {}
    }
    SubShader {
      Tags { "RenderType" = "Opaque" }
      Cull Off
      CGPROGRAM
      #pragma surface surf Lambert
      struct Input {
          float2 uv_MainTex;
          float2 uv_BumpMap;
          float3 worldPos;
      };
      sampler2D _MainTex;
      sampler2D _BumpMap;
      void surf (Input IN, inout SurfaceOutput o) {
      // 自定义的切片函数(将y和z作为参数,意味沿x轴做切片)
          clip (frac((IN.worldPos.y+IN.worldPos.z*0.1) * 5) - 0.5);
          o.Albedo = tex2D (_MainTex, IN.uv_MainTex).rgb;
          o.Normal = UnpackNormal (tex2D (_BumpMap, IN.uv_BumpMap));
      }
      ENDCG
    }
    Fallback "Diffuse"
  }
使用顶点修改器的法线挤压(Normal Extrusion with Vertex Modifier)
  Shader "Example/Normal Extrusion" {
    Properties {
      _MainTex ("Texture", 2D) = "white" {}
      _Amount ("Extrusion Amount", Range(-1,1)) = 0.5 // 挤压参数
    }
    SubShader {
      Tags { "RenderType" = "Opaque" }
      CGPROGRAM
      #pragma surface surf Lambert vertex:vert // 声明会使用顶点修改器
      struct Input {
          float2 uv_MainTex;
      };
      float _Amount;
      void vert (inout appdata_full v) { // 顶点修改器实现
          v.vertex.xyz += v.normal * _Amount; // 沿法线移动顶点的坐标
      }
      sampler2D _MainTex;
      void surf (Input IN, inout SurfaceOutput o) {
          o.Albedo = tex2D (_MainTex, IN.uv_MainTex).rgb;
      }
      ENDCG
    }
    Fallback "Diffuse"
  }
逐顶点计算自定义数据(Custom data computed per-vertex)
  Shader "Example/Custom Vertex Data" {
    Properties {
      _MainTex ("Texture", 2D) = "white" {}
    }
    SubShader {
      Tags { "RenderType" = "Opaque" }
      CGPROGRAM
      #pragma surface surf Lambert vertex:vert
      struct Input {
          float2 uv_MainTex;
          float3 customColor; // 自定义数据
      };
      void vert (inout appdata_full v, out Input o) {
          UNITY_INITIALIZE_OUTPUT(Input,o);
          // 在顶点修改器中,将法向量的绝对值赋值给参数customColor
          o.customColor = abs(v.normal);
      }
      sampler2D _MainTex;
      void surf (Input IN, inout SurfaceOutput o) {
          o.Albedo = tex2D (_MainTex, IN.uv_MainTex).rgb;
          // 使用传递过来的参数,对颜色做叠加
          o.Albedo *= IN.customColor;
      }
      ENDCG
    }
    Fallback "Diffuse"
  }
注释:
[1]:Unity中最常用的是两种内置的光照模型:Lambert 和 BlinnPhong。
[2]:Albedo是物体的基础颜色,与之不同的Emission是自发光颜色,详细的input和output变量表参见官网。
[3]:法向贴图是为了实现凹凸不平的效果,可参见文章。
[4]:细节纹理是为了让纹理产生更细腻的感觉,可参见文章。
[5]:注意rgb相乘和相加的应用场合不同,这里给出了解释。
[6]:立方体贴图可用来做环境反射和天空盒,可参见文章。