Spring Security简介
Spring Security是一个能够为基于Spring的企业应用系统提供声明式的安全访问控制解决方案的安全框架。它提供了一组可以在Spring应用上下文中配置的Bean,充分利用了Spring IoC,DI(控制反转Inversion of Control ,DI:Dependency Injection 依赖注入)和AOP(面向切面编程)功能,为应用系统提供声明式的安全访问控制功能,减少了为企业系统安全控制编写大量重复代码的工作。
Spring Security安全框架:授权(角色)和认证(登录)。
Spring Security入门小程序
第一步:创建apache maven webapp工程,编写pom.xml
<?xml version="1.0" encoding="UTF-8"?>

<project xmlns="http://maven.apache.org/POM/4.0.0" xmlns:xsi="http://www.w3.org/2001/XMLSchema-instance"
         xsi:schemaLocation="http://maven.apache.org/POM/4.0.0 http://maven.apache.org/maven-v4_0_0.xsd">
    <modelVersion>4.0.0</modelVersion>
    <groupId>cn.itcast.demo</groupId>
    <artifactId>spring-security-demo</artifactId>
    <packaging>war</packaging>
    <version>1.0-SNAPSHOT</version>
    <properties>
        <spring.version>4.3.10.RELEASE</spring.version>
    </properties>
    <dependencies>
        <dependency>
            <groupId>org.springframework</groupId>
            <artifactId>spring-core</artifactId>
            <version>${spring.version}</version>
        </dependency>
        <dependency>
            <groupId>org.springframework</groupId>
            <artifactId>spring-web</artifactId>
            <version>${spring.version}</version>
        </dependency>
        <dependency>
            <groupId>org.springframework</groupId>
            <artifactId>spring-webmvc</artifactId>
            <version>${spring.version}</version>
        </dependency>
        <dependency>
            <groupId>org.springframework</groupId>
            <artifactId>spring-context-support</artifactId>
            <version>${spring.version}</version>
        </dependency>
        <dependency>
            <groupId>org.springframework</groupId>
            <artifactId>spring-test</artifactId>
            <version>${spring.version}</version>
        </dependency>
        <dependency>
            <groupId>org.springframework</groupId>
            <artifactId>spring-jdbc</artifactId>
            <version>${spring.version}</version>
        </dependency>
        <dependency>
            <groupId>org.springframework.security</groupId>
            <artifactId>spring-security-web</artifactId>
            <version>4.1.0.RELEASE</version>
        </dependency>
        <dependency>
            <groupId>org.springframework.security</groupId>
            <artifactId>spring-security-config</artifactId>
            <version>4.1.0.RELEASE</version>
        </dependency>
        <dependency>
            <groupId>javax.servlet</groupId>
            <artifactId>servlet-api</artifactId>
            <version>2.5</version>
            <scope>provided</scope>
        </dependency>
    </dependencies>
    <build>
        <plugins>
            <!-- java编译插件 -->
            <plugin>
                <groupId>org.apache.maven.plugins</groupId>
                <artifactId>maven-compiler-plugin</artifactId>
                <version>3.2</version>
                <configuration>
                    <source>1.8</source>
                    <target>1.8</target>
                    <encoding>UTF-8</encoding>
                </configuration>
            </plugin>
            <plugin>
                <groupId>org.apache.tomcat.maven</groupId>
                <artifactId>tomcat7-maven-plugin</artifactId>
                <configuration>
                    <!-- 指定端口 -->
                    <port>9090</port>
                    <!-- 请求路径 -->
                    <path>/</path>
                </configuration>
            </plugin>
        </plugins>
    </build>
</project>
第二步:编写web.xml
<?xml version="1.0" encoding="UTF-8"?>
<web-app xmlns:xsi="http://www.w3.org/2001/XMLSchema-instance"
         xmlns="http://java.sun.com/xml/ns/javaee"
         xsi:schemaLocation="http://java.sun.com/xml/ns/javaee http://java.sun.com/xml/ns/javaee/web-app_2_5.xsd"
         version="2.5">
    <context-param>
        <param-name>contextConfigLocation</param-name>
        <param-value>classpath:spring/spring-security.xml</param-value>
    </context-param>
    <listener>
        <listener-class>
            org.springframework.web.context.ContextLoaderListener
        </listener-class>
    </listener>
    <filter>
        <filter-name>springSecurityFilterChain</filter-name>
        <filter-class>org.springframework.web.filter.DelegatingFilterProxy</filter-class>
    </filter>
    <filter-mapping>
        <filter-name>springSecurityFilterChain</filter-name>
        <url-pattern>/*</url-pattern>
    </filter-mapping>
</web-app>
第三步:创建spring-security.xml
<?xml version="1.0" encoding="UTF-8"?>
<beans:beans xmlns="http://www.springframework.org/schema/security"
             xmlns:beans="http://www.springframework.org/schema/beans"
             xmlns:xsi="http://www.w3.org/2001/XMLSchema-instance"
             xsi:schemaLocation="http://www.springframework.org/schema/beans http://www.springframework.org/schema/beans/spring-beans.xsd
        http://www.springframework.org/schema/security http://www.springframework.org/schema/security/spring-security.xsd">

    <!-- 页面拦截规则 -->
    <http use-expressions="false">
        <intercept-url pattern="/**" access="ROLE_USER"/>
        <form-login/>
    </http>

    <!-- 认证管理器 -->
    <authentication-manager>
        <authentication-provider>
            <user-service>
                <user name="admin" password="admin" authorities="ROLE_USER"/>
            </user-service>
        </authentication-provider>
    </authentication-manager>
</beans:beans>
配置说明:
intercept-url表示拦截页面
/* 表示的是该目录下的资源,只包括本级目录不包括下级目录;
/** 表示的是该目录以及该目录下所有级别子目录的资源。
form-login为开启表单登陆
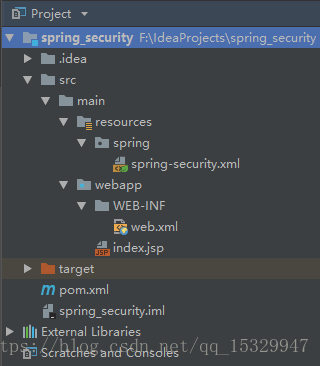
以上步骤完成后,工程目录结构如下:
第四步:配置好maven的tomcat插件及命令:

第五步:访问http://localhost:9090/index.jsp,会被spring security的认证管理器ROLE_USER拦截,跳转到spring security自带的登录页面:
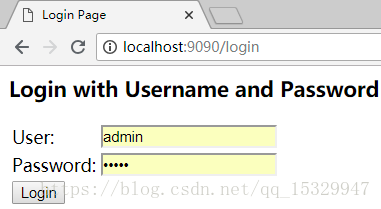
此时,输入认证管理器中配置好的用户名和密码,才能跳转到index.jsp页面。
用户自定义登录页
实际开发中,我们不可能使用系统生成的登录页,而是使用我们自己的登录页。
第六步:构建自定义的登录页面login.html
<!DOCTYPE html>
<html lang="en">
<head>
    <meta charset="UTF-8">
    <title>登录页面</title>
</head>
<body>
<form action='/login' method='POST'>
    <table>
        <tr>
            <td>用户名:</td>
            <td><input type='text' name='username' value=''></td>
        </tr>
        <tr>
            <td>密码:</td>
            <td><input type='password' name='password'/></td>
        </tr>
        <tr>
            <td colspan='2'><input name="submit" type="submit" value="登陆"/></td>
        </tr>
    </table>
</form>
</body>
</html>
第七步:构建登录失败页面login_error.html
<!DOCTYPE html>
<html lang="en">
<head>
    <meta charset="UTF-8">
    <title>登录失败页面</title>
</head>
<body>
    <h1 style="color: red">用户名或密码错误,请重新返回登录页面输入。</h1>
</body>
</html>
第八步:重新配置spring-security.xml中的http元素。
    <!-- 以下页面不被拦截 -->
    <http pattern="/login.html" security="none"></http>
    <http pattern="/login_error.html" security="none"></http>
    <!-- 页面拦截规则 -->
    <http use-expressions="false">
        <intercept-url pattern="/**" access="ROLE_USER"/>
        <form-login login-page="/login.html" default-target-url="/index.html"
                    authentication-failure-url="/login_error.html"/>
        <csrf disabled="true"/>
    </http>
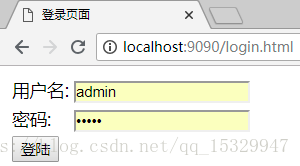
第九步:再执行第五步,跳转到访问自定义的登录页面:
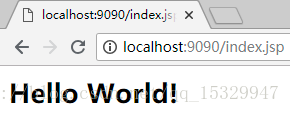
登录成功,跳转至index.jsp:
登录失败,跳转至login_error.html:

配置说明:
security=”none”设置此资源不被拦截.
如果你没有设置登录页security=”none”,将会出现以下错误:
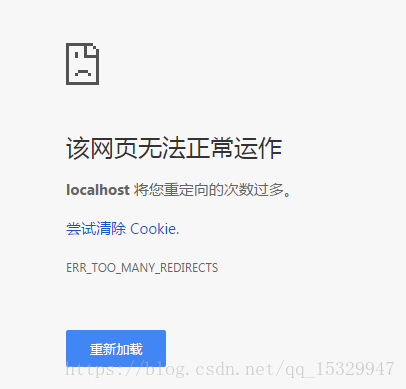
因为登录页会被反复重定向。
login-page:指定登录页面。
authentication-failure-url:指定了身份验证失败时跳转到的页面。
default-target-url:指定了成功进行身份验证和授权后默认呈现给用户的页面。
csrf disabled=”true”关闭csrf ,如果不加会出现错误:

CSRF(Cross-site request forgery)跨站请求伪造,也被称为“One Click Attack”或者Session Riding,通常缩写为CSRF或者XSRF,是一种对网站的恶意利用。