iOS7前是拟物化,扁平化。iOS7以后交互动画:拟真效果
目前知名的2D物理引擎有 Box2d,和Chipmunk,这些是跨平台的。但苹果本身也封装了一个物理引擎, UIDynamic是从iOS 7开始引入的一种新技术,隶属于UIKit框架。这可以让开发人员可以在远离物理学公式的情况下,实现炫酷的物理仿真效果。在游戏开发中会经常用到。本文主要是玩一些较浅的功能,就不说那些游戏中框架中的高级用法了。毕竟我也入门这个没多久啊只会些简单点的,可以用在普通应用界面中偶尔炫酷一下足矣。
UIGravityBehavior:重力行为
UICollisionBehavior:碰撞行为
UISnapBehavior:捕捉行为
UIPushBehavior:推动行为
UIAttachmentBehavior:附着行为
UIDynamicItemBehavior:动力元素行为
所有物理仿真行为都继承自UIDynamicBehavior
所有的UIDynamicBehavior都可以独立进行
组合使用多种行为时,可以实现一些比较复杂的效果。
使用2D物理引擎分两个步骤:
1.添加行为(绑定view)
@property(nonatomic,strong)UIDynamicAnimator * animator;
@property(nonatomic,strong)UIAttachmentBehavior * attachmentBehavior;
@property(nonatomic,strong)UIView * redView;
//懒加载
- (UIDynamicAnimator *)animator
{
if (!_animator) {
// 创建一个物理仿真器
//容器(里面放一些行为)
/*
ReferenceView:关联的view
*/
_animator = [[UIDynamicAnimator alloc] initWithReferenceView:self.view];
}
return _animator;
}2.把行为添加在容器中(绑定view的父view)
//自由落体行为
    UIGravityBehavior * gravity = [[UIGravityBehavior alloc]initWithItems:@[_redView,_greenView,_yellowView]];
    //重力行为有一个属性是重力加速度,设置越大速度增长越快。默认是1
    gravity.magnitude = 2;
    //添加到容器
    [_animator addBehavior:gravity];
还可以添加其他行为
//碰撞行为
UICollisionBehavior *collision =[[UICollisionBehavior alloc]initWithItems:@[_redView,_yellowView,_greenView]];
//设置边缘(父View的bounds)
collision.translatesReferenceBoundsIntoBoundary = YES;
//也可以自己写边缘
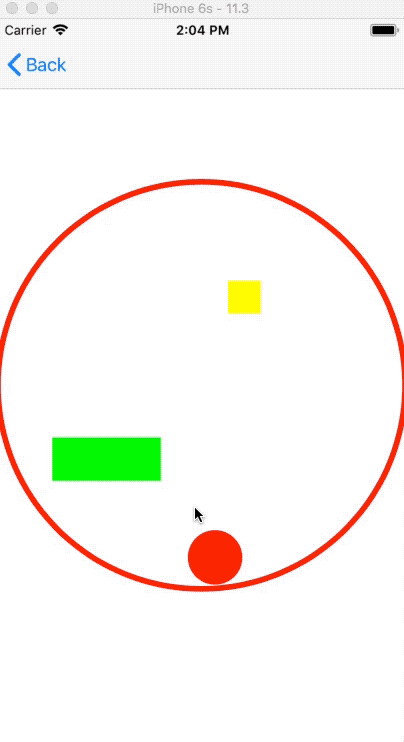
UIBezierPath *path = [UIBezierPath bezierPathWithOvalInRect:
CGRectMake(0,150, self.view.frame.size.width, self.view.frame.size.width)];
CAShapeLayer * shapeLayer =[CAShapeLayer layer];
shapeLayer.path =path.CGPath;
shapeLayer.strokeColor =[UIColor redColor].CGColor;//画笔颜色
shapeLayer.lineWidth = 5;
shapeLayer.fillColor = nil;//填充颜色
[self.view.layer addSublayer:shapeLayer];
[collision addBoundaryWithIdentifier:@"circle" forPath:path];
[_animator addBehavior:collision];//模拟捕捉行为 UISnapBehavior
//捕捉行为需要在创建时就给与一个点
//捕捉行为有一个防震系数属性,设置的越大,振幅就越小
CGPoint point = CGPointMake(100, 400);
UISnapBehavior *snap = [[UISnapBehavior alloc] initWithItem:_greenView snapToPoint:point];
snap.damping = 1;
[_animator addBehavior:snap];
//其他行为的拓展
UIDynamicItemBehavior *itemBehavior =[[UIDynamicItemBehavior alloc]initWithItems:@[_redView]];
/*
elasticity 弹性系数
friction 摩擦系数
density 密度
resistance 抵抗性
angularResistance 角度阻力
charge 冲击
anchored 锚定
allowsRotation 允许旋转
*/
itemBehavior.elasticity =.6;//弹性系数
[_animator addBehavior:itemBehavior];效果图如下: