在Ubuntu下安装PCL库有两种方法:
(1) 对于Ubuntu可以通过如下方式进行安装(更多操作系统可以参考:http://www.pointclouds.org/downloads/linux.html)
sudo add-apt-repository ppa:v-launchpad-jochen-sprickerhof-de/pcl
sudo apt-get update
sudo apt-get install libpcl-all
(2) 通过源代码进行安装:
a. 下载源代码:
git clone https://github.com/PointCloudLibrary/pcl.git 或者直接到Github网站下载源代码:
https://github.com/PointCloudLibrary/pcl.git(可能更快)
b. 安装依赖库:
apt-get install cmake g++ libboost1.58-all-dev libeigen3-dev libflann-dev python libusb-1.0-0-dev libudev-dev freeglut3-dev doxygen graphviz libpng12-dev libgtest-dev libxmu-dev libxi-dev libpcap-dev libqhull-dev libvtk5-qt4-dev python-vtk libvtk-java 注意: 最后一个"."是需要的。
c. 编译源代码:
cmake  -D CMAKE_BUILD_TYPE=None  -D BUILD_GPU=ON  -D BUILD_apps=ON  -D BUILD_examples=ON .
make -j2
make install
d. 注意根据实际情况调用ldconfig命令,可参考(http://blog.csdn.net/chenzixun0/article/details/56278632), 否则会出现找不到库文件的错误。
3. 在QT中配置应用:
a. "project.pro"配置文件中添加如下路径信息:
#Eigen
INCLUDEPATH += /usr/include/eigen3

#Vtk
INCLUDEPATH += /usr/include/vtk-6.3

LIBS += /usr/lib/x86_64-linux-gnu/libvtk*.so

#Boost
INCLUDEPATH += /usr/include/boost

LIBS += /usr/lib/x86_64-linux-gnu/libboost_*.so

#PCL Header
INCLUDEPATH += /usr/include/pcl-1.8

#PCL Lib
LIBS        += /usr/lib/libpcl_*.so
安装位置、库的链接路径都是根据自己的配置
b. 测试代码:实际为pcl库文件中的:pcl/doc/tutorials/content/sources/cloud_viewer路径下的demo
#include <iostream>
#include <pcl/visualization/cloud_viewer.h>
#include <iostream>
#include <pcl/io/io.h>
#include <pcl/io/pcd_io.h>
using namespace std;

int user_data;

void
viewerOneOff (pcl::visualization::PCLVisualizer& viewer)
{
    viewer.setBackgroundColor (1.0, 0.5, 1.0);
    pcl::PointXYZ o;
    o.x = 1.0;
    o.y = 0;
    o.z = 0;
    viewer.addSphere (o, 0.25, "sphere", 0);
    std::cout << "i only run once" << std::endl;

}

void
viewerPsycho (pcl::visualization::PCLVisualizer& viewer)
{
    static unsigned count = 0;
    std::stringstream ss;
    ss << "Once per viewer loop: " << count++;
    viewer.removeShape ("text", 0);
    viewer.addText (ss.str(), 200, 300, "text", 0);

    //FIXME: possible race condition here:
    user_data++;
}

int
main ()
{
    pcl::PointCloud<pcl::PointXYZRGBA>::Ptr cloud (new pcl::PointCloud<pcl::PointXYZRGBA>);
    pcl::io::loadPCDFile ("five_people.pcd", *cloud);

    pcl::visualization::CloudViewer viewer("Cloud Viewer");

    //blocks until the cloud is actually rendered
    viewer.showCloud(cloud);

    //use the following functions to get access to the underlying more advanced/powerful
    //PCLVisualizer

    //This will only get called once
    viewer.runOnVisualizationThreadOnce (viewerOneOff);

    //This will get called once per visualization iteration
    viewer.runOnVisualizationThread (viewerPsycho);
    while (!viewer.wasStopped ())
    {
    //you can also do cool processing here
    //FIXME: Note that this is running in a separate thread from viewerPsycho
    //and you should guard against race conditions yourself...
    user_data++;
    }

    return 0;
}
测试效果:
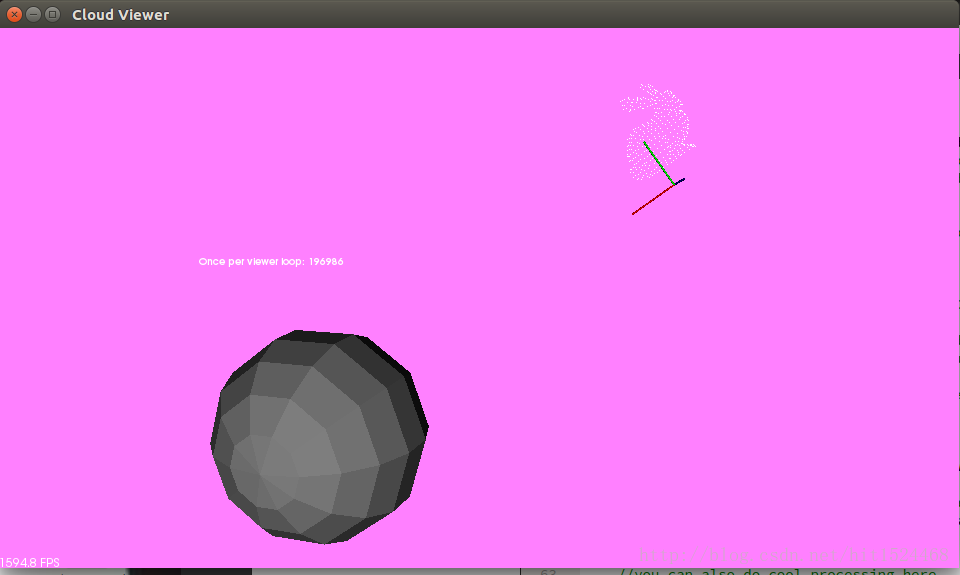
注意: 在刚开始运行PCL官网上的demo时,也是出现PCD文件正确,数据读取正确的情况下,但是,Demo的图像就是(红/黑/蓝)三种颜色的图块;但是,后来无意中拖动鼠标,发现显示的区域不对,导致产生不显示的错觉