看到网上充斥着很多词云分析的资料,今天心血来潮,也尝试下词云分析。最近热火的《创造101》,杨超越小姐姐一直在风口浪尖,因此这里借用小姐姐的微博数据做分析。
一、准备工具
作词云分析主要用到两个工具:
jieba,俗称结巴,中文分词工具;
wordcloud,词云生成工具。可以先用pip安装这两个库。
二、分析
首先打开移动端 https://m.weibo.cn/searchs,在里边找到小姐姐的微博主页,分析浏览器的请求。
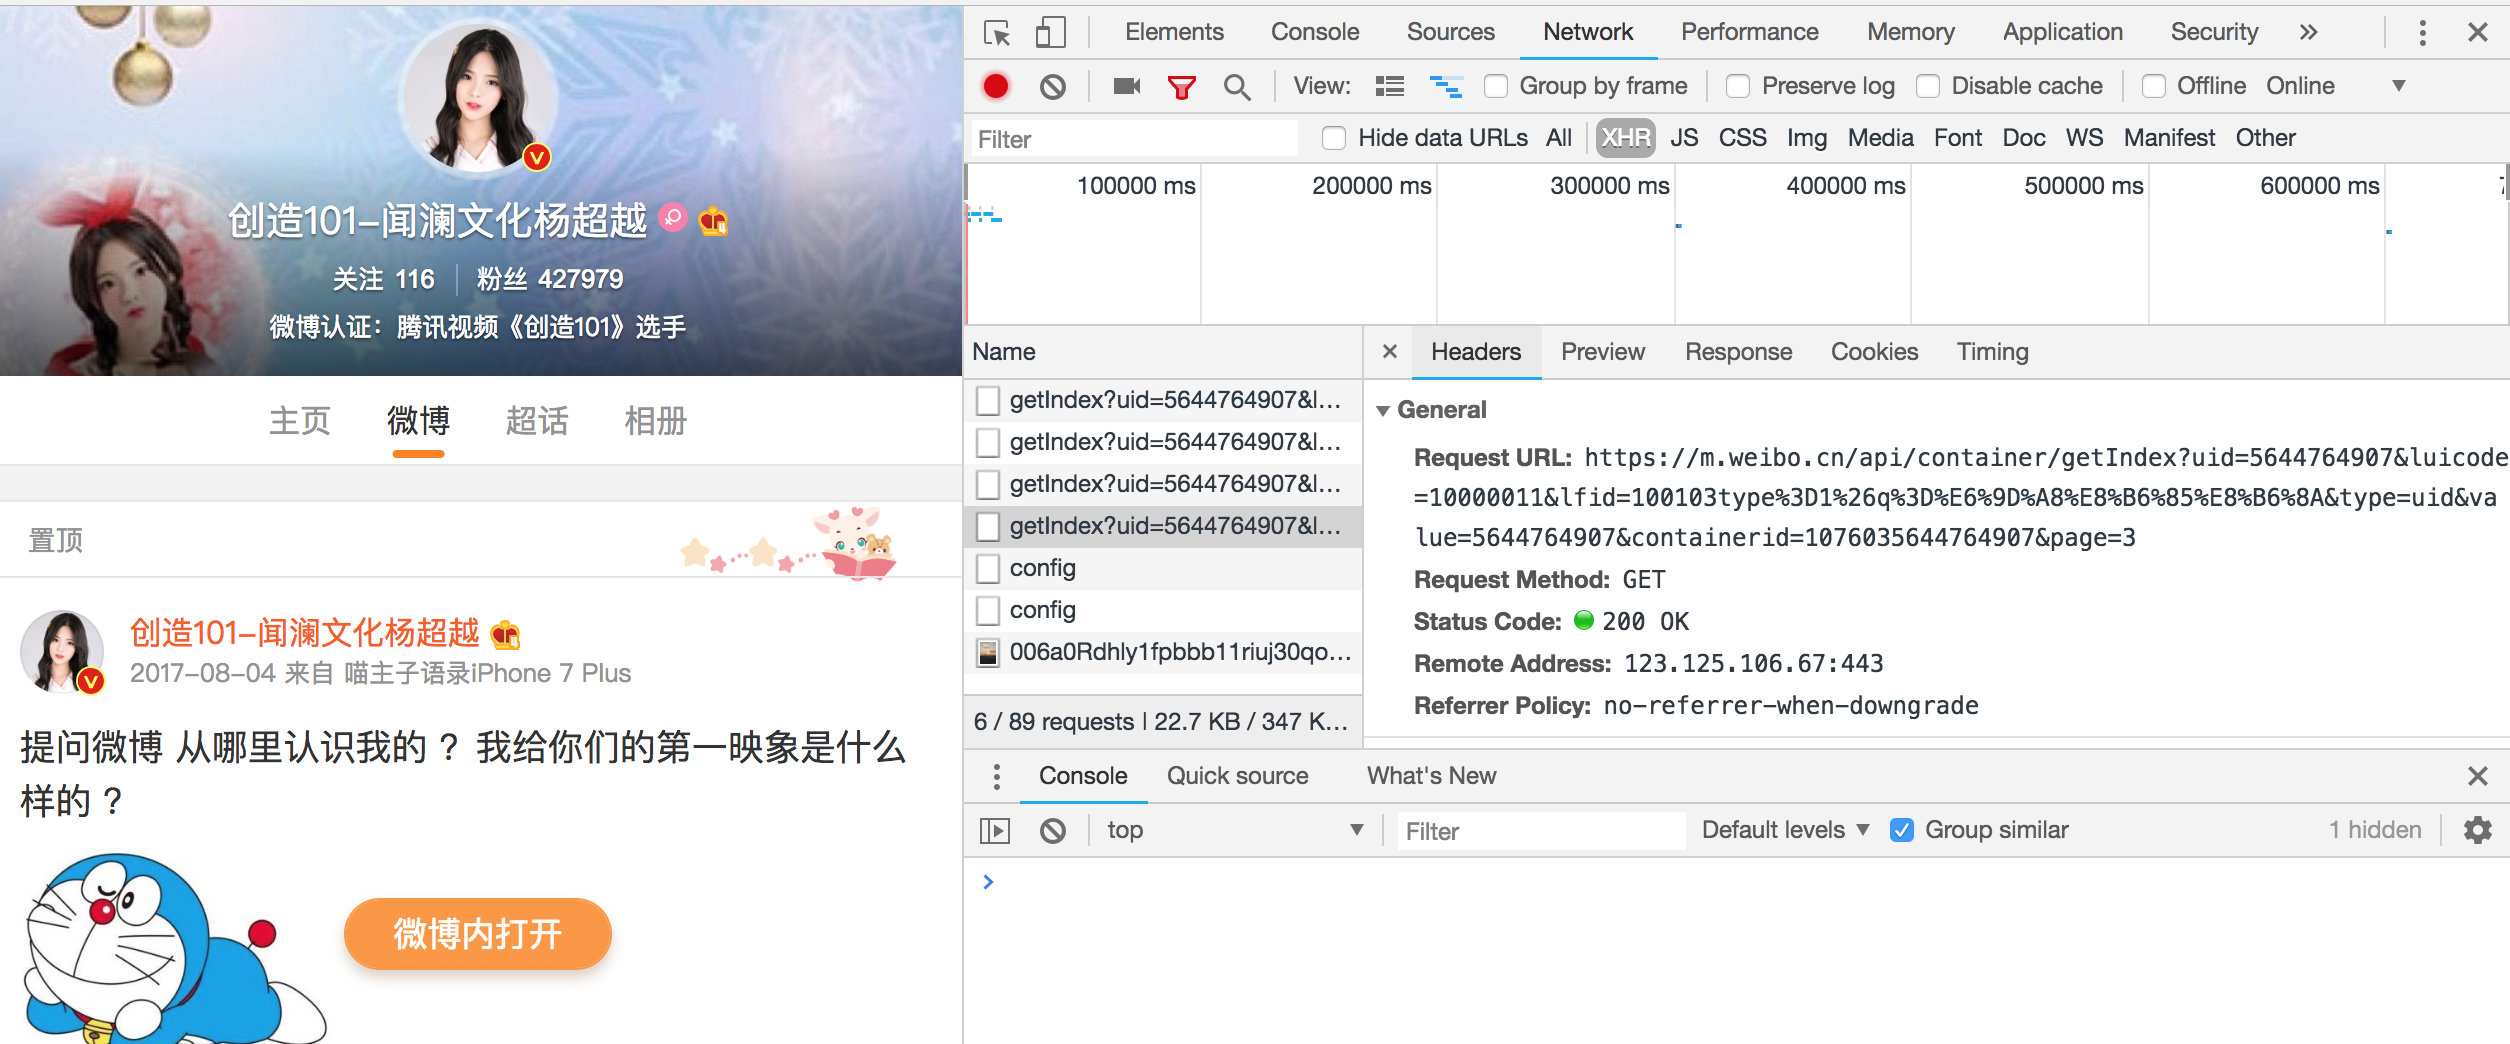
新浪微博应用的是Ajax渲染方式,因此若要准确分析数据需要提取出Ajax请求,Ajax的请求类型为XHR,如图getIndex前缀的都是Ajax请求,查看其Request URL, 观察到获取微博数据的的接口是 https://m.weibo.cn/api/container/getIndex。仔细观察这个URL参数:

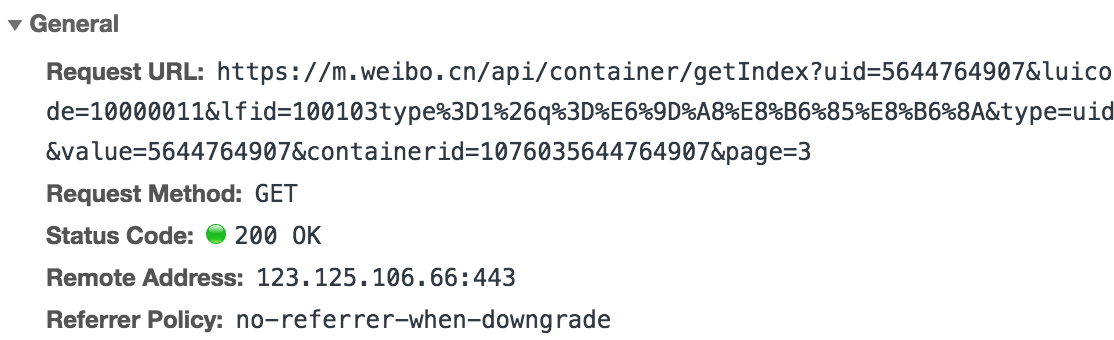
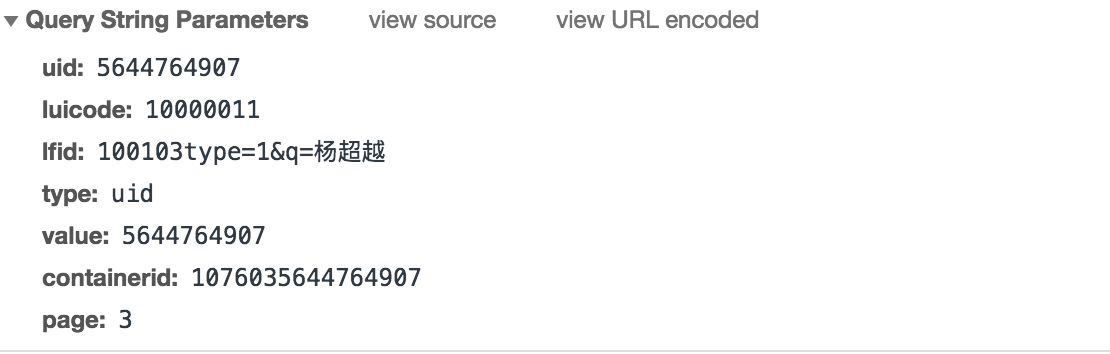
发现其中有一些固定参数在不同请求中是恒定不变的,同时也有一些加密参数,page是翻页参数。在response选项卡中查看这个借口返回的数据,发现是JSON字典类型,在JSON.cn中进行在线转化:
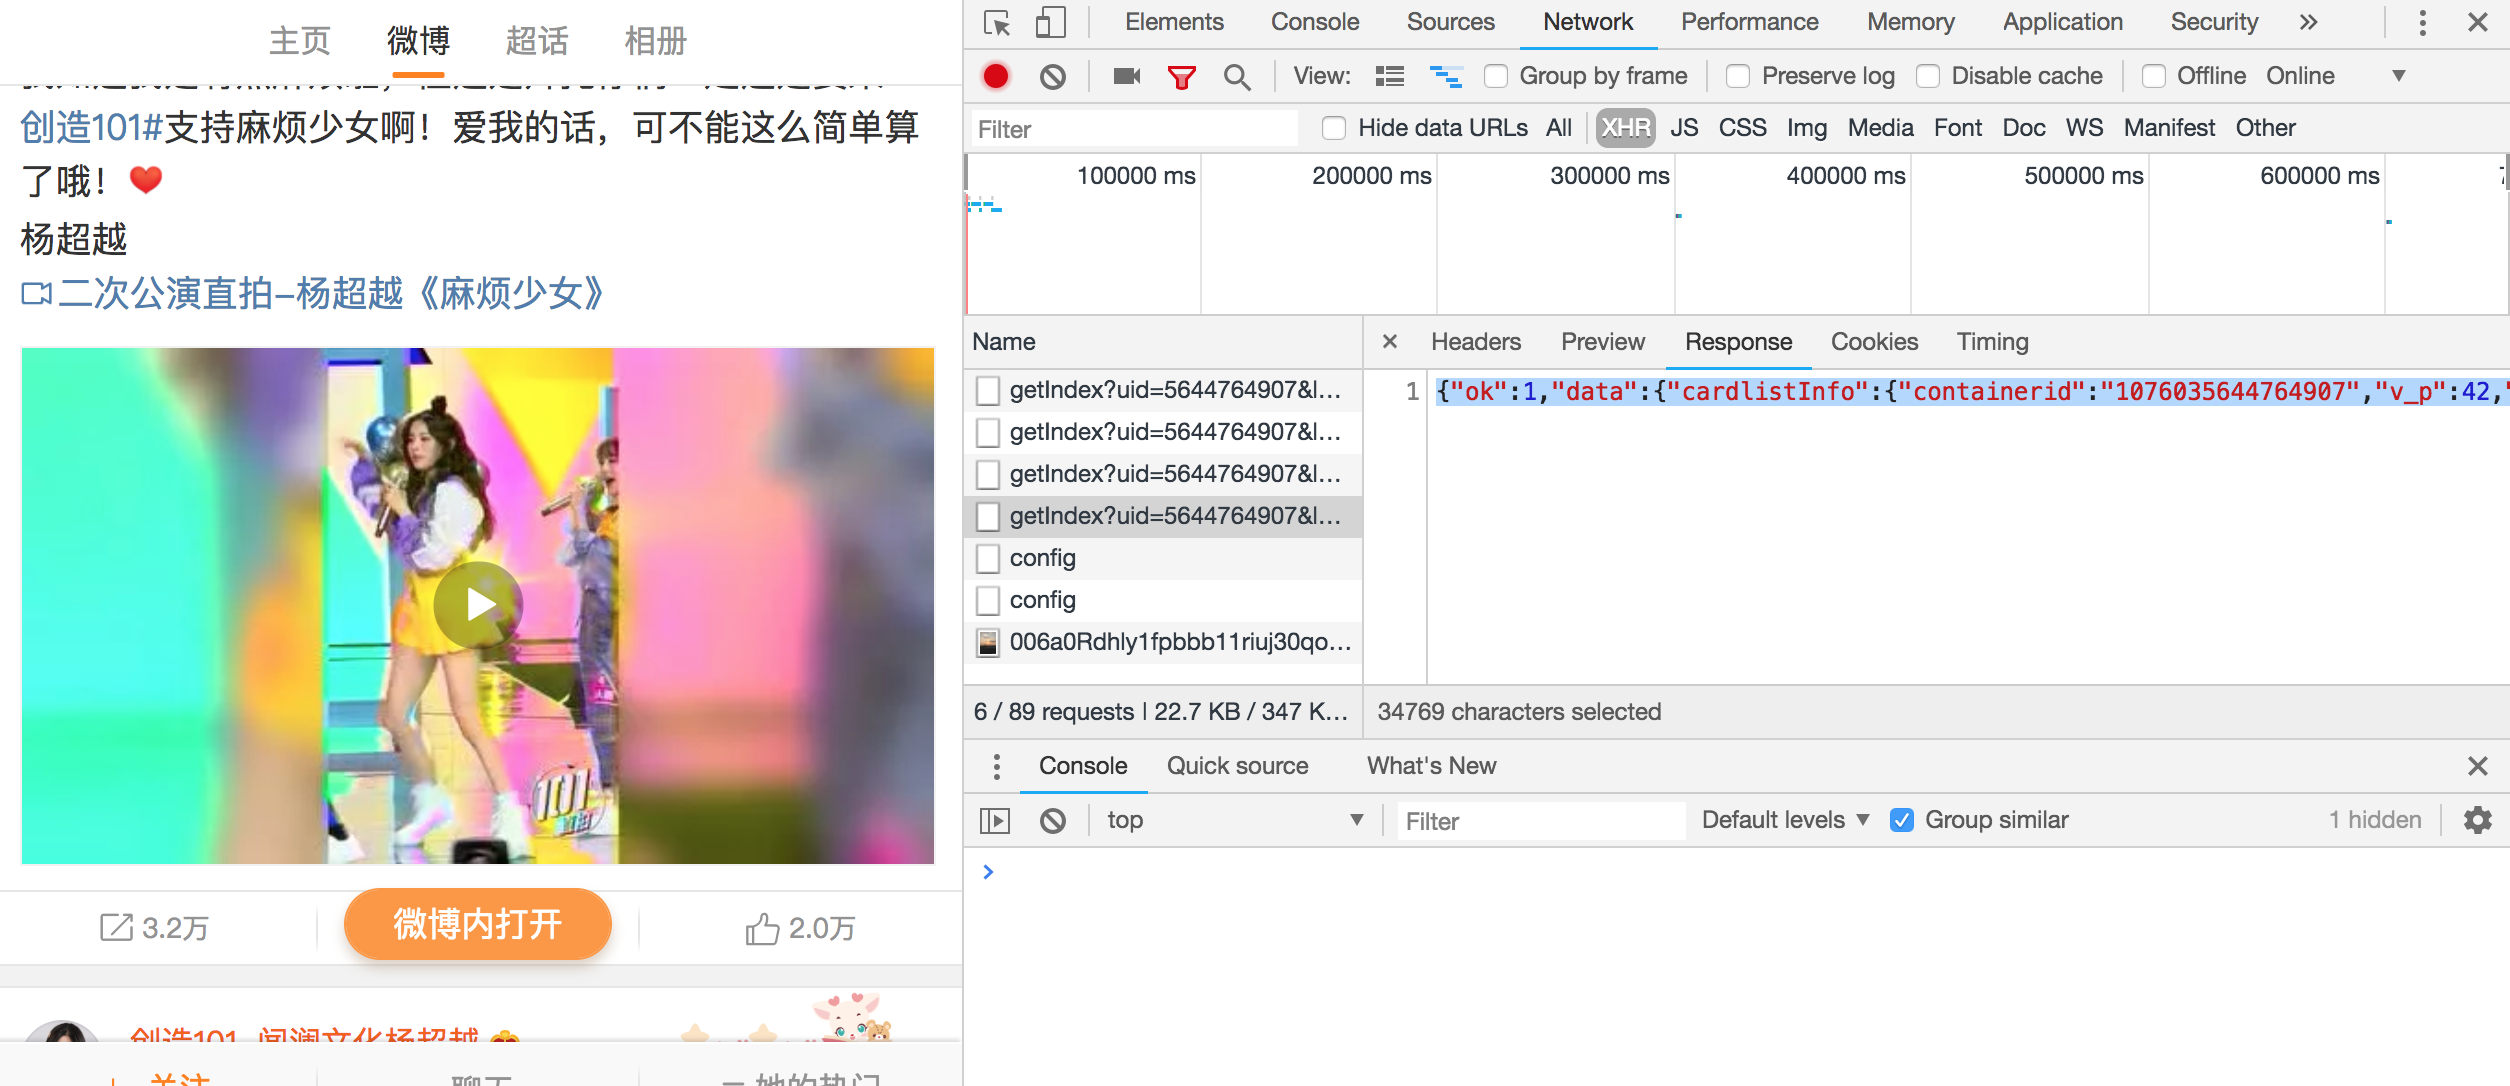
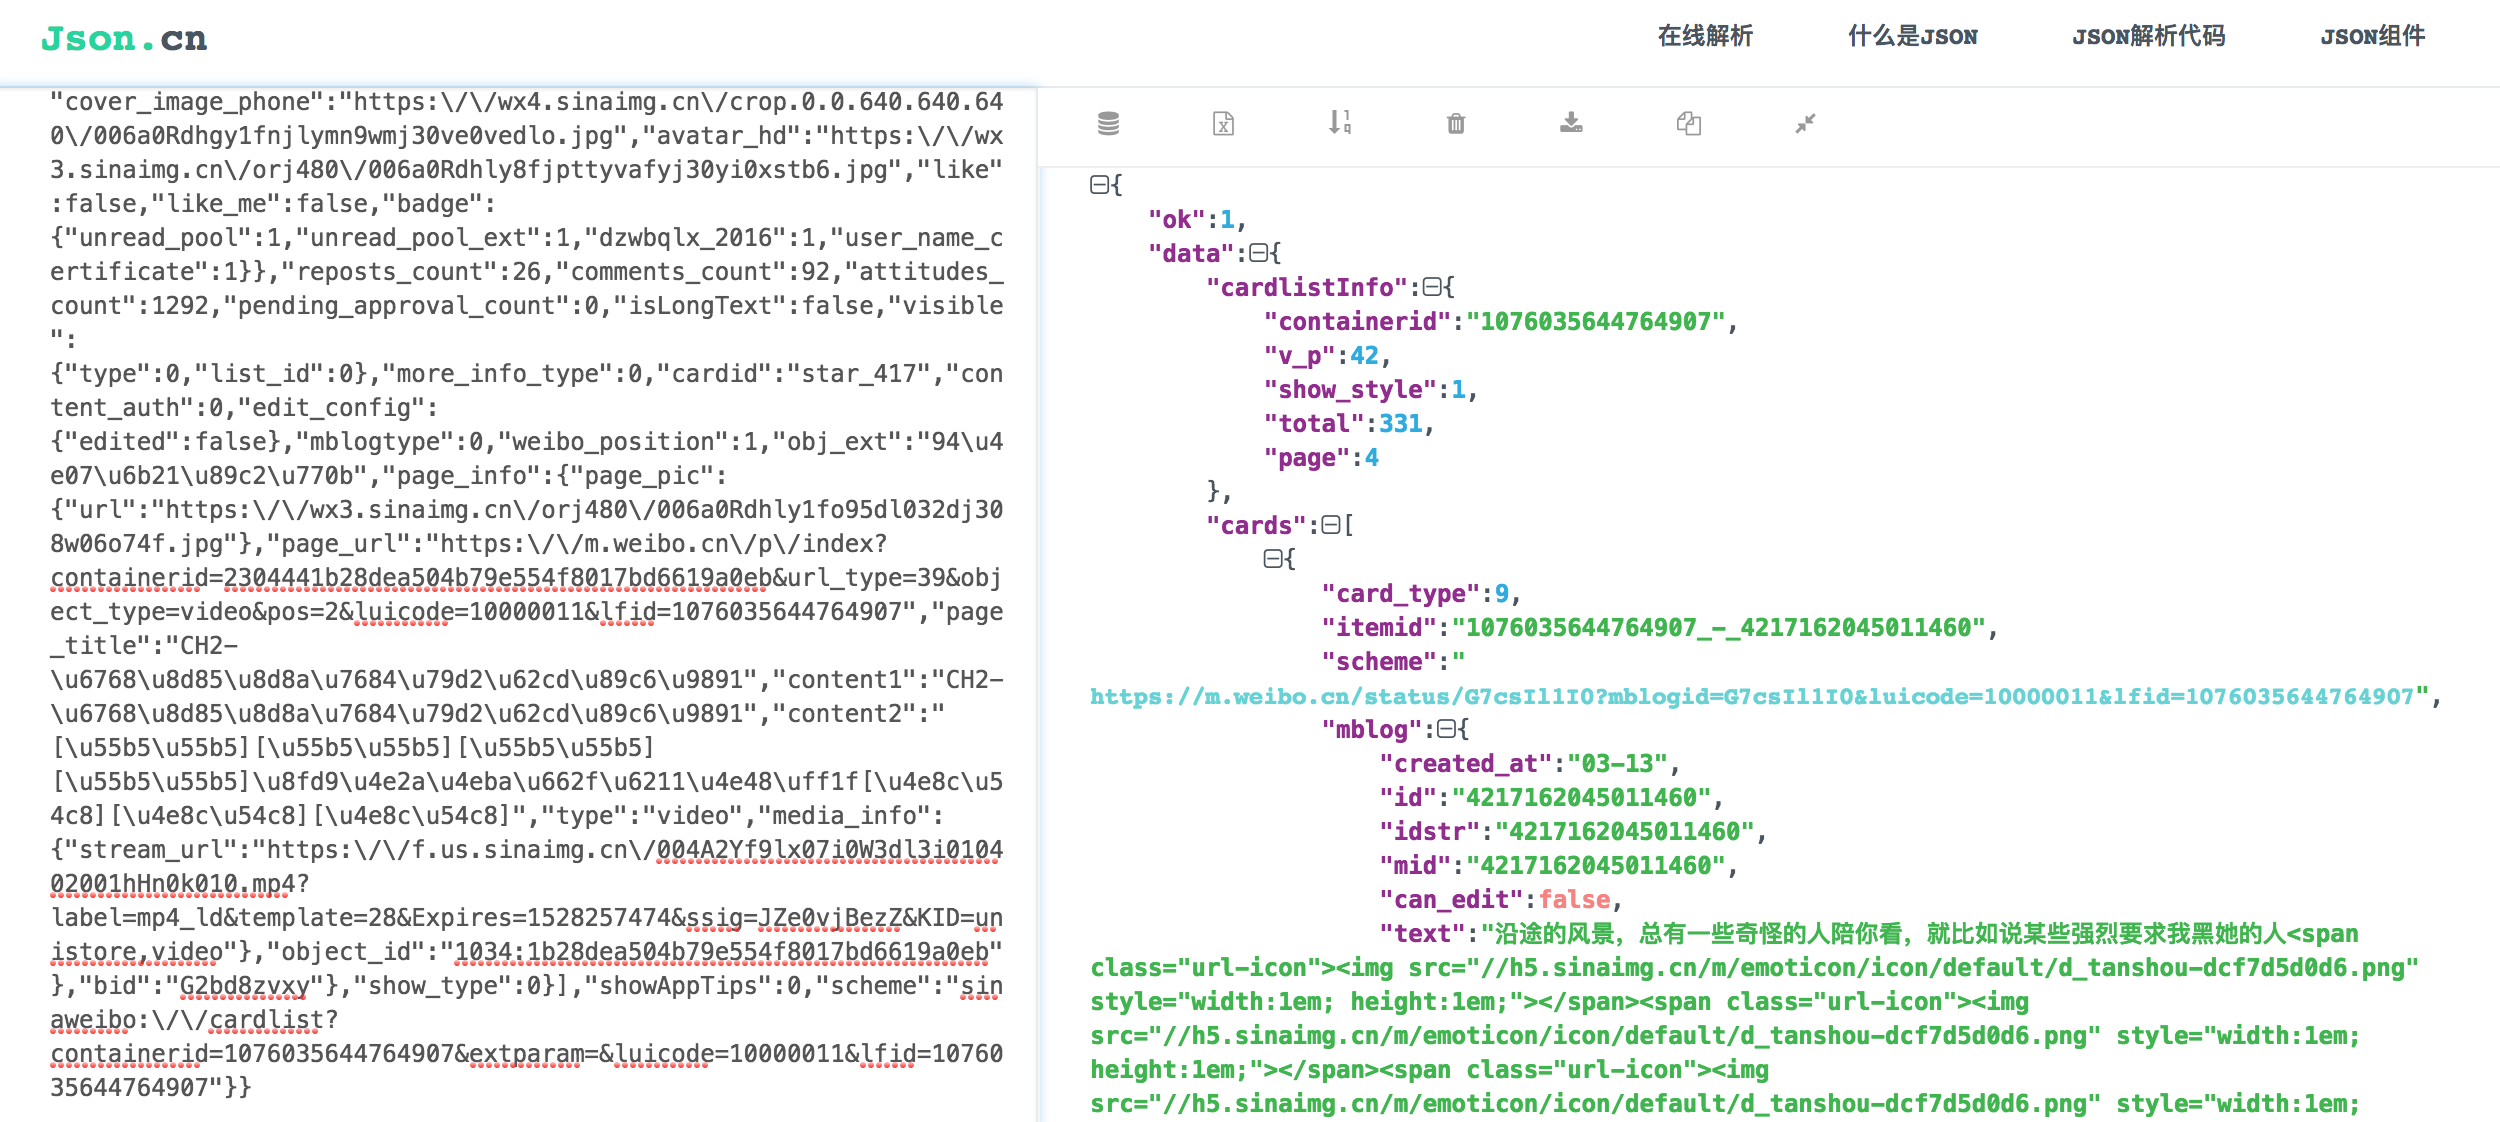
total是微博总条数,page是页数,每10条微博为一页,每一条微博都被封装在cards数组中,具体内容在text标签里。
三、构造请求头
分析完网页,我们用requests模拟浏览器来获取数据,因为不需要登陆就可以查看小姐姐的微博,因此这里不需要准备cookies。应用以上分析得到的参数构建请求头:
headers = {
    "Host": "m.weibo.cn",
    "Referer": "https://m.weibo.cn/u/5644764907",
    "User-Agent": "Mozilla/5.0 (iPhone; CPU iPhone OS 9_1 like Mac OS X) AppleWebKit/601.1.46 (KHTML, like Gecko) "
                  "Version/9.0 Mobile/13B143 Safari/601.1",
}
url = "https://m.weibo.cn/api/container/getIndex"
params = {"uid": "{uid}",
"luicode": "10000011",
"type": "uid",
"value": "5644764907",
"containerid": "{containerid}",
"page": "{page}"}四、构造简单爬虫
通过返回的数据能查询到总微博条数 total,爬取数据直接利用 requests 提供的方法把 json 数据转换成 Python 字典对象,从中提取出所有的 text 字段的值并放到 blogs 列表中,提取文本之前进行简单过滤,去掉无用信息。顺便把数据写入文件,方便下次转换时不再重复爬取。
同时,在这里准备一个由常见连接词组成的“结巴关键语录”,里边存放“你、我、他、虽然、但是”等连接词,用这个语录对微博语句进行断句。
同时,准备好词云背景图,这个背景图除了图案背景最好是白色。
通过hsl函数来决定生成词云的颜色。
def grey_color_func(word, font_size, position, orientation, random_state=None,
**kwargs):
s = "hsl(10, %d%%, %d%%)" % (random.randint(200, 255),random.randint(10, 55)) #色相、饱和度、明度
print(s)
return s五、效果图

哈哈哈,结果出来了,是不是很开心!发现小姐姐提到较多的关键字是好看、超越、抖音......
六、原始代码
# -*- coding:utf-8 -*-
import codecs
import re
import random
import imageio
import jieba.analyse
import matplotlib.pyplot as plt
import requests
from wordcloud import WordCloud
__author__ = 'Slash'
headers = {
"Host": "m.weibo.cn",
"Referer": "https://m.weibo.cn/u/5644764907",
"User-Agent": "Mozilla/5.0 (iPhone; CPU iPhone OS 9_1 like Mac OS X) AppleWebKit/601.1.46 (KHTML, like Gecko) "
"Version/9.0 Mobile/13B143 Safari/601.1",
}
def clean_html(raw_html):
pattern = re.compile(r'<.*?>|转发微博|//:|Repost|,|?|。|、|分享图片|回复@.*?:|//@.*')
text = re.sub(pattern, '', raw_html)
return text
url = "https://m.weibo.cn/api/container/getIndex"
params = {"uid": "{uid}",
          "luicode": "10000011",
          "type": "uid",
          "value": "5644764907",
          "containerid": "{containerid}",
          "page": "{page}"}
def fetch_data(uid=None, container_id=None):
"""
抓取数据,并保存到CSV文件中
:return:
"""
page = 0
total = 331
blogs = []
for i in range(0, total // 10):
params['uid'] = uid
params['page'] = str(page)
params['containerid'] = container_id
res = requests.get(url, params=params, headers=headers)
cards = res.json().get("data").get("cards")
for card in cards:
# 每条微博的正文内容
if card.get("card_type") == 9:
text = card.get("mblog").get("text")
text = clean_html(text)
blogs.append(text)
page += 1
print("抓取第{page}页,目前总共抓取了 {count} 条微博".format(page=page, count=len(blogs)))
with codecs.open('weibo.txt', 'a', encoding='utf-8') as f:
f.write("\n".join(blogs))
def grey_color_func(word, font_size, position, orientation, random_state=None,
                    **kwargs):
    s = "hsl(10, %d%%, %d%%)" % (random.randint(200, 255),random.randint(10, 55))   #色相、饱和度、明度
    print(s)
    return s
def generate_image():
data = []
jieba.analyse.set_stop_words("./stopwords.txt")
with codecs.open("weibo.txt", 'r', encoding="utf-8") as f:
for text in f.readlines():
data.extend(jieba.analyse.extract_tags(text, topK=20))
data = " ".join(data)
mask_img = imageio.imread('./bg.jpg')
wordcloud = WordCloud(
font_path='./WenQuanZhengHei-1.ttf',
background_color='white',
mask=mask_img
).generate(data)
plt.title('Yangchaoyue',fontsize='large')
plt.imshow(wordcloud.recolor(color_func=grey_color_func, random_state=3),
interpolation="bilinear") #双线性差值
plt.imshow(wordcloud, interpolation="bilinear")
plt.axis('off')
plt.savefig('./yang.jpg', dpi=1600)
if __name__ == '__main__':
fetch_data("5644764907", "1076035644764907")
generate_image()