1.安装jdk1.8
下载链接:http://www.oracle.com/technetwork/java/javase/downloads/jdk8-downloads-2133151.html
在~/.bash_profile配置环境
export JAVA_HOME=/Library/Java/JavaVirtualMachines/jdk1.8.0_77.jdk/Contents/Home
执行source ~/.bash_profile
2.搭建nexus
Nexus 是一个maven管理界面
下载链接 https://www.sonatype.com/download-oss-sonatype
解压:tar -zxvf nexus-3.1.0-04-mac.tgz
环境配置:
export PATH=${PATH}:/Users/chenxiangyu/local/nexus/nexus-3.9.0-01/bin执行source ~/.bash_profile
修改配置文件 安装目录下有 etc/nexus-default.properties文件
# Jetty section
application-port=9999//仅仅修改端口号
application-host=0.0.0.0
nexus-args=${jetty.etc}/jetty.xml,${jetty.etc}/jetty-http.xml,${jetty.etc}/jetty-requestlog.xml
nexus-context-path=/

# Nexus section
nexus-edition=nexus-pro-edition
nexus-features=\
nexus-pro-featurenexus start
结果
nexus is running
说明nexus 安装成功
浏览器访问地址 http://127.0.0.1:9999/nexus
默认用户:admin 密码:admin123
2.1

2.1

2.3

2.4
3、maven下载安装(以下内容都是在mac平台上的环境配置,其余平台自行google或度娘)
下载链接:http://maven.apache.org/download.cgi
安装:
解压安装包:tar -zxvf apache-maven-3.3.9-bin.tar.gz
解压到 ~/Documents目录下面(自选路径)
配置环境路径,vi ~/.bash_profile 或 /etc/profile 添加bin路径
export PATH=${PATH}:/Users/chenxiangyu/local/maven/apache-maven-3.5.3/bin
配置maven 在解压目录中有conf/settings.xml
私有库存在的位置 android studio 里面引用的是file:////Users/apple/projects/maven
<localRepository>/Users/apple/projects/maven</localRepository>
nexus 服务器
<server>
<id>my-nexus-releases</id>
<username>admin</username>
<password>admin123</password>
</server>
<server>
<id>my-nexus-snapshot</id>
<username>admin</username>
<password>admin123</password>
</server>
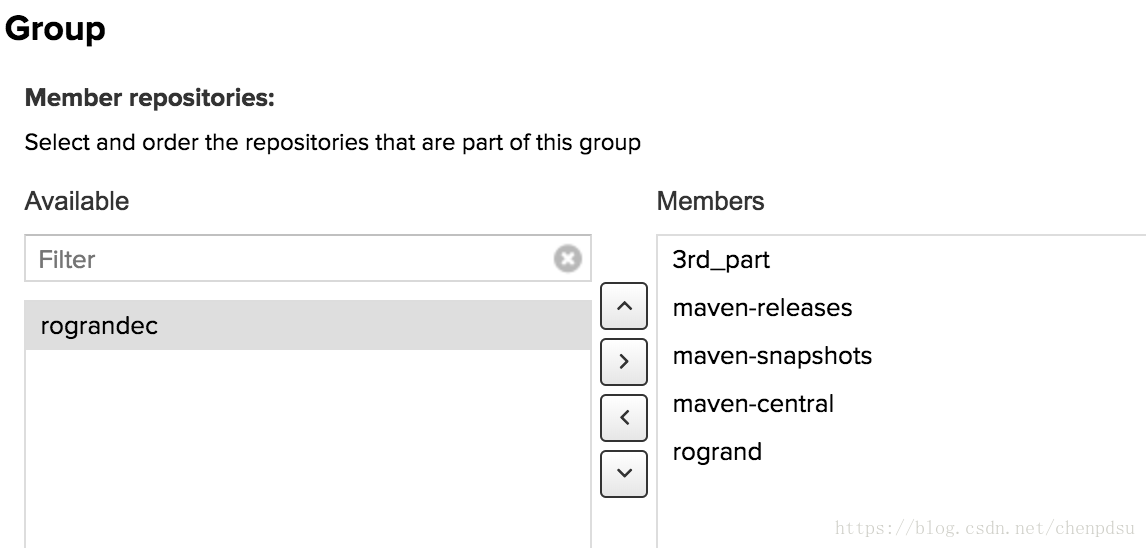
//镜像 maven 库的路径
<mirror>
<id>nexus</id>
<url>http://127.0.0.1:9999/repository/cody/</url>
<mirrorOf>*</mirrorOf>
</mirror>
//nexus 配置
<profile>
<id>nexusProfile</id>
<repositories>
<repository>
<id>nexus</id>
<name>Nexus Repository</name>
<url>http://127.0.0.1:9999/repository/cody/</url>
<layout>default</layout>
<releases>
<enabled>true</enabled>
</releases>
<snapshots>
<enabled>true</enabled>
</snapshots>
</repository>
</repositories>
</profile>
//激活
<activeProfiles>
<activeProfile>nexusProfile</activeProfile>
</activeProfiles>4.gradle脚本上传aar
build.gralde文件添加
apply plugin: 'com.android.library'
apply plugin: 'maven'
uploadArchives {
repositories {
mavenDeployer {
repository(url: "http://127.0.0.1:9999/repository/3rd_part/") {
authentication(userName: "admin", password: "admin123")
}
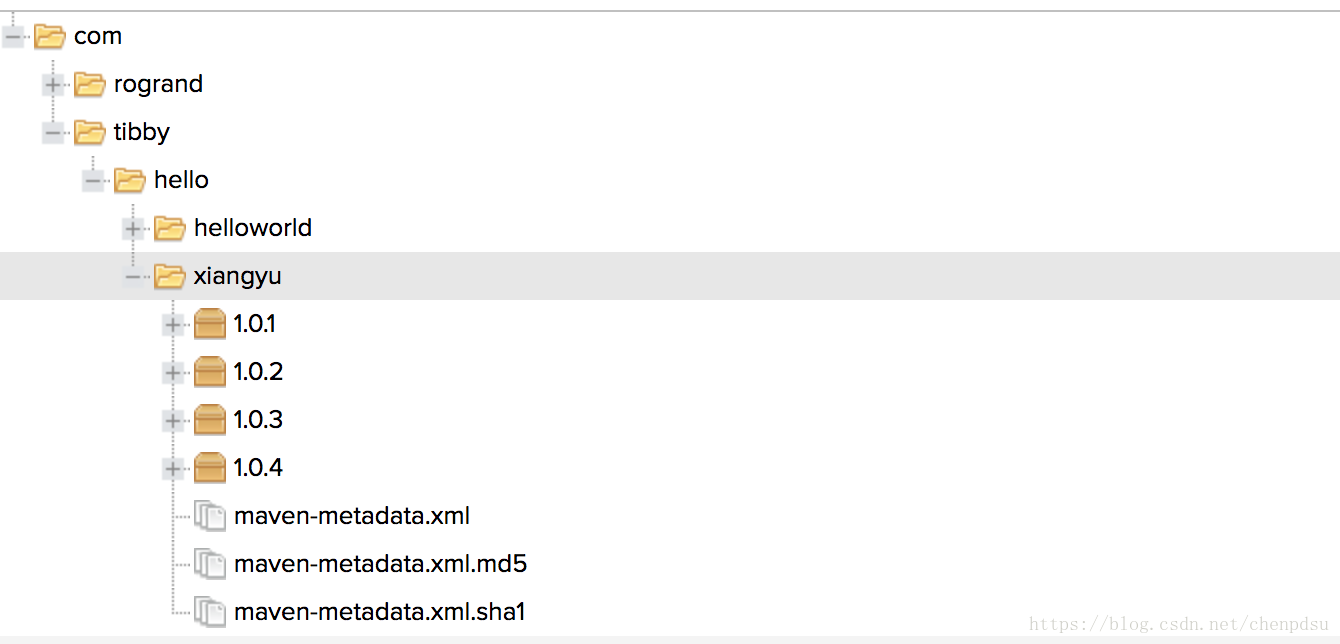
pom.version = "1.0.4"
pom.artifactId = "xiangyu"
pom.groupId = "com.tibby.hello"
pom.name = "hello"
pom.packaging = 'aar'
}
}
}注意:
moudle打包aar:
./gradlew :readercomponent:assembleRelease ————release.aar
rebulid project———只能打出debug.aar
执行uploadArchives
gradle uploadArchives
./gradlew uploadArchives
./gradlew :sharecomponent:uploadArchives
都可上传成功
4.引用
dependencies {
    repositories {
        maven {
            url "http://127.0.0.1:9999/repository/3rd_part/"
        }
    }
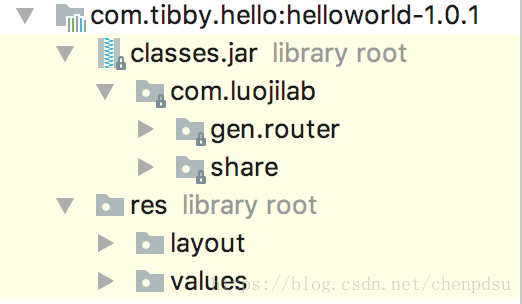
compile 'com.tibby.hello:helloworld:1.0.1@aar'
}
引用成功
同理:上传gradle插件
//apply plugin: 'maven'
uploadArchives {
    repositories.mavenDeployer {
        name = 'mavenCentralReleaseDeployer'
        repository(url: "http://127.0.0.1:9999/repository/rogrand/") {
            authentication(userName: "admin", password: "admin123")
        }

        pom.version = "1.0.1"
        pom.artifactId = "MyPlugin"
        pom.groupId = "com.dd.buildgradle"
        pom.name = "MyPlugin11"

    }

}