HTML基础
一、HTML(超文本标记语言)
html代码实际上就是一套能够被浏览器所识别的规则代码,由一个个标签组成。html代码就是一大长串字符串,而这种字符串的格式正好能够被浏览器所识别,也就有了我们的WEB页面。
后端与前端交互方式:
1、后端通过直接返回浏览器能够识别的html代码
2、后端返回数据,前端替换html种的指定数据
二、前端三把利器
1、HTML:赤裸的一个人
2、CSS:华丽的衣服
3、JS/JavaScript:赋予这个人的行为,也就是动起来
三、最初的HTML文件:
1、每个html文件最顶部有一个:<!DOCTYPE html> 这是告诉我们这是一个标准的html文件
2、一个页面只有一个html
3、有head头部
4、有body身体
<!DOCTYPE html><!-- 规定标准的html -->
<!--一个页面只有一个html标签-->
<!--标签的属性 指定英文-->
<html lang="en">
<head><!-- html head标签的开始 -->
    <!--头部当中大部分标签是不可见的-->
    <!--自闭合标签-->
    <meta charset="UTF-8">
    <!--主动闭合标签-->
    <title>Title</title>
</head> <!-- html body标签的开始 -->
<body><!-- html body标签的开始 -->
</body><!-- html body标签的结束 -->
</html>
四、HTML 头部 head标签
1、自闭和标签:只有开头没有结尾的标签:<meta charset="UTF-8">
2、主动闭合标签:有开头标签、结尾标签: <title>Title</title> 、<a></a>
3、头部head当中大部分标签不可见,唯一title标签可见,页面的标题更改浏览器tab的名字
4、meta标签添加属性:
1)<meta http-equiv="refresh" content="1">:每隔一秒钟刷新一次页面
2)<meta http-equiv="refresh" content="2;url=http://www.baidu.com">每隔两秒刷新一下并且跳转到百度
3)<meta name="keywords" content="天气真好">关键字检索
4)<meta name="description" content="测试工程师">网站描述
5)<meta http-equiv="X-UA-Compatible" content="IE=edge"> ie打开时以最高的兼容模式打开
5、link标签:超链接标签
<link rel="shortcut icon" href="http://www.imdsx.cn/wp-content/themes/QQ/images/logo.jpg"> <!--rel 代表link做什么用,href代表路径-->
<!DOCTYPE html> <!-- 规定标准的html -->
<!--一个页面只有一个html标签-->
<!--标签的属性 指定英文-->
<html lang="en">
<head>
    <!--头部当中大部分标签是不可见的-->
    <!--自闭合标签-->
    <meta charset="UTF-8">
    <!--每隔一秒钟刷新一次页面-->
    <!--<meta http-equiv="refresh" content="1">-->
    <!--每隔两秒刷新一下并且跳转到百度-->
    <!--<meta http-equiv="refresh" content="2;url=http://www.baidu.com">-->
    <!--主动闭合标签-->
    <!--更改浏览器tab的名字-->
    <title>测试一下</title>
    <!--rel 代表link做什么用,href代表路径-->
    <link rel="shortcut icon" href="http://www.imdsx.cn/wp-content/themes/QQ/images/logo.jpg">
</head>
<body>
</body>
</html>
截图:

五、HTML 头部body标签
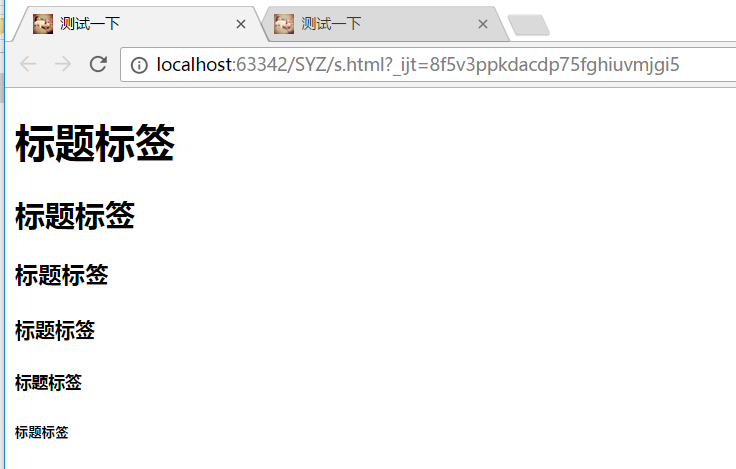
1、标题标签:h标签,有六个,<h1></h1><h2></h2><h3></h3><h4></h4><h5></h5><h6></h6>,h1最大,h6最小
2、段落标签:
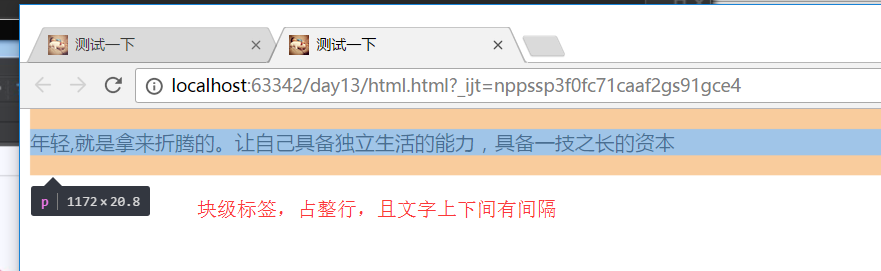
1)块级标签:<p></p>,行之间有间隔,即使文字没有一行,但每一行占页面的整行,可以跟span块级标签做对比
<p>年轻,就是拿来折腾的。让自己具备独立生活的能力,具备一技之长的资本</p>
2)行内标签:span :<span>年轻,就是拿来折腾的。让自己具备独立生活的能力,具备一技之长的资本</span>
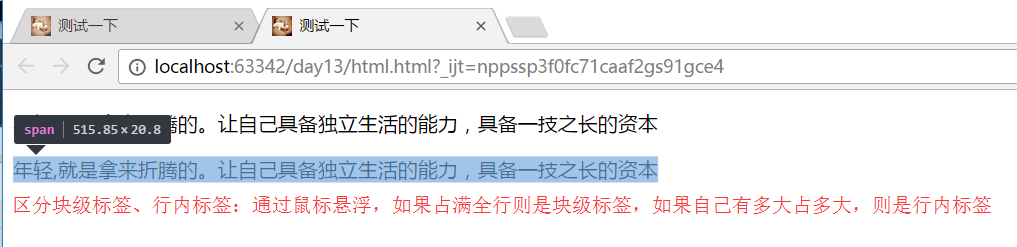
备注:<span></span>是最基础的白板标签,没有任何的css样式,p标签增加了上边距下边距,但是span没有,可以通过CSS进行装饰变成任何一种标签
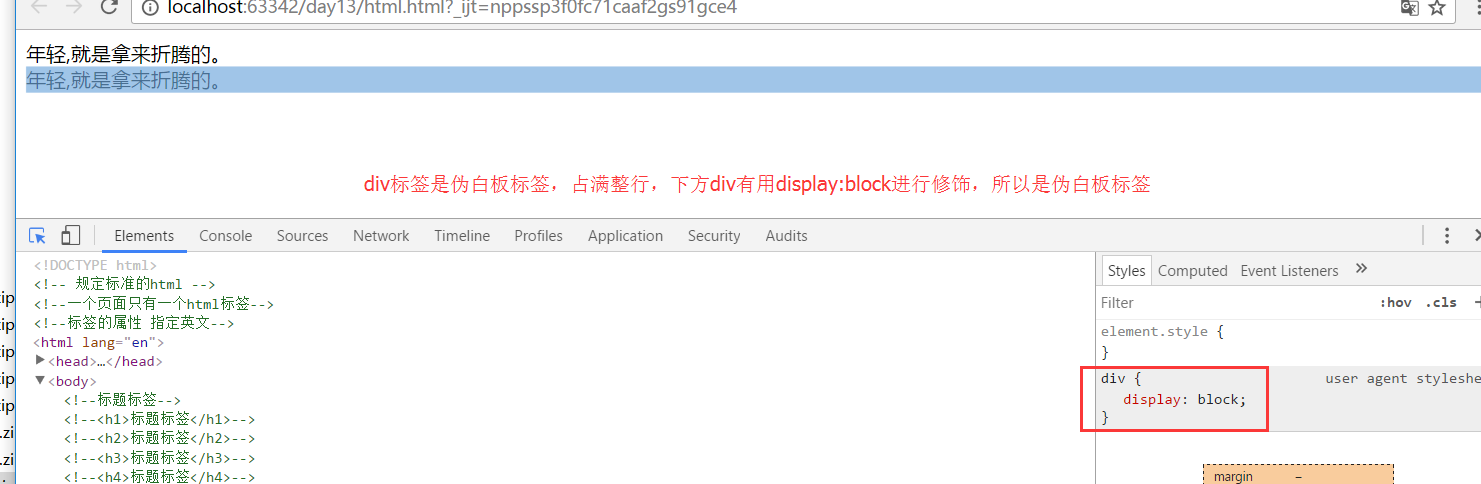
3、伪白板标签:div标签,因为能占满整行
块级标签,整满整行 div是HTML中出场率的标签,特点是没有任何属性,可以通过css进行装饰后成为任何一种标签
4、input标签
1)type属性:代表指定是一个什么框,text代表输入框,password密码框,button按钮,checkbox多选框、radio单选框、file上传文件、submit提交按钮、reset重置按钮
2)name属性:相当于前端请求给后端的那个key
3)value:默认值
4)placeholder属性:提示文案,当鼠标点击时消失:input type="text" placeholder="请输入用户" name="useranme" value="admin">
5)checked="checked"默认勾选


<!DOCTYPE html> <!-- 规定标准的html -->
<!--一个页面只有一个html标签-->
<!--标签的属性 指定英文-->
<html lang="en">
<head>
    <meta charset="UTF-8">
    <title>测试一下</title>
    <!--rel 代表link做什么用,href代表路径-->
    <link rel="shortcut icon" href="http://www.imdsx.cn/wp-content/themes/QQ/images/logo.jpg">
</head>
<body>
<!--value="admin"默认值为admin-->
<input type="text" placeholder="请输入用户名" name="username" value="admin"><br>
    <input placeholder="请输入密码" type="password" name="password"><br>
    <!--勾选框-->
    <!--checked="checked"默认勾选-->
    <input type="checkbox" name="xxx" checked="checked"><span>是否记住登录</span>
    <div>性别</div>
   <!--两个input添加name="sex",说明两个input互斥,选择了男就不能选择女-->
    <span>男</span><input type="radio" checked="checked" name="sex">
    <span>女</span><input type="radio" name="sex"><br>
    <input type="file" name="file">
    <!--button是需要和js连用,通过js进行提交操作-->
    <!--<input type="button" value="提交">-->

</body>
</html>

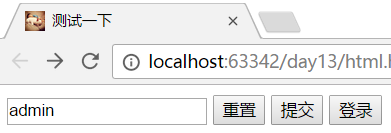
5、表单标签:form标签
form相当于一个承载体,form就相当于一个载体白纸,input 相当于往这个白纸上写东西,请求是通过from标签统一处理,拿到数据发送给后端
区分:submit如果和form连用,直接提交form表单,而点击button却没有任何作用,是需要通过js处理。
<!DOCTYPE html>
<html lang="en">
<head>
    <meta charset="UTF-8">
    <title>测试一下</title>
    <!--rel 代表link做什么用,href代表路径-->
    <link rel="shortcut icon" href="http://www.imdsx.cn/wp-content/themes/QQ/images/logo.jpg">
</head>
<body>
    <form action="http://www.baidu.com" method="post">
        <input type="text" value="admin" name="username">
        <input type="reset">
        <!--submit如果和form连用,直接提交form表单-->
        <input type="submit" value="提交">
        <input type="button" value="登录">
    </form>
</body>
</html>
from属性:
1)、action:与后端交互的时候一定要知道后端的接口或者url,action就是响应的接口或者URL
2)、method属性:请求方式,post请求或者get请求
备注:现在很少用submit提交数据,现在前端开发都是用ajax请求,用绑定按钮的方式去请求 。为什么不用submit方式是因为
例如如果注册用户,填写一堆注册数据,其中有一个出错,submit一点登陆刷新了整个页面,所有input框都被清空,所有数据得重新输入一遍,,而button登录采用用ajax异 步提交,前端页面不动,前端通过js向后端偷偷发送请求,拿出他的请求结果之后,如果邮箱的规则不正确,直接将返回结果渲染到界面上,能保证页面输入的数据不被清空。
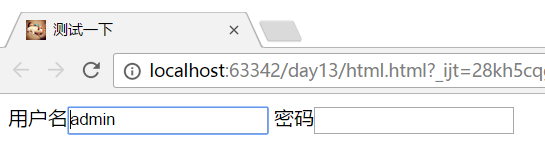
6、标题标签:label标签
label 标题标签 与input联合运用,增加input的点击范围 可直接点击文字就输入 for:映射到input的id
<!DOCTYPE html>
<html lang="en">
<head>
    <meta charset="UTF-8">
    <title>测试一下</title>
    <link rel="shortcut icon" href="http://www.imdsx.cn/wp-content/themes/QQ/images/logo.jpg">
</head>
<body>
<!--label扩展了input的可点击范围-->
    <label for="i1">用户名</label><input id="i1" type="text" value="admin">
    <span>密码</span><input type="password">
</body>
</html>
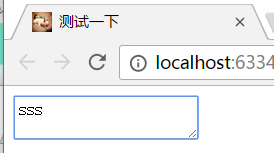
7、多行文本标签:textarea,有name属性跟后端进行交互
<!DOCTYPE html>
<html lang="en">
<head>
    <meta charset="UTF-8">
    <title>测试一下</title>
    <link rel="shortcut icon" href="http://www.imdsx.cn/wp-content/themes/QQ/images/logo.jpg">
</head>
<body>
<!--多行文本-->
    <textarea name="text">sss</textarea>
</body>
</html>
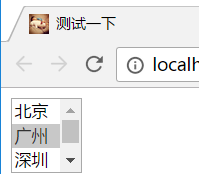
8、下拉框:select标签<select></select>
先创建一个下拉框select,2、下拉选项option
1)默认选中:option中添加selected="selected"
2)后端交互:每个option设置value参数,例如北京代表1,在select中设置name属性为:city ,city:1这样拼成的参数传给后端
3)size:下拉框显示几个数据,例如设置:size=2,表示该下拉框显示两个数据,多余数据下拉查看
4)多选multiple="multiple"
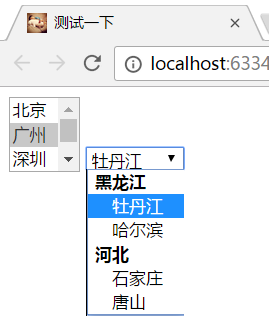
<!DOCTYPE html>
<html lang="en">
<head>
    <meta charset="UTF-8">
    <title>测试一下</title>
    <link rel="shortcut icon" href="http://www.imdsx.cn/wp-content/themes/QQ/images/logo.jpg">
</head>
<body>
<select name="city" size="3" multiple="multiple">
        <option value="1">北京</option>
        <option value="2" selected="selected">广州</option>
        <option value="3">深圳</option>
        <option value="4">深圳2</option>
    </select>
</body>
</html>
9、分组下拉框:<select></select>
1、先创建一个下拉框select,2、分组optgroup 3、option组成
<!DOCTYPE html>
<html lang="en">
<head>
    <meta charset="UTF-8">
    <title>测试一下</title>
    <link rel="shortcut icon" href="http://www.imdsx.cn/wp-content/themes/QQ/images/logo.jpg">
</head>
<body>
<select name="city" size="3" multiple="multiple">
        <option value="1">北京</option>
        <option value="2" selected="selected">广州</option>
        <option value="3">深圳</option>
        <option value="4">深圳2</option>
    </select>
<select>
        <optgroup label="黑龙江">
            <option>牡丹江</option>
            <option>哈尔滨</option>
        </optgroup>
        <optgroup label="河北">
            <option>石家庄</option>
            <option>唐山</option>
        </optgroup>
    </select>
</body>
</html>
10、超链接标签:<a></a>
1)跳转到网址链接:<a href="http://www.baidu.com">百度一下</a>,直接点击百度一下就跳转到百度首页
2)锚点跳转,<a href=#li>跳转</a> <div id="#li">sssss</div>, a标签内添加:href=#li,直接会跳转到对应 id号为 li 的div附近
<!DOCTYPE html>
<html lang="en">
<head>
    <meta charset="UTF-8">
    <title>测试一下</title>
    <link rel="shortcut icon" href="http://www.imdsx.cn/wp-content/themes/QQ/images/logo.jpg">
</head>
<body>
<!--超链接标签-->
    <a href="http://www.baidu.com">百度一下</a>
    <a href=#li>跳转</a>
    <div id="#li">sssss</div>
</body>
</html>
11、列表便签:
1)· 形式的列表 ul标签(以点位开头):外层为ul标签,里层 li 标签
2)数字形式列表 ol 标签(以数字为开头):外层为ol标签,里层 li 标签
3)分层列表 dl标签:最外层dl标签,第一层 dd 标签 第二层 dt 标签
<!DOCTYPE html>
<html lang="en">
<head>
    <meta charset="UTF-8">
    <title>测试一下</title>
    <link rel="shortcut icon" href="http://www.imdsx.cn/wp-content/themes/QQ/images/logo.jpg">
</head>
<body>
<ul>
        <li>大连</li>
        <li>秦皇岛</li>
    </ul>
    <ol>
        <li>大连</li>
        <li>秦皇岛</li>
    </ol>
    <dl>
        <dt>黑龙江</dt>
        <dd>黑龙江</dt>
        <dd>牡丹江</dd>
    </dl>
</body>
</html>

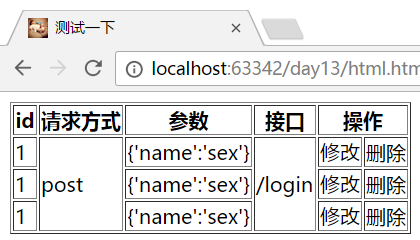
11、表格标签:table标签
1)包含表头thead:表头分行:tr ,每一列 : th
2)表体tbody:表头分行:tr ,每一列 : td
3)边框:border border="1"边框为1
4)colspan="2":表示占两列
5)rowspan="3":表示占三行
6)如果修改可跳转直接加个a标签
<!DOCTYPE html>
<html lang="en">
<head>
    <meta charset="UTF-8">
    <title>测试一下</title>
    <link rel="shortcut icon" href="http://www.imdsx.cn/wp-content/themes/QQ/images/logo.jpg">
</head>
<body>
<table border="1">
        <thead>
        <!--tr代表行,th代表表头的列-->
        <tr>
            <th>id</th>
            <th>请求方式</th>
            <th>参数</th>
            <th>接口</th>
            <th colspan="2">操作</th>
        </tr>
        </thead>
        <tbody>
         <!--tr代表行,td代表表头的列-->
            <tr>
                <td>1</td>
                 <td rowspan="3">post</td>
                 <td>{'name':'sex'}</td>
                 <td rowspan="3">/login</td>
                 <td><a herf="updata"></a>修改</td>
                <td>删除</td>
            </tr>
            <tr>
                <td>1</td>
                 <!--<td >post</td>-->
                 <td>{'name':'sex'}</td>
                 <!--<td>/login</td>-->
                 <td>修改</td>
                <td>删除</td>
            </tr>
            <tr>
                <td>1</td>
                 <!--<td>post</td>-->
                 <td>{'name':'sex'}</td>
                 <!--<td>/login</td>-->
                 <td>修改</td>
                <td>删除</td>
            </tr>
        </tbody>
    </table>
</body>
</html>
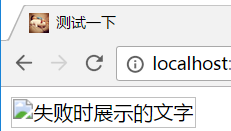
12、图片标签:img标签
<!DOCTYPE html>
<html lang="en">
<head>
    <meta charset="UTF-8">
    <title>测试一下</title>
    <link rel="shortcut icon" href="http://www.imdsx.cn/wp-content/themes/QQ/images/logo.jpg">
</head>
<body>
<img src="http://ui.imdsx.cn/static/image/dsx.jpg" alt="失败时展示的文字" title="悬浮时显示的文字123">
</body>
</html>

小工具:
1、推荐谷歌浏览器,有时候刷新不清除缓存,浏览器右键点击检查,然后右键点击刷新按钮,点击清空缓存并硬性重新加载
2、获取网页图片地址:谷歌浏览器右键点击检查--》Network--》刷新页面-->找到图片img--》点击Headers--》request url
3、空格:  大于号:> 小于号 < 记住常用的这三个,其他的用时百度