一、创建 Vue3 + TS + Vite 项目
输入项目名称,并依次选择需要安装的依赖项
npm create vue@latest项目目录结构截图如下:

二、编写组件代码、配置项和本地打包测试组件
在项目根目录新建 package 文件夹用于存放组件 (以customVideo为例,其他类似)

在项目根目录中的 vite.config.ts 中写入相关配置项:
import { defineConfig } from 'vite'
import path, { join } from 'path';
import setupPlugins from "./vite/plugins";
import dts from "vite-plugin-dts"

export default defineConfig(({ command, mode }) => {
  const isBuild = command == 'build'

  return {
    publicPath:"/",
    plugins: [...setupPlugins(isBuild),
        //生成ts声明文件
        dts({
        include:"./package"
    })],
    //设置别名
    resolve: {
      alias: {
        "@/package": join(__dirname, './package/')
      },
      extensions: [".vue",'.js', '.json', '.ts', '.tsx'],//使用别名省略的后缀名
    },
    build: {
      outDir: "lib", //输出文件名称
      lib: {
        entry: join(__dirname, './package/index.ts'), //指定组件编译入口文件
        name: 'vue3VideoH',
        fileName: (format) => `index.${format}.js` // 打包后的文件名
      }, //库编译模式配置
      rollupOptions: {
        // 确保外部化处理那些你不想打包进库的依赖
        external: ["vue"],
        output: {
          // 在 UMD 构建模式下为这些外部化的依赖提供一个全局变量
          globals: {
            vue: "Vue",
          },
        },
      }, // rollup打包配置
    }
  }

})
组件封装好之后需要在 customVideo/index.ts 中导出组件
import "./assets/font/iconfont.css"
import "./assets/css/base.less"
import customVideo from "./src/customVideo.vue"

export default customVideo
然后还需要在 packages/index.ts 文件中对整个组件库进行导出
import CustomVideo from "./customVideo"
import {App} from "vue";
let comps = [CustomVideo]
const install = (Vue:App) =>{
    comps.map((component:any)=>{
        Vue.component(component.__name as string, component);
    })
}
//使用import.meta.globEager遍历获取文件,会丢失icon图标和style样式
//获取文件
// const components:any = import.meta.globEager('./**/*.vue');
// const install = (Vue:any) =>{
//     for(let i in components) {
//         let component = components[i].default;
//         //注册组件
//         Vue.component(component.__name, component);
//     }
// }

let windowObj = window as any
/* 支持使用标签的方式引入 */
if (typeof windowObj !== 'undefined' && windowObj.Vue) {
    const vm = windowObj.Vue.createApp({})
    install(vm)
}

export default install
在编写组件代码和配置项之后进行本地打包测试组件,在 src/main.ts 中导入刚创建的组件,检测是否正常可用
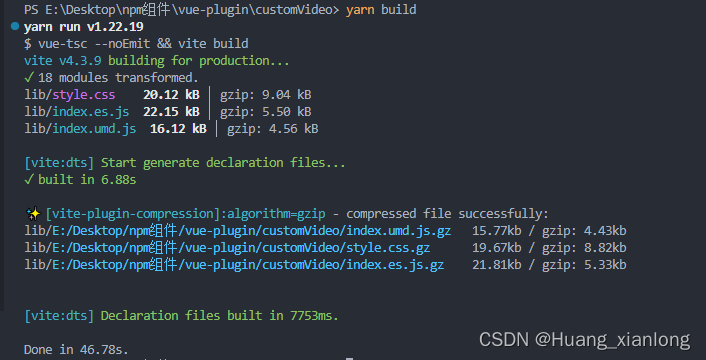
打包命令 npm run build
import { createApp } from 'vue';
import App from './App.vue';
import './style.css'
import customVideo from "@/package/index";

const app = createApp(App);
app.use(customVideo); //全局注册
app.mount('#app');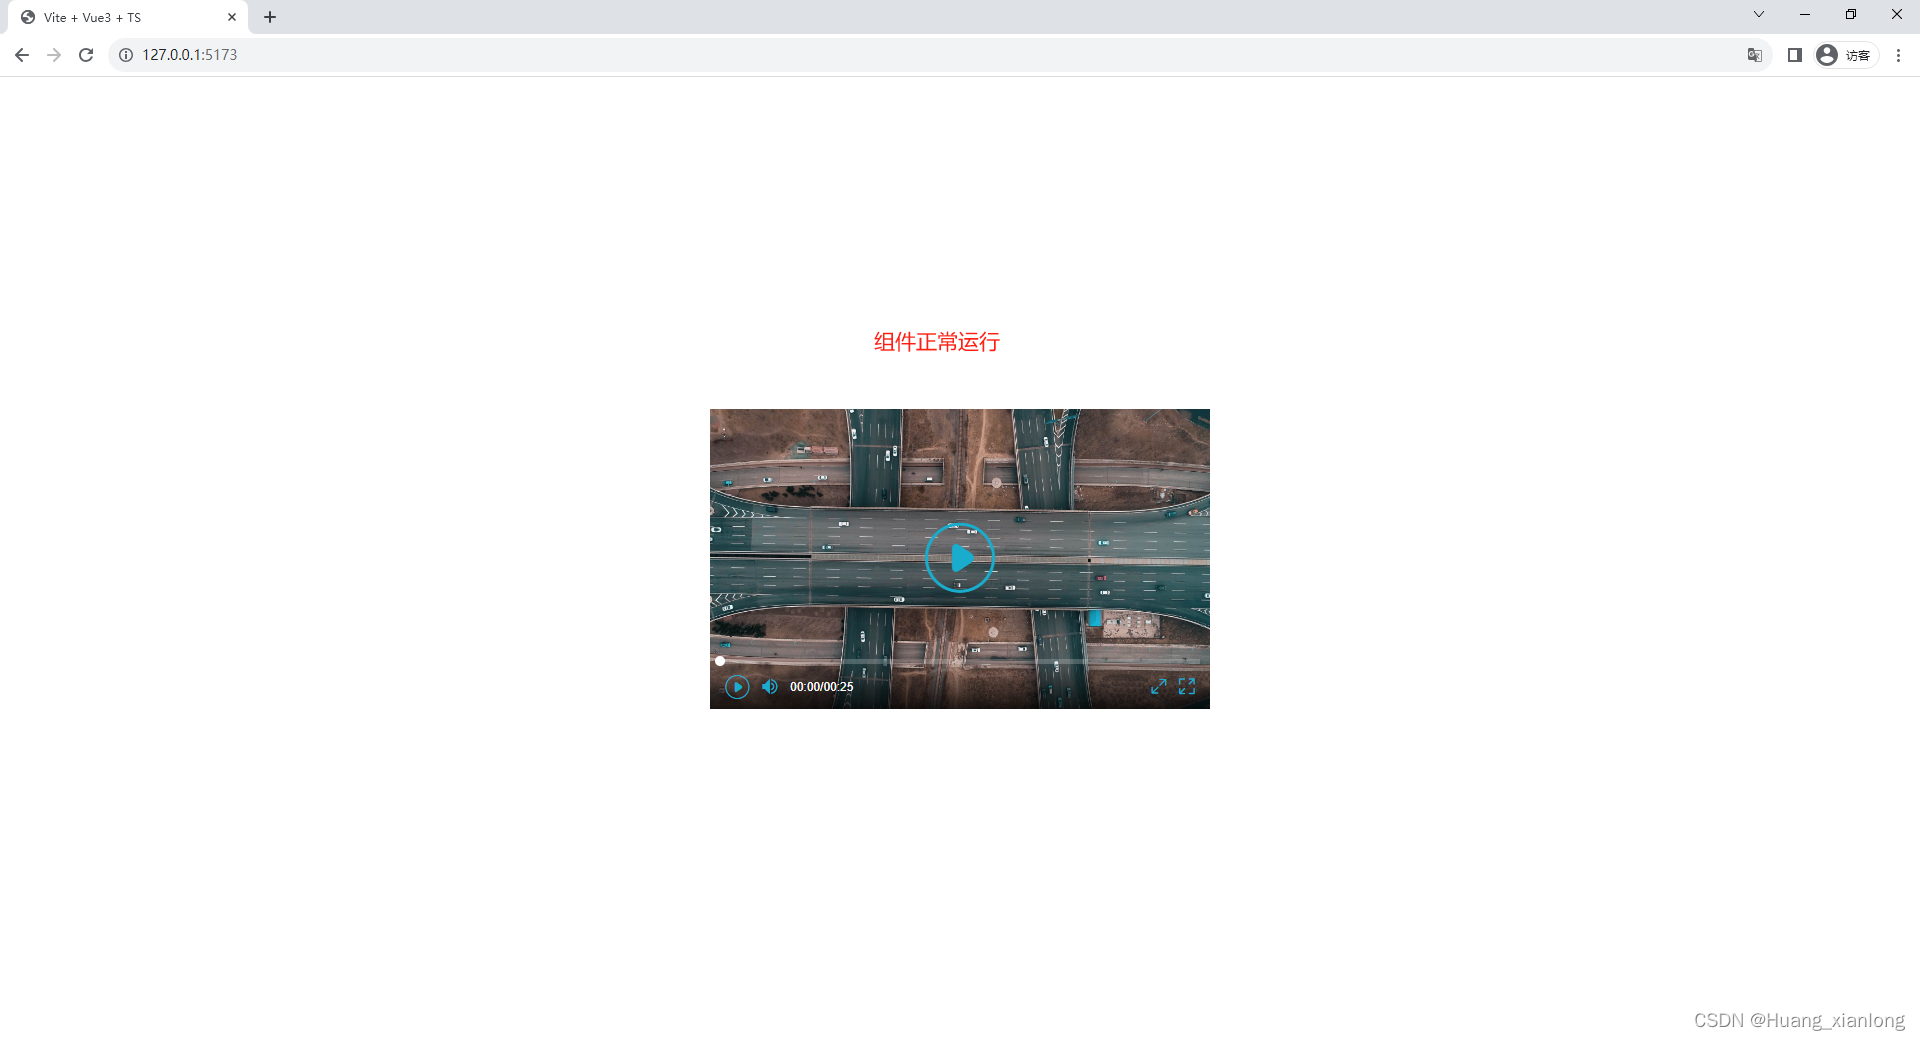
三、 编写package.json、.npmignore 和 README.md 文件
编写package.json 配置文件
{
  "name": "vue3-video-h",
  "version": "0.0.3",
  "description": "vue3自定义视频播放器",
  "main": "lib/index.umd.js",
  "module": "lib/index.es.js",
  "style": "lib/style.css",
  "types": "lib/index.d.ts",
  "files": [
    "lib"
  ],
  "scripts": {
    "dev": "vite",
    "build": "vue-tsc --noEmit && vite build",
    "preview": "vite preview"
  },
  "dependencies": {
    "less": "^4.1.3",
    "less-loader": "^11.1.3",
    "loader": "^2.1.1",
    "path": "^0.12.7",
    "vite-plugin-compression": "^0.5.1",
    "vite-plugin-dts": "1.4.1",
    "vue": "^3.2.47",
    "vue3-video-h": "^0.0.2"
  },
  "devDependencies": {
    "@types/node": "^20.3.3",
    "@vitejs/plugin-vue": "^4.1.0",
    "typescript": "^5.0.2",
    "vite": "^4.3.9",
    "vue-tsc": "^1.4.2"
  },
  "directories": {
    "lib": "lib"
  },
  "keywords": [
    "vue-video",
    "vue3-video-h",
    "vue3",
    "vue3-video"
  ],
  "author": "Huang",
  "license": "MIT",
  "homepage": "",
  "repository": "https://gitee.com/Huangxianlong11/vue-plugin/tree/master/customVideo"
}
name : 包名,该名字是唯一的。可在 npm 官网搜索名字,不可重复。
version: 版本号,每次发布至 npm 需要修改版本号,不能和历史版本号相同。
description: 关于包的描述。
main: 入口文件,需指向最终编译后的包文件。
keywords:关键字,以空格分离希望用户最终搜索的词。
author:作者
license: 开源协议
在项目根目录创建 .npmignore 文件,设置忽略发布的文件,类似 .gitignore 文件
# 忽略目录
.idea
.vscode
scripts/
packages/
public/
node_modules/
src/
types/
vite/
yarn.lock

# 忽略指定文件
vite.config.ts
tsconfig.json
.gitignore
*.map
编写 README.md 文件
# vue3-video-h

> A HTML5 video player component for Vue3

## Installation
```bash

npm i vue3-video-h --save

```


## Usage

main.ts
```
// script
import { createApp } from 'vue';
import App from './App.vue';
import customVideo from "vue3-video-h"
import "vue3-video-h/lib/style.css";//引入样式

const app = createApp(App);
app.use(customVideo); //全局注册
app.mount('#app');
```

App.vue

```
<template>
  <div class="app-container">
    <customVideo :config="config" />
  </div>
</template>

<script setup lang="ts">
import {ref} from "vue";

let config = ref({
  src:"", //视频
  poster: "", // 初始化占位图片
  volume: 20,//声音
  themeColor:"#19accc",//主体颜色
  activeColor:"red",//选中颜色
  width:"500px",//宽度
  height:"300px",//高度
})
</script>
```
四、发布组件到 npm
登录 npm
如果没有 npm 账号,可以去 npm官网 注册一个账号,注册成功后在本地查看 npm 镜像
npm config get registry输出:http://registry.npmjs.org 即可,如果不是则需要设置为npm镜像
npm config set registry https://registry.npmjs.org切换为npm镜像之后进行登录
npm login依次输入用户名,密码,邮箱,输出Logged in as…即可

发布组件到 npm
npm publish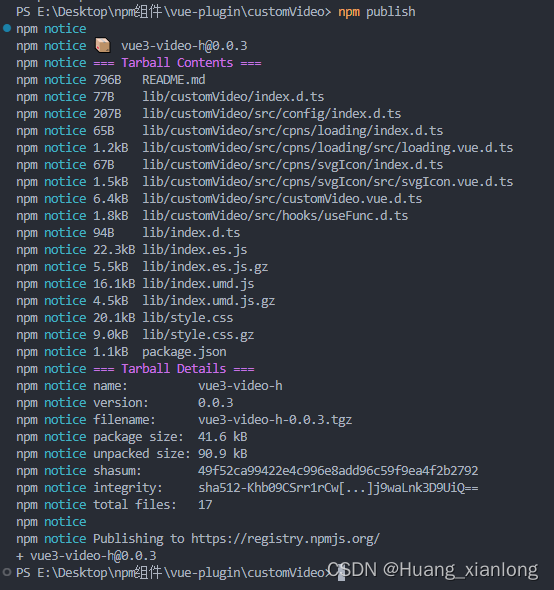
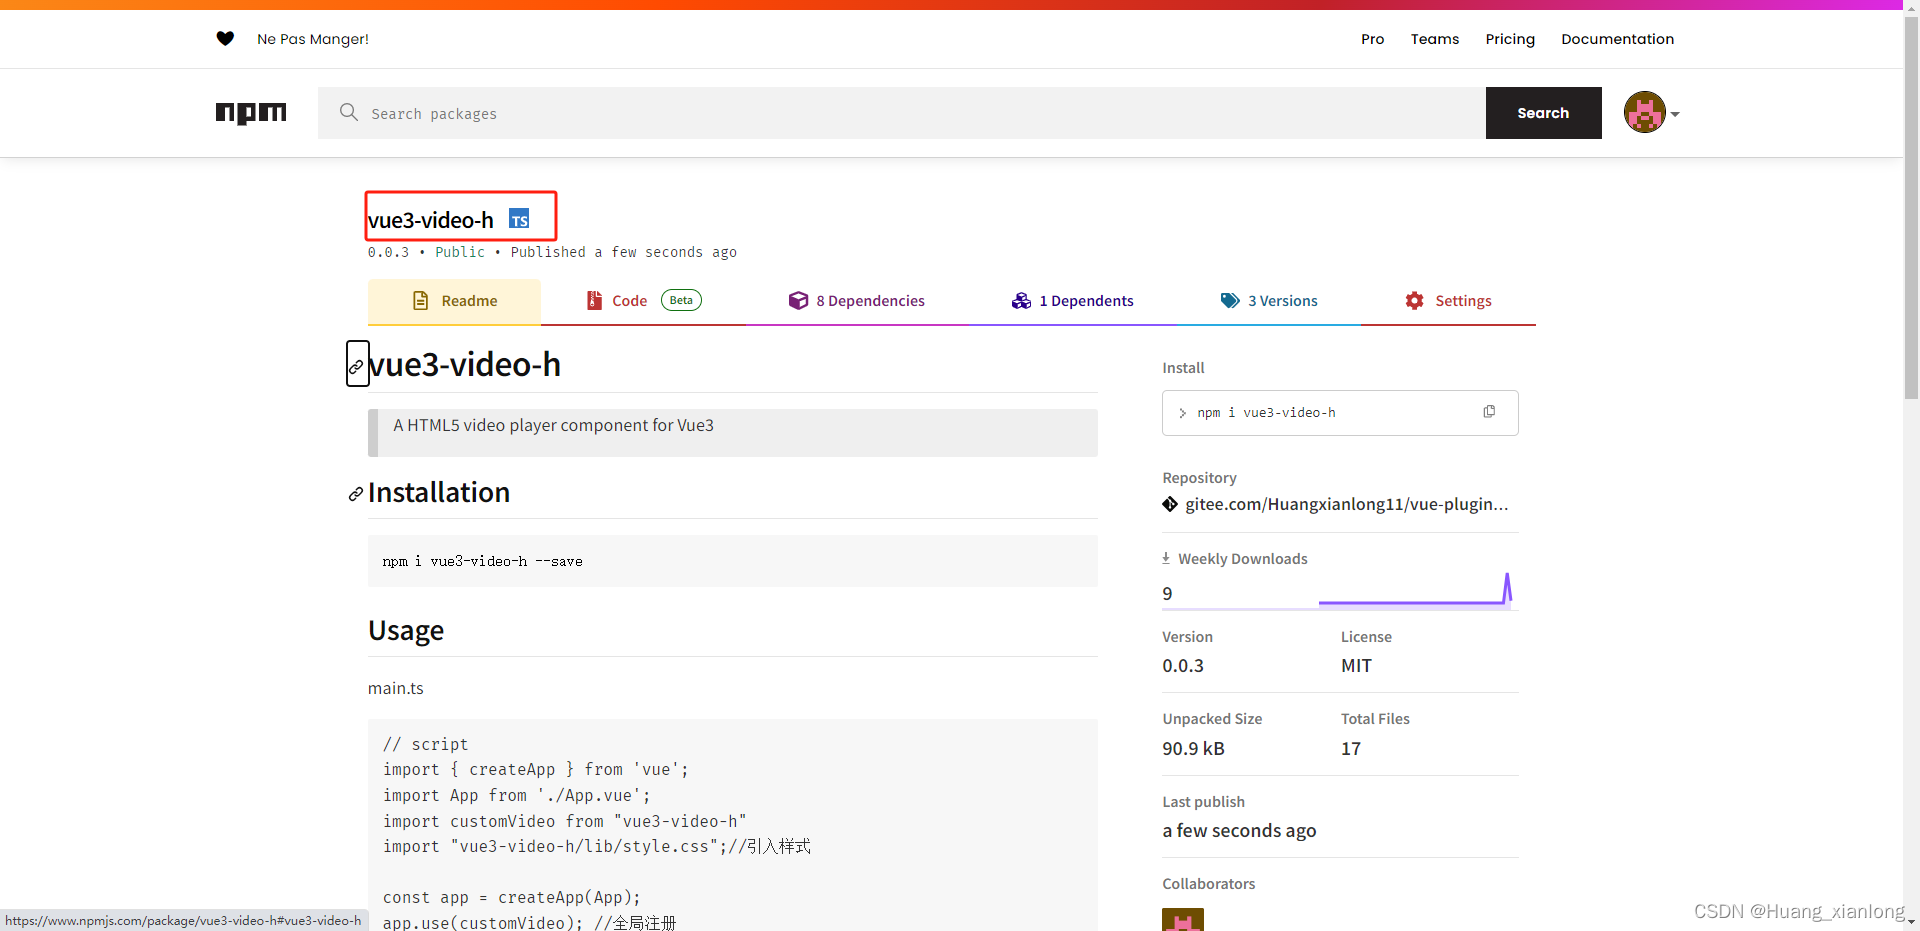
发布成功后即可在npm官网搜索到该组件,如下图
并可以通过 npm install vue3-video-h(或 yarn add vue3-video-h )进行安装
五、npm组件使用
在要使用的项目中安装并注册插件:
yarn add vue3-video-h
# or
npm install vue3-video-h
然后在 main.ts 文件中引入并注册:
import { createApp } from 'vue';
import App from './App.vue';
import customVideo from "vue3-video-h"
import "vue3-video-h/lib/style.css";//引入样式

const app = createApp(App);
app.use(customVideo); //全局注册
app.mount('#app');
在要使用组件的页面直接使用即可:
<template></template>
  <div class="app-container">
    <customVideo :config="config" />
  </div>
</template>

<script setup lang="ts">
import {ref} from "vue";

let config = ref({
  src:"", //视频
  poster: "", // 初始化占位图片
  volume: 20,//声音
  themeColor:"#19accc",//主体颜色
  activeColor:"red",//选中颜色
  width:"500px",//宽度
  height:"300px",//高度
})
</script>