ElementPlus中的分页逻辑与实现
分页是web开发中必不可少的组件,element团队提供了简洁美观的分页组件,配合table数据可以实现即插即用的分页效果。分页的实现可以分成两种,一是前端分页,二是后端分页。这两种分页分别适用于不同的业务场景,分页写了无数回了,但一直记不住,因此记录一下这两种分页效果的逻辑和实现。
一、前端分页
前端分页适用于数据量少的情况,向后端发起一次数据请求,前端处理分页。优点就是接口请求少,逻辑很简单,缺点很明显,处理大量数据时,效率极低。
前端分页是我非常喜欢的一种分页模式,最主要的原因就是代码简单。
现在来看看是怎么实现的。
首先看看最终的实现效果:

配合代码来看:
<template>
    <div class="outer">
        <el-table :data="currentTableData" height="480" stripe border class="table">
            <el-table-column v-for="(item, index) in tableForm" :key="index" :prop="item.prop" :label="item.label"
                :width="100" show-overflow-tooltip></el-table-column>
            <el-table-column fixed="right" label="详细" width="100">
                <template #default="scope">
                    <el-button link type="primary" size="small" @click="handleClick(scope.$index, scope.row)">查看</el-button>
                </template>
            </el-table-column>
        </el-table>
        <el-pagination class="pagination" small background layout="prev, pager, next" :total="totalItems"
            v-model:current-page="currentPage" @current-change="handelCurrentChange" :hide-on-single-page="paginationShow"
            style="margin-top: 20px;" />
    </div>
</template>

<script setup>
import {

       ref, onMounted, watch } from 'vue'
import {

       getAnalisisNolocalTableApi } from '@/apis/analysisNolocal'
import {

       ElMessage } from 'element-plus';
const tableData = ref([])
const tableForm = [
   // 表头数据
]

// 点击每行的查看,展示详细事故信息
import mitt from '@/utils/mitt'
const emitter = mitt
const handleClick = (index, row) => {


    emitter.emit('showDrawer', row)
    // console.log(index, row)
}

// 分页
const currentTableData = ref([])
const currentPage = ref(1)
const pageSize = 10
const totalItems = ref(0)
const paginationShow = ref(true)

watch(tableData, (newVal, oldVal) => {


    currentPage.value = 1
    totalItems.value = tableData.value.length
    currentTableData.value = tableData.value.filter((item, index) => index < pageSize)
    // paginationShow.value = tableData.value.length > 10 ? true : false
})

const handelCurrentChange = page => {


    currentPage.value = page
    // currentPage.value = 1
    const index = pageSize * (page - 1)
    const nums = pageSize * page
    const tables = []
    for (let i = index; i < nums; i++) {


        if (tableData.value[i]) tables.push(tableData.value[i])
    }
    currentTableData.value = tables
}

const getData = async () => {


    try {


        const {

       data } = await getAnalisisNolocalTableApi()
        // console.log(data)
        tableData.value = data
    } catch (error) {


        ElMessage.error('请求接口报错')
        console.log(error)
    }
}
onMounted(async () => {


    getData()
})
</script>

<style lang="scss" scoped>

</style>
首先解释一下代码:
- 表格中的全部数据绑定的是tableData,获取tableData的方法是getData,在组件挂载前即调用
- 当前页面的表格数据是currentTableData
- 表格的表头是tableForm,这里根据自己的实际情况去写
接着看分页:
<el-pagination class="pagination" small background layout="prev, pager, next" :total="totalItems"
   v-model:current-page="currentPage" @current-change="handelCurrentChange" :hide-on-single-page="paginationShow"
   style="margin-top: 20px;" />
参数非常多,我们直接看elementplus给的api:
| 属性名 | 说明 | 类型 | 默认值 |
|---|---|---|---|
| small | 是否使用小型分页样式 | boolean |
false |
| background | 是否为分页按钮添加背景色 | boolean |
false |
| page-size / v-model:page-size | 每页显示条目个数 | number |
— |
| default-page-size | 每页默认的条目个数,不设置时默认为10 | number |
— |
| total | 总条目数 | number |
— |
| page-count | 总页数, total 和 page-count 设置任意一个就可以达到显示页码的功能;如果要支持 page-sizes 的更改,则需要使用 total 属性 |
number |
— |
| pager-count | 设置最大页码按钮数。 页码按钮的数量,当总页数超过该值时会折叠 | number |
7 |
| current-page / v-model:current-page | 当前页数 | number |
— |
| default-current-page | 当前页数的默认初始值,不设置时默认为 1 | number |
— |
| layout | 组件布局,子组件名用逗号分隔 | string |
prev, pager, next, jumper, ->, total |
| page-sizes | 每页显示个数选择器的选项设置 | object |
[10, 20, 30, 40, 50, 100] |
| popper-class | 每页显示个数选择器的下拉框类名 | string |
‘’ |
| prev-text | 替代图标显示的上一页文字 | string |
‘’ |
| prev-icon | 上一页的图标, 比 prev-text 优先级更高 |
string / Component |
ArrowLeft |
| next-text | 替代图标显示的下一页文字 | string |
‘’ |
| next-icon | 下一页的图标, 比 next-text 优先级更低 |
string / Component |
ArrowRight |
| disabled | 是否禁用分页 | boolean |
false |
| teleported 2.3.13 | 是否将下拉菜单teleport至 body | boolean |
true |
| hide-on-single-page | 只有一页时是否隐藏 | boolean |
false |
有这么几个参数很重要:
const currentPage = ref(1),绑定的属性是current-page / v-model:current-page,即当前页码,默认为1const totalItems = ref(0),绑定的属性是total,就是数据总数,根据tableData的长度来确定
还有一个事件很重要,即current-change,就是当前页码发生变化的时候执行的事件,绑定的方法是handelCurrentChange,来看看这个方法做了什么事情
const handelCurrentChange = page => {


    currentPage.value = page
    // currentPage.value = 1
    const index = pageSize * (page - 1)
    const nums = pageSize * page
    const tables = []
    for (let i = index; i < nums; i++) {


        if (tableData.value[i]) tables.push(tableData.value[i])
    }
    currentTableData.value = tables
}
- 首先这个方法接收一个默认的参数page,其实就是当前的页码,把默认参数赋值给currentPage
- 获取当前页数据的起始索引,即index = pageSize * (page - 1),因为页码是从1开始,第一页的数据从第0条开始,所以其实索引应该是pageSize * (page - 1),这里的pageSize 就是每页数据要显示的条数
- 获取当前页最后一条数据的索引,即nums = pageSize * page
- 根据index和nums来获取当前页的数据
注意看,我还写了一个监听事件:
watch(tableData, (newVal, oldVal) => {


    currentPage.value = 1
    totalItems.value = tableData.value.length
    currentTableData.value = tableData.value.filter((item, index) => index < pageSize)
    // paginationShow.value = tableData.value.length > 10 ? true : false
})
这个代码写在这里是因为我还对数据做了筛选,筛选数据后,tableData发生变化,所以分页的总数和当前页都需要变化,这和我这里讲的前端分页关系不大
至此,就实现了前端分页的全部效果,还是挺简单的,总结一下,核心在于:
- 定义分页的参数
- 向后端获取总的数据
- 写好current-change方法
二、后端分页
其实后端分页才是正确的思路,因为正常的情况下,后端不会一下子把全部的数据都给前端,传输效率低而且也不安全。但后端分页相对来说要麻烦很多,不管咋样,还是记录一下
先看看我的分页结果:
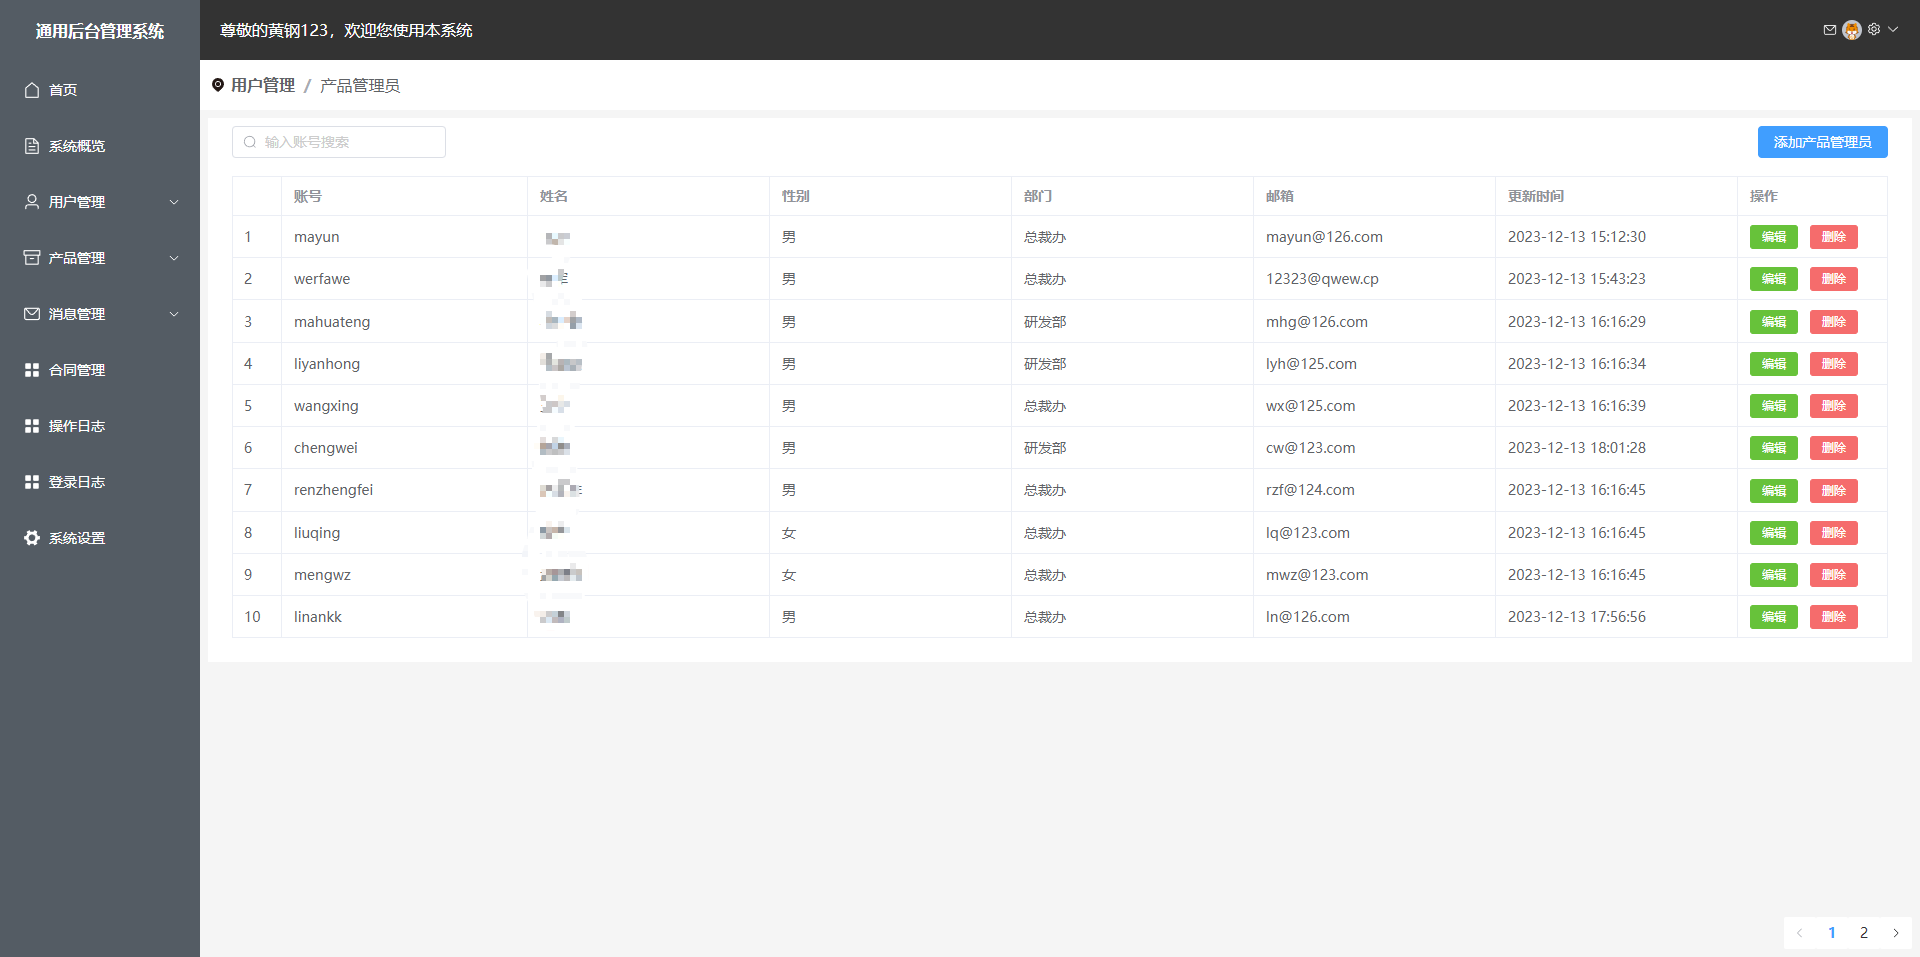
都是用的测试数据,分页在右下角,其实在显示上没有任何差别,但逻辑完全不一样
1.后端代码
后端写了俩接口,我用node写的,一是获取列表总数,二是监听换页返回给前端当前页面的数据
代码如下:
// 分页
// 获取列表总数
exports.getAdminListLength = (req, res) => {


  const sql = "select * from users where identity = ?";
  db.query(sql, req.body.identity, (err, results) => {


    if (err) res.cc(err);
    res.send({


      length: results.length,
    });
  });
};

// 监听换页,返回数据,参数为页码和身份
exports.returnListData = (req, res) => {


  // 每页显示10条,offset是起始处的偏移量
  const number = req.body.page * 10;
  const sql = `select * from users where identity = ? limit 10 offset ${

      number}`;
  db.query(sql, [req.body.identity, number], (err, results) => {


    if (err) res.cc(err);
    results.forEach((item) => {


      item.password = "";
      item.create_time = "";
      item.update_time = item.update_time.slice(0, 19);
    });
    res.send(results);
  });
};
获取列表总数没啥好说的,就是一个查询语句
主要看returnListData方法
其实前端给后端传递了两个参数,一个是当前的页码(page),一个是查询条件(identity)
看查询语句
const sql = `select * from users where identity = ? limit 10 offset ${

      number}`;
limit 10表示返回前10条数据
这里的offset很关键,表示从哪里开始返回10条数据,比如我想要查询第3页的数据,那么前端实际的page=3,传递给后端实际的page=page-1=2(这里的逻辑要理解一下),那么,第3页的数据应该是索引20-29的数据,这里的number=20,offset 20的意思就是从第20条开始取数据
后端的逻辑就是这样
2.前端代码
直接上代码
<template>
    <BreadCrumb ref="breadCrumb" :item="item"></BreadCrumb>
    <div class="table-wrapped">
        <div class="table-top">
            <div class="table-header">
                <div class="search-wrapped" style="display: flex">
                    <el-input v-model="input1" class="w-50 m-2" placeholder="输入账号搜索" :prefix-icon="Search"
                        @change="searchAdmin" />
                    <!-- <el-button type="primary" @click="getAdmin" style="margin-left: 10px;" circle :icon="Refresh"
                        title="重置列表"></el-button> -->
                </div>
                <div class="button-wrapped">
                    <el-button type="primary" @click="create">添加产品管理员</el-button>
                </div>
            </div>
            <div class="table-content">
                <el-table :data="tableData" border style="width: 100%">
                    <el-table-column type="index" width="50" />
                    <el-table-column prop="account" label="账号" />
                    <el-table-column prop="name" label="姓名" />
                    <el-table-column prop="sex" label="性别" />
                    <el-table-column prop="department" label="部门" />
                    <el-table-column prop="email" label="邮箱" />
                    <el-table-column prop="update_time" label="更新时间" />

                    <el-table-column label="操作" width="150">
                        <template #default="scope">
                            <el-button type="success" size="small"
                                @click="handleEdit(scope.$index, scope.row)">编辑</el-button>
                            <el-button type="danger" size="small"
                                @click="handleDelete(scope.$index, scope.row)">删除</el-button>
                        </template>
                    </el-table-column>

                </el-table>
            </div>
        </div>
        <div class="table-footer">
            <el-pagination :page-size="2" :current-page="paginationData.currentPage" :pager-count="5" :total="adminTotal"
                :page-count="paginationData.pageCount" @current-change="currentPageChange" layout="prev, pager, next" />
        </div>
    </div>
    <CreateAdmin></CreateAdmin>
    <EditAdmin></EditAdmin>
    <DeleteAdmin></DeleteAdmin>
</template>

<script setup>
import {

       ref, onMounted, onBeforeUnmount } from 'vue'
import {

       Refresh, Search } from '@element-plus/icons-vue'
import BreadCrumb from '@/components/BreadCrumb.vue';
import CreateAdmin from '../components/CreateAdmin.vue'
import EditAdmin from '../components/EditAdmin.vue'
import DeleteAdmin from '../components/DeleteAdmin.vue';
import {

       getAdminAPI, searchUserAPI, getAdminListLengthAPI, returnListDataAPI } from "@/apis/userinfo";
import mitt from '@/utils/mitt'
import {

       ElMessage } from 'element-plus';
const emitter = mitt

const item = ref({


    first: '用户管理',
    second: '产品管理员'
})
const input1 = ref('')
const tableData = ref([])

const create = () => {


    emitter.emit('openCreateDialog', '添加产品管理员')
}

const handleEdit = (index, row) => {


    emitter.emit('openEditDialog', {

       index, row, title: '编辑产品管理员' })
    // console.log('-----------', index, row)
}
const handleDelete = (index, row) => {


    emitter.emit('openDeleteDialog', {

       row })
}

const getAdmin = async () => {


    const res = await getAdminAPI({

       identity: '产品管理员' })
    if (res.status && res.status == 1) return ElMessage.error('获取数据出错')
    tableData.value = res
    // console.log(res)
}

emitter.on('refreshAdminList', async () => {


    // getAdmin()
    getAdminListLength()
    tableData.value = await returnListDataAPI({

       identity: '产品管理员', page: paginationData.value.currentPage - 1 })

})
const searchAdmin = async () => {


    const res = await searchUserAPI({

       account: input1.value })
    // console.log(res)
    tableData.value = res
}

// 分页
const paginationData = ref({


    // 总页数
    pageCount: 1,
    // 当前页
    currentPage: 1,
})

const adminTotal = ref(0)
const getAdminListLength = async () => {


    const res = await getAdminListLengthAPI({

       identity: '产品管理员' })
    adminTotal.value = res.length
    // 每页显示10条数据,所以除以10
    paginationData.value.pageCount = Math.ceil(res.length / 10)
}

// 默认获取第一页的数据
const getFirstPageList = async () => {


    tableData.value = await returnListDataAPI({

       identity: '产品管理员', page: 0 })
}
const currentPageChange = async (val) => {


    // console.log(val)
    paginationData.value.currentPage = val
    tableData.value = await returnListDataAPI({

       identity: '产品管理员', page: val - 1 })
}
onMounted(() => {


    // getAdmin()
    getAdminListLength()
    getFirstPageList()
})
onBeforeUnmount(() => {


    emitter.all.clear()
})
</script>

<style lang="scss" scoped></style>
代码挺长,我们只要关注表格和分页就行了
表格绑定的数据是tableData,注意,这里已经不是全部的数据了,而是当前页的数据
分页组件:
<el-pagination :page-size="10" :current-page="paginationData.currentPage" :pager-count="5" :total="adminTotal"
   :page-count="paginationData.pageCount" @current-change="currentPageChange" layout="prev, pager, next" />
数据的总条目adminTotal根据后端的第一个接口获取,写了total属性page-count就可以不用写了
属性就不再详细介绍了,就关注current-change相关的方法
const currentPageChange = async (val) => {


    // console.log(val)
    paginationData.value.currentPage = val
    tableData.value = await returnListDataAPI({

     identity: '产品管理员', page: val - 1 })
}
在前端分页的时候介绍了,current-change事件传递默认参数为当前页码,这个页码是需要给后端传递的非常重要的一个参数,实际传递给后端的page是当前页码-1后的值
还有一个需要注意的事,组件挂载时,应该默认显示第一页的数据,所以还需要写一个获取第一页数据的方法,即:
// 默认获取第一页的数据
const getFirstPageList = async () => {


    tableData.value = await returnListDataAPI({

     identity: '产品管理员', page: 0 })
}
至此,后端分页的全部逻辑就完了
这玩意儿,还得常写常练,一段时间不写,直接忘光。。。。