学习过程中的一些记录
文章目录
- 好用 / 有用的链接
- 关于c#常用命令的整理
- unity 生命周期
- unity 定时调用 Invoke系列
- unity 向量
- unity 预制体 Prefab
- unity 物理系统 Physics
- unity切换场景
- unity 自定义输入
- unity 天空盒
- 导入本地资源包
- unity 脚本执行顺序
- 主控脚本
- 关于unity学习中遇到的问题
-
- ✎ VS 使用unity语句报错
- ✎ CS1503:参数1:无法从“double"转换为“float"”
- ✎ No Sprite Editor Window registered.Please download2D Sprite package from Package Manager.
- ✎ Dropdown获取失败 NullReferenceException: Object reference not set to an instance of an object
- ✎ UnassignedReferenceException: The variable bulletPrefab of FireLogic has not been assigned.
- ✎ 场景切换问题:Scene 'NewScene' couldn't be loaded because it has not been added to the build settings or the AssetBundle has not been loaded.
- ✎ 协程报错:Coroutine 'XXX' couldn't be started because the the game object 'XXXX' is inactive!
Unity是单线程核心,不必考虑线程、并发、互斥
好用 / 有用的链接
Unity脚本API
Unity生命周期
详解Unity中的预制体
关于c#常用命令的整理
❀ unity的打印
Debug.Log("** **");
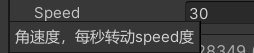
❀工具提示(注解)
[ Tooltip("角速度,每秒转动speed度")]
public float speed = 30f;
❀ 获取当前脚本绑定的相关信息
this.name   // 绑定模型名字
this.transform.position; // 绑定模型当前世界位置坐标
this.transform.localPosition;  // 绑定模型本地位置坐标(相对坐标
this.transform.eulerAngles;	// 绑定模型当前世界转角坐标
this.transform.localEulerAngles; // 绑定模型当前本地转角坐标
AudioSource audio = this.GetComponent<AudioSource>(); // 获取当前的AudioSource组件
this.transform.childCount;  // 获取子物体数量
❀ 获取另外节点的组件的相关信息
引用组件
获取AudioSource组件
// 方法一
public GameObject bgmNode;
void Start()
{


    AudioSource audio = bgmNode.GetComponent<AudioSource>();
    audio.Play();
}
// 方法二
public AudioSource bgm;
void Start()
{


    bgm.Play();
}
引用脚本
// 方法一
public GameObject planetNode;
void Start()
{


    // 引用其他节点脚本
    PlanetLogic planet = planetNode.GetComponent<PlanetLogic>();
    planet.rotateSpeed = 10;
}
// 方法二
public PlanetLogic planet;
void Start()
{


    planet.rotateSpeed = 10;
}
❀ 设置帧率
Application.targetFrameRate = 60;
❀ 获取目标物体
 // 获取层级物体(容易出错,不适应自动变化)
 GameObject capsule = GameObject.Find("胶囊");
 GameObject node = GameObject.Find("飞机盒子/机翼"); // 二级子节点应指定路径
 // 检查器引用
 public GameObject node;
❀ 获取当前节点的父子节点
获取父级节点
// 获取父级
Transform parent = this.transform.parent;
// 获取父级节点
GameObject parentNode = this.transform.parent.gameObject;

Debug.Log("父级节点" + parentNode.name);
获取子级节点
// 获取子级节点
// 方法一 遍历获取
foreach(Transform child in transform)
{


    Debug.Log("子级节点" + child.name);
}
// 方法二 按索引获取
Transform aa = this.transform.GetChild(0);
Debug.Log("子级节点aa=" + aa.name);
// 方法三 按名字查找
Transform a = this.transform.Find("c");
Transform b = this.transform.Find("b");
Transform c = this.transform.Find("b/bb");  // 二级子节点应指定路径
❀ 移动到新节点下
移动到新父级下
// 从根节点下查找
Transform p2 = this.transform.Find("/parent1");
// 移动到新父级节点
this.transform.SetParent(p2);
设为一级节点(没有父节点)
// 设为一级节点(没有父级)
this.transform.SetParent(null);
操作物体显示/隐藏节点
(三个不同物体)
// 找到要显示/隐藏的节点
Transform child = this.transform.Find("b");
// 判断当前显示状态
if(child.gameObject.activeSelf)
{


    // 禁用
    child.gameObject.SetActive(false);
}
else
{


    // 启用
    child.gameObject.SetActive(true);
}
❀ 匀速向前运动
// 匀速每秒speed米运动
float speed = 2;
float distance = speed * Time.deltaTime;
// 蟹老板每秒向前移动
//Vector3 pos = this.transform.localPosition;
//pos.z -= distance; // 0.02f;
//this.transform.localPosition = pos;
// 相对运动  transform.Translate(dx, dy, dz, space) space: Space.World--世界坐标  Space.Self--本地坐标(自身坐标)
this.transform.Translate(0, 0, distance, Space.Self);
❀ 每秒转动
转动
// 获取当前转角
Vector3 angles = this.transform.localEulerAngles;
// 蟹老板每秒旋转
//angles.y += 0.5f;
//this.transform.localEulerAngles = angles;

float rotateSpeed = 60; // 角速度,每秒转动60度
this.transform.Rotate(0, rotateSpeed * Time.deltaTime, 0 ,Space.Self);
地月系统(自转与公转)
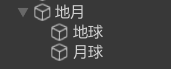
// 地球
void Update()
    {


        float rotateSpeed = 10; // 角速度,每秒转动60度角
        //按y轴旋转 自转
        this.transform.Rotate(0, rotateSpeed * Time.deltaTime, 0, Space.Self);
    }
// 月球
void Update()
    {


        float rotateSpeed = 60;
        // 查找该物体的父物体
        Transform parent = this.transform.parent;
        parent.Rotate(0, rotateSpeed * Time.deltaTime, 0, Space.Self);
    }
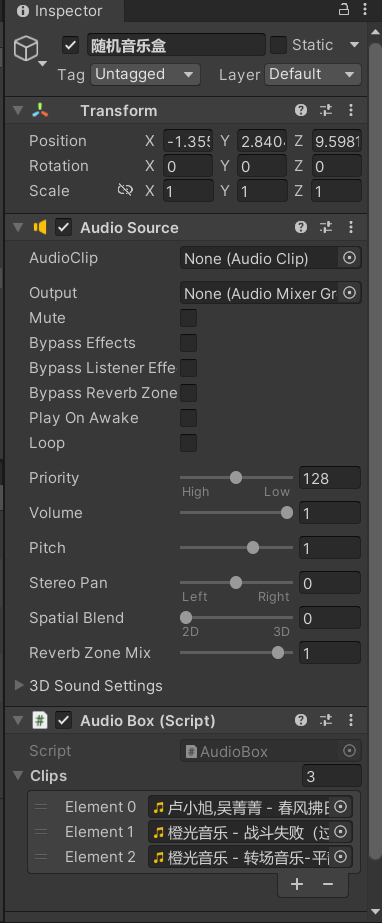
❀ 资源数组
(同个物体下三个不同东西)
随机播放音乐
代码:
    // 定义一个数组变量
    public AudioClip[] clips;
    // Start is called before the first frame update
    void Start()
    {


        if (clips == null || clips.Length == 0)
        {


            Debug.Log("请添加音乐");
            return;
        }
    }

    // Update is called once per frame
    void Update()
    {


        if (Input.GetMouseButtonDown(0))
        {


            NextSong();
        }
    }

    private void NextSong()
    {


        // 随机播放
        int index = UnityEngine.Random.Range(0, clips.Length);

        AudioSource source = GetComponent<AudioSource>();
        source.clip = clips[index];
        source.Play();
        Debug.Log("歌名" + clips[index].name);
    }
检测器:
变色小球
public Material[] colors;
int index = 0;
public float speed = 1.5f; // 小球的速度
// Start is called before the first frame update
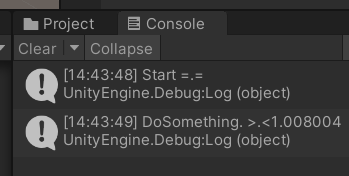
void Start()
{
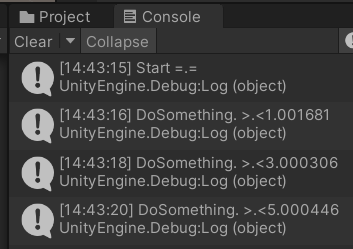
Debug.Log("Start =.=");
}
// Update is called once per frame
void Update()
{
if (Input.GetMouseButtonDown(0))
{
// 变色
ChangeColor();
if (IsInvoking("DoSomething"))
{
// 取消单个定时调用
CancelInvoke("DoSomething");
Debug.Log("Stop 0.0");
}
else
{
this.InvokeRepeating("DoSomething", 1, 2);
}
}
// 移动
this.transform.Translate(0, speed * Time.deltaTime, 0, Space.Self);
}
private void DoSomething()
{
Debug.Log("DoSomething. >.<" + Time.time);
speed = 0 - speed;
}
private void ChangeColor()
{
index++;
if(index >= colors.Length)
{
index = 0;
}
Material color = colors[index];
MeshRenderer mr = GetComponent<MeshRenderer>();
mr.material = color;
}
❀ 退出游戏 / 程序
    public void ExitGame()
    {


        #if UNITY_EDITOR
            //退出编辑器模式
            UnityEditor.EditorApplication.isPlaying = false;
        #else
            // 退出程序
            Application.Quit();
        #endif
    }
常用的预处理标识符
| 标识符 | 解释 |
|---|---|
| UNITY_EDITOR | 只在编辑器中编译 |
| UNITY_ANDROID | 只在安卓下编译 |
| UNITY_IPHONE | 只在苹果系统下编译 |
| UNITY_STANDALONE_OSX | 专门为Mac OS(包括Universal,PPC和Intelarchitectures)平台的定义 |
| UNITY_STANDALONE_WIN | 只在Windows系统下编译 |
❀ 游戏暂停 / 继续
Time.timeScale 时间缩放
暂停:Time.timeScale = 0
继续:Time.timeScale = 1
❀ 动态创建空GameObject
GameObject menuGroup = new GameObject("MenuGroup");
menuGroup.transform.parent = transform;
menuGroup.AddComponent<Menu>();
❀ 读取文件文本
File.ReadAllText
注意: 从当前project开始查找路径,路径要写全,否则会报错 Could not find a part of the path “D:\Resources\Jsons\menuData.json”.
string str = File.ReadAllText("Assets/Resources/Jsons/menuData.json");
Resources.Load
通过 Resources.Load 函数,可访问 Assets 文件夹中处于任意位置的名为“Resources”的文件夹中的所有资源
注意: Assets 中的 Resources 文件夹需要在使用前创建
//使用指定文本内容创建一个新 TextAsset
TextAsset menuJson = Resources.Load<TextAsset>("Jsons/menuData");
❀ JSON 序列化
JSON 转换回对象 ( JsonUtility.FromJson)
简单Json
1、json文件
注意: json的保存必须是utf-8且无签名的,否则会报错
// .json
{


    "name":"推荐",
    "icon":"Icons/activity",
    "icon1":"Icons/activity1"
}
2、创建Class 实例 存放字段
注意: 必须使用 Serializable 属性标记
// TestArr.cs
[System.Serializable]  // 重点
class TestArr
{


    public string name;
    public string icon;
    public string icon1;
}
3、JSON 转换回对象
// Menu.cs
// 简单Json
TextAsset testJson = Resources.Load<TextAsset>("Jsons/testData");
TestArr testArr = JsonUtility.FromJson<TestArr>(testJson.text);
Debug.Log(testArr.name);
复杂Json
1、json文件
注意: json的保存必须是utf-8且无签名的,否则会报错
//.json
{


    "menuData":[
        {


            "id":0,
            "name":"推荐",
            "icon":"Icons/activity",
            "icon1":"Icons/activity1"
        },
        {


            "id":1,
            "name":"我的喜欢",
            "icon":"Icons/activity",
            "icon1":"Icons/activity1"
        }
    ]
}
2、创建Class 实例 存放字段
注意: 1、必须使用 Serializable 属性标记
2、注意json的键和自定义的类的字段完全一致,否则读不到数据
// MenuArr.cs
[System.Serializable] // 记得添加,否则转换不了
 class MenuArr
{


    public List<MenuList> menuData; //注意json的键和自定义的类的字段完全一致,否则读不到数据
}

[System.Serializable]  // 记得添加,否则转换不了
class MenuList
{


    public string id;
    public string name;
    public string icon;
    public string icon1;
}
3、JSON 转换回对象
 void Start()
    {


        // 另一种读取文本文件方法
		//string str = File.ReadAllText("Assets/Resources/Jsons/menuData.json");
		//MenuArr menuArr1 = JsonUtility.FromJson<MenuArr>(str);

		//使用指定文本内容创建一个新 TextAsset
		TextAsset menuJson = Resources.Load<TextAsset>("Jsons/menuData");
		MenuArr menuArr = JsonUtility.FromJson<MenuArr>(menuJson.text);

		for (int i = 0; i < menuArr.menuData.Count; i++)
		{


		   Debug.Log(menuArr.menuData[i].name);
		}
    }
❀ 动态使用Json数据路径
解析Json看上面JSON 转换回对象
 Resources.Load<Sprite>($"{

      menuArr.menuData[i].icon}");
unity 生命周期
详细请查看有用的链接里 Unity生命周期 以及 UnityAPI: MonoBehaviour
❀ Awake(唤醒)
只执行一次
无论脚本是否可用,只要物体被加载就会调用
始终在任何 Start 方法之前并在实例化预制体之后调用
❀ Start(开始)
只执行一次
物体载入且脚本对象启用时被调用
Start仅在Update函数第一次被调用前调用,且只会在脚本实例启用时被调用一次
❀ Update(帧更新)
每帧调用一次
❀ OnEnable(当可用)
可多次调用
当对象变为可用或激活状态时此函数被调用
❀ OnTriggerXXX(触发)
触发器被触发时调用。
OnTriggerEnter
GameObject 与另一个 GameObject 碰撞时,Unity 会调用 OnTriggerEnter。
触碰条件:
双方必须有一方设置Is Trigger为Enable。

双方必须有一方设置有Rigidbody刚体组件。
函数:
    private void OnTriggerEnter(Collider other)
    {


        Debug.Log("***子弹碰撞*** other = " + other.name);

        //检测名字是否以xxx开头
        if (! other.name.StartsWith("SlimePBR"))
            return;

        // 销毁节点
        // 自毁
        Destroy(gameObject);
        // 销毁怪兽
        Destroy(other.gameObject);
    }
unity 定时调用 Invoke系列
定时调用invoke系列函数 ,即一般所谓的定时器
使用时要 避免重复使用
Invoke
public void Invoke (string methodName, float time)
在 time 秒后调用 methodName 方法。只调用一次
void Start()
    {


        Debug.Log("Start =.=");
        // 一秒后执行
        this.Invoke("DoSomething", 1);
    }
private void DoSomething()
    {


        Debug.Log("DoSomething. >.<" + Time.time);
    }
InvokeRepeating
public void InvokeRepeating( string methodName, float time, float repeatRate):
在 time 秒后调用 methodName 方法,然后每 repeatRate 秒调用一次。循环调用
    void Start()
    {


        Debug.Log("Start =.=");
        // 1秒后执行,之后每隔2秒执行一次
        this.InvokeRepeating("DoSomething", 1, 2);
    }
	private void DoSomething()
    {


        Debug.Log("DoSomething. >.<" + Time.time);
    }
IsInvoking
public bool IsInvoking ( string methodName )
是否有任何待处理的 methodName 调用
//判断是否调用
if (IsInvoking("DoSomething"))
{


    // 取消单个定时调用
    CancelInvoke("DoSomething");
}
else
{


    this.InvokeRepeating("DoSomething", 1, 2);
}
CancelInvoke
public void CancelInvoke ( )
取消该 MonoBehaviour 上的所有 Invoke 调用
// 取消单个定时调用
CancelInvoke("DoSomething");
// 取消所有定时调用
CancelInvoke();
案例
红绿灯
    [Tooltip("红绿黄按顺序")]
    public Material[] colors;

    int index = 0; // 从红灯开始

    void Start()
    {


        ChangeColor();
    }
    void ChangeColor()
    {


        // 当前材质
        Material color = colors[index];
        MeshRenderer meshRenderer = GetComponent<MeshRenderer>();
        meshRenderer.material = color;

        if(index == 0)
        {


            Invoke("ChangeColor", 4);
        }
        else if(index == 1)
        {


            Invoke("ChangeColor", 4);
        }else if(index == 2)
        {


            Invoke("ChangeColor", 1);
        }

        // 切换
        index++;
        if(index >= colors.Length)
        {


            index = 0;
        }
    }
加减速
    [Tooltip("最大转速")]
    public float maxSpeed = 720;

    float speed = 0; // 当前转速
    bool isSpeedUp = false; // 是否加速

    // Start is called before the first frame update
    void Start()
    {


        InvokeRepeating("AdjustSpeed", 0.1f, 0.1f);
    }

    // Update is called once per frame
    void Update()
    {


        if (Input.GetMouseButtonDown(0))
        {


            isSpeedUp = !isSpeedUp;
        }

        // 旋转
        if(speed > 0)
        {


            this.transform.Rotate(0, speed * Time.deltaTime, 0, Space.Self);
        }
    }
    void AdjustSpeed()
    {


        // 是否处于加速状态
        if (isSpeedUp)
        {


            if(speed < maxSpeed)
                speed += 10;
        }
        else
        {


            speed -= 10;
            if(speed < 0)
                speed = 0;
        }
    }
unity 向量
❀ 获取向量长度 magnitude
Vector3 v = new Vector3(3, 0, 4);
// 获得三维向量长度
float len = v.magnitude;
Debug.Log("长度=" + len);
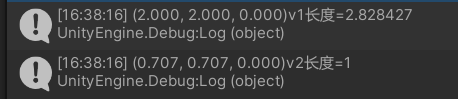
❀标准化为单位向量 normalized
Vector3 v1 = new Vector3(2, 2, 0);
 // 标准化为单位向量(长度为1的向量)
Vector3 v2 = v1.normalized;
Debug.Log(v1.ToString("f3") + "v1长度=" + v1.magnitude);
Debug.Log(v2.ToString("f3") + "v2长度=" + v2.magnitude);
❀ 常量(静态变量)
| Vector3.xx | 备注 |
|---|---|
| back | 用于编写 Vector3(0, 0, -1) 的简便方法。 |
| down | 用于编写 Vector3(0, -1, 0) 的简便方法。 |
| forward | 用于编写 Vector3(0, 0, 1) 的简便方法。 |
| left | 用于编写 Vector3(-1, 0, 0) 的简便方法。 |
| negativeInfinity | 用于编写 Vector3(float.NegativeInfinity, float.NegativeInfinity, float.NegativeInfinity) 的简便方法。 |
| one | 用于编写 Vector3(1, 1, 1) 的简便方法。 |
| positiveInfinity | 用于编写 Vector3(float.PositiveInfinity, float.PositiveInfinity, float.PositiveInfinity) 的简便方法。 |
| right | 用于编写 Vector3(1, 0, 0) 的简便方法。 |
| up | 用于编写 Vector3(0, 1, 0) 的简便方法。 |
| zero | 用于编写 Vector3(0, 0, 0) 的简便方法。 |
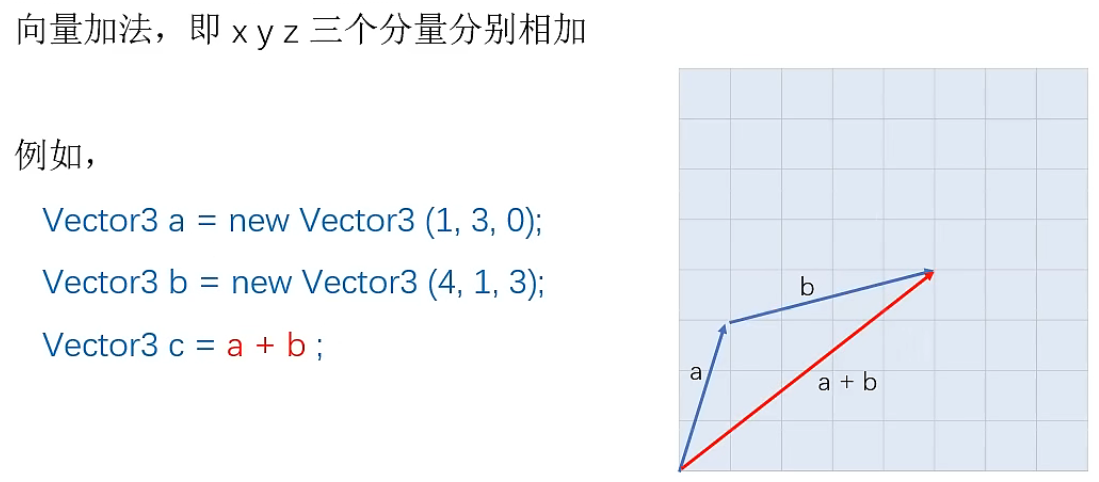
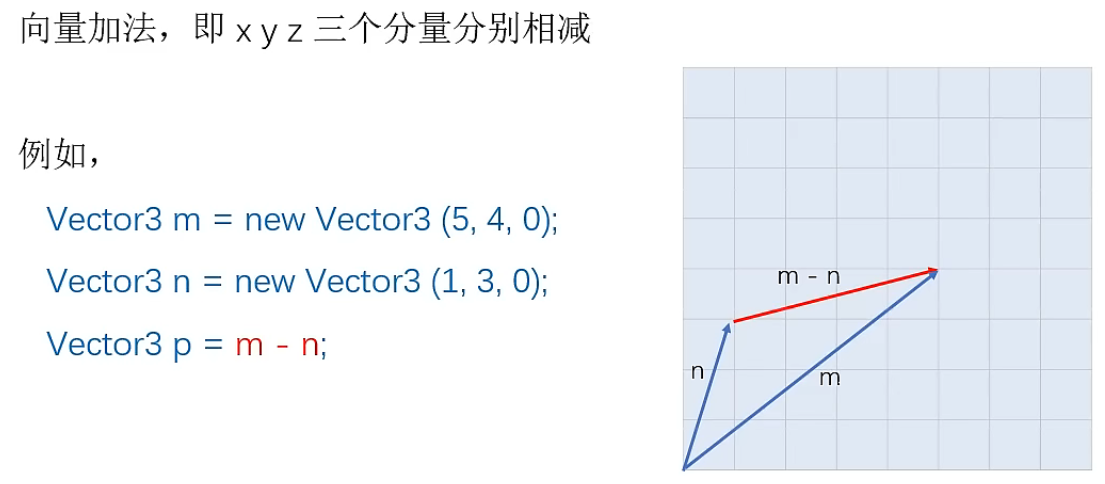
❀ 向量运算
加法
减法
乘法
向量乘法,分为3种:
- 标量乘法b = a * 2
- 点积c = Vector3.Dot ( a, b )
- 叉积c = Vector3.Cross ( a,b )
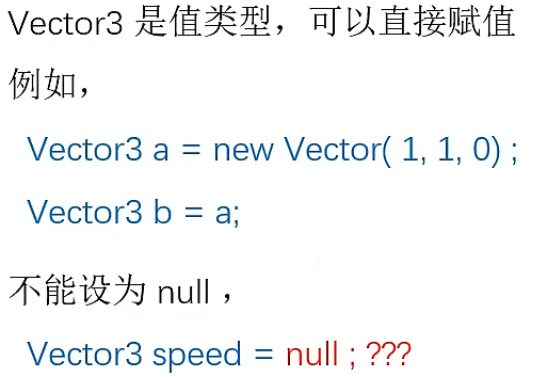
❀ 赋值
❀ 向量测距
求两物体的距离
// 获取当前位置
Vector3 p1 = this.transform.position;
Vector3 p2 = capsule.transform.position;
// 计算间距
Vector3 p = p2 - p1;
float dist = p.magnitude;  // 两个物体间距离
Debug.Log("两个物体间距离:" + dist);
- Vector3.Distance
返回 a 与 b 之间的距离。
Vector3.Distance(a,b) 与 (a-b).magnitude 相同。
// 获取当前位置
Vector3 p1 = this.transform.position;
Vector3 p2 = capsule.transform.position;
// 计算间距
float dist = Vector3.Distance(p2, p1); // 两个物体间距离
Debug.Log("两个物体间距离:" + dist);
unity 预制体 Prefab
详解Unity中的预制体
预制体的作用就是为了重复利用资源,所以对于场景中重复使用的对象都尽可能的做成预制体再拖入游戏使用
在导出prefab资源时,应该将依赖文件一并导出。
prefab 只是记录了节点的信息。
prefab文件中不包含材质、贴图数据,仅包含引用
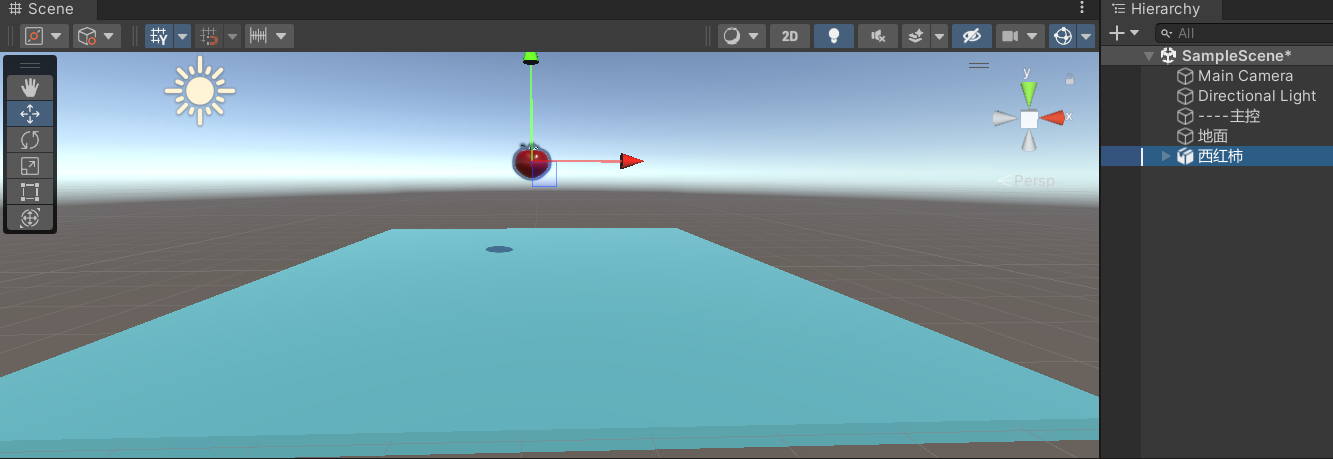
✿ 制作预制体
直接将物体从Hierarchy拖到Assets中
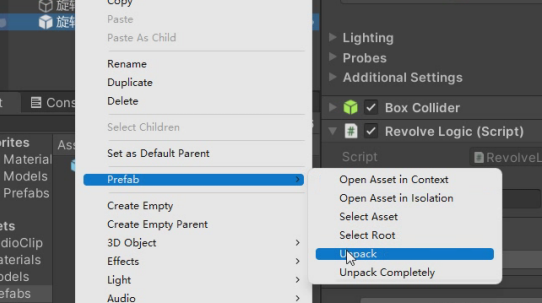
✿ 打包预制体
1、右键选择打包
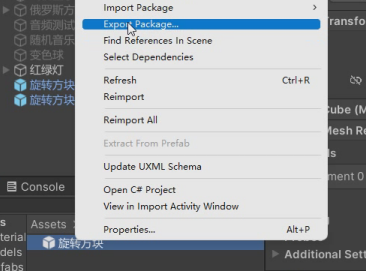
2、选择依赖(勾选 Include dependencies)
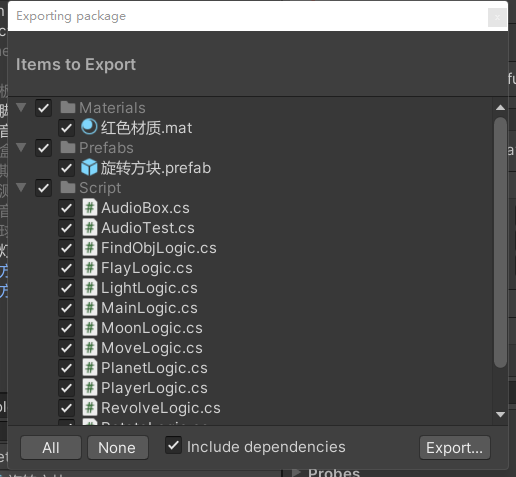
3、Export 导出
✿ 预制体实例
Prefab Instance,由预制体创建得到的对象
预制体资源发生变化,预制体实例也会同步变化
特征:
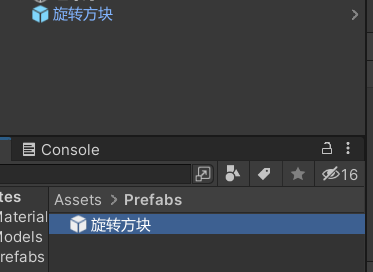
- 在 Hierarchy中,节点图标不同
- 在 Hierarchy 中,右键菜单|Prefab
- 在Inspector 中,上下文工具| Prefab
解除某个预制体实例 变成普通物体
选中要接解除的预制体实例,右键
✿ 编辑预制体
*.prefab相当于是一个模板,可以再次编辑
方式一:单独编辑
1、双击Prefab ,进入单独编辑模式-编辑节点和组件
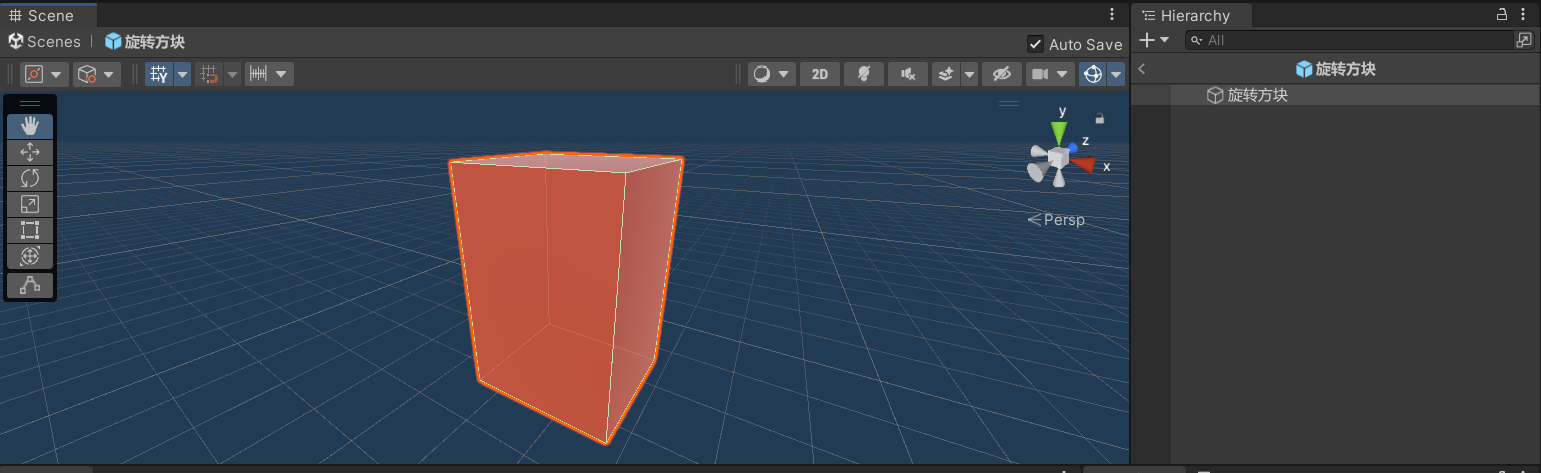
2、退出,完成编辑
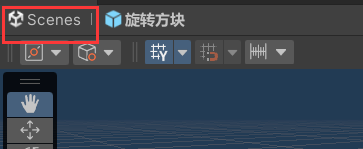
退出一:点击Scenes
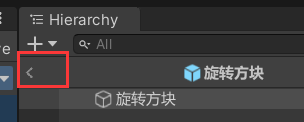
退出二:点击返回
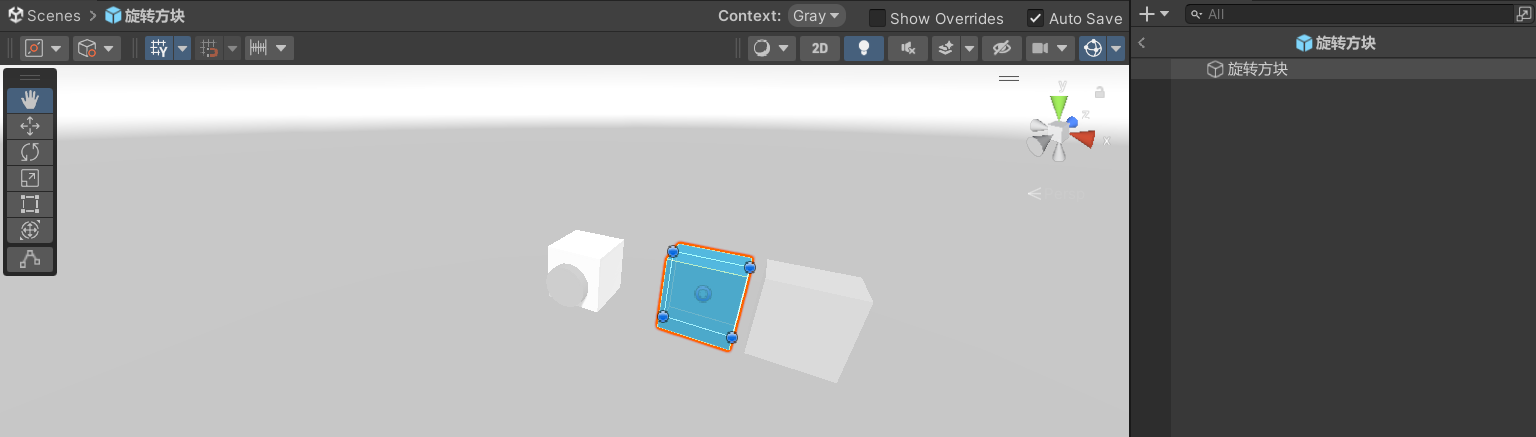
方式二:原位编辑
1、选择Prefab lnstance(预制体实例)

2、在检查器中Open
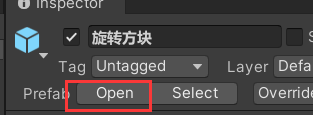
或

3、Context显示:Normal / Gray / Hidden
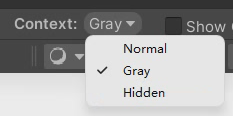
此时,仅选中的物体被编辑,其余物体是陪衬-编辑节点
4、退出,完成编辑
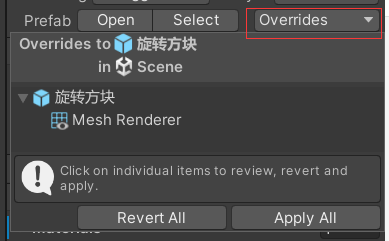
方式三:覆盖编辑
1、选择Prefab Instance
2、直接在场景中编辑-编辑完后
Overrides | Apply ,应用编辑
Overrides | Revert ,取消编辑
✿ 脚本查找预制体,创建预制体
预制体放到Assets/Resouces目录下
    void Start()
    {


        var findMainObj = GameObject.Find("MusicUIProject/MusicUIMainPage");
        if (findMainObj == null)
        {


        	// 查找预制体
            GameObject mainObj = Resources.Load<GameObject>("Prefabs/Pages/MusicUIMainPage");
            // 添加预制体
            mainObj = Instantiate(mainObj, transform);
            // 修改预制体名字
            mainObj.name = "MusicUIMainPage";
        }
        Debug.Log(findMainObj);
    }
✿ 动态创建预制体实例
Object.Instantiate:克隆 original 对象并返回克隆对象。
	// 对子弹prefab引用
    public GameObject bulletPrefab;

    // Start is called before the first frame update
    void Start()
    {


    }

    // Update is called once per frame
    void Update()
    {


        if (Input.GetMouseButtonDown(0))
        {


            TestFire();
        }
    }

    private void TestFire()
    {


        Debug.Log("创建子弹");
        //克隆 original 对象并返回克隆对象
        // (预制体节点,父节点路径) null:在根节点下
        GameObject node = Object.Instantiate(bulletPrefab, null);
    }
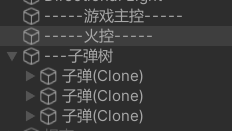
✿ 初始化预制体实例
(1) 一般引用Transform ,而 GameObject是没有存在感的
(2) 可以使用空物体,标记一个空间坐标
创建Prefab Instance之后,应做初始化
- parent ,父节点
// 引用子弹树 Transform 节点   获取实例根目录
public Transform bulletFolder;
...
private void TestFire()
{


	Debug.Log("创建子弹");
	//克隆 original 对象并返回克隆对象
	// (预制体节点,父节点路径)
	GameObject node = Object.Instantiate(bulletPrefab, bulletFolder);
	...
}
- position / localPosition ,位置
- eulerAngles / localEulerAngles,旋转
private void TestFire()
{


    ...
    node.transform.position = Vector3.zero;
    node.transform.localEulerAngles = new Vector3(-90, 0, -90);
}
或
// 引用子弹出生的Transform节点 获取实例的出生位置
public Transform firePoint;
// 引用坦克Transform节点  获取实例的旋转角度
public Transform tank;
...
private void TestFire()
{


    ...
    // 指定子弹出生的位置   (使用世界坐标
    node.transform.position = this.firePoint.position;
    // 指定子弹出生的旋转角度(随炮台  (使用世界坐标
    node.transform.eulerAngles = this.tank.eulerAngles;
    //node.transform.rotation = this.tank.rotation;
}
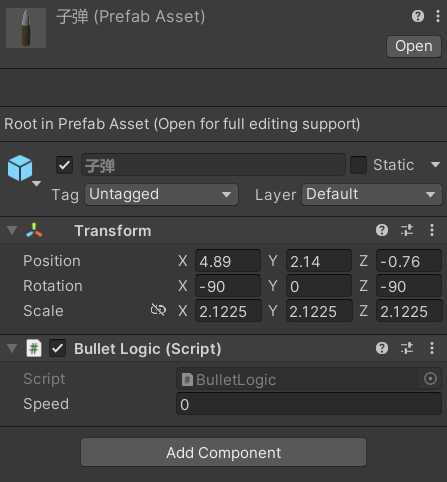
- Script ,自带的控制脚本
    private void TestFire()
    {


		...
        // 获取接口
        BulletLogic bulletLogic = node.GetComponent<BulletLogic>();
        // 设置子弹的速度参数
        bulletLogic.speed = 5f;
    }
预制体
✿ 销毁预制体实例
Object.Destroy:移除 GameObject、组件或资源。
Destroy()不会立即执行,而是在本轮Update 之后才执行
	void Start()
    {


    	// 延时销毁
        Invoke("SelfDestroy", 100);
    }
    // 自毁
    private void SelfDestroy()
    {


        Debug.Log("销毁了");
        Destroy(this.gameObject);
    }
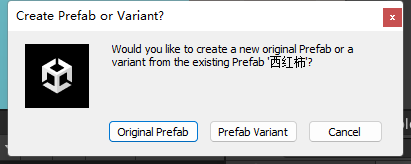
预制体和变体预制体
unity 物理系统 Physics
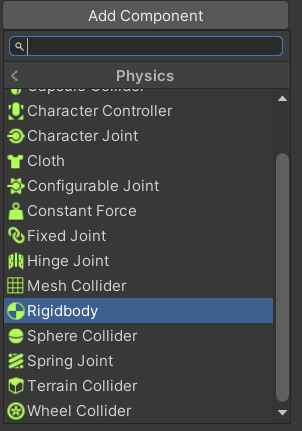
❀ 添加刚体Rigidbody
当添加Rigidbody后,由物体引擎负责刚体的运动
组件Physics | Rigidbody
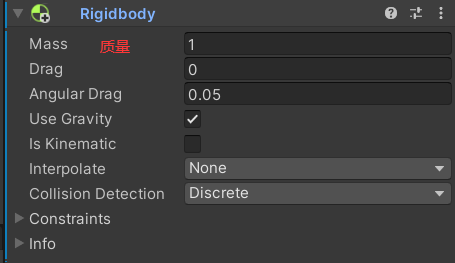
Mass:质量
Drag
Angular Drag
Use Gravity:使用重力
ls Kinematic :是否为运动学刚体
lnterpolate
Collision Detection:碰撞检测
Constraints
lnfo
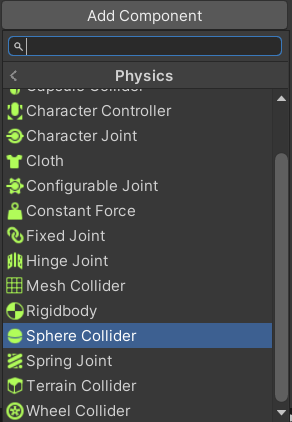
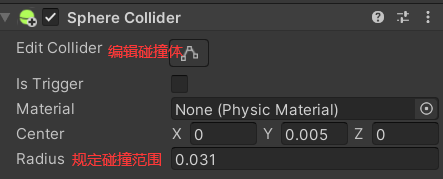
❀ 物理碰撞Collider
碰撞体Collider ,描述了物体的碰撞范围。
其中,
Box Collider ,长方碰撞体
Sphere Collider ,球形碰撞体
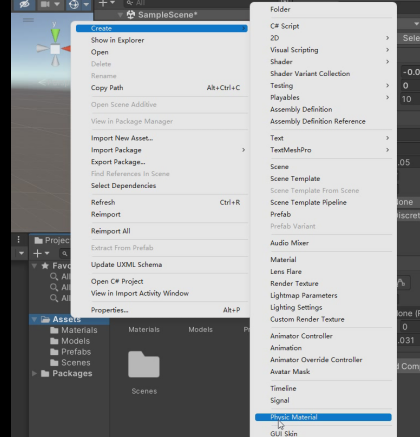
❀ 刚体的反弹与摩擦Physic Material
1、新建物理材质 右键 - create - Physic Material
2、面板
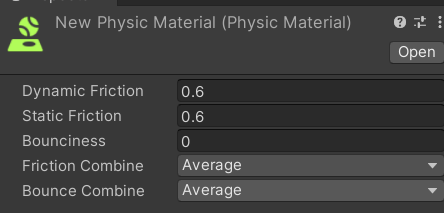
Dynamic Friction:动态摩擦力
Static Friction:静态摩擦力
Bounciness:弹跳力
Friction Combine
Average
Bounce Combine
Average
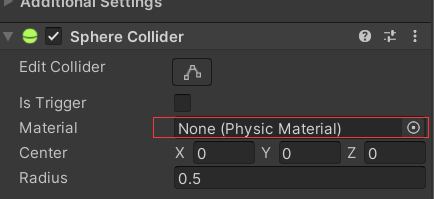
3、使用材质
拖动材质到material

❀ 物理碰撞检测
OnTriggerEnter
GameObject 与另一个 GameObject 碰撞时,Unity 会调用 OnTriggerEnter。
触碰条件:
双方必须有一方设置Is Trigger为Enable。
双方必须有一方设置有Rigidbody刚体组件。
    private void OnTriggerEnter(Collider other)
    {


        Debug.Log("***子弹碰撞*** other = " + other.name);

        //检测名字是否以xxx开头
        if (! other.name.StartsWith("SlimePBR"))
            return;

        // 销毁节点
        // 自毁
        Destroy(gameObject);
        // 销毁怪兽
        Destroy(other.gameObject);
    }
❀ CharacterController(角色控制器)
参考 CharacterController(角色控制器) 和 UintyApi:CharacterController
- 角色控制器可以让你更容易的处理有有碰撞的运动,同时不用处理刚体。(也就是说角色控制器负责处理角色的移动,如果添加角色控制器,就不用在添加刚体组件)
- 角色控制器不受力的影响,并且只有当你调用move函数时才会移动。他的运动收碰撞的约束。
    CharacterController cc;
    void Start()
    {


        cc = GetComponent<CharacterController>();
    }

    // 移动
    public void Move(Vector3 v)
    {


        Vector3 movement = v * speed;
        cc.SimpleMove(movement);
    }
CharacterController.velocity(该角色的当前相对速度)
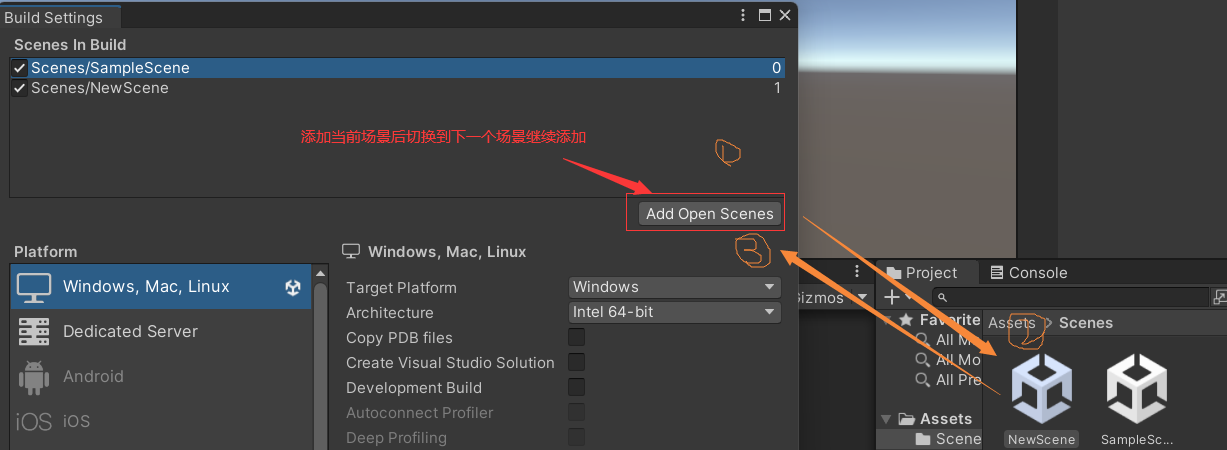
unity切换场景
切换场景
1、添加场景
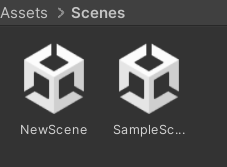
2、构建场景
3、在跳转场景的按钮上添加脚本

using UnityEngine.SceneManagement;
...
    public void ToScene()
    {


        SceneManager.LoadScene("NewScene");
        //SceneManager.LoadScene(1);
        Debug.Log("跳转");
    }
切换场景同时传参
场景A 传递参数到 场景B
- 场景A
1、在触发跳转事件(点击按钮或角色消失等)的脚本A内添加跳转事件
	// 按钮事件
	 public void ToScene()
    {


        SetScene(1233);
    }
	// 传参跳转
    void SetScene(int data)
    {


    	// 赋值
        GameObject.Find("gameData").GetComponent<GameData>().param = data;
        // 场景切换
        SceneManager.LoadScene(2);
    }
2、在场景A创建空物体EmptyObject,命名为gameData

❗在整个游戏中只有一个gameData,并且是同一个,保证只被初始化一次
在gameData上挂载脚本GameData
    public static GameData instance;
    // 保存的数据
    public int param;

    private void Awake()
    {


        if(instance == null)
        {


            DontDestroyOnLoad(gameObject);
            instance = this;
        }
        else if(instance != null)
        {


            Destroy(gameObject);
        }

    }
- 场景B
在空节点或需要的节点上挂载脚本B
    void Start()
    {


        int param = GameObject.Find("gameData").GetComponent<GameData>().param;
        // 验证参数获取
        Debug.Log(param);
    }
延时跳转场景
定时器 Invoke
    void Start()
    {


        Invoke("ToSecene", 0.5f);
    }

    void ToSecene()
    {


        SceneManager.LoadScene(2);
    }
协程 StartCoroutine
❗物体在inactive(隐藏 / 不可见)的情况下不能调用协程。
    void Start()
    {


        StartCoroutine("ToSecene");
    }

    IEnumerator ToSecene()
    {


        yield return new WaitForSeconds(0.5f); // 暂停协程,1秒后执行之后的操作
        Debug.Log("111");
        SceneManager.LoadScene(2);
    }
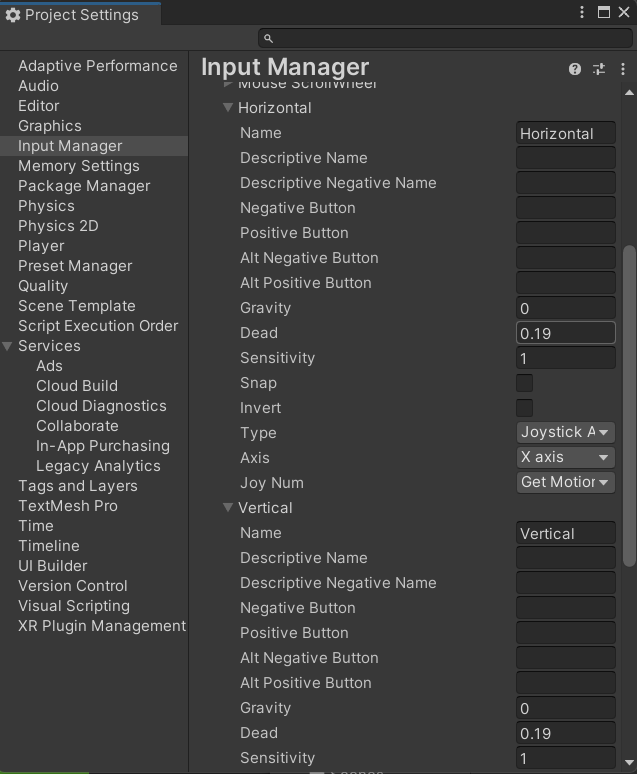
unity 自定义输入
自定义
打开菜单栏中的【Edit】->【Project Setting】->【Input】
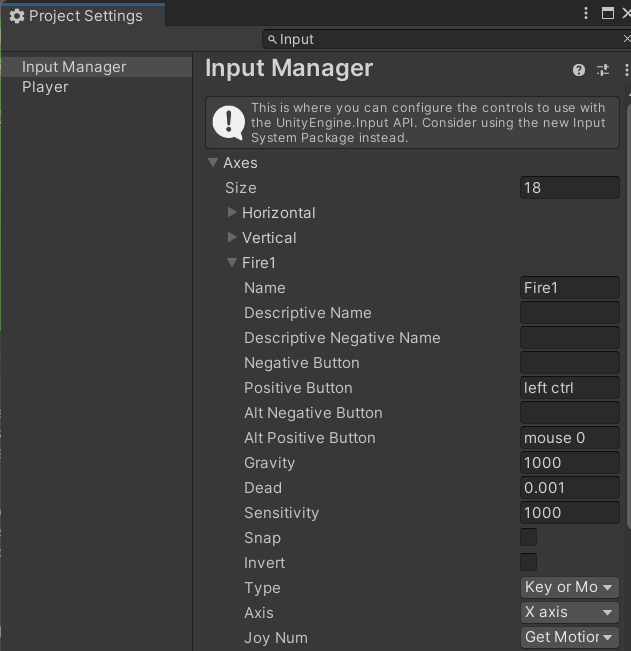
❤ Input.GetButtonDown :(自定义的虚拟按键)
在用户按下由 buttonName 标识的虚拟按钮的帧期间返回 true。
使用
        // 按下虚拟按钮时触发
        if (Input.GetButtonDown("Fire1"))
        {


            character.Attack();
        }
❤ Input.GetAxis:
返回由 axisName 标识的虚拟轴的值。
使用
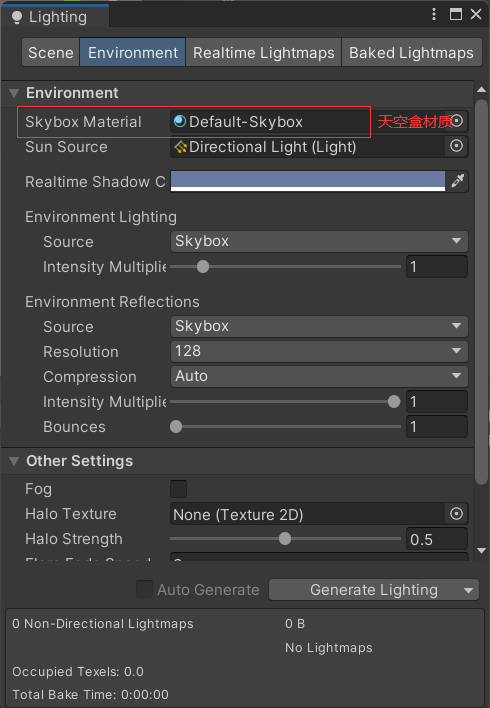
unity 天空盒
1、光照设置
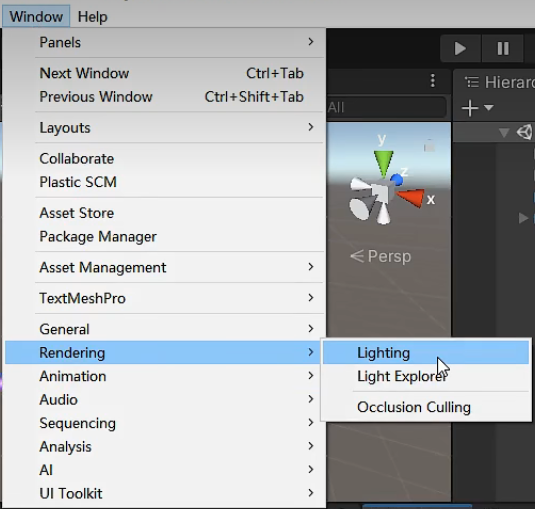
2、 选择天空盒材质
导入本地资源包
要在 Unity 中导入本地资源包,请执行以下操作:
1、在 Editor 中打开要向其中导入资源包的项目。
2、下载 Assets > Import Package > Custom Package。
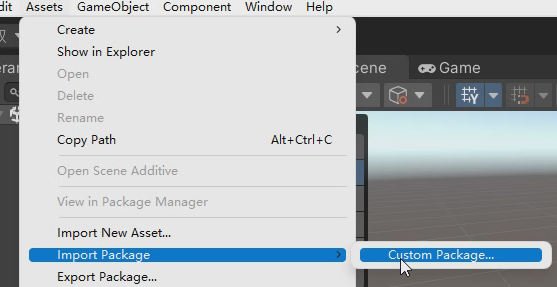
此时会显示文件浏览器,提示您找到 .unitypackage 文件。
3、在文件浏览器中,选择要导入的文件,然后单击 Open。
unity 脚本执行顺序
调用顺序
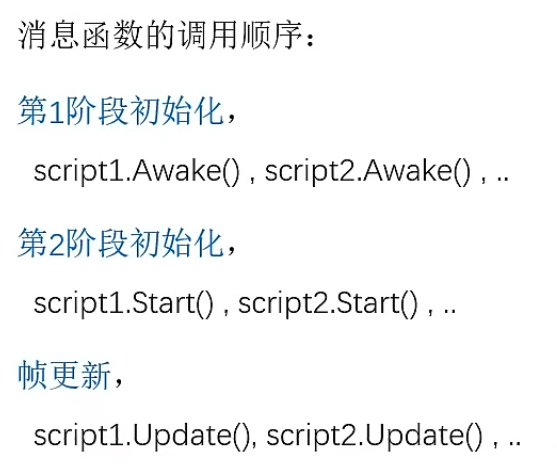
Unity 调用每个 GameObject 的 Awake 的顺序是不确定的
优先级
默认所有脚本执行优先级为0
脚本的执行顺序,和Hierarchy 中的层级顺序无关
一般地,并不需要显式设置Execution Order默认即可
设定优先级:
1 选中一个脚本,打开Execution Order对话框
2 点+按钮,添加一个脚本
3 指定优先级,值越小、优先级越高或者,直接拖动调节顺序

主控脚本
1、设置一个空节点,添加主控脚本

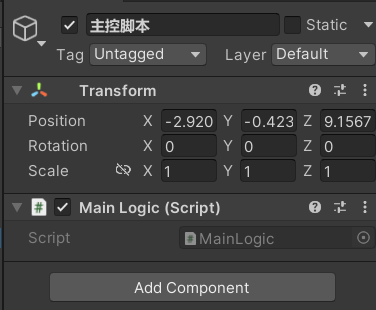
添加后可引用其他组件等等
关于unity学习中遇到的问题
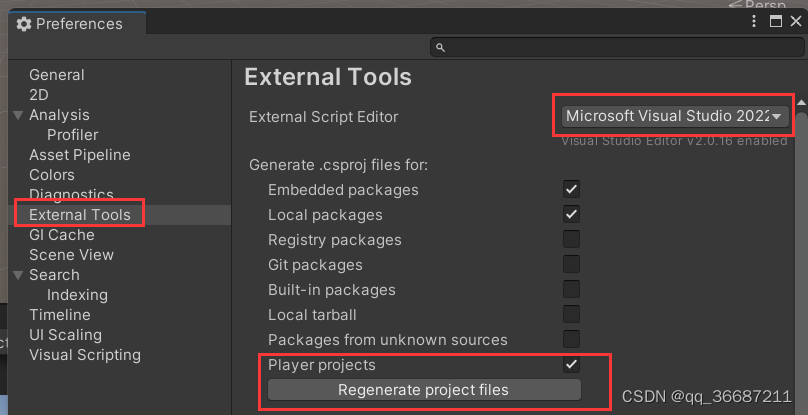
✎ VS 使用unity语句报错
使用Debug.Log(“第一个脚本”); 时直接报错,检查后发现是unity没有链接vs编辑器
解决:unity面板 Edit - Preferences
✎ CS1503:参数1:无法从“double"转换为“float"”
pos.z += 0.02;  // 报错写法
pos.z += 0.02f;	 // 正确写法
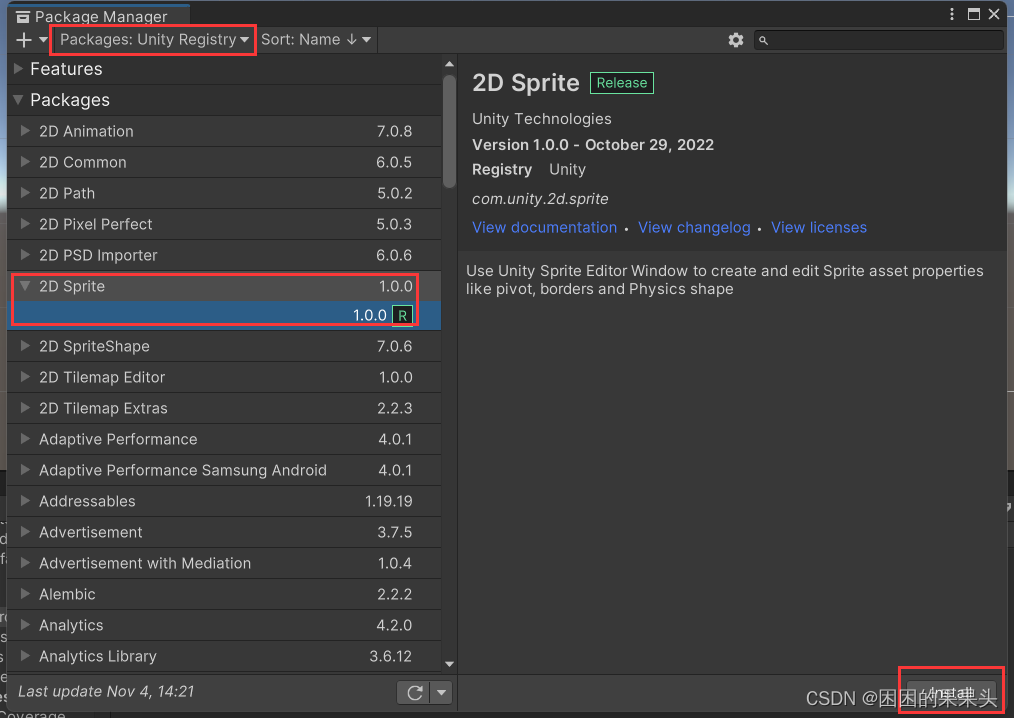
✎ No Sprite Editor Window registered.Please download2D Sprite package from Package Manager.
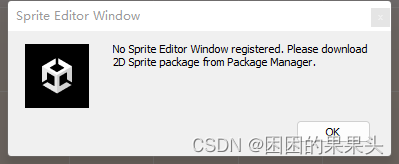
解决方案:unity面板 Windows - Package Manager 下载
切换至Packages: Unity Registry,选择安装
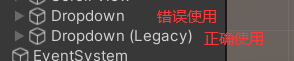
✎ Dropdown获取失败 NullReferenceException: Object reference not set to an instance of an object

解决:使用错组件了
✎ UnassignedReferenceException: The variable bulletPrefab of FireLogic has not been assigned.
问题:检查器存在没赋值
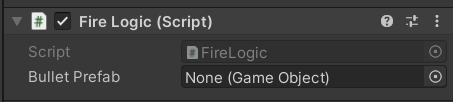
解决:赋值
✎ 场景切换问题:Scene ‘NewScene’ couldn’t be loaded because it has not been added to the build settings or the AssetBundle has not been loaded.

解决:
1、选择构建场景
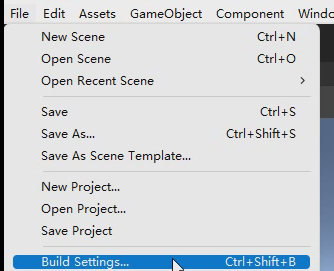
2、添加所有需要的场景

✎ 协程报错:Coroutine ‘XXX’ couldn’t be started because the the game object ‘XXXX’ is inactive!
物体在inactive(隐藏 / 不可见)的情况下不能调用协程。