文章专栏
前言
今天来学直线测距,主要是用来测量连点之间的线段距离。感觉是用来得到工业产品精度的。
文章解读
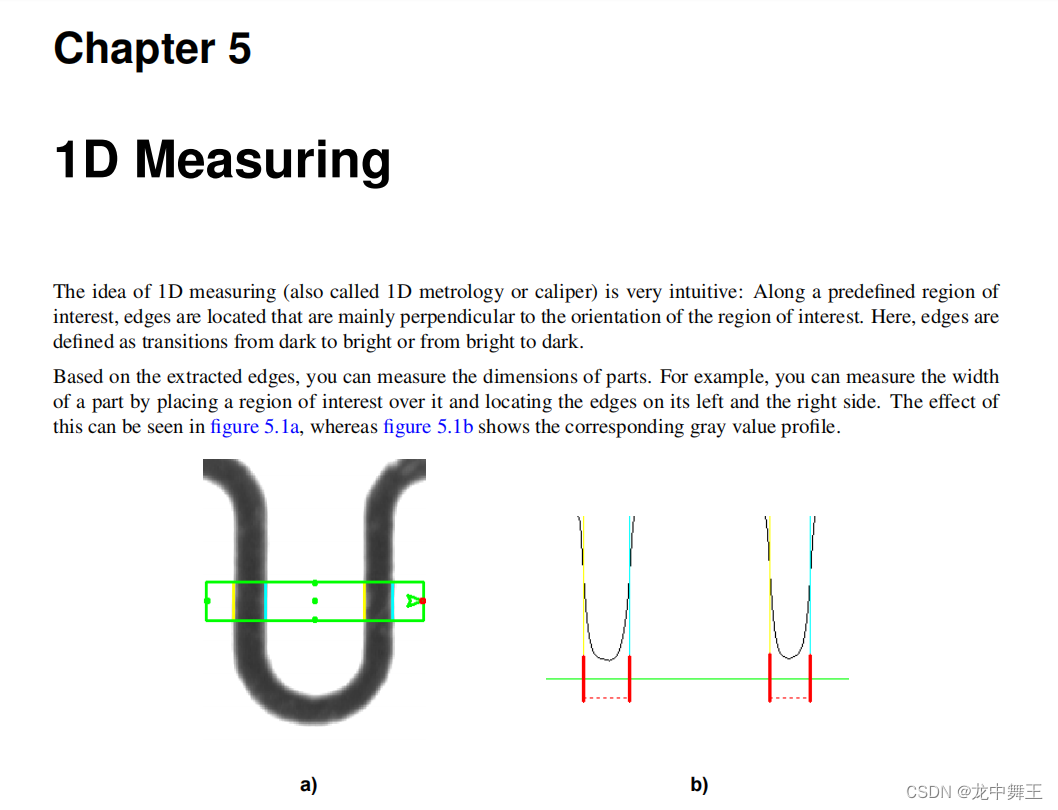
- 一维测距是非常简单的
- 这里提供了一个强明暗对比的示例
- 你可以对示例边缘的左侧和右侧间距进行测距
- 一维测距的优点是,开销低,速度快,效果好。
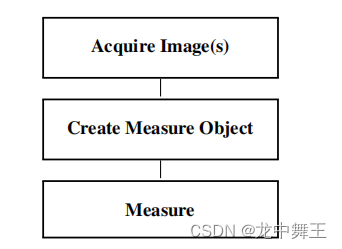
流程图
获取图片->创建测距对象->测距
官方案例
Inspecting a Fuse(检查保险丝)
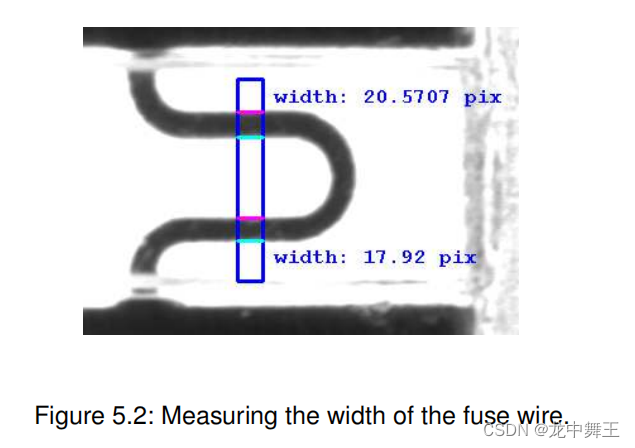
- 分析线段的组成部分
- 进行对称性分析测量,返回对称图像的边缘的宽度和间距
- 程序将最新的一部分进行分析并且得到XLD轮廓
这章算子的概念有点多
这里遇到的两个十分重要的算子,[gen_measure_rectangle2]和[measure_pairs],由于太过于抽象,需要深入理解,选中算子按下F1进入文档。对我这种英语文盲有点痛苦。
gen_measure_rectangle2
- gen_measure_rectangle2用于处理直线边缘,垂直于矩形轴线。矩形轴线默认方向为水平,即默认处理竖直的边缘。如果想处理水平的边缘,则需要将ROI区域进行旋转。其它的,看不下了辣
mearsur_paris
这位更是重量级,算子的参数基本看不懂。简单来说这个就是用于处理对称边缘的。
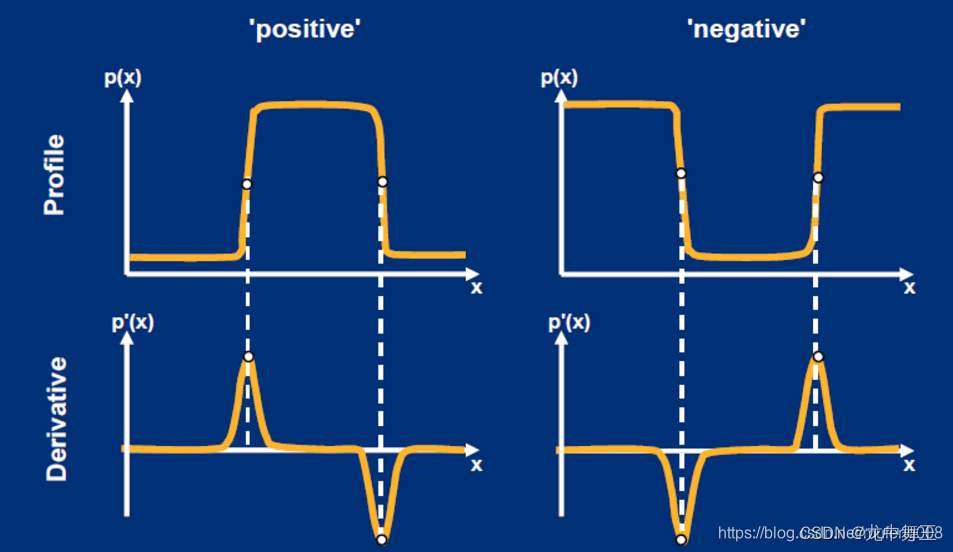
如果Transition = ‘positive’,则在矩形长轴方向上具有从暗到亮过渡的边缘点将在RowEdgeFirst和ColumnEdgeFirst中返回。在这种情况下,在RowEdgeSecond和ColumnEdgeSecond中返回具有明暗转换的相应边。如果Transition = ‘negative’,则行为完全相反。如果Transition = ‘all’,第一个检测到的边定义了RowEdgeFirst和ColumnEdgeFirst的过渡。即,根据测量对象的位置,返回具有光-暗-光过渡的边缘对或具有暗-光-暗过渡的边缘对。这适用于测量相对于背景具有不同亮度的物体。
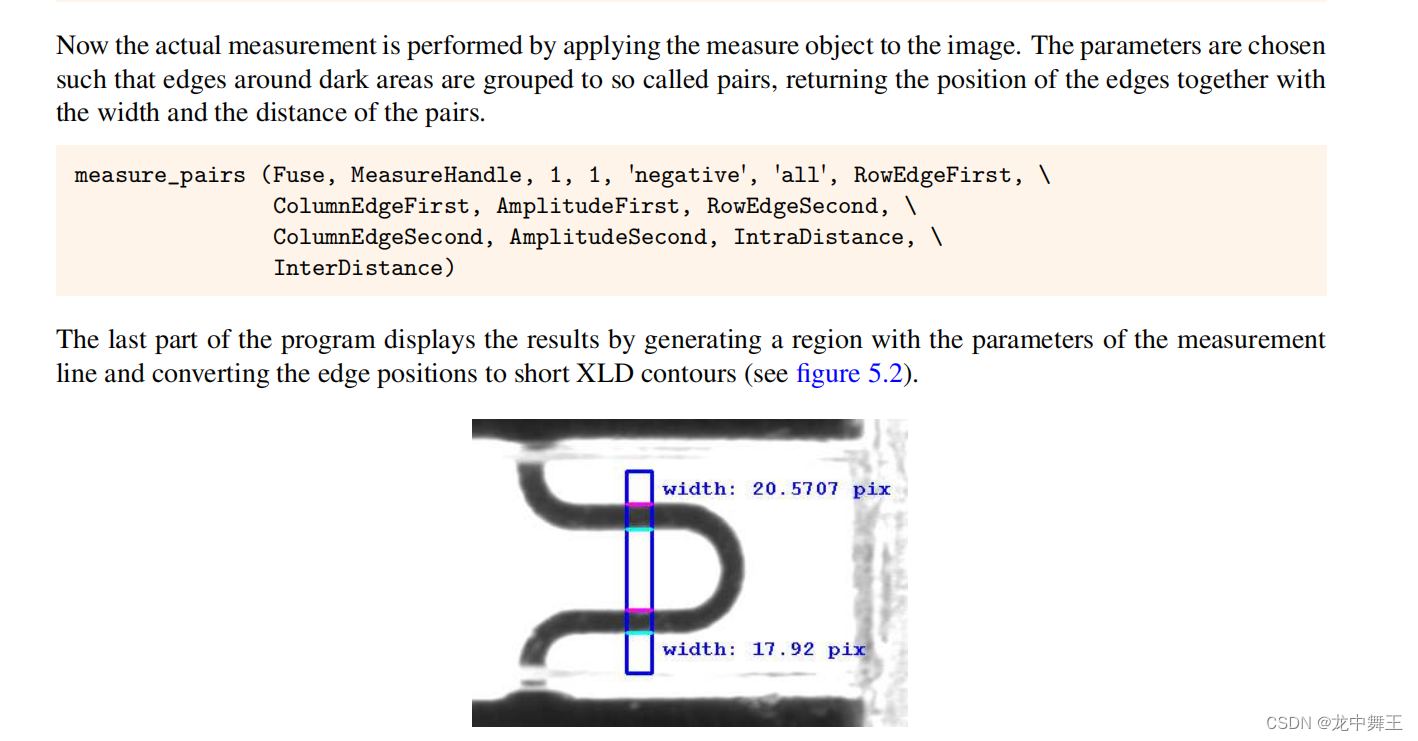
还是给图看得懂
代码注释
第一次接触,是真的没看懂。有机会到时候多看看其它的案例融会贯通一下
* fuse.hdev: measuring the width of a fuse wire
*
dev_update_window ('off')
dev_close_window ()
* ****
* step: acquire image
* ****
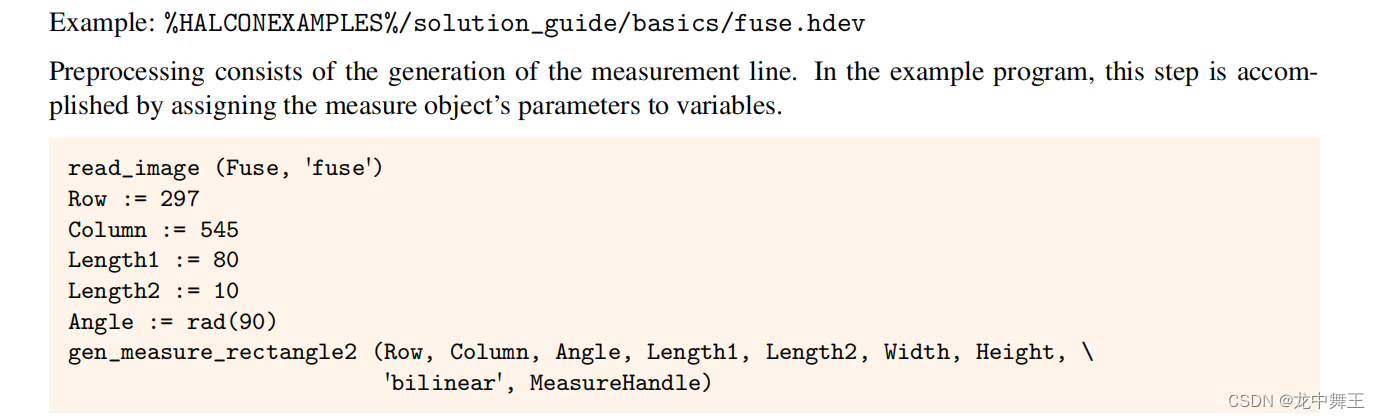
read_image (Fuse, 'fuse')
get_image_size (Fuse, Width, Height)
dev_open_window_fit_image (Fuse, 0, 0, Width, Height, WindowID)
set_display_font (WindowID, 12, 'mono', 'true', 'false')
dev_set_draw ('margin')
dev_set_line_width (3)
dev_display (Fuse)
set_display_font (WindowID, 12, 'mono', 'true', 'false')
disp_continue_message (WindowID, 'black', 'true')
stop ()
* ****
* step: 创建测距ROI
* ****
* -> 手动定义 ROI
Row := 297
Column := 545
Length1 := 80
Length2 := 10
* rad为度数转弧度。90表达逆时针旋转90°
Angle := rad(90)
* 生成2型矩阵。1型矩形:绝对坐标生成。2型矩形:中心点坐标+长宽+偏转角
gen_rectangle2 (ROI, Row, Column, Angle, Length1, Length2)
* -> 2型矩形测距,获得测距句柄,测试'bicubic'只是算法选择,对结果影响不大
gen_measure_rectangle2 (Row, Column, Angle, Length1, Length2, Width, Height, 'bicubic', MeasureHandle)
dev_display (ROI)
disp_continue_message (WindowID, 'black', 'true')
stop ()
* ****
* step: measure
* ****
* 对称性测距。获得对称两边的数据
measure_pairs (Fuse, MeasureHandle, 1, 1, 'negative', 'all', RowEdgeFirst, ColumnEdgeFirst, AmplitudeFirst, RowEdgeSecond, ColumnEdgeSecond, AmplitudeSecond, IntraDistance, InterDistance)
disp_continue_message (WindowID, 'black', 'true')
stop ()
* ****
* step: visualize results
* ****
for i := 0 to |RowEdgeFirst| - 1 by 1
* 设置边缘的上下边距
gen_contour_polygon_xld (EdgeFirst, [-sin(Angle + rad(90)) * Length2 + RowEdgeFirst[i],-sin(Angle - rad(90)) * Length2 + RowEdgeFirst[i]], [cos(Angle + rad(90)) * Length2 + ColumnEdgeFirst[i],cos(Angle - rad(90)) * Length2 + ColumnEdgeFirst[i]])
gen_contour_polygon_xld (EdgeSecond, [-sin(Angle + rad(90)) * Length2 + RowEdgeSecond[i],-sin(Angle - rad(90)) * Length2 + RowEdgeSecond[i]], [cos(Angle + rad(90)) * Length2 + ColumnEdgeSecond[i],cos(Angle - rad(90)) * Length2 + ColumnEdgeSecond[i]])
* 绘画出上下边缘
dev_set_color ('cyan')
dev_display (EdgeFirst)
dev_set_color ('magenta')
dev_display (EdgeSecond)
dev_set_color ('blue')
* 设置text光标起点,和write_string搭配使用
if (i == 0)
set_tposition (WindowID, RowEdgeFirst[i] + 5, ColumnEdgeFirst[i] + 20)
else
set_tposition (WindowID, RowEdgeFirst[i] - 40, ColumnEdgeFirst[i] + 20)
endif
write_string (WindowID, 'width: ' + IntraDistance[i] + ' pix')
endfor
disp_continue_message (WindowID, 'black', 'true')
stop ()
* ****
* step: destroy measure object
* ****
close_measure (MeasureHandle)
dev_update_window ('on')
dev_clear_window ()
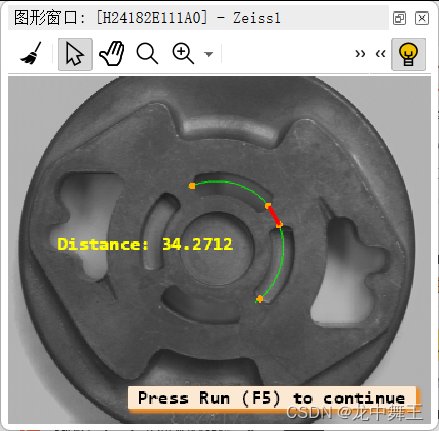
Inspect Cast Part(零件测距)
- 本次目标就是测量两个洞之间的间距
- 使用弧度的ROI,来简化测距运算
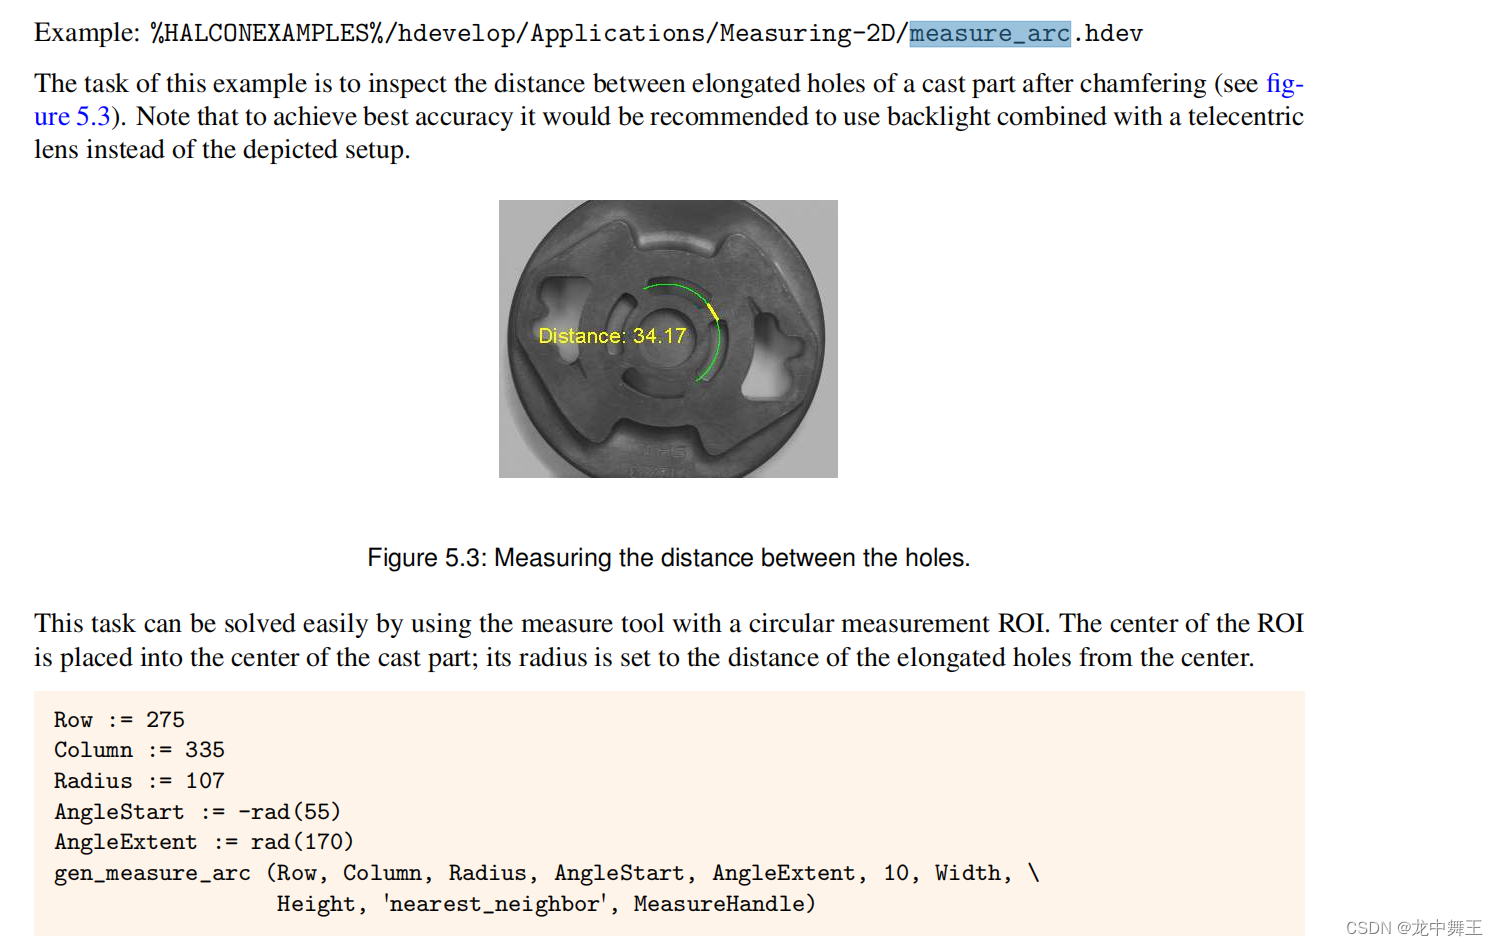
使用一个算子来得到对应的测距的数据

*  Example for the application of the measure package
* including a lot of visualization operators
*
read_image (Zeiss1, 'zeiss1')
get_image_size (Zeiss1, Width, Height)
dev_close_window ()
dev_set_draw ('margin')
dev_open_window (0, 0, Width / 2, Height / 2, 'black', WindowHandle)
set_display_font (WindowHandle, 14, 'mono', 'true', 'false')
dev_display (Zeiss1)
disp_continue_message (WindowHandle, 'black', 'true')
stop ()
* 设置中心点坐标+半径+弧度起点+终点
Row := 275
Column := 335
Radius := 107

* disp_circle (WindowHandle, Row, Column, Radius)
AngleStart := -rad(55)
AngleExtent := rad(170)
dev_set_draw ('fill')
dev_set_color ('green')
dev_set_line_width (1)
* 得到弧度的起点
get_points_ellipse (AngleStart + AngleExtent, Row, Column, 0, Radius, Radius, RowPoint, ColPoint)
* 绘制弧度:中心坐标+弧度长度+弧度起点
disp_arc (WindowHandle, Row, Column, AngleExtent, RowPoint, ColPoint)
dev_set_line_width (3)
* 得到测距的ROI句柄
gen_measure_arc (Row, Column, Radius, AngleStart, AngleExtent, 10, Width, Height, 'bicubic', MeasureHandle)
disp_continue_message (WindowHandle, 'black', 'true')
stop ()
* 得到运行时间,没啥用
count_seconds (Seconds1)
* 看不懂为什么要重复10次,可能是为了计算运算花的时间吧
* n := 10
* for i := 1 to n by 1
*     measure_pos (Zeiss1, MeasureHandle, 1, 10, 'all', 'all', RowEdge, ColumnEdge, Amplitude, Distance)
* endfor
* 得到边缘计算的结果
measure_pos (Zeiss1, MeasureHandle, 1, 10, 'all', 'all', RowEdge, ColumnEdge, Amplitude, Distance)
count_seconds (Seconds2)
* disp_circle (WindowHandle, RowEdge, ColumnEdge, 5)
dev_set_color ('orange')
* 绘制交点
for i := 0 to |ColumnEdge|-1 by 1
    disp_circle (WindowHandle, RowEdge[i], ColumnEdge[i], 5)
endfor
* Time := (Seconds2 - Seconds1) / n
disp_continue_message (WindowHandle, 'black', 'true')
* stop ()
* 得到两点的距离
distance_pp (RowEdge[1], ColumnEdge[1], RowEdge[2], ColumnEdge[2], IntermedDist)
* dev_display (Zeiss1)
dev_set_color ('red')
* disp_circle (WindowHandle, RowEdge, ColumnEdge, RowEdge - RowEdge + 1)
* 绘制两点线段
disp_line (WindowHandle, RowEdge[1], ColumnEdge[1], RowEdge[2], ColumnEdge[2])
dev_set_color ('yellow')
disp_message (WindowHandle, 'Distance: ' + IntermedDist, 'image', 250, 80, 'yellow', 'false')
* dump_window (WindowHandle, 'tiff_rgb', 'C:\\Temp\\zeiss_result')
dev_set_line_width (1)
* disp_continue_message (WindowHandle, 'black', 'true')
stop ()
dev_clear_window ()
Inspecting an IC Using Fuzzy Measuring(测量集成电路间距)
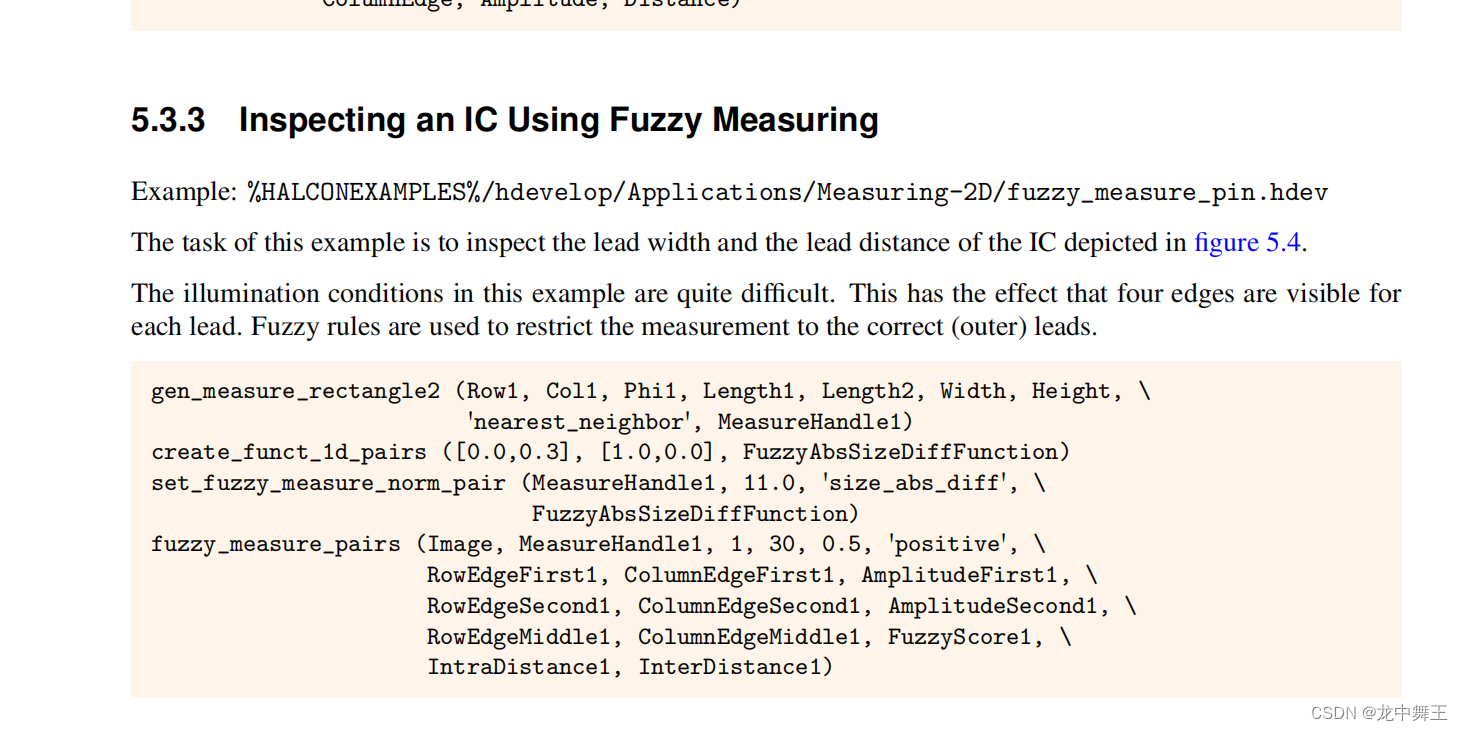
算子解释
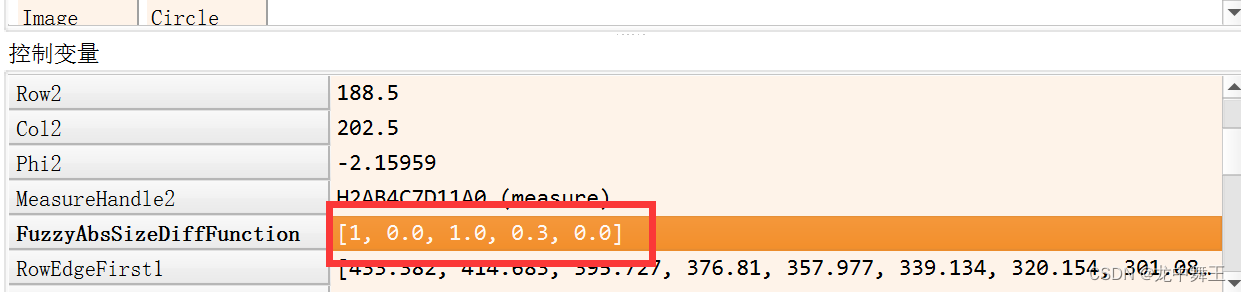
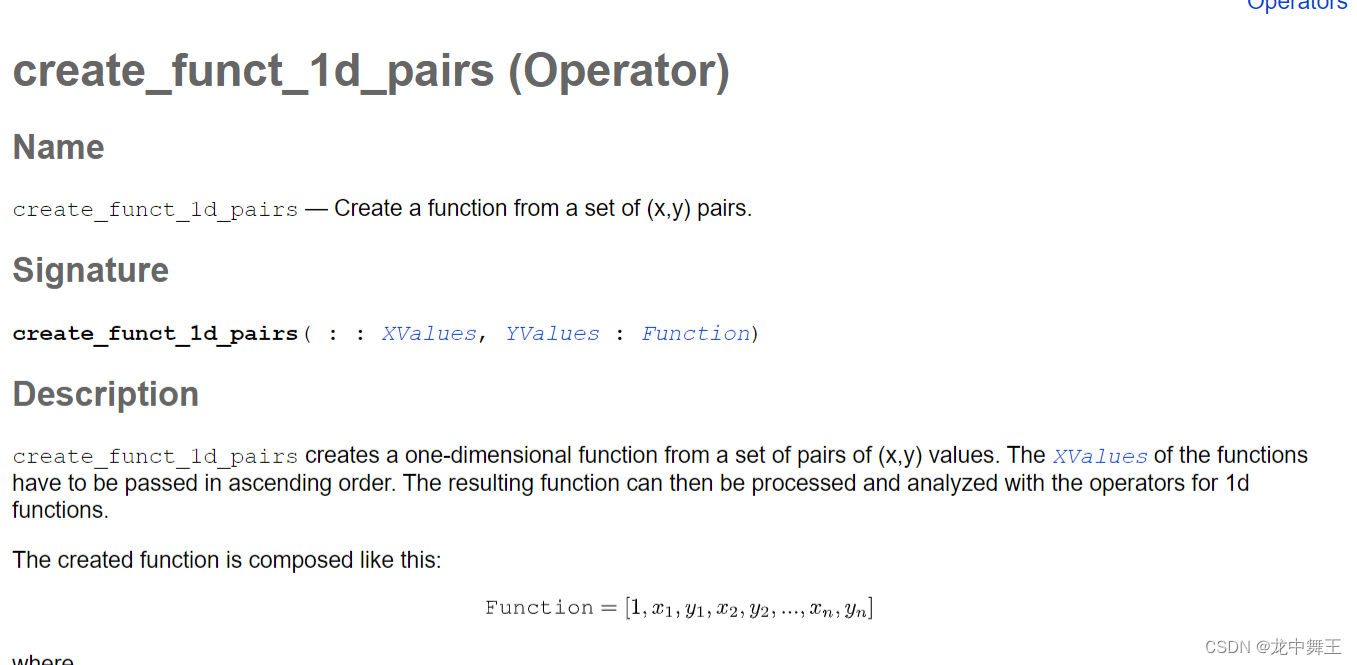
create_funct_1d_pairs(将[x,y]对张开)
效果:将[x1,y1],[x2,y2]…[xn,yn]
转化为 (1,x1,y1,x2,y2)
实际效果:
create_funct_1d_pairs ([0.0,0.3], [1.0,0.0], FuzzyAbsSizeDiffFunction)