编译环境:Ubuntu16.04 64位
交叉编译工具:arm-himix200-linux-gcc
文章目录
1. 交叉编译lighttpd
交叉编译lighttpd过程中发现需要pcre的支持,这里先表之,我这里使用的是pcre-8.43.tar.gz,点击下载地址。
1.1 交叉编译pcre
cd ~/work
mkdir pcre.install
tar zxf pcre-8.43.tar.gz
cd pcre-8.43/
./configure --prefix=/home/jerry/work/pcre.install --host=arm-himix200-linux CC=arm-himix200-linux-gcc
make
make install
生成的~/work/pcre.install/lib/libpcre.a就是待会编译lighttpd需要的库。
1.2 交叉编译lighttpd
我下载的是lighttpd-1.4.54.tar.gz,点击下载地址。
cd ~/work
mkdir lighttpd.install
tar zxf lighttpd-1.4.54.tar.gz
cd lighttpd-1.4.54/
CC=arm-himix200-linux-gcc ./configure --prefix=/home/jerry/work/lighttpd.install/ --host=arm-himix200-linux --without-zlib --without-bzip2 PCRE_LIB=/home/jerry/work/pcre.install/lib/libpcre.a CPPFLAGS=-I/home/jerry/work/pcre.install/include
make
make install
编译并安装完成,会在~/work/lighttpd.install目录生成lib、sbin和share三个目录,其中sbin/lighttpd就是我们需要的程序。
2 配置lighttpd服务
2.1 拷贝配置文件
在~/work/lighttpd.install中手动创建目录cache、cgi-bin、config、log、sockets、upload、vhosts、webpages,并将源码包中doc/config目录下的conf.d目录、lighttpd.conf和modules.conf复制到lighttpd.install/config,
cd ~/work/lighttpd.install
mkdir -p cache cgi-bin config log sockets upload vhosts webpages
cp -rf ~/work/lighttpd-1.4.54/doc/config/conf.d ~/work/lighttpd-1.4.54/doc/config/lighttpd.conf ~/work/lighttpd-1.4.54/doc/config/modules.conf ./config
2.2 修改配置文件
2.2.1 修改lighttpd.conf
只列出修改点,做如下修改:
var.log_root    = "/root/lighttpd/log"
var.server_root = "/root/lighttpd"
var.state_dir   = "/root/lighttpd"
var.home_dir    = "/root/lighttpd"
var.conf_dir    = "/root/lighttpd/config"

var.cache_dir   = server_root + "/cache"

server.use-ipv6 = "disable"

#server.username  = "lighttpd"
#server.groupname = "lighttpd"

server.document-root = server_root + "/webpages"

#server.pid-file = state_dir + "/lighttpd.pid"

#include "conf.d/access_log.conf"

#server.network-backend = "sendfile"

#$HTTP["url"] =~ "\.pdf$" {
#  server.range-requests = "disable"
#}

server.upload-dirs = ( "/root/lighttpd/upload" )
2.2.2 修改modules.conf
只列出修改点,做如下修改:
server.modules = (
  "mod_access",
  "mod_alias",
#  "mod_auth",
#  "mod_authn_file",
#  "mod_evasive",
#  "mod_setenv",
#  "mod_usertrack",
#  "mod_redirect",
#  "mod_rewrite",
)

include "conf.d/cgi.conf"
2.2.3 修改modules.conf
只列出修改点,做如下修改:
cgi.assign = (".cgi" => "")
#cgi.assign                 = ( ".pl"  => "/usr/bin/perl",
#                               ".cgi" => "/usr/bin/perl",
#                               ".rb"  => "/usr/bin/ruby",
#                               ".erb" => "/usr/bin/eruby",
#                               ".py"  => "/usr/bin/python" )

alias.url += ( "/cgi-bin" => server_root + "/cgi-bin" )
2.2.4 网页添加
在lighttpd.install/webpages目录下创建index.html文件,文件中添加如下内容:
<!DOCTYPE html>
<html>
<head>
<meta http-equiv="Content-Type" content="text/html; charset=UTF-8">
<title>lighttpd Test</title>
</head>
<body>
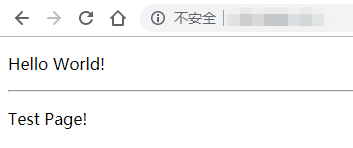
<p>Hello World!</p>
<hr>
<p>Test Page!</p>
</body>
</html>
2.3 lighttpd服务测试
将lighttpd.install目录下的内容拷贝到开发板的/root/lighttpd/目录下,这里在修改lighttpd.conf时做了相关目录的配置,我通过nfs挂载做的拷贝,开发板上运行lighttpd,
~/lighttpd/sbin # ./lighttpd -f ../config/lighttpd.conf -m ../lib/
浏览器输入开发板IP地址,显示如下:
转载请注明出处,如有错漏之处,敬请指正。