目录
本文介绍如何在嵌入式设备上使用lighttpd搭建web服务器,将会介绍OpenSSL的交叉编译、OpenSSL加入lighttpd的交叉编译、部署,https和http的页面访问测试、fcgi测试的操作等。

1、概述
Lighttpd 是众多开源的轻量级 Web Server 中较为优秀的一个,支持 FastCGI、CGI、Auth、输出压缩(output compress)、URL 重写、Alias 等重要功能,具有非常低的内存开销,CPU 占用率低,效能好,且ighttpd易配置https,实现安全访问页面功能。
Lighttpd一般用在嵌入式设备中,嵌入式设备的磁盘空间和内存相对有限,主要还是运行设备的主程序,预留给Web服务器的资源相对较少,因此在嵌入式设备中不可能部署大型的Web服务器,比如使用tomcat等,所以在嵌入式设备中轻量级的Lighttpd是个很好的选择。
Lighttpd是一个小巧却高效的HTTPD服务器,在静态内容处理和PHP CGI上的速度要比传统APACHE快很多,且易加入openssl,可实现https的功能。
2、编译openssl

由于lighttpd的实现https功能,依赖于openssl的库,因而先编译和安装openssl,后编译lighttpd。当前我们使用的openssl版本是openssl-1.0.2d,lighttpd版本是 lighttpd-1.4.32。这些都可以到openssl和lighttpd官网上下载。
将下载的源码包放到编译机的某个目录下,并进行解压:
$ tar zxvf openssl-1.0.2d.tar.gz               //解压
$ cd openssl-1.0.2d
在openssl-1.0.2d目录下建立shell脚本,文件名为configure-arm.sh,在configure-arm.sh中输入如下代码:
#!/bin/bash
CC=arm-hisiv300-linux-uclibcgnueabi-gcc
AR=arm-hisiv300-linux-uclibcgnueabi-ar
LD=arm-hisiv300-linux-uclibcgnueabi-ld
RANLIB=arm-hisiv300-linux-uclibcgnueabi-ranlib
STRIP=arm-hisiv300-linux-uclibcgnueabi-strip
./Configure enable-shared no-asm linux-elf --prefix=/home/cly/work/openssl/obj \ --cross-compile-prefix=/opt/hisi-linux/x86-arm/arm-hisiv300-linux/bin/arm-hisiv300-linux-uclibcgnueabi-
其中,/opt/hisi-linux/x86-arm/arm-hisiv300-linux/bin/arm-hisiv300-linux-uclibcgnueabi-为hisi3516的交叉编译器前缀,--prefix=/home/cly/work/openssl/obj 为编译输出路径。
给configure-arm.sh脚本文件添加可执行权限,执行命令:
chmod +x configure-arm.sh然后执行configure-arm.sh生成openssl配置,执行命令:
./configure-arm.sh编译openssl,执行命令:
make安装openssl,执行命令:
make install安装完成后会在/home/chenchunlin/work/openssl/obj 路径下面生成下面四个目录:
lib:存放生成的库文件
sbin:存放openssl运行程序
include:openssl的头文件
ssl
3、编译lighttpd

将下载的源码包放到某个目录下,并进行解压:
$ tar zxvf lighttpd-1.4.32.tar.gz               //解压
$ cd lighttpd-1.4.32
然后在lighttpd-1.4.32目录下建立shell脚本,文件名为configure-arm.sh,在configure-arm.sh中输入如下代码:
#!/bin/bash
CC=arm-hisiv300-linux-uclibcgnueabi-gcc
AR=arm-hisiv300-linux-uclibcgnueabi-ar
LD=arm-hisiv300-linux-uclibcgnueabi-ld
RANLIB=arm-hisiv300-linux-uclibcgnueabi-ranlib
STRIP=arm-hisiv300-linux-uclibcgnueabi-strip
./configure --prefix=/usr/web/lighttpd-1.4.32-arm --host=arm-hisiv100nptl-linux --enable-shared --disable-static --disable-lfs --disable-ipv6 --without-PACKAGE --without-valgrin    d --without-kerberos5 --without-pcre --without-zlib --without-bzip2 --without-lua --with-openssl --with-openssl-includes=/home/cly/openssl/obj/include/ --with-openssl-libs=/home/cly/openssl/obj/lib
其中,CC= arm-hisiv300-linux-uclibcgnueabi-gcc为hisi3516的交叉编译器前缀,--prefix=/home/chenchunlin/work/lighttpd_exec 为编译输出路径,--with-openssl-includes=/home/chenchunlin/openssl/obj/include/ 为openssl头文件路径,--with-openssl-libs=/home/chenchunlin/openssl/obj/lib 为openssl的lib路径。
给configure-arm.sh文件添加可执行权限,执行命令:
chmod +x configure-arm.sh执行configure-arm.sh生成openssl配置,执行命令:
./configure-arm.sh编译lighttpd,执行命令:
make安装lighttpd,执行命令:
make install安装完成后会在/usr/web/lighttpd-1.4.32-arm 路径下面生成下面三个目录:
lib:存放运行时需要用到的动态库
sbin:存放lighttpd运行程序
share:存放帮助信息
4、在lighttpd中配置https
4.1、目录设计
在编译完成后的安装目录/usr/web/lighttpd-1.4.32-arm下面手动创建以下文件目录:
cache //存放服务器缓存
cgi-bin //存放运行的cgi文件
config //存放lighttpd服务相关配置文件
log //存放日志文件
sockets //存放fcgi等创建的socket信息
upload //存放web应用程序的上传下载文件
vhosts //存放虚拟主机目录
webpages //存放web 等html项目文件
4.2、lighttpd默认配置文件导入
将源码包中的doc/config目录下面的config.d、lighttpd.conf和modules.conf复制到安装目录中config文件夹里面。目录及其目录下面的子目录和子文件拷贝命令:cp -rf 原路径/ 目的路径/。
4.3、Lighttpd.conf配置文件修改
修改刚复制过来的lighttpd.conf文件的内容:
1)修改下列节点的内容:
var.log_root = "/usr/web/lighttpd-1.4.32-arm/log"
var.server_root = "/usr/web/lighttpd-1.4.32-arm"
var.state_dir = "/usr/web/lighttpd-1.4.32-arm"
var.home_dir = "/opt/web/lighttpd-1.4.32-arm"
var.conf_dir = "/opt/web/lighttpd-1.4.32-arm/config"......
var.cache_dir = server_root + "/cache"
server.use-ipv6 = "disable"......
server.document-root = server_root + "/webpages"
......
server.max-fds = 128
server.max-connections = 64......
server.upload-dirs = ( "/usr/web/lighttpd-1.4.32-arm/upload" )
2) 添加端口信息:
$SERVER["socket"] == "0.0.0.0:443" {
ssl.engine = "enable"
ssl.pemfile = "/usr/server.pem"
server.document-root = server_root + "/webpages"
}
3)将下列节点注释掉:
#server.username = "lighttpd"
#server.groupname = "lighttpd"
......
#server.pid-file = state_dir + "/lighttpd.pid"......
#server.errorlog = log_root + "/error.log"
#include "conf.d/access_log.conf"
#include "conf.d/debug.conf"
#server.network-backend = "linux-sendfile"
......
#$HTTP["url"] =~ "\.pdf$" {
# server.range-requests = "disable"
#}
4.4、modules.conf配置文件修改
修改刚复制过来的modules.conf文件 用户支持FastCGI允许,去除#include "conf.d/fastcgi.conf" 前面的注释,如下:
##
## FastCGI (mod_fastcgi)
##
include "conf.d/fastcgi.conf"
4.5、fastcgi.conf配置文件修改
先将server.modules += ( "mod_fastcgi" )前面的注释#放开。然后,修改#fastcgi.server配置
fastcgi.server= (
"/fastcgi" =>
( "localhost" =>
(
"socket" => "/usr/web/lighttpd-1.4.32-arm/socktes/myfastcgi-arm-fcgi.socket",
"check-local" => "disable",
"bin-path" => "/usr/web/lighttpd-1.4.32-arm/cgi-bin/myfastcgi-arm.cgi",
"idle-timeout" => 10,
"min-procs" => 1,
"max-procs" => 4
)
)
)
4.6、生成Openssl证书
使用openssl去生成证书,给它传递一些参数,如下:
./openssl req -new -x509 -keyout server.pem -out server.pem -days 365 –nodes生成后的证书server.pem (此证书为临时证书,未认证),放至/usr目录下。
5、测试demo编写
5.1、编写fastcgi测试程序
编写 myfastcgi-arm.fcgi的测试代码:
//FCGI测试程序
#include <fcgi_stdio.h>
#include <fcgi_config.h>
#include "stdlib.h"
#include "stdio.h"
int main(int argc, char* argv[])
{
        int count = 0;
        while(FCGI_Accept() >= 0)
        {
                printf("ContentType: text/plain \r\n" "\r\n");
                //输入计数器
                printf("count:%d ", count++);
                printf("<br>");
                //http response结束
                printf("\n\n");
        }
        return 0;
}
上述代码基于hisi3516a的编译器编译:
arm-hisiv300-linux-uclibcgnueabi-g++ -c -I /usr/web/fcgi-2.4.0-arm/include myfastcgi.cpp -o myfastcgi-arm.o链接:
arm-hisiv300-linux-uclibcgnueabi-g++ myfastcgi-arm.o -L/usr/web/fcgi-2.4.0-arm/lib/ -lfcgi -o myfastcgi-arm.fcgi会在myfastcgi.cpp 目录下生成myfastcgi-arm.fcgi程序,将链接生成的myfastcgi-arm.fcgi程序存放到 /usr/web/lighttpd-1.4.32-arm/cgi-bin路径下。
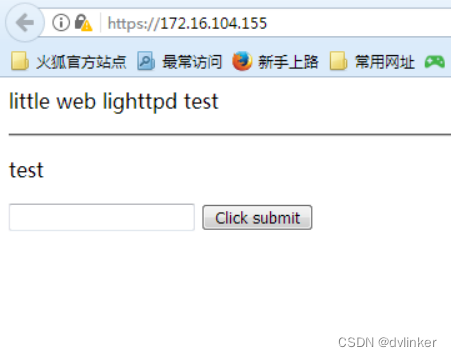
5.2、html测试页面编写
test.html测试网页编写内容如下:
<html>
<head>
<meta http-equiv="Content-Type" content="text/html; charset=utf-8"/>
<title>my lighttpd测试</title>
</head>
<body>
<p>轻量级web服务器lighttpd的测试(for arm-linux)</p>
<hr>
<p>测试页面</p>
<form method="post" action="/fastcgi/" >
     <input type="text" id ="username" >
     <input type="submit"   value ="Click submit"  >
</form>
</body>
</html>
将test.html以utf-8的方式保存,并且将test.html存放到/usr/web/lighttpd-1.4.32-arm/ webpages目录下面。
运行测试:
#! /bin/sh
./sbin/lighttpd -f ./config/lighttpd.conf –m  /usr/web/lighttpd-1.4.32-arm/lib/
6、测试结果
https的测试结果:
fcgi测试结果:

每点击click submit button,就会加1,返回到测试页面上。
测试过程中可能会遇到问题:
1)浏览器访问时,初次访问会报证书出错或者不安全,点击高级,将此证书加入 。
2)如果出现lighttpd进程未成功启动有可能是下面原因造成的:
i)error while loading shared libraries: libfcgi.so.0: cannot open shared object file: No such file or directory, 加载fcgi时,没找到fcgi库, 将编译好的FCGI库存放到/usr/web/fcgi-2.4.0-arm/lib路径下,同时设置下环境变量,执行下面命令export LD_LIBRARY_PATH = $LD_LIBRARY_PATH:/usr/web/fcgi-2.4.0-arm/libii)80端口占用,因为HD3默认有一个web服务器已经暂用了80端口,当前web服务器是集成在nip里面的,不能去除,临时先修改lighttpd的端口解决,后面正常版本需要nip去除内置的web服务。
修改配置文件/usr/web/lighttpd-1.4.32-arm/config /lighttpd.conf文件
将server.port = 80 修改为server.port = 8080
iii)大多数的错误都是由于配置导致,如果启用了fcgi,也有可能是缺少运行支持库, 针对缺少允许支持库的,可以通过直接运行cgi程序的方式来判断,如果是缺少,一般都会有对应的出错提示。
iv)报证书不存在或者不匹配问题,有可能是证书已过期,或者存放路径不正确。