实现效果
使用css和js实现一个tab切换的效果

原理解析
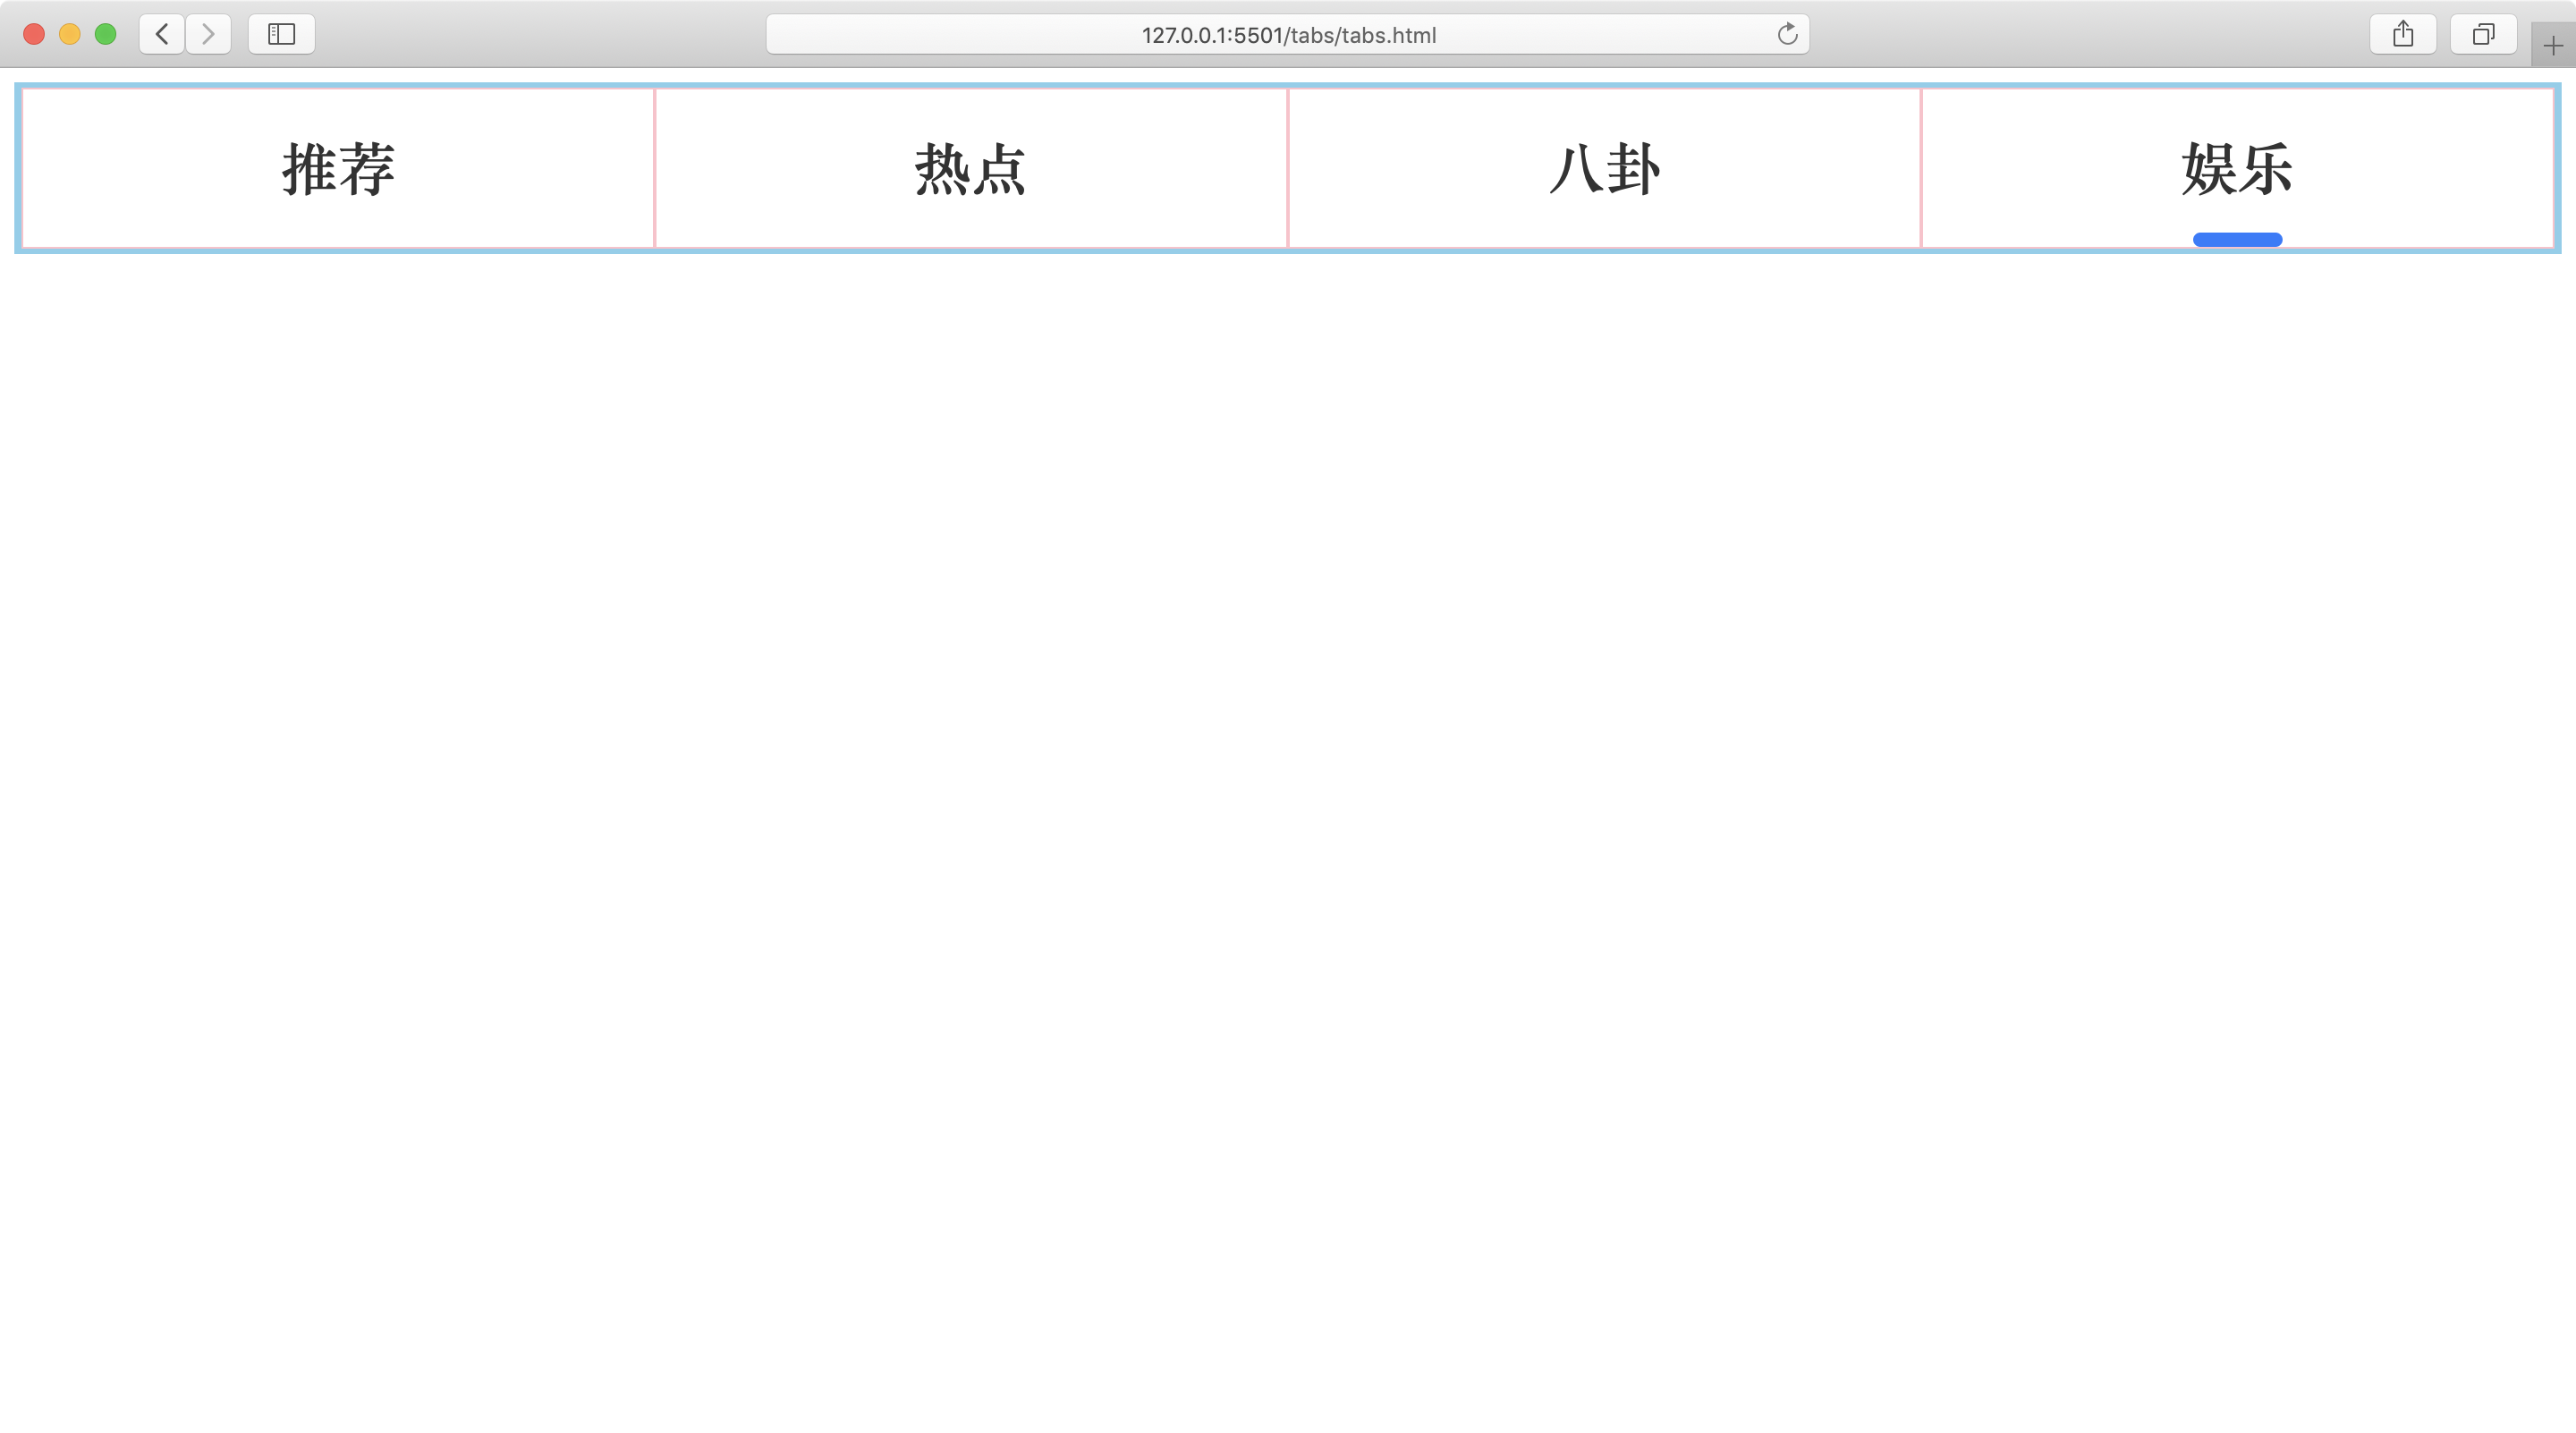
如上图
- 红色框框代表盒子,总宽度记作
totalWidth - 绿色框框代表每一项,宽度记作
itemWidth - 深蓝色框框代表的是下划线,宽度记作
activeWitdh
那么我们可以得到线的左边距是每一项的左边距加上一个值
这个值是每一项的宽度减去线的宽度的结果再除以二
即
// index是当前点击的item索引,从0开始
itemWidth * index + (itemWidth - activeWitdh) / 2
代码实现
<div id="app">
  <div class="tabs_wrap">
    <div
      v-for="(item, index) in tabsList"
      :key="item.value"
      :class="['item','item-' + (index+1)]"
      @click="changeIndex(index)"
    >
      {

   { item.label || ""}}
    </div>
    <div class="active" :style="{left: left + 'px'}"></div>
  </div>
</div>
.tabs_wrap {


  position: relative;
  display: flex;
  align-items: center;
  justify-content: space-around;
  font-size: 32px;
  color: #333;
  font-weight: bold;
  height: 88px;
  line-height: 88px;
  border: 4px solid skyblue;
}

.item {


  cursor: pointer;
  border: 1px solid pink;
  flex: 1;
  text-align: center;
}

.active {


  position: absolute;
  left: 0;
  bottom: 0;
  width: 50px;
  height: 8px;
  background-color: #2979ff;
  border-radius: 50px;
  transition: left 0.3s ease;
}
<script src="https://unpkg.com/vue@3/dist/vue.global.js"></script>

<script>
  const {

       createApp } = Vue;

  const app = {


    data() {


      return {


        currentIndex: 0,
        left: 0,
        tabsList: [
          {


            label: "推荐",
            value: "1",
          },
          {


            label: "热点",
            value: "2",
          },
          {


            label: "八卦",
            value: "3",
          },
          {


            label: "娱乐",
            value: "4",
          },
        ],
      };
    },

    methods: {


      initPostion(index) {


        let currentItem = document.querySelector(".item-" + (index + 1));
        let activeItem = document.querySelector(".active");
        console.log(currentItem.offsetWidth);
        console.log(activeItem.offsetWidth);

        // 计算下划线位置
        this.left =
          currentItem.offsetWidth * index +
          (currentItem.offsetWidth - activeItem.offsetWidth) / 2;
        console.log(this.left);
      },

      changeIndex(index) {


        if (this.currentIndex === index) return;

        this.currentIndex = index;
        this.initPostion(index);
      },
    },

    mounted() {


      this.initPostion(0);
    },
  };

  createApp(app).mount("#app");
</script>
在线演示:https://mouday.github.io/front-end-demo/tabs/tabs.html
参考文章