目录
2.在components文件夹下创建切换的.vue页面、引入使用
一、方法1:使用Vant组件库的tab组件
Vant 2 - Mobile UI Components built on Vue

扫描二维码关注公众号,回复:
15208242 查看本文章

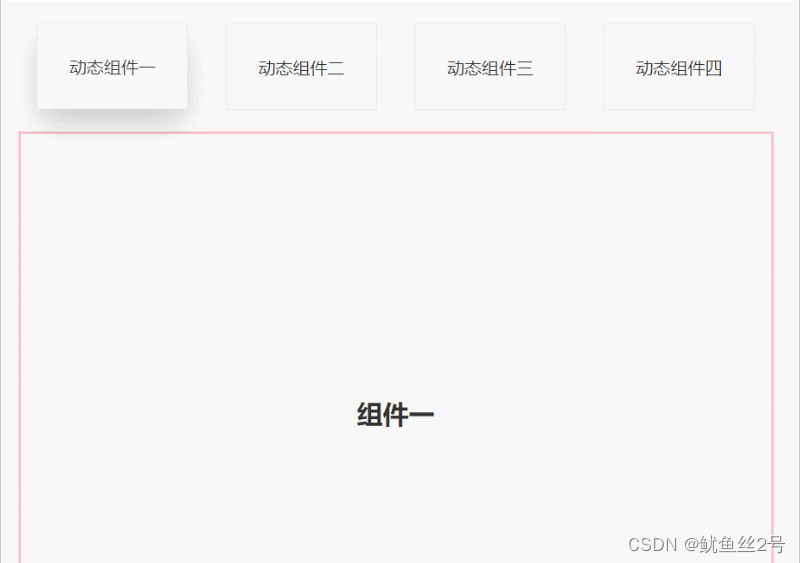
二、 方法2:手动创建tab切换效果
2.在components文件夹下创建切换的.vue页面、引入使用
import one from "./components/one";
import two from "./components/two";
import three from "./components/three";
import four from "./components/four";

components: {
    one,
    two,
    three,
    four,
},
3.布局:上面放tab点击的标签,下面放组件呈现对应内容
// 然后使用v-for循环出来呈现
<template>
   <div id="app">
      <div class="top">
      <!-- 放置tab点击标签 -->
         <div class="crad"
         :class="{ highLight: whichIndex == index }"
         v-for="(item, index) in cardArr"
         :key="index"
         @click="whichIndex = index">
            {

   { item.componentName }}
        </div>
      </div>
      <div class="bottom">
        <!-- 放置动态组件... -->
       <!-- keep-alive缓存组件,这样的话,组件就不会被销毁,DOM就不会被重新渲染,
       浏览器也就不会回流和重绘,就可以优化性能。不使用的话页面加载就会慢一点 -->
       <keep-alive>
         <component :is="componentId"></component>
       </keep-alive>
      </div>
   </div>
</template>
4.写好上面的tab点击标签,定义数据修改样式
// 首先我们在data中定义数组cardArr存放点击tab的数据
data() {
   return {
      whichIndex: 0,
      cardArr: [
        {
          componentName: "动态组件一",
          componentId: "one",
        },{
          componentName: "动态组件二",
          componentId: "two",
        },{
          componentName: "动态组件三",
          componentId: "three",
        },{
          componentName: "动态组件四",
          componentId: "four",
        },
      ],
    };
},
// 又因为需要有高亮状态样式:默认索引0高亮
.highLight {
box-shadow: 0 15px 30px rgba(0, 0, 0, 0.2);
transform: translate3d(0, -1px, 0);
}二、完整代码
<template>
  <div id="app">
    <div class="top">
      <div
        class="crad"
        :class="{ highLight: whichIndex == index }"
        v-for="(item, index) in cardArr"
        :key="index"
        @click="
          whichIndex = index;
          componentId = item.componentId;
        "
      >
        {

   { item.componentName }}
      </div>
    </div>
    <div class="bottom">
      <keep-alive>
        <component :is="componentId"></component>
      </keep-alive>
    </div>
  </div>
</template>

<script>
import one from "./components/one";
import two from "./components/two";
import three from "./components/three";
import four from "./components/four";
export default {
  components: {
    one,
    two,
    three,
    four,
  },
  data() {
    return {
      whichIndex: 0,
      componentId: "one",
      cardArr: [
        {
          componentName: "动态组件一",
          componentId: "one",
        },
        {
          componentName: "动态组件二",
          componentId: "two",
        },
        {
          componentName: "动态组件三",
          componentId: "three",
        },
        {
          componentName: "动态组件四",
          componentId: "four",
        },
      ],
    };
  },
};
</script>

<style lang="less" scoped>
#app {
  width: 100%;
  height: 100vh;
  box-sizing: border-box;
  padding: 50px;
  .top {
    width: 100%;
    height: 80px;
    display: flex;
    justify-content: space-around;
    .crad {
      width: 20%;
      height: 80px;
      line-height: 80px;
      text-align: center;
      background-color: #fff;
      border: 1px solid #e9e9e9;
    }
    .highLight {
      box-shadow: 0 15px 30px rgba(0, 0, 0, 0.2);
      transform: translate3d(0, -1px, 0);
    }
  }
  .bottom {
    margin-top: 20px;
    width: 100%;
    height: calc(100% - 100px);
    border: 3px solid pink;
    display: flex;
    justify-content: center;
    align-items: center;
  }
}
</style>