整理自一个文档 作者:郝文龙 博客首页:https://me.csdn.net/a639735331
1.MVC

2.SpringMVC执行流程
Spring MVC是结构最清晰的MVC实现。Controller接收请求,然后返回ModelAndView。

1.springmvc将所有的请求都提交给DispatcherServlet,它会委托应用系统的其他模块负责对请求进行真正的处理工作。
2.DispatcherServlet查询HandlerMapping,找到处理请求的Controller。
3.DispatcherServlet将请求提交到目标Controller。
4.Controller进行业务逻辑处理后,会返回一个ModelAndView。
5.Dispathcher查询ViewResolver视图解析器,找到ModelAndView对象指定的视图对象。
6.将页面渲染到浏览器客户端。
3.常见MVC框架比较
运行性能上:
Jsp+servlet+javabean>spring mvc>struts2。
开发效率上,基本正好相反。值得强调的是,spring mvc开发效率和struts2不相上下。
4.环境搭建
4.1.下载zip包spring-framework-3.2.4.RELEASE-dist.zip(不支持jdk1.8)
4.2.解压到指定目录
4.3.创建web项目并加入jar包
注意:commons-logging-1.0.4.jar需单独下载
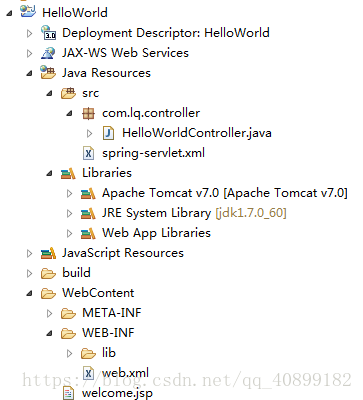
4.4. 创建HelloWorldController
| @Controller public class HelloWorldController { @RequestMapping("/helloWorld.do") public String helloWorld(){ return "welcome.jsp"; } } |
4.5. 在src下创建spring的配置文件spring-servlet.xml
| <?xml version="1.0" encoding="UTF-8"?> <beans xmlns="http://www.springframework.org/schema/beans" xmlns:xsi="http://www.w3.org/2001/XMLSchema-instance" xmlns:mvc="http://www.springframework.org/schema/mvc" xmlns:context="http://www.springframework.org/schema/context" xsi:schemaLocation="http://www.springframework.org/schema/beans http://www.springframework.org/schema/beans/spring-beans-3.0.xsd http://www.springframework.org/schema/context http://www.springframework.org/schema/context/spring-context-3.0.xsd http://www.springframework.org/schema/mvc http://www.springframework.org/schema/mvc/spring-mvc-3.0.xsd "> <!-- 启动spring自动扫描,注入bean --> <context:component-scan base-package="com.niit.springmvc"/> <!-- 启用springmvc注解功能 --> <mvc:annotation-driven /> </beans> |
4.6.配置web.xml
| <servlet> <servlet-name>example</servlet-name> <!--Spring MVC里的前端控制器DispatcherServlet就是一个Servlet --> <servlet-class>org.springframework.web.servlet.DispatcherServlet</servlet-class> <init-param> <!-- 加载spring核心配置文件 --> <param-name>contextConfigLocation</param-name> <!--param-value是Spring MVC配置文件的路径 --> <param-value>classpath:spring-servlet.xml</param-value> </init-param> <!--启动级别为1,当Tomcat启动时,应用也随之启动 --> <load-on-startup>1</load-on-startup> </servlet> <servlet-mapping> <servlet-name>example</servlet-name> <url-pattern>*.do</url-pattern> </servlet-mapping> |
4.7.添加welcome.jsp
4.8.测试请求: http://localhost:8080/HelloWorld/helloWorld.do
5. RequestMapping注解
1.@RequestMapping用来定义访问的URL,你可以为整个类定义一个@RequestMapping,或者为每个方法指定一个。
把@RequestMapping放在类级别上,这可令它与方法级别上的@RequestMapping注解协同工作,取得缩小选择范围的效果。 例如:
| @RequestMapping("/test") |
该类下的所有访问路径都在/test之下。
2.将@RequestMapping用于整个类不是必须的,如果没有配置,则直接参考方法的注解匹配对应的url。
3.完整的参数项为:@RequestMapping(value="",method ={"",""},params={"",""}),各参数说明如下:
value :设置访问地址 ,当只有value时可以省略value属性
method:设置请求方式,常用RequestMethod.GET,RequestMethod.POST,例如:method={RequestMethod.GET}
params:设置访问参数,例如:params={"method=hello"}
6.RequestMapping中value常用配置
value:指定请求的实际地址 (最终请求的url为:类的注解的url+方法注解的url)
value的uri值为以下两类
6.1指定普通的具体值
| @Controller @RequestMapping("/user") public class UserController{ @RequestMapping(value="/some.do") public String handleRequest() throws Exception { System.out.println("handleRequest"); return "/addsuc.jsp"; } } 该注解的是说:请求的url为”user/some.do”就会进入handleRequest方法处理。 url:user/some.do
|
6.2指定为含有某变量的一类值(restful风格)
| @RequestMapping(value="/{userId}/delete.do",method=RequestMethod.GET) public String delete(@PathVariable String userId){ System.out.println("delete:"+userId); return "success.jsp"; } 这个注解:url中带了参数userId url:user/123/delete.do 使用@PathVariable 指定形参接收url中的数据 |
7.参数绑定
页面表单如下
| <form action="user/addUser.do" method="post"> 用户名:<input type="text" name="name"/><br/> 年龄:<input type="text" name="age"/><br/> 生日:<input type="text" name="birth"/><br/> <input type="submit" value="添加"/> </form> |
7.1. request接收前台参数
| @RequestMapping(value="/addUser.do",method=RequestMethod.POST) public String addUser(Model model,HttpServletRequest request){ String name = request.getParameter("name"); String age = request.getParameter("age"); String birth = request.getParameter("birth"); System.out.println("姓名"+name); System.out.println("年龄"+age); System.out.println("生日"+birth); return "addsuc.jsp"; } |
注意:日期的格式必须是 1988/10/10
7.1. 直接使用形参获取前台传递的参数数据
| @RequestMapping(value="/addUser.do",method=RequestMethod.POST) public String addUser(String name,Integer age,Date birth){ System.out.println("姓名"+name); System.out.println("年龄"+age); System.out.println("生日"+birth); return "addsuc.jsp"; } |
7.2. 使用对象接受前台传递的参数
| public class User { private String name; private Integer age; private Date birth; public User(String name, Integer age, Date birth) { this.name = name; this.age = age; this.birth = birth; } } |
| @RequestMapping(value="/addUser.do",method=RequestMethod.POST) public String addUser(User user){ System.out.println("姓名"+ user.getName()); System.out.println("年龄"+ user.getAge()); System.out.println("生日"+ user.getBirth()); return "addsuc.jsp"; } |
8.页面跳转
Controller跳转方式:主要通过方法的类型来进行跳转,主要返回类型有
1、String
2、ModleAndView
3、void
4、json
8.1.String
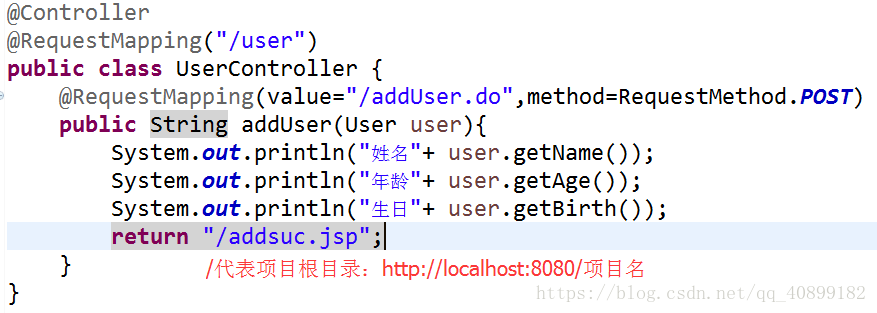
请求转发
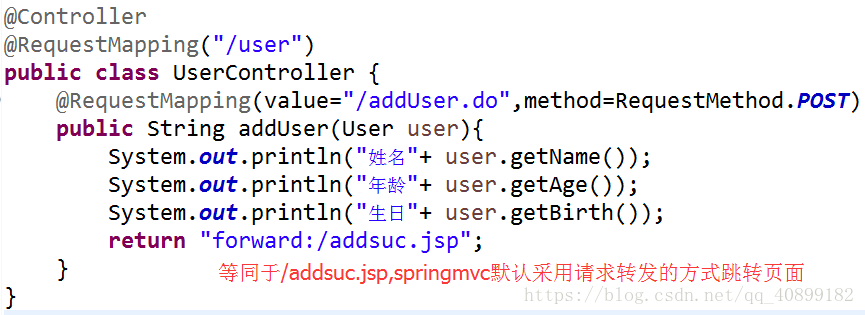
重定向
8.2. ModleAndView
| @RequestMapping(value="/addUser.do",method=RequestMethod.POST) public ModelAndView addUser(ModelAndView mv,User user){ System.out.println("姓名"+ user.getName()); System.out.println("年龄"+ user.getAge()); System.out.println("生日"+ user.getBirth()); mv.addObject("name", user.getName()); mv.setViewName("/addsuc.jsp"); return mv; } |
8.3.void
| @RequestMapping(value="/addUser.do",method=RequestMethod.POST) public void addUser(User user,HttpServletRequest request,HttpServletResponse response) throws Exception{ System.out.println("姓名"+ user.getName()); System.out.println("年龄"+ user.getAge()); System.out.println("生日"+ user.getBirth()); request.setAttribute("name", user.getName()); request.getRequestDispatcher("/addsuc.jsp").forward(request, response); } |
9.数据回显
1.HttpServletRequest HttpSession
2.ModleAndView
3.Model
4.json
1.导入jar包
commons-beanutils.jar
commons-collections.jar
commons-lang.jar
ezmorph-1.0.2.jar
commons-logging-1.1.jar
json-lib-2.4-jdk13.jar
2.编写jsp
| <html> <head> <base href="<%=basePath%>"> <title>My JSP 'JsonJquery.jsp' starting page</title> <script type="text/javascript" src="./js/jquery-1.8.3.js" ></script> <script type="text/javascript"> $(document).ready(function() { $("#btn").click(function(){ $.ajax({ url:"getJson.do", data:{username:"12",date:new Date()}, type:"get", dataType:"json", success: function(result){ $.each(result, function(index, item){ $("#show").html($("#show").html()+ "<option value="+item+">"+item+"</option>"); }); } }); }); }); </script> </head>
<body> <button id="btn">获取json数据</button> <select id="show"> </select> </body> </html> |
3.编写Controller
| @Controller public class JsonController { @RequestMapping(value="/getJson.do") public void getJson(HttpServletResponse response,String username){ response.setContentType("text/html"); response.setCharacterEncoding("utf-8"); PrintWriter out; try { out = response.getWriter(); List<String> list = new ArrayList<String>(); list.add("意大利"); list.add("韩国"); JSONArray jsonArray = new net.sf.json.JSONArray(); //通过json插件生成json字符串传向前台 JSONArray array = jsonArray.fromObject(list); out.print(array); //手动拼接json字符串方式向前台传参 //String json="[{\"name\":\"中国\"},{\"name\":\"美国\"}]"; //out.print(json); out.flush(); out.close(); } catch (IOException e) { // TODO Auto-generated catch block e.printStackTrace(); } } } |
注:生成json的jar包有很多,只要保证返回的是json数据就可以
10.将jsp放在WEB-INF下
对于外部访问来说,WEB-INF下的文件都是不可见的(即不能通过url获得WEB-INF下的任何文件),所以直接访问jsp是不可能的。WEB-INF的存在以及其下的lib和classes目录的作用都是jsp规定的,主要是系统运行的配置信息和环境,用来存储服务端配置文件信息和在服务端运行的类文件,它下面的东西不允许客户端直接访问的,这是jsp环境的规定。将jsp存放在WEB-INF后,只可以从服务器内部通过请求转发的方式访问
11.视图解析器
在spring-servlet.xml中添加如下配置
| <bean class="org.springframework.web.servlet.view.InternalResourceViewResolver"> <!-- 视图后缀,controller中的方法返回的url字符串会添加该后缀 --> <property name="suffix" value=".jsp"/> <!-- 视图前缀controller中的方法返回的url字符串会添加该前缀 --> <property name="prefix" value="/WEB-INF/jsp/"/> </bean> |
return "addsuc"; 实际跳转的url为:/WEB-INF/jsp/addsuc.jsp
12.文件上传下载
1.添加jar包
commons-fileupload-1.2.1.jar
commons-io-1.3.2.jar
2. 在spring-servlet.xml配置处理文件上传的bean
| <bean id="multipartResolver" class="org.springframework.web.multipart.commons.CommonsMultipartResolver"> <property name="defaultEncoding" value="utf-8" /> <!-- 默认编码 (ISO-8859-1) --> <property name="maxInMemorySize" value="10240" /> <!-- 最大内存大小 (10240) 设置在文件上传时允许写到内存中的最大值--> <property name="uploadTempDir" value="/temp/" /> <!--(临时文件存储目录) 上传后的目录--> <property name="maxUploadSize" value="-1" /> <!-- 最大文件大小,-1为无限止(-1) --> </bean>
|
12.1.单个文件上传
| @RequestMapping(value="/upload.do",method=RequestMethod.POST) public String fileUpLoad(String name,@RequestParam("file") CommonsMultipartFile file,HttpSession session){ if(!file.isEmpty()){ String path = session.getServletContext().getRealPath("/upload/"); String fileName = file.getOriginalFilename(); String fileType = fileName.substring(fileName.lastIndexOf(".")); File targetFile = new File(path,new Date().getTime()+fileType); try { file.getFileItem().write(targetFile); } catch (Exception e) { e.printStackTrace(); } } return "showData"; } 编写jsp页面 <form action="upload.do" method="post" enctype="multipart/form-data"> <input type="file" name="file" /> <input type="submit" value="上传"> </form> |
12.2.上传多个文件
| @RequestMapping(value="/mupload.do",method=RequestMethod.POST) public String muFileUpLoad(String name,@RequestParam("file") CommonsMultipartFile[] files,HttpSession session){ if(files!=null && files.length>0){ String path = session.getServletContext().getRealPath("/upload/"); for (CommonsMultipartFile file : files) { String fileName = file.getOriginalFilename(); String fileType = fileName.substring(fileName.lastIndexOf(".")); File targetFile = new File(path,new Date().getTime()+fileType); try { file.getFileItem().write(targetFile); } catch (Exception e) { e.printStackTrace(); } } } return "showData"; } 编写jsp页面 <form action="mupload.do" method="post" enctype="multipart/form-data"> <input type="file" name="file" /> <input type="file" name="file" /> <input type="submit" value="上传"> </form> |
12.3.文件下载
| @RequestMapping(value="/downLoad.do",method=RequestMethod.GET) public void downLoad(HttpSession session,HttpServletResponse response,String fileName)throws Exception{ String path = session.getServletContext().getRealPath("/upload")+"\\"+fileName; File file = new File(path); if(!file.exists()){ response.sendError(404, "您要下载的文件没找到"); return; } BufferedInputStream bis = new BufferedInputStream(new FileInputStream(file)); response.setContentType("multipart/form-data"); /** * 服务端向客户端游览器发送文件时,如果是浏览器支持的文件类型,一般会默认使用浏览器打开,比如txt、 jpg等,会直接在浏览器中显示,如果需要提示用户保存,就要利用Content-Disposition进行一下处理, * 关键在于一定要加上attachment: */ response.setHeader("Content-Disposition", "attachment;filename="+fileName); OutputStream out = response.getOutputStream(); byte [] buff = new byte[1024]; int len = -1; while((len= bis.read(buff))!=-1){ out.write(buff,0,len); } bis.close(); out.close(); } |