序幕:
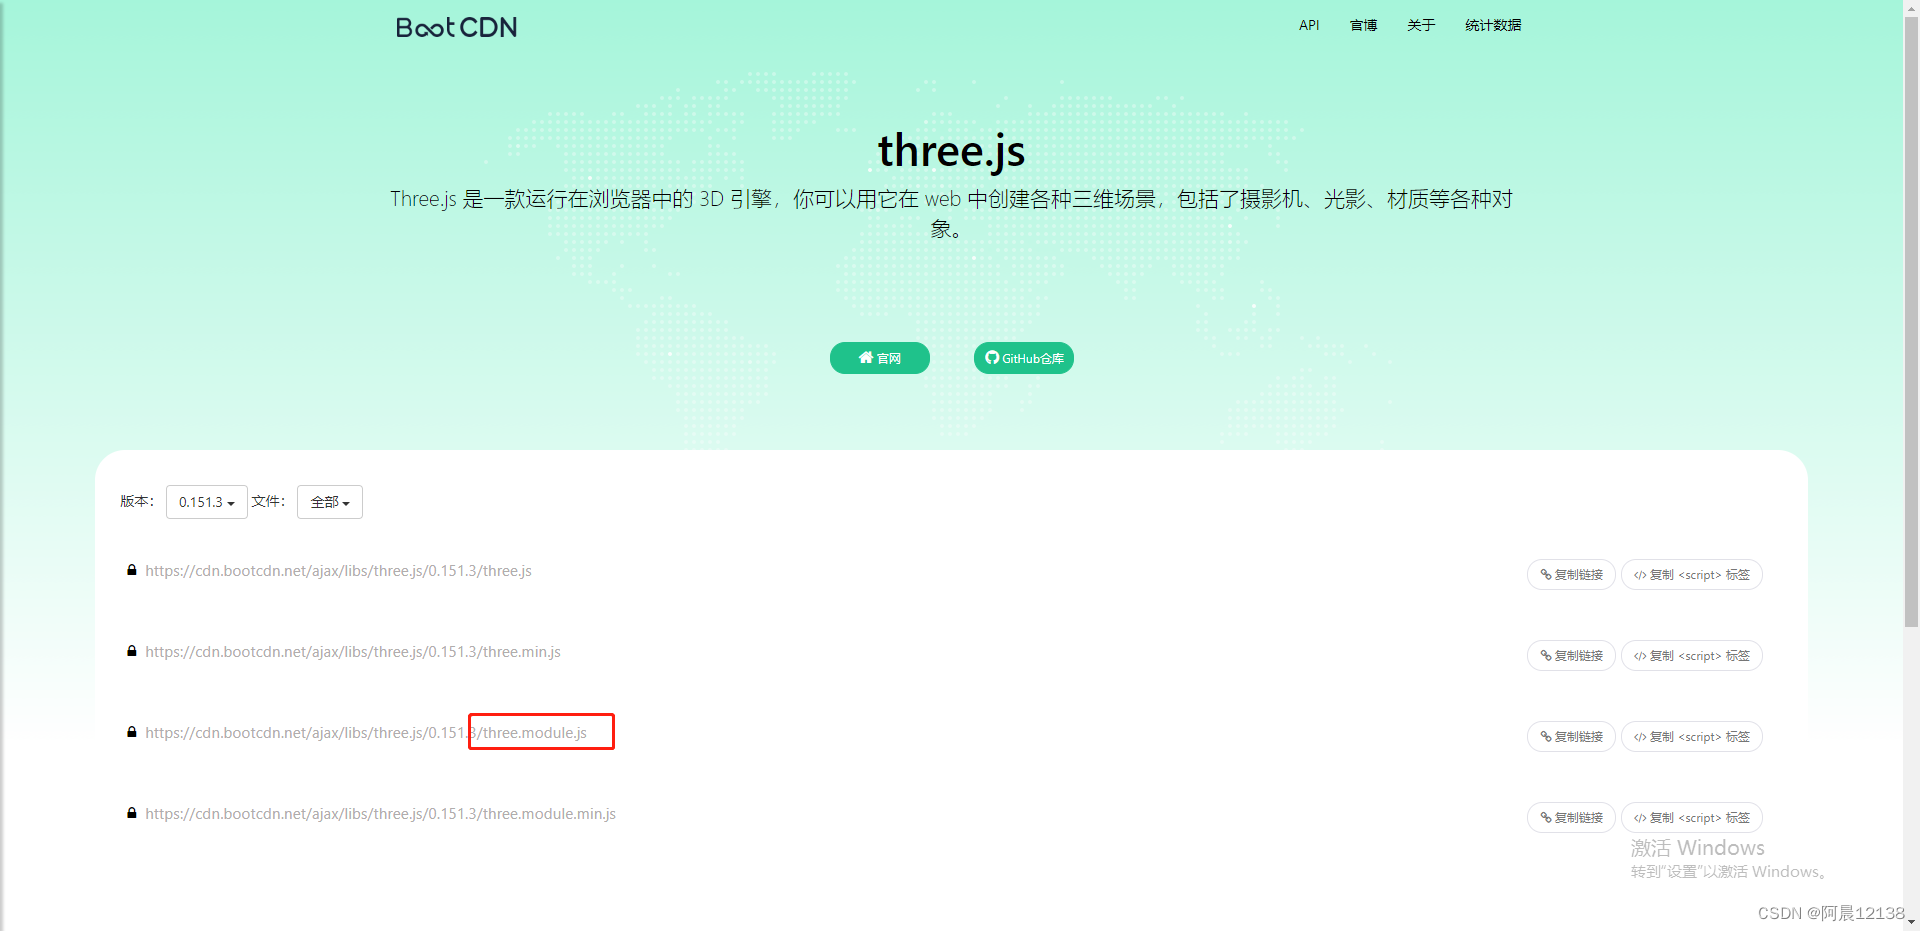
首先附上官方文档以及案例库地址:
全景图切割工具:HDRI to CubeMap
前置了解:
Three.js 是一个用于创建和渲染 3D 图形的 JavaScript 库。它基于 WebGL 技术
three.js有四个不同的引用资源:three.module.min.js、three.module.js、three.min.js、three.js,区别如下:
three.module.min.js是最小化且已模块化的版本,用于生产环境。three.module.js是模块化但未压缩的版本,用于开发环境。three.min.js是非模块化且压缩过的旧版本,适合旧项目或不支持 ES 模块的环境。three.js是未压缩和精简的旧版本
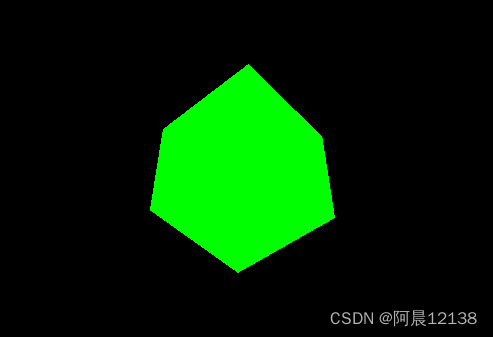
首先实现一个3d自动旋转的几何体
- 从BootCDN中下载three.module.js
- 根据官方文档起步中编写如下代码:
<html>

<head>
    <meta charset="utf-8">
    <title>My first three.js app</title>
    <style>
        body {
            margin: 0;
        }
    </style>
</head>

<body>
    <script type="module">
        // script标签中加入type="module" 浏览器将把该脚本作为 ES6 模块来处理
        // 通过es6的方式导入THREE
        import * as THREE from './three.module.js';

        // 创建场景
        const scene = new THREE.Scene();

        // 创建相机
        const camera = new THREE.PerspectiveCamera(75, window.innerWidth / window.innerHeight, 0.1, 1000);
        // 相机的位置
        camera.position.z = 5;

        // 渲染器
        const renderer = new THREE.WebGLRenderer();
        renderer.setSize(window.innerWidth, window.innerHeight);
        document.body.appendChild(renderer.domElement);

        // 添加立方体
        const geometry = new THREE.BoxGeometry(1, 1, 1);
        // 创建材质
        const material = new THREE.MeshBasicMaterial({ color: 0x00ff00 });
        //  创建物体
        const cube = new THREE.Mesh(geometry, material);
        // 将物体添加到场景中
        scene.add(cube);


        // 动画循环又叫渲染循环
        function animate() {
            requestAnimationFrame(animate);

            // 使立方体动起来
            cube.rotation.x += 0.01;
            cube.rotation.y += 0.01;

            // 渲染场景和相机
            renderer.render(scene, camera);
        }

        animate();
    </script>
</body>

</html>
效果如下:
将3d自动旋转的几何体改成可鼠标旋转
需要借助轨道控制器(OrbitControls)
- 首先下载Three资源库
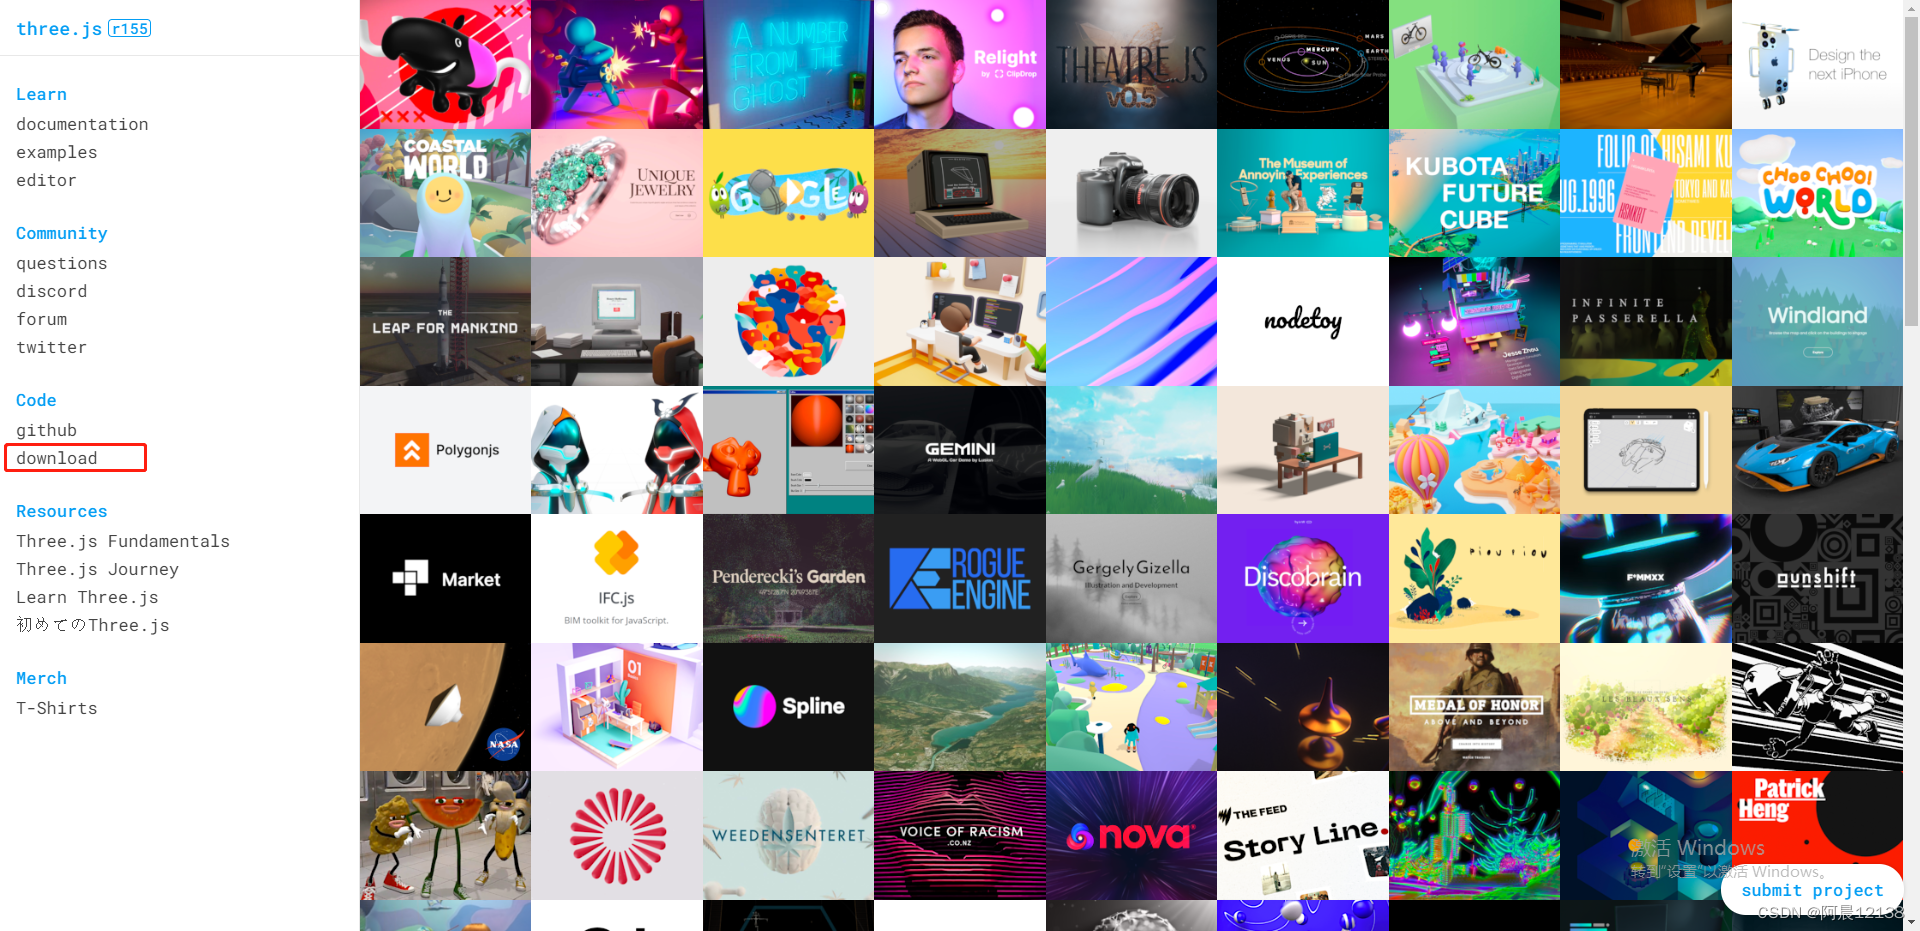
- 然后根据three/examples/jsm/controls/OrbitControls路径,获取到OrbitControls.js
- 开始编码修改
<html>

<head>
    <meta charset="utf-8">
    <title>My first three.js app</title>
    <style>
        body {
            margin: 0;
        }
    </style>
</head>

<body>
    <!-- 在 HTML 中使用 JavaScript 模块的新特性,被称为 Import Maps(导入映射) -->
    <!-- 当浏览器加载该 three 文件时,它会根据导入映射的规则来解析 JavaScript 中的模块导入语句 -->
    <script type="importmap">
        {
            "imports": {
                "three": "./three.module.js"
            }
        }
    </script>
    <script type="module">
        import * as THREE from 'three';
        import { OrbitControls } from './OrbitControls.js'

        const scene = new THREE.Scene();

        const camera = new THREE.PerspectiveCamera(75, window.innerWidth / window.innerHeight, 0.1, 1000);
        camera.position.z = 5;

        const renderer = new THREE.WebGLRenderer();
        renderer.setSize(window.innerWidth, window.innerHeight);
        document.body.appendChild(renderer.domElement);

        const geometry = new THREE.BoxGeometry(1, 1, 1);

        const colors = [
            { color: 0xff0000 },
            { color: 0x00ff00 },
            { color: 0x0000ff },
            { color: 0xff00ff },
            { color: 0xffff00 },
            { color: 0x00ffff }
        ]
        const material = []
        // 将6个面涂上不同的颜色
        for (let i = 0, len = colors.length; i < len; i++) {
            material.push(new THREE.MeshBasicMaterial(colors[i]))
        }

        const cube = new THREE.Mesh(geometry, material);
        scene.add(cube);


        // renderer.domElement 表示 Three.js 渲染器(renderer)所输出的 HTML 元素,通常是一个 <canvas> 元素
        const container = renderer.domElement
        // 创建了一个 OrbitControls 对象  OrbitControls 类会基于鼠标和触摸手势来控制相机在场景中的移动、旋转和缩放
        const controls = new OrbitControls(camera, container)
        // 启用了阻尼效果,使得相机在停止操作之后会自动减速停止
        controls.enableDamping = true
        // 设置了相机可以向外拉近或向内推离目标物体的最大距离。超过这个距离,相机将无法再拉近或推离
        controls.maxDistance = 2

        // 渲染
        const render = () => {
            renderer.render(scene, camera)
            requestAnimationFrame(render)
        }
        render()
    </script>
</body>

</html>- 效果如图:

全景查看房屋
根据我的了解目前常用于实现全景看房效果的有两种,分别是 天空盒(skyBox) 和 全景图片贴图。
天空盒
方法是最容易理解的,在我们身处的场景内,无非就是6个面,上下、前后、左右。将这6个面的视觉处理成图片就得到6张不同方向视觉的图片,如下:
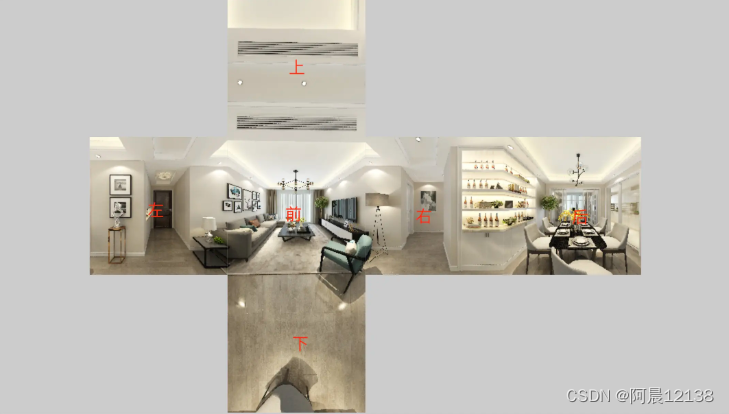
- 首先我们将6个视觉的图片贴到立方体的6个面,可以得到一个房间

- 然后将视觉移到立方体中心,并让贴图内翻转一下,就能实现全景看房
最终效果图:
全代码如下:
<html>

<head>
    <meta charset="utf-8">
    <title>My first three.js app</title>
    <style>
        body {
            margin: 0;
        }
    </style>
</head>

<body>
    <script type="importmap">
        {
            "imports": {
                "three": "./three.module.js"
            }
        }
    </script>
    <script type="module">
        import * as THREE from 'three';
        import { OrbitControls } from './OrbitControls.js'

        const scene = new THREE.Scene();

        const camera = new THREE.PerspectiveCamera(75, window.innerWidth / window.innerHeight, 0.1, 1000);
        camera.position.z = 5;

        const renderer = new THREE.WebGLRenderer();
        renderer.setSize(window.innerWidth, window.innerHeight);
        document.body.appendChild(renderer.domElement);


        // 添加立方体  参数分别是立方体的宽度、高度和深度
        const geometry = new THREE.BoxGeometry(10, 10, 10)
        // 左右、上下、后前
        const urls = [
            'https://cdn.huodao.hk/upload_img/20220620/3e532822bd445485d27677ca55a79b10.jpg?proportion=1',
            'https://cdn.huodao.hk/upload_img/20220620/cebf6fbcafdf4f5c945e0881418e34ec.jpg?proportion=1',
            'https://cdn.huodao.hk/upload_img/20220620/273081d1896fc66866842543090916d3.jpg?proportion=1',
            'https://cdn.huodao.hk/upload_img/20220620/8747f61fd2215aa748dd2afb6dce3822.jpg?proportion=1',
            'https://cdn.huodao.hk/upload_img/20220620/c34262935511d61b2e9f456b689f5c1c.jpg?proportion=1',
            'https://cdn.huodao.hk/upload_img/20220620/722d2bf88f6087800ddf116511b51e73.jpg?proportion=1'
        ]
        const boxMaterial = []

        urls.forEach((item, index) => {
            // 纹理加载
            const texture = new THREE.TextureLoader().load(item)
            // 通过旋转修复天花板和地板
            if (index == 2 || index == 3) {
                texture.rotation = Math.PI
                texture.center = new THREE.Vector2(0.5, 0.5)
            }
            // 创建材质
            boxMaterial.push(new THREE.MeshBasicMaterial({ map: texture }))
        })
        //  创建一个三维物体
        const house = new THREE.Mesh(geometry, boxMaterial)

        house.geometry.scale(1, 1, -1)
        scene.add(house)


        const container = renderer.domElement
        const controls = new OrbitControls(camera, container)
        controls.enableDamping = true
        controls.maxDistance = 2

        // 渲染
        const render = () => {
            renderer.render(scene, camera)
            requestAnimationFrame(render)
        }
        render()
    </script>
</body>

</html>
全景图贴图
全景图贴图这种方式我认为是简单而且效果最好的一种。写之前需要一张全景图片,这个用单反的全景模式就能拍一张,如下:
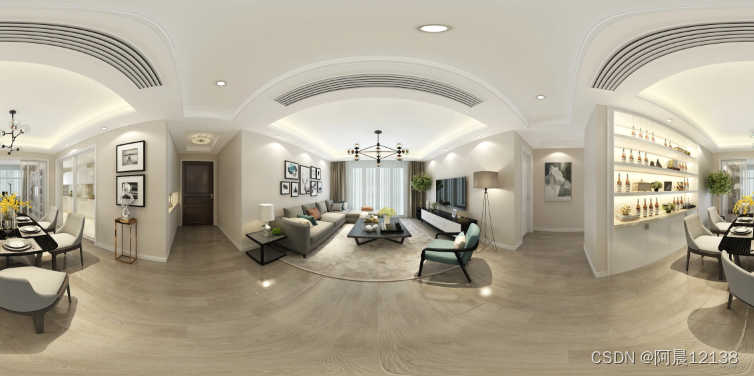
- 添加一个球体。并把全景图作为贴图贴到球体上,得到的效果如下
- 同样,把视觉放球内,贴图反转。
最终效果同上
全代码:
<html>

<head>
    <meta charset="utf-8">
    <title>My first three.js app</title>
    <style>
        body {
            margin: 0;
        }
    </style>
</head>

<body>
    <script type="importmap">
        {
            "imports": {
                "three": "./three.module.js"
            }
        }
    </script>
    <script type="module">
        import * as THREE from 'three';
        import { OrbitControls } from './OrbitControls.js'

        const scene = new THREE.Scene();

        const defaultMap = {
            x: 20,
            y: 20,
            z: 20,
        }
        const camera = new THREE.PerspectiveCamera(75, window.innerWidth / window.innerHeight, 0.1, 1000);
        const { x, y, z } = defaultMap
        camera.position.set(x, y, z)

        const renderer = new THREE.WebGLRenderer();
        renderer.setSize(window.innerWidth, window.innerHeight);
        document.body.appendChild(renderer.domElement);


        // 添加立方体  参数分别是立方体的宽度、高度和深度
        let geometry = new THREE.SphereGeometry(16, 50, 50)
        let texture = new THREE.TextureLoader().load("./assets/quanjing.webp");
        let sphereMaterial = new THREE.MeshBasicMaterial({ map: texture });
        const house = new THREE.Mesh(geometry, sphereMaterial);
        house.geometry.scale(16, 16, -16);
        scene.add(house)


        const container = renderer.domElement
        const controls = new OrbitControls(camera, container)
        controls.enableDamping = true
        controls.maxDistance = 1000

        // 渲染
        const render = () => {
            renderer.render(scene, camera)
            requestAnimationFrame(render)
        }
        render()
    </script>
</body>

</html>
扩展记录
以下代码为将纹理赋给场景背景,如何旋转调整单独几张图片:
        function sceneBackground() {
            scene = new THREE.Scene();
            var urls = [
                'https://cdn.huodao.hk/upload_img/20220620/3e532822bd445485d27677ca55a79b10.jpg?proportion=1',
                'https://cdn.huodao.hk/upload_img/20220620/cebf6fbcafdf4f5c945e0881418e34ec.jpg?proportion=1',
                'https://cdn.huodao.hk/upload_img/20220620/273081d1896fc66866842543090916d3.jpg?proportion=1',
                'https://cdn.huodao.hk/upload_img/20220620/8747f61fd2215aa748dd2afb6dce3822.jpg?proportion=1',
                'https://cdn.huodao.hk/upload_img/20220620/c34262935511d61b2e9f456b689f5c1c.jpg?proportion=1',
                'https://cdn.huodao.hk/upload_img/20220620/722d2bf88f6087800ddf116511b51e73.jpg?proportion=1'
            ];

            var cubeTextureLoader = new THREE.CubeTextureLoader();
            var textureCube = cubeTextureLoader.load(urls, function (texture) {
                // 确定要旋转的面索引,例如右侧面为第 0 个面(索引从 0 开始)
                var faceIndex = [2, 3];
                for (let i = 0; i < faceIndex.length; i++) {
                    // 获取指定面的纹理
                    var faceTexture = texture.image[faceIndex[i]];

                    // 创建一个 canvas 元素用于绘制纹理
                    var canvas = document.createElement("canvas");
                    canvas.width = faceTexture.width;
                    canvas.height = faceTexture.height;
                    var ctx = canvas.getContext("2d");

                    // 在 canvas 上进行旋转操作
                    ctx.translate(canvas.width / 2, canvas.height / 2);
                    ctx.rotate(Math.PI); // 旋转 90 度
                    ctx.drawImage(faceTexture, -canvas.width / 2, -canvas.height / 2);

                    // 将修改后的 canvas 赋值给纹理对象的指定面
                    texture.image[faceIndex[i]] = canvas;
                    texture.needsUpdate = true;
                }
                // 将纹理赋给场景背景
                scene.background = texture;
            });
            // scene.fog = new THREE.Fog(0xa0a0a0, 200, 1000); //雾
        }
new THREE.TextureLoader().load()与new THREE.CubeTextureLoader().load()的作用,区别
THREE.TextureLoader().load() 方法用于加载普通的二维纹理图像,例如贴图、照片或其他平面图像。
THREE.CubeTextureLoader().load() 方法用于加载立方体贴图,也称为环境贴图。立方体贴图是由六个纹理图像组成的贴图,每个图像代表了立体空间的一个面。