前言
贴图地址:https://share.weiyun.com/InI7dQoE
贴图来源于老陈打码教程:vr看房
实现
基本原理
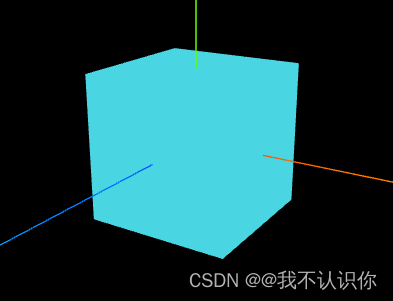
现创建一个立方体,将摄像机放在立方体内部。将立方体6个面贴上房子的贴图。
基础设置
<template>
    <div id="container"></div>
</template>

<script setup lang="ts">
import {

     onMounted } from 'vue';
import * as THREE from 'three';
// 引入轨道控制器
import {

     OrbitControls } from 'three/examples/jsm/controls/OrbitControls';

onMounted(() => {


    // 创建场景
    const scene = new THREE.Scene();
    // 创建相机
    const camera = new THREE.PerspectiveCamera(75, window.innerWidth / window.innerHeight, 1, 1000);
    // 设置相机位置
    camera.position.set(100, 100, 100);
    // 设置相机视锥体的长宽比
    camera.aspect = window.innerWidth / window.innerHeight;
    // 更新相机投影矩阵
    camera.updateProjectionMatrix();
    // 将相机添加到场景中
    scene.add(camera);
    // 初始化渲染器
    const renderer = new THREE.WebGLRenderer({


        antialias: true // 抗锯齿
    });
    // 设置渲染的尺寸
    renderer.setSize(window.innerWidth, window.innerHeight);
    // 使用渲染器,通过相机将场景渲染
    renderer.render(scene, camera);
    // 将渲染的内容输出到dom元素中
    document.getElementById('container')?.appendChild(renderer.domElement);
    // 监听窗口的变化
    window.addEventListener('resize', () => {


        // 重新设置
        camera.aspect = window.innerWidth / window.innerHeight;
        camera.updateProjectionMatrix();
        renderer.setSize(window.innerWidth, window.innerHeight);
    });

    // 创建轨道控制器
    const controls = new OrbitControls(camera, renderer.domElement);
    // 设置控制器阻尼
    controls.enableDamping = true;
    // 创建渲染函数
    const render = () => {


        controls.update();
        renderer.render(scene, camera);
        requestAnimationFrame(render);
    };
    render();

    /** *************vr看房的后续逻辑************* */
});
</script>
创建立方体并贴图
创建立方体
 // 创建并添加一个立方体
 const geometry = new THREE.BoxGeometry(3, 3, 3); // 几何体
 const material = new THREE.MeshBasicMaterial({

     color: 0x11abc3 }); // 材质
 const cube = new THREE.Mesh(geometry, material); // 物体
 scene.add(cube);
颜色贴图
 //颜色贴图
 const baseUrl = '../../../../public/imgs/living/';
 const imgList = ['4_l.jpg', '4_r.jpg', '4_u.jpg', '4_d.jpg', '4_b.jpg', '4_f.jpg'];
 const boxMaterial = [];
 imgList.forEach(item => {


     // 加载纹理
     const texture = new THREE.TextureLoader().load(baseUrl + item);
     // 创建材质
     boxMaterial.push(new THREE.MeshBasicMaterial({

     map: texture }));
 });
 cube.material = boxMaterial;
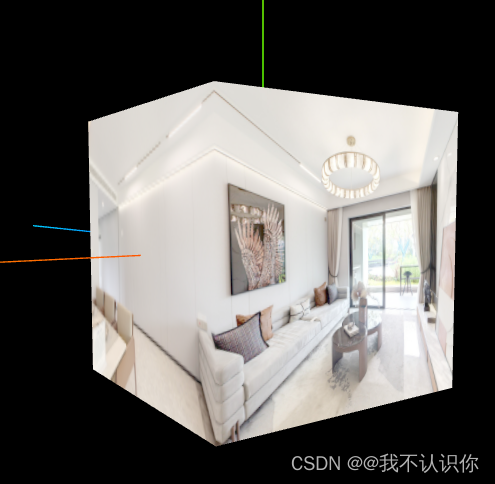
设置相机的观察方向
主要是通过修改物体的z轴来实现
 // 将物体反转,是视觉到物体内部。核心是将z轴设置为-1
cube.geometry.scale(1, 1, -1);

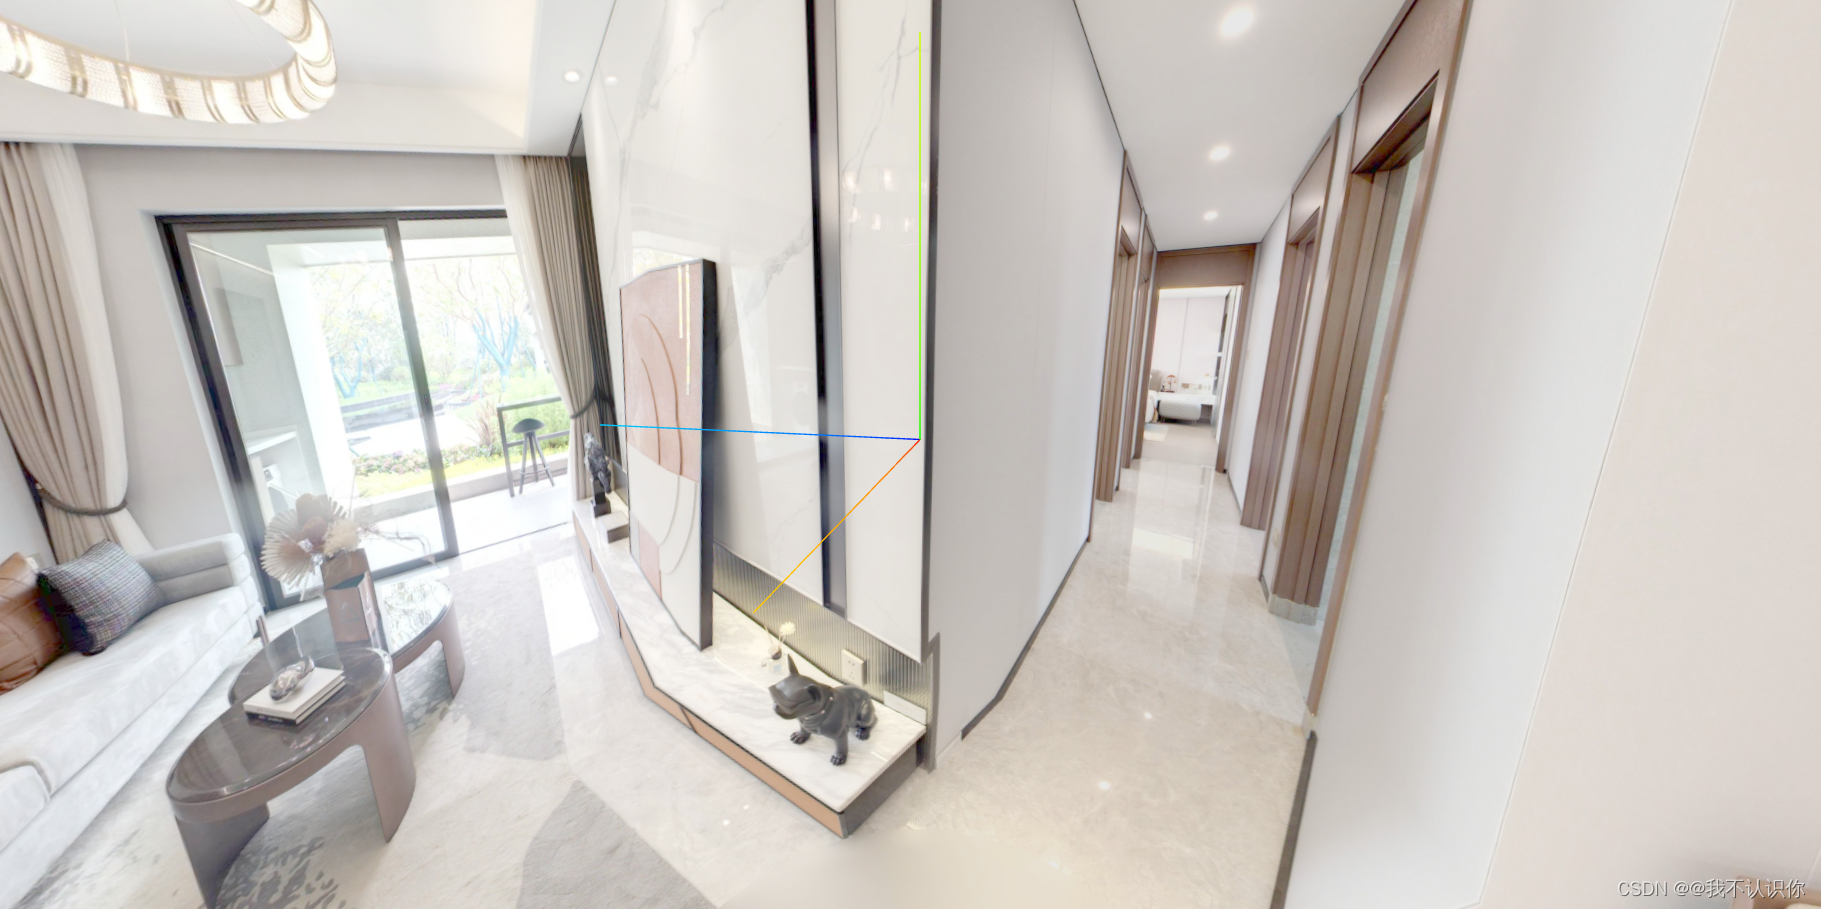
中间这块的纹理贴图有问题,简单处理一下
imgList.forEach(item => {


    // 加载纹理
    const texture = new THREE.TextureLoader().load(baseUrl + item);
    // 调整上下两个贴图
    if (item === '4_u.jpg' || item === '4_d.jpg') {


        // 旋转纹理的角度
        texture.rotation = Math.PI;
        // 设置纹理旋转中心点为平面向量中心点
        texture.center = new THREE.Vector2(0.5, 0.5);
        // 创建材质
        boxMaterial.push(new THREE.MeshBasicMaterial({

     map: texture }));
    } else {


        // 创建材质
        boxMaterial.push(new THREE.MeshBasicMaterial({

     map: texture }));
    }
});
动图太大了,就放一个普通图
补充:
如果是hdr全景图的话,可以创建一个球体,将全景图映射到球体表面。
视频中并没有讲解房间直接的切换,原理应该是有多个物体,通过点击传送点的方式,将摄像头放到另一个物体中。