目录
1 TigerBot大语言模型
虎博科技”发布自研多模态大模型TigerBot,开源模型、代码及数据,今天先搭建环境体验一下他的大模型,在github上找到:GitHub - TigerResearch/TigerBot: TigerBot: A multi-language multi-task LLM
1.1 环境安装
conda create --name tigerbot python=3.8
conda activate tigerbot
conda install pytorch torchvision torchaudio pytorch-cuda=11.7 -c pytorch -c nvidia 我服务器的cuda是11.0版本的,如果我改成pytorch-cuda=11.0发现找不到这个包。于是去CUDA Toolkit 11.7 Downloads | NVIDIA 开发者
下载了11.7的cuda,然后安装了新版本的cuda。
然后
git clone https://github.com/TigerResearch/TigerBot
cd TigerBot
pip install -r requirements.txt
1.2 模型下载
1.2.1 hugging face 网站下载
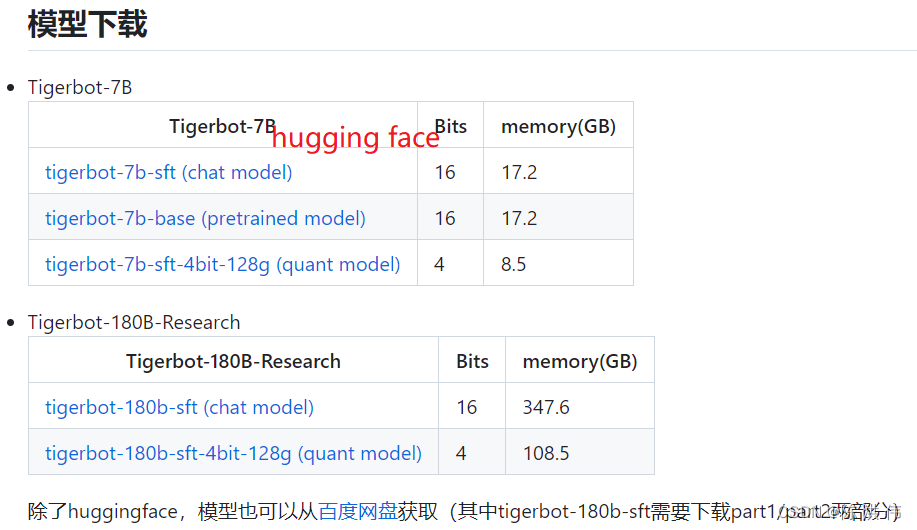
点击左边的蓝色链接就去了huggingface网站,
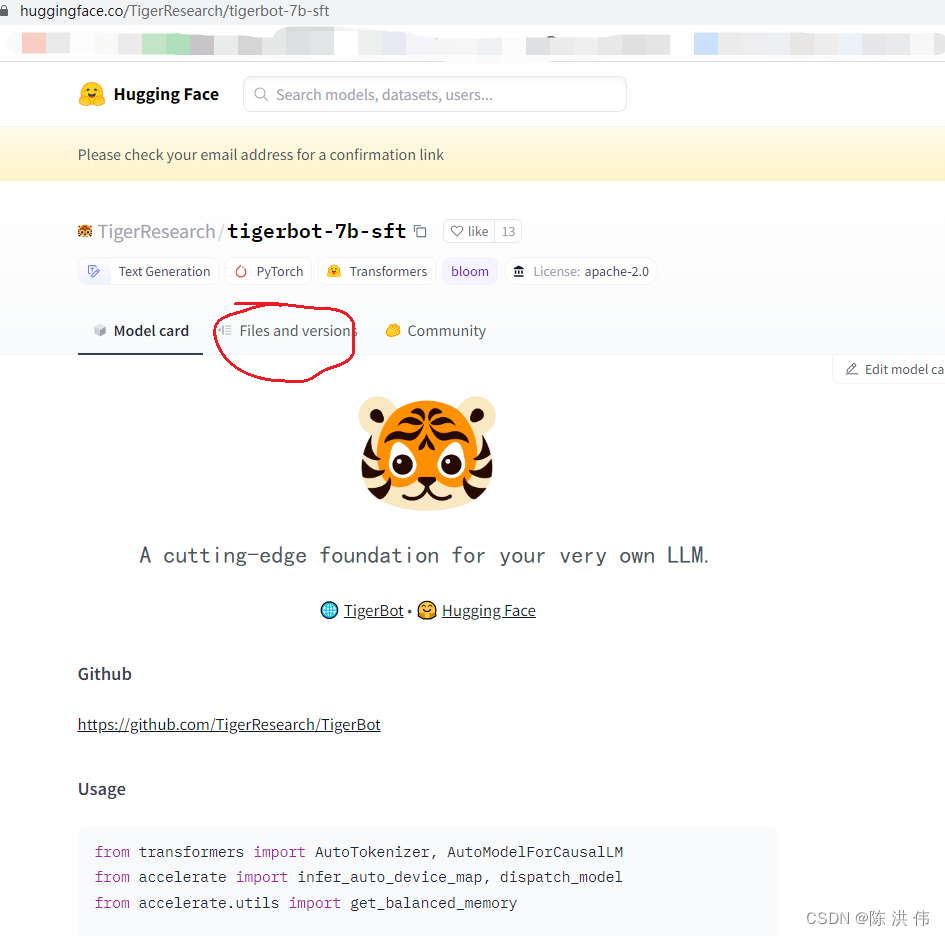
然后这时候不能直接
git clone https://huggingface.co/TigerResearch/tigerbot-7b-sft这样下载之后是不包含大文件的,要先安装lfs,然后再下载
curl -s https://packagecloud.io/install/repositories/github/git-lfs/script.deb.sh | sudo bash
sudo apt-get install git-lfs
git lfs install
git clone https://huggingface.co/TigerResearch/tigerbot-7b-sft
1.2.2 百度网盘下载
没什么好说的了,
1.3 推理
单卡推理用下面的命令
CUDA_VISIBLE_DEVICES=0 python infer.py --model_path ${MODEL_DIR}注意后面的MODEL_DIR是目录,不是模型文件名字,就把你下载的模型文件夹放这里就行了。
CUDA_VISIBLE_DEVICES=0 python infer.py --model_path ./tigerbot-7b-sft得到如下结果

我再试一下web界面的,
CUDA_VISIBLE_DEVICES=0 python ./apps/web_demo.py
loading model: tigerbot-7b-sft...
Loading checkpoint shards: 100%|███████████████████████████████████████████████████████████████████████████████████████████████| 2/2 [00:09<00:00,  4.73s/it]
Using the following device map for the model: {'': 0}
/root/anaconda3/envs/tigerbot_chw/lib/python3.8/site-packages/gradio/components/textbox.py:259: UserWarning: The `style` method is deprecated. Please set these arguments in the constructor instead.
  warnings.warn(
Running on local URL:  http://127.0.0.1:7860
直接运行CUDA_VISIBLE_DEVICES=0 python ./apps/web_demo.py然后利用公司的内网地址也不能访问,需要修改代码,将web_demo.py最后一行的
demo.queue().launch( share=False,  inbrowser=True)

修改为

demo.queue().launch(server_name="0.0.0.0", share=False,  inbrowser=True)

即可。
2 ChatGLM大语言模型
2.1环境搭建
这个是清华大学的,直接去github,
git clone https://github.com/THUDM/ChatGLM-6B
cd ChatGLM-6B
conda create -n chatglm_chw python=3.8
conda activate chatglm_chw
pip install -r requirements.txt
官网上直接就是用pip install,我还是先创建个conda环境,然后再安装依赖,
2.2 模型下载
git lfs install
git clone https://huggingface.co/THUDM/chatglm-6b
经历漫长的等待,会下载完,
2.3 推理
因为我们是自己下载了代码,所以修改cli_demo.py中的这两行为如下形式
tokenizer = AutoTokenizer.from_pretrained("./chatglm-6b", trust_remote_code=True)
model = AutoModel.from_pretrained("./chatglm-6b", trust_remote_code=True).half().cuda()
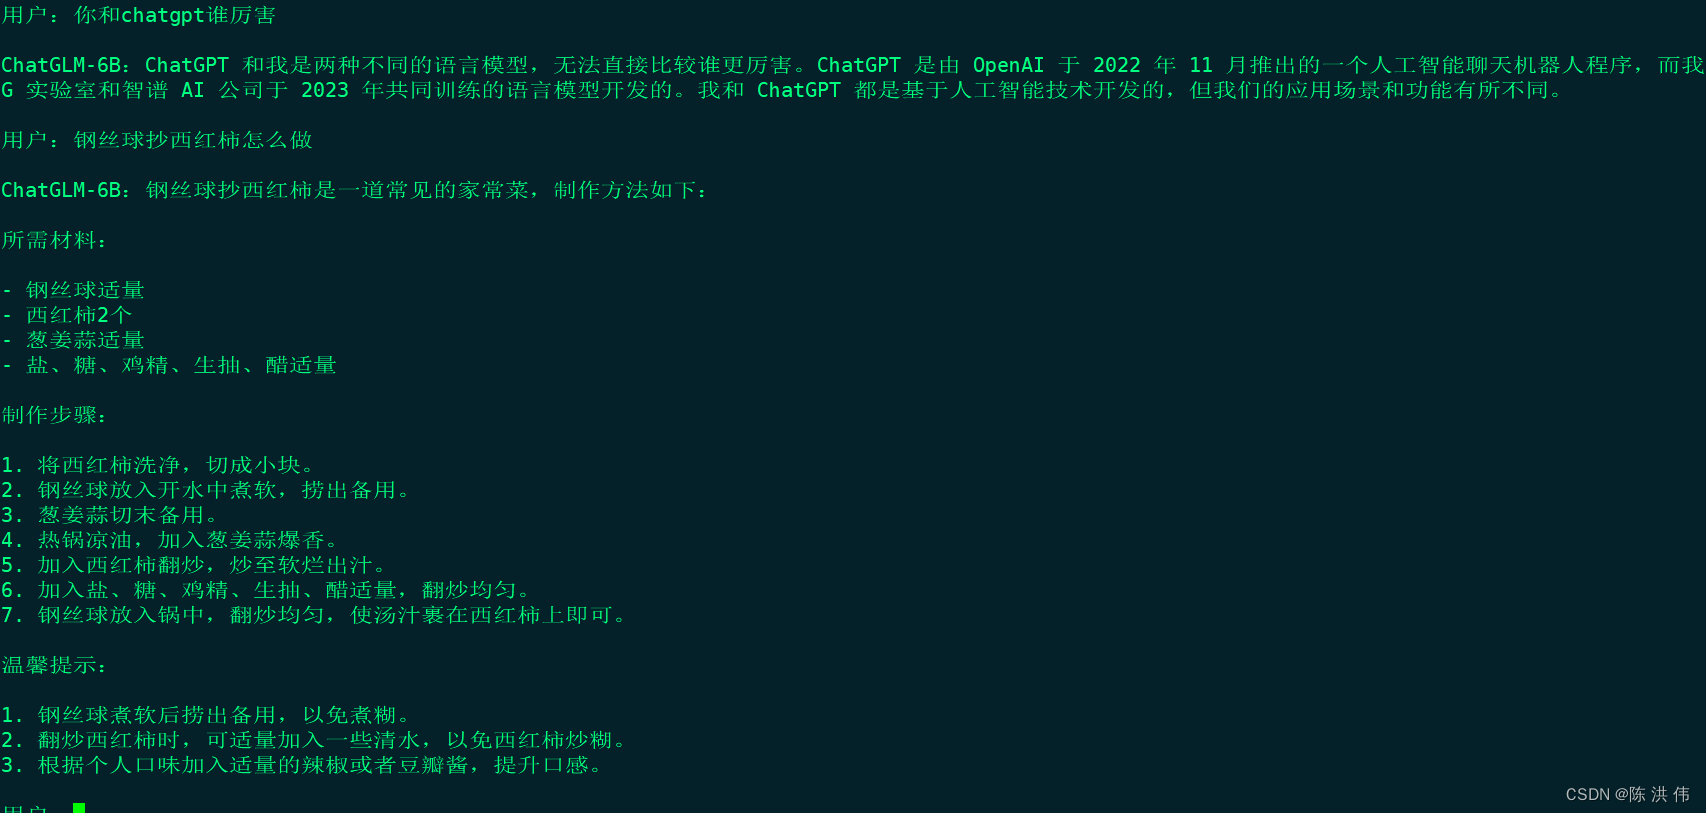
然后 python cli_demo.py可以启动程序,然后可以输入问题
参考文献:
GitHub - TigerResearch/TigerBot: TigerBot: A multi-language multi-task LLM