conda create -n chatglm python=3.8
conda activate chatglm
git clone https://github.com/THUDM/ChatGLM-6B.git
我这里是cuda11.2,根据自己的版本安装,这里是pytorch版本:https://pytorch.org/get-started/previous-versions/

pip install torch==1.10.0+cu111 torchvision==0.11.1+cu111 torchaudio==0.10.0 -f https://download.pytorch.org/whl/torch_stable.html
pip install -r requirement.txt
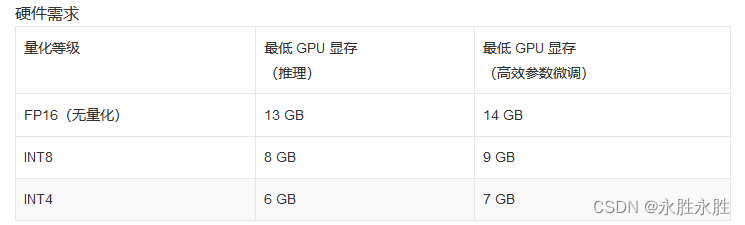
vim web_demo.py
# 增加server_name和server_port参数
demo.queue().launch(share=True,server_name="0.0.0.0",server_port=9234)
# 如果gpu太小,修改如下代码
model = AutoModel.from_pretrained("THUDM/chatglm-6b", trust_remote_code=True).half().quantize(4).cuda()
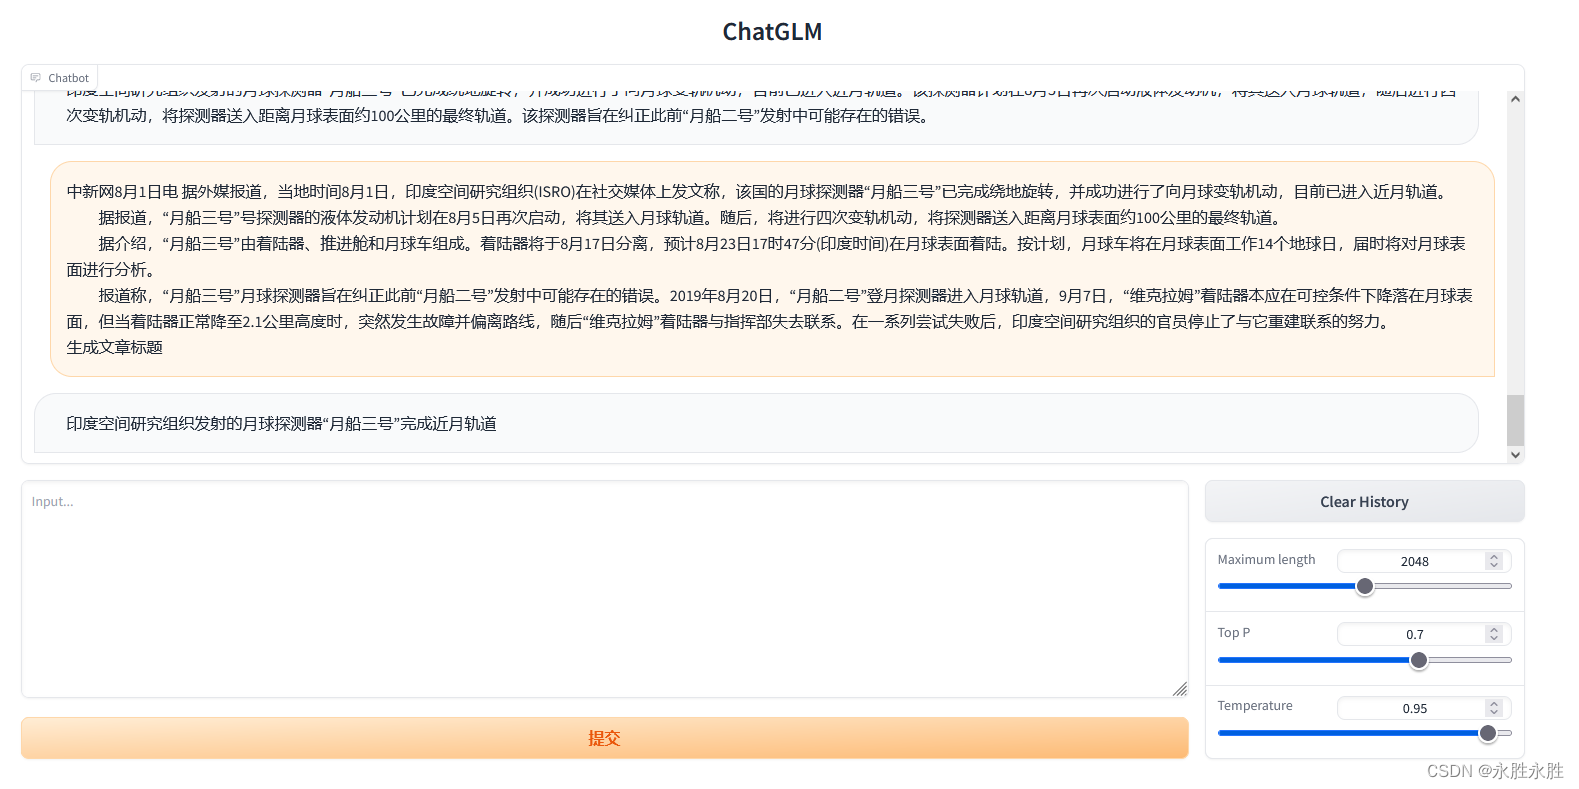
python web_demo.py