文章目录
ChatGPT所展现出的强大能力,足以使许多行业发生翻天覆地的变化,而通过微调及部署较小的模型,在一些垂直领域达到和ChatGPT相近的效果,显得尤为重要。本文从模型参数,中文,微调难度等多角度考虑,选取了ChatGLM-6B模型来进行实验,主要分为3个部分:基于ChatGLM-6B的部署,基于peft框架的LoRA微调ChatGLM-6B,基于P-Tuning v2微调ChatGLM-6B(官方)。
ChatGLM-6B 由清华大学提出,是一个开源的、支持中英双语的对话语言模型,基于 General Language Model (GLM) 架构,具有 62 亿参数。参考链接:https://github.com/THUDM/ChatGLM-6B。
本次实验所使用的配置如下:
- CPU&内存:28核(vCPU)112 GB
- 操作系统:Ubuntu_64
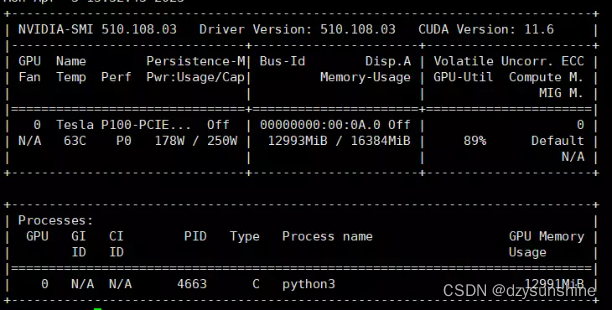
- GPU:NVIDIA Tesla P100
- 显存:16G
基于ChatGLM-6B的推理与部署
配置环境与准备
配置环境
先下载项目仓库
git clone https://github.com/THUDM/ChatGLM-6B
cd ChatGLM-6B
建议最好自己新建一个conda环境。
pip install -r requirements.txt
特别注意torch版本不低于1.10(这里安装的1.10),transformers为4.27.1。
torch的安装命令可以参考pytorch官网:https://pytorch.org/
这里使用的pip命令安装的,命令如下
pip install torch==1.10.0+cu102 torchvision==0.11.0+cu102 torchaudio==0.10.0 -f https://download.pytorch.org/whl/torch_stable.html
模型文件准备
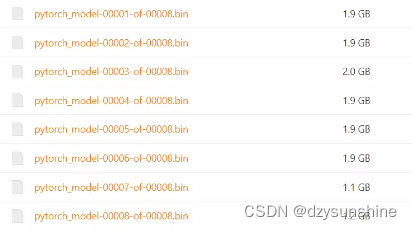
下载ChatGLM-6B模型文件
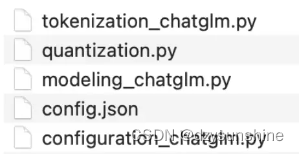
较大的8个模型文件可以从这里下载(下载速度快):https://cloud.tsinghua.edu.cn/d/fb9f16d6dc8f482596c2/
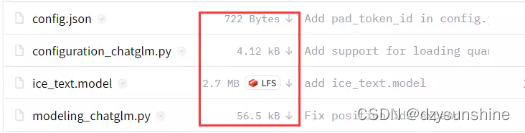
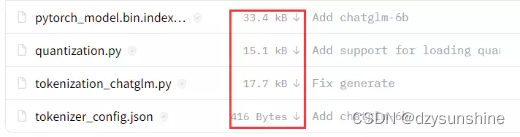
其他的小文件可以从这里下载(点击红框的下载按钮即可):https://huggingface.co/THUDM/chatglm-6b
注意这里都下载在了/data/chatglm-6b下,在后面执行代码的时候需要将文件中的模型文件路径改为自己的。
代码运行 Demo
在本地运行可以直接用下面代码:
from transformers import AutoTokenizer, AutoModel
tokenizer = AutoTokenizer.from_pretrained("/data/chatglm-6b", trust_remote_code=True)
model = AutoModel.from_pretrained("/data/chatglm-6b", trust_remote_code=True).half().cuda()
model = model.eval()
response, history = model.chat(tokenizer, "你好", history=[])
print(response)
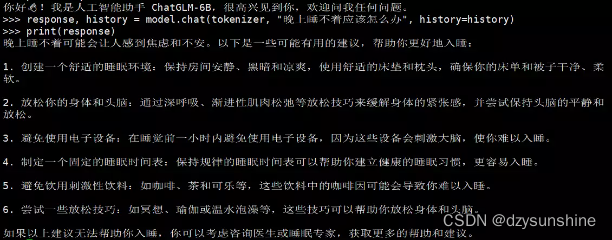
response, history = model.chat(tokenizer, "晚上睡不着应该怎么办", history=history)
print(response)
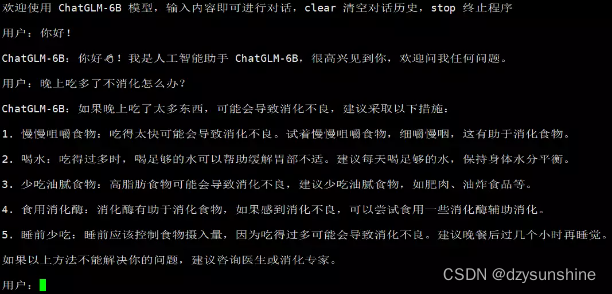
命令行 Demo
运行仓库中 cli_demo.py:
python cli_demo.py
程序会在命令行中进行交互式的对话,在命令行中输入指示并回车即可生成回复,输入 clear 可以清空对话历史,输入 stop 终止程序。
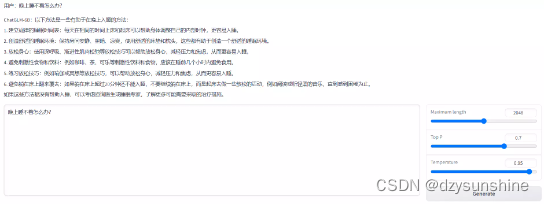
基于 Gradio 的网页版 Demo
运行web_demo.py即可(注意可以设置share=True,便于公网访问):
python web_demo.py(注意运行前确认下模型文件路径)
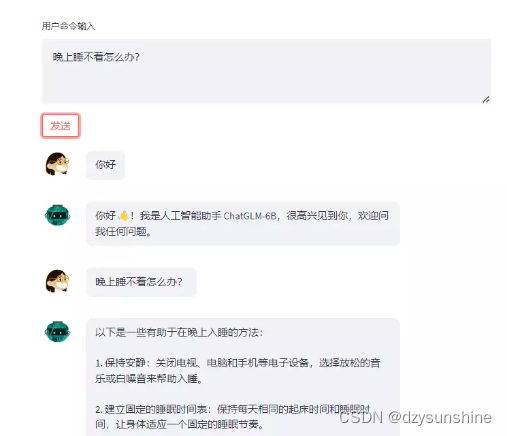
基于 Streamlit 的网页版 Demo
基于streamlit:
pip install streamlit
pip install streamlit-chat
streamlit run web_demo2.py --server.port 6006(可以将6006端口放出,便于公网访问)
默认情况下,模型以 FP16 精度加载,运行上述代码需要大概 13GB 显存。如果显存有限,还可以考虑模型量化,目前支持4/8 bit 量化。具体详见项目描述。
基于peft框架的LoRA微调ChatGLM-6B
参考链接:https://github.com/mymusise/ChatGLM-Tuning
配置环境与准备
配置环境
先下载项目仓库
git clone https://github.com/mymusise/ChatGLM-Tuning.git
创建一个python3.8的环境
conda create -n torch1.13 python==3.8
conda activate torch1.13
根据requirements.txt配置环境
pip install bitsandbytes==0.37.1
安装1.13,cuda11.6(torch官网命令)
pip install torch==1.13.1+cu116 torchvision==0.14.1+cu116 torchaudio==0.13.1 --extra-index-url https://download.pytorch.org/whl/cu116
安装其他的包
pip install accelerate==0.17.1
pip install tensorboard==2.10
pip install protobuf==3.19.5
pip install transformers==4.27.1
pip install icetk
pip install cpm_kernels==1.0.11
pip install datasets==2.10.1
pip install git+https://github.com/huggingface/peft.git # 最新版本 >=0.3.0.dev0
遇到冲突问题:icetk 0.0.5 has requirement protobuf<3.19, but you have protobuf 3.19.5.
最后装了3.18.3的protobuf,发现没有问题。
模型文件准备
模型文件在前面基于ChatGLM-6B的部署中已经准备好了,注意路径修改正确即可。
数据准备
项目中提供了数据,数据来源为 Stanford Alpaca 项目的用于微调模型的52K数据。数据生成过程可详见:https://github.com/tatsu-lab/stanford_alpaca#data-release。
alpaca_data.json包含用于微调羊驼模型的 52K 指令数据。这个 JSON 文件是一个字典列表,每个字典包含以下字段:
- instruction: str,描述了模型应该执行的任务。52K 条指令中的每一条都是唯一的。
- input: str,任务的可选上下文或输入。例如,当指令是“总结以下文章”时,输入就是文章。大约 40% 的示例有输入。
- output: str,由 生成的指令的答案text-davinci-003。
示例如下:
[
{
“instruction”: “Give three tips for staying healthy.”,
“input”: “”,
“output”: “1.Eat a balanced diet and make sure to include plenty of fruits and vegetables. \n2. Exercise regularly to keep your
body active and strong. \n3. Get enough sleep and maintain a
consistent sleep schedule.”
},
{
“instruction”: “What are the three primary colors?”,
“input”: “”,
“output”: “The three primary colors are red, blue, and yellow.”
},
…]
数据处理
数据处理,运行 cover_alpaca2jsonl.py 文件
python cover_alpaca2jsonl.py \
    --data_path data/alpaca_data.json \
    --save_path data/alpaca_data.jsonl \
处理后的文件示例如下:
{

    "text": "### Instruction:\nGive three tips for staying healthy.\n\n### Response:\n1.Eat a balanced diet and make sure to include plenty of fruits and vegetables. \n2. Exercise regularly to keep your body active and strong. \n3. Get enough sleep and maintain a consistent sleep schedule.\nEND\n"}
{

    "text": "### Instruction:\nWhat are the three primary colors?\n\n### Response:\nThe three primary colors are red, blue, and yellow.\nEND\n"}
运行 tokenize_dataset_rows.py 文件,注意:修改tokenize_dataset_rows中的model_name为自己的文件路径 :/data/chatglm-6b。
python tokenize_dataset_rows.py \
    --jsonl_path data/alpaca_data.jsonl \
    --save_path data/alpaca \
    --max_seq_length 200 \
    --skip_overlength \
微调过程
注意:运行前修改下finetune.py 文件中模型路径:/data/chatglm-6b
python finetune.py \
    --dataset_path data/alpaca \
    --lora_rank 8 \
    --per_device_train_batch_size 6 \
    --gradient_accumulation_steps 1 \
    --max_steps 52000 \
    --save_steps 1000 \
    --save_total_limit 2 \
    --learning_rate 1e-4 \
    --fp16 \
    --remove_unused_columns false \
    --logging_steps 50 \
    --output_dir output;
Nvidia驱动报错(如没有可忽略)
遇到问题,说明Nvidia驱动太老,需要更新驱动。
UserWarning: CUDA initialization: The NVIDIA driver on your system is too old (found version 10020). Please update your GPU driver by downloading and installing a new version from the URL: http://www.nvidia.com/Download/index.aspx Alternatively, go to: https://pytorch.org to install a PyTorch version that has been compiled with your version of the CUDA driver. (Triggered internally at …/c10/cuda/CUDAFunctions.cpp:109.)
解决:更新驱动即可,参考:https://zhuanlan.zhihu.com/p/59618999
BUG REPORT报错
参考:https://github.com/mymusise/ChatGLM-Tuning/issues/108
CUDA SETUP: CUDA version lower than 11 are currently not supported for LLM.int8()
考虑安装11以上的cudatooklit,参考下面链接,安装cudatooklit11.3(因为Ubuntu系统版本的原因,不能装11.6的)
https://zhuanlan.zhihu.com/p/396292888
cudatooklit下载地址:
https://developer.nvidia.cn/cuda-11.3.0-download-archive?target_os=Linux&target_arch=x86_64&Distribution=Ubuntu&target_version=16.04&target_type=runfile_local
运行代码前先执行下面命令:
export LD_LIBRARY_PATH=/usr/local/cuda-11.3/lib64:$LD_LIBRARY_PATH
export CUDA_HOME=/usr/local/cuda-11.3:$CUDA_HOME
export PATH=/usr/local/cuda-11.3/bin:$PATH
内存不够,考虑将per_device_train_batch_size设为1
python finetune.py \
    --dataset_path data/alpaca \
    --lora_rank 8 \
    --per_device_train_batch_size 1 \
    --gradient_accumulation_steps 1 \
    --max_steps 52000 \
    --save_steps 1000 \
    --save_total_limit 2 \
    --learning_rate 1e-4 \
    --fp16 \
    --remove_unused_columns false \
    --logging_steps 50 \
    --output_dir output;
报错:RuntimeError: expected scalar type Half but found Float
https://github.com/mymusise/ChatGLM-Tuning/issues?q=is%3Aissue+is%3Aopen+RuntimeError%3A+expected+scalar+type+Half+but+found+Float
解决方法:
一种是,不启用fp16, load_in_8bit设为True,可以运行,但loss为0;
一种是,启用fp16, load_in_8bit设为False,不行,应该还是显存不够的问题。至少需要24G左右的显存。
基于P-Tuning v2微调ChatGLM-6B(官方)
配置环境与准备
配置环境
地址:https://github.com/THUDM/ChatGLM-6B/tree/main/ptuning
安装以下包即可,这里直接在torch1.13的conda环境下安装的。
pip install rouge_chinese nltk jieba datasets
模型文件准备
模型文件在前面基于ChatGLM-6B的部署中已经准备好了,注意路径修改正确即可。
特别注意:如果你是之前下载的可能会报错,下面有详细的错误及说明。
数据准备
ADGEN 数据集任务为根据输入(content)生成一段广告词(summary)。
{
“content”: “类型#上衣版型#宽松版型#显瘦图案#线条衣样式#衬衫衣袖型#泡泡袖衣款式#抽绳”,
“summary”: “这件衬衫的款式非常的宽松,利落的线条可以很好的隐藏身材上的小缺点,穿在身上有着很好的显瘦效果。领口装饰了一个可爱的抽绳,漂亮的绳结展现出了十足的个性,配合时尚的泡泡袖型,尽显女性甜美可爱的气息。”
}
从 Google Drive 或者 Tsinghua Cloud 下载处理好的 ADGEN 数据集,将解压后的 AdvertiseGen 目录放到本 ptuning 目录下即可。
微调过程
修改train.sh文件。
1、去掉最后的 --quantization_bit 4。
2、注意修改模型路径,THUDM/chatglm-6b修改为/data/chatglm-6b。
3、如果你也是在云服务器上运行,建议可以加上nohup后台命令,以免断网引起训练中断的情况。
修改后train.sh文件如下:
PRE_SEQ_LEN=8
LR=1e-2

CUDA_VISIBLE_DEVICES=0 nohup python -u main.py \
    --do_train \
    --train_file AdvertiseGen/train.json \
    --validation_file AdvertiseGen/dev.json \
    --prompt_column content \
    --response_column summary \
    --overwrite_cache \
    --model_name_or_path /data/chatglm-6b \
    --output_dir output/adgen-chatglm-6b-pt-$PRE_SEQ_LEN-$LR \
    --overwrite_output_dir \
    --max_source_length 64 \
    --max_target_length 64 \
    --per_device_train_batch_size 1 \
    --per_device_eval_batch_size 1 \
    --gradient_accumulation_steps 16 \
    --predict_with_generate \
    --max_steps 3000 \
    --logging_steps 10 \
    --save_steps 1000 \
    --learning_rate $LR \
    --pre_seq_len $PRE_SEQ_LEN \
    >> log.out 2>&1 &
执行命令,开始微调
bash train.sh
报错:‘ChatGLMModel’ object has no attribute ‘prefix_encoder’(如没有可忽略)
解决:需要更新 https://huggingface.co/THUDM/chatglm-6b/tree/main 里面的几个py文件。(重新下载下这几个文件就可以了)
微调过程占用大约13G的显存。
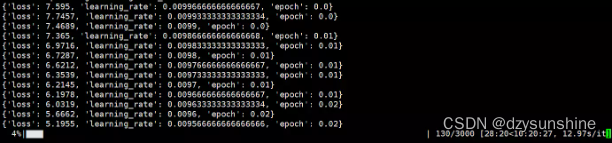
微调过程loss变化情况
微调完成后,output/adgen-chatglm-6b-pt-8-1e-2路径下会生成对应的模型文件,如下(这里生成了3个):

推理过程
只需要在加载模型的位置修改成微调后的路径即可。
将 evaluate.sh 中的 CHECKPOINT 更改为训练时保存的 checkpoint 名称,运行以下指令进行模型推理和评测:
改这一行即可:–model_name_or_path ./output/$CHECKPOINT/checkpoint-3000
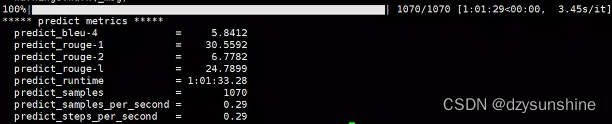
bash evaluate.sh

评测指标为中文 Rouge score 和 BLEU-4。生成的结果保存在 ./output/adgen-chatglm-6b-pt-8-1e-2/generated_predictions.txt。
我们可以对比下微调前后的效果。
以命令行 Demo为例,只需修改cli_demo.py中的模型路径为ptuning/out/adgen-chatglm-6b-pt-8-1e-2/checkpoint-3000,运行 cli_demo.py即可:
python cli_demo.py
以以下数据为例:
Input: 类型#上衣*材质#牛仔布*颜色#白色*风格#简约*图案#刺绣*衣样式#外套*衣款式#破洞
Label: 简约而不简单的牛仔外套,白色的衣身十分百搭。衣身多处有做旧破洞设计,打破单调乏味,增加一丝造型看点。衣身后背处有趣味刺绣装饰,丰富层次感,彰显别样时尚。
这件上衣的材质是牛仔布,颜色是白色,风格是简约,图案是刺绣,衣样式是外套,衣款式是破洞。
用户:根据输入生成一段广告词,输入为:类型#上衣材质#牛仔布颜色#白色风格#简约图案#刺绣衣样式#外套衣款式#破洞。
Output[微调前]:

Output[微调后]:

总结:建议使用官方提供的基于P-Tuning v2微调ChatGLM-6B的方式对自己的数据进行微调。