项目下载
下载地址:https://github.com/THUDM/ChatGLM-6B/tree/main
远程环境搭建以及配置
因为我是在服务器上运行,所以先搭建一下远程环境,如果不知道的话,可以看我之前这篇博客
详细完整pycharm远程连接服务器,远程环境配置,虚拟环境配置
(这里是从下载Anaconda3开始的,可以自行从自己需要的步骤开始)
下载环境需求
打开
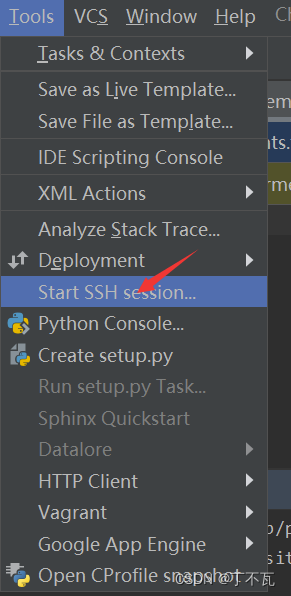
这里会出现你的远程项目地址和远程python环境地址,选择python的那一个
然后开始在terminal里,根据requirements.txt里的
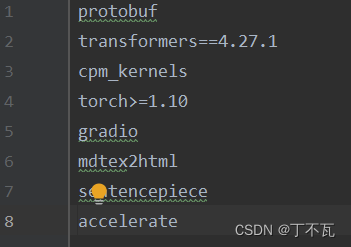
开始一一下载,例如
“pip3 install transformers==4.27.1”
不过也可点击上面的
 也可以自己在terminal输入
“pip install -r requirement.txt”
看你自己喜好
然后再把标红的都给下载了比如这种

在pip install streamlit_chat 出现问题,手动下这些
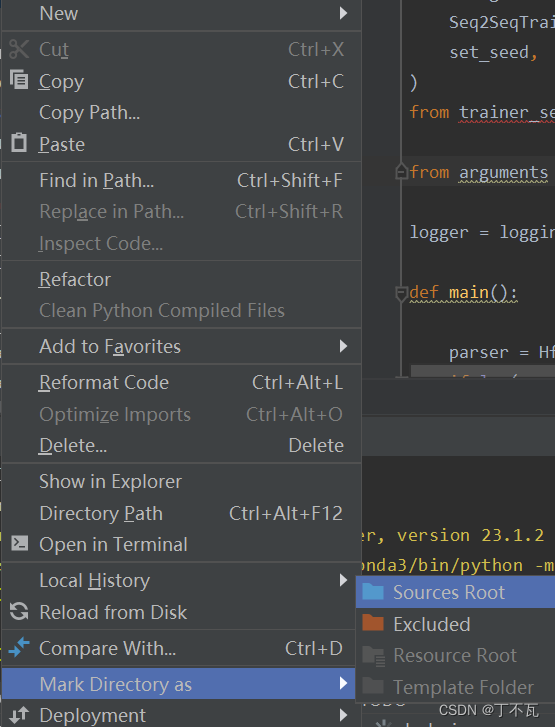
 对于下面这种标红,一看这些都是引用本文件夹中其他文件中的方法,只需要右键该文件夹选择sources Root就好了

 其他的也一样下载了
对于下面这种标红,一看这些都是引用本文件夹中其他文件中的方法,只需要右键该文件夹选择sources Root就好了
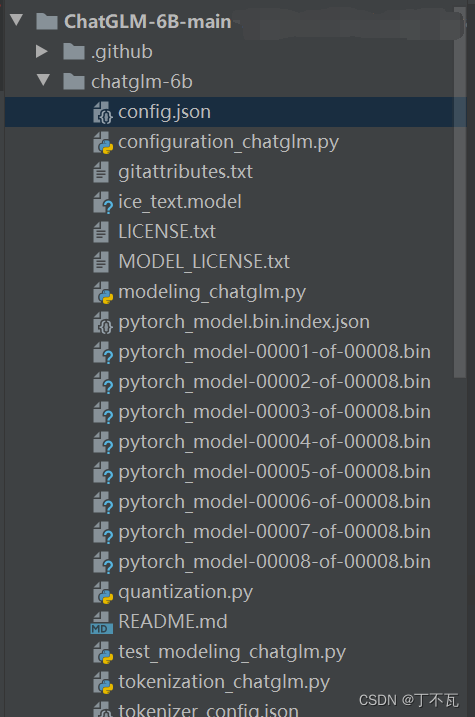
模型下载到本地
从这下载模型https://huggingface.co/THUDM/chatglm-6b/tree/main
在项目里建一个chatglm-6b的文件夹,将东西放进去
运行
随便在根目录下创一个python文件,比如我叫run.py,写入以下代码,如果你建的文件夹叫其他名字的话,把chatglm-6b改成其他名字就好
from transformers import AutoTokenizer, AutoModel
tokenizer = AutoTokenizer.from_pretrained("chatglm-6b", trust_remote_code=True)
model = AutoModel.from_pretrained("chatglm-6b", trust_remote_code=True).half().cuda()
model = model.eval()
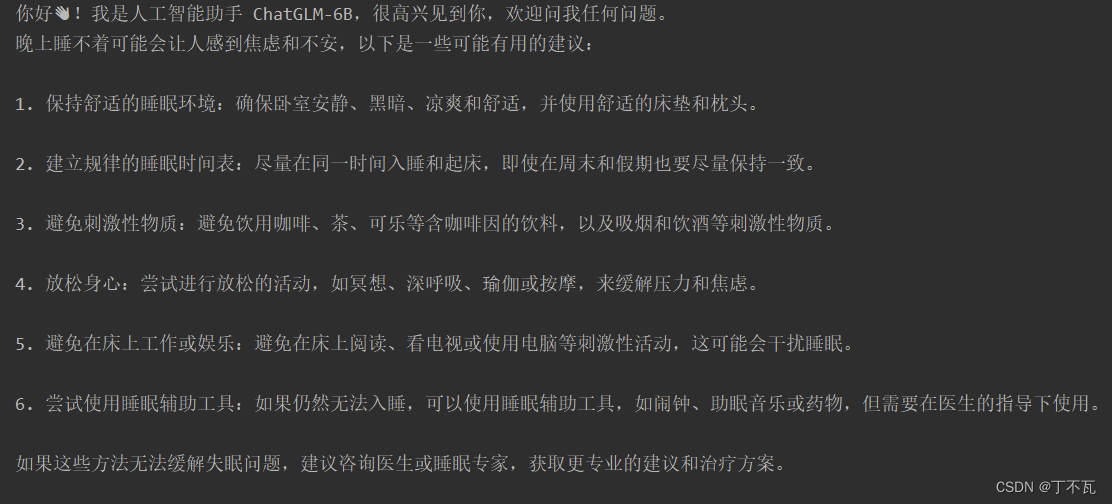
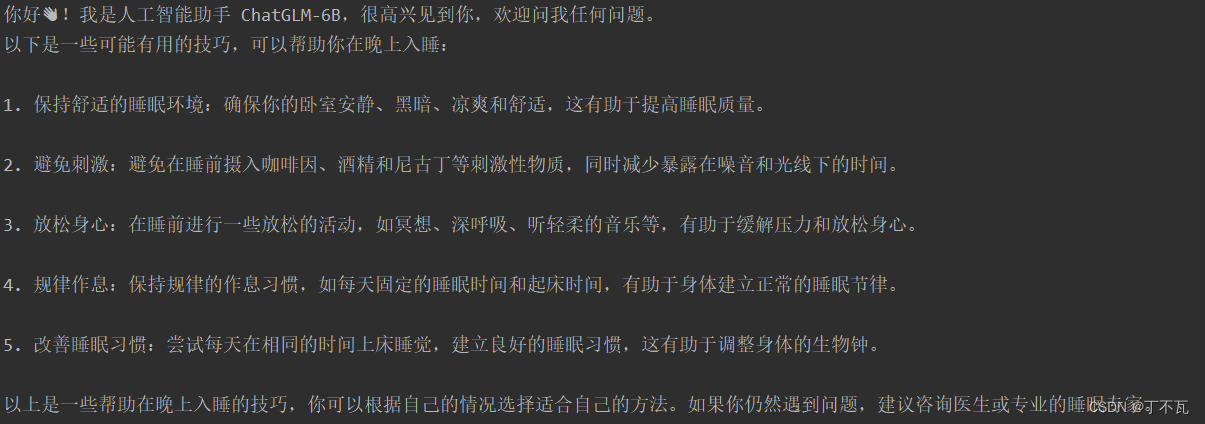
response, history = model.chat(tokenizer, "你好", history=[])
print(response)
response, history = model.chat(tokenizer, "晚上睡不着应该怎么办", history=history)
print(response)
然后运行run.py就行啦
页面运行
把web_demo.py中的这两行地址改成chatglm-6b
tokenizer = AutoTokenizer.from_pretrained("chatglm-6b", trust_remote_code=True)
model = AutoModel.from_pretrained("chatglm-6b", trust_remote_code=True).half().cuda()
右键运行得到
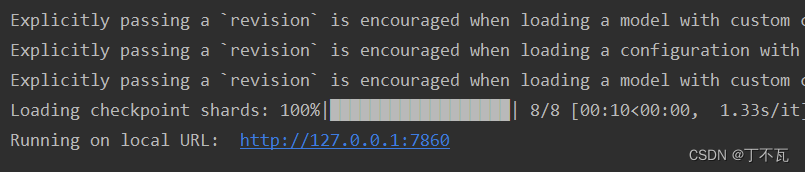 复制这个网址就行了,不过这是在服务器运行的,在本机打开没用
问题
如果报错为内存不足
把要运行的代码的
tokenizer = AutoTokenizer.from_pretrained("chatglm-6b", trust_remote_code=True)
model = AutoModel.from_pretrained("chatglm-6b", trust_remote_code=True).half().cuda()
改成
tokenizer = AutoTokenizer.from_pretrained("chatglm-6b", trust_remote_code=True)
model = AutoModel.from_pretrained("chatglm-6b", trust_remote_code=True).quantize(4).half().cuda()
同样能返回这些内容
后续
待添加