Torch安装的方法

学习方法
- 1.边用边学,torch只是一个工具,真正用,查的过程才是学习的过程
- 2.直接就上案例就行,先来跑,遇到什么来解决什么
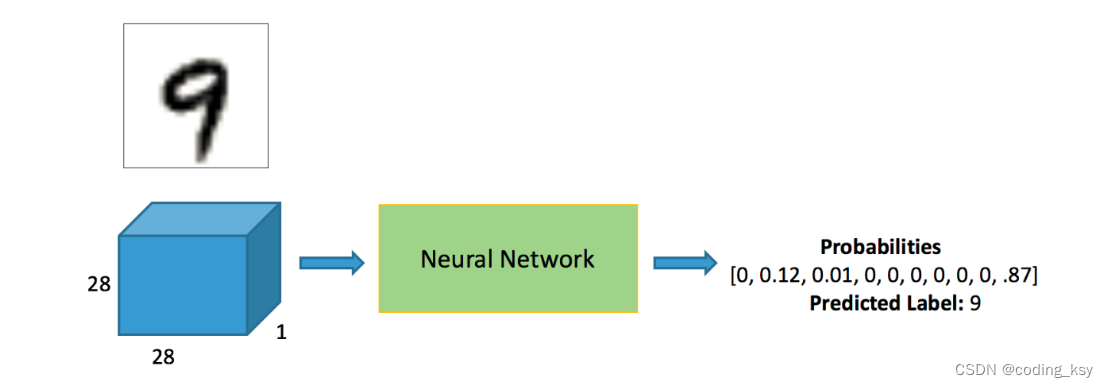
Mnist分类任务:
-
网络基本构建与训练方法,常用函数解析
-
torch.nn.functional模块
-
nn.Module模块
读取Mnist数据集
- 会自动进行下载
# 查看自己的torch的版本
import torch
print(torch.__version__)
%matplotlib inline
# 前两步,不用管是在网上下载数据,后续的我们都是在本地的数据进行操作
from pathlib import Path
import requests

DATA_PATH = Path("data")
PATH = DATA_PATH / "mnist"

PATH.mkdir(parents=True, exist_ok=True)

URL = "http://deeplearning.net/data/mnist/"
FILENAME = "mnist.pkl.gz"

if not (PATH / FILENAME).exists():
        content = requests.get(URL + FILENAME).content
        (PATH / FILENAME).open("wb").write(content)
import pickle
import gzip

with gzip.open((PATH / FILENAME).as_posix(), "rb") as f:
        ((x_train, y_train), (x_valid, y_valid), _) = pickle.load(f, encoding="latin-1")
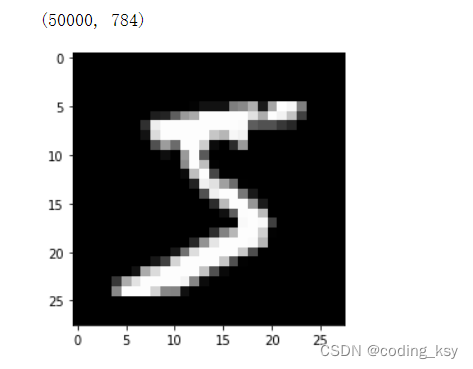
784是mnist数据集每个样本的像素点个数
from matplotlib import pyplot
import numpy as np

pyplot.imshow(x_train[0].reshape((28, 28)), cmap="gray")
print(x_train.shape)
全连接神经网络的结构
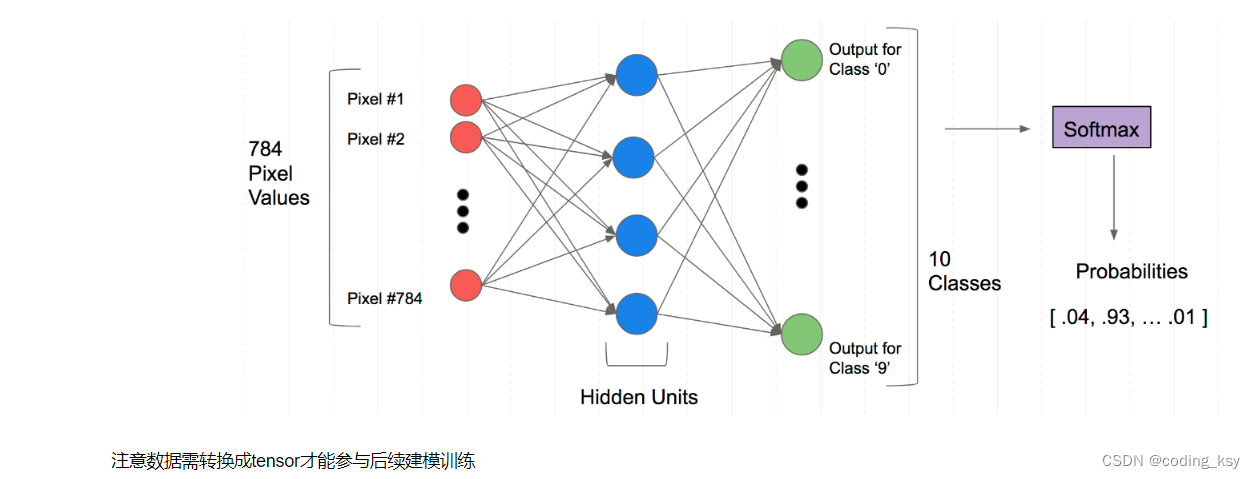 注意数据需转换成tensor才能参与后续建模训练
import torch

x_train, y_train, x_valid, y_valid = map(
    torch.tensor, (x_train, y_train, x_valid, y_valid)
)
n, c = x_train.shape
x_train, x_train.shape, y_train.min(), y_train.max()
print(x_train, y_train)
print(x_train.shape)
print(y_train.min(), y_train.max())
torch.nn.functional 很多层和函数在这里都会见到
torch.nn.functional中有很多功能,后续会常用的。那什么时候使用nn.Module,什么时候使用nn.functional呢?一般情况下,如果模型有可学习的参数,最好用nn.Module,其他情况nn.functional相对更简单一些
import torch.nn.functional as F

loss_func = F.cross_entropy

def model(xb):
    return xb.mm(weights) + bias
bs = 64
xb = x_train[0:bs]  # a mini-batch from x
yb = y_train[0:bs]
weights = torch.randn([784, 10], dtype = torch.float,  requires_grad = True)
bs = 64
bias = torch.zeros(10, requires_grad=True)

print(loss_func(model(xb), yb))
创建一个model来更简化代码
- 必须继承nn.Module且在其构造函数中需调用nn.Module的构造函数
- 无需写反向传播函数,nn.Module能够利用autograd自动实现反向传播
- Module中的可学习参数可以通过named_parameters()或者parameters()返回迭代器
from torch import nn

class Mnist_NN(nn.Module):
    # 构造函数
    def __init__(self):
        super().__init__()
        self.hidden1 = nn.Linear(784, 128)
        self.hidden2 = nn.Linear(128, 256)
        self.out  = nn.Linear(256, 10)
        self.dropout = nn.Dropout(0.5)
    #前向传播自己定义,反向传播是自动进行的
    def forward(self, x):
        x = F.relu(self.hidden1(x))
        x = self.dropout(x)
        x = F.relu(self.hidden2(x))
        x = self.dropout(x)
        #x = F.relu(self.hidden3(x))
        x = self.out(x)
        return x
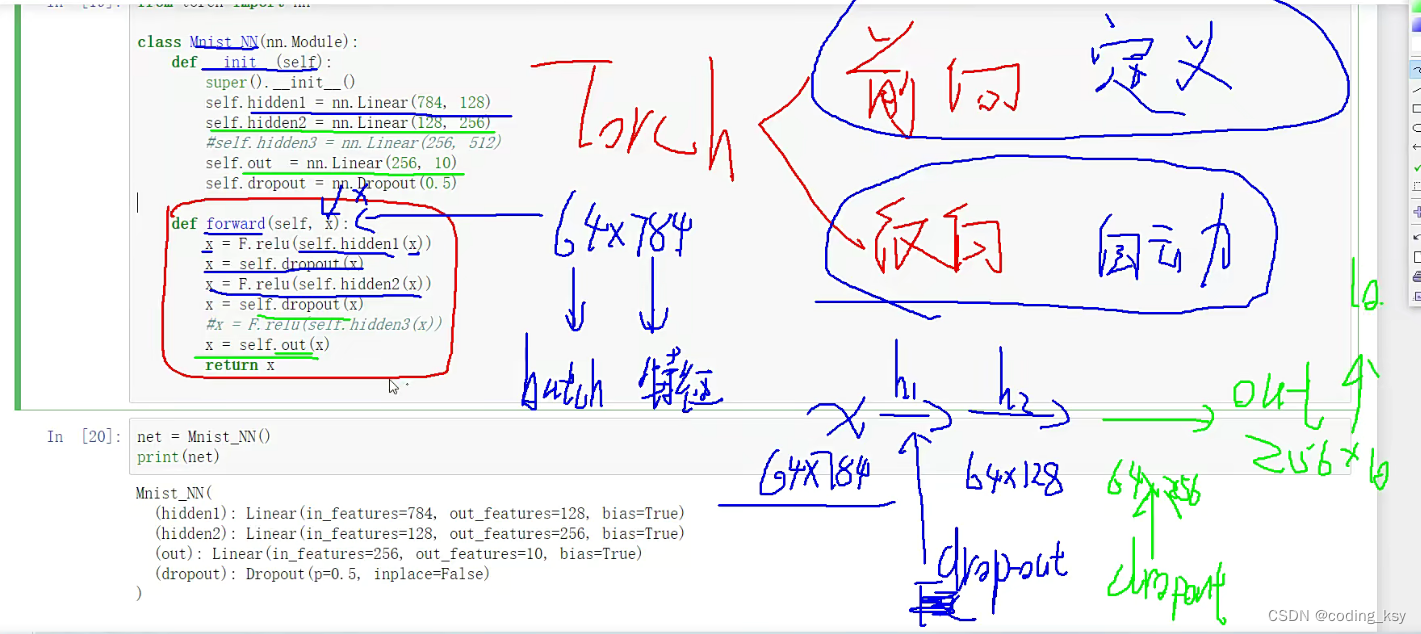
net = Mnist_NN()
print(net)
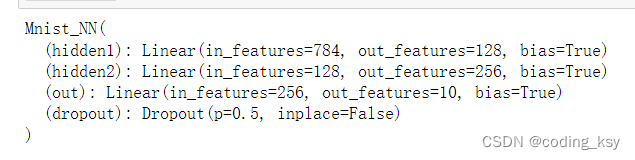
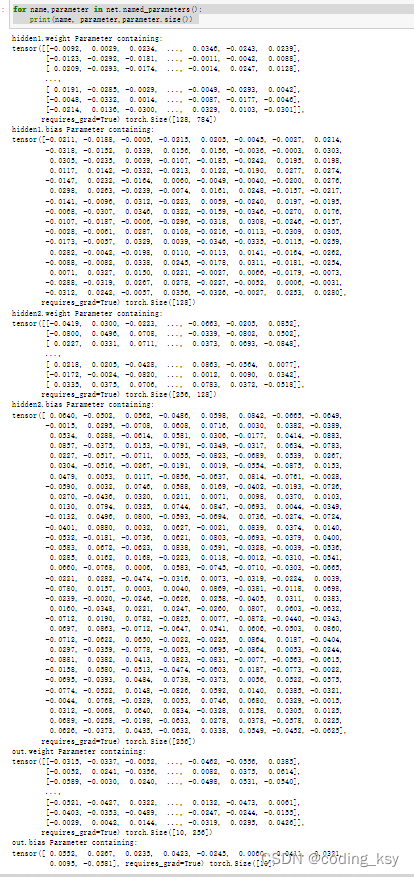
可以打印我们定义好名字里的权重和偏置项
for name,parameter in net.named_parameters():
    print(name, parameter,parameter.size())
使用TensorDataset和DataLoader来简化
from torch.utils.data import TensorDataset
from torch.utils.data import DataLoader

train_ds = TensorDataset(x_train, y_train)
train_dl = DataLoader(train_ds, batch_size=bs, shuffle=True)

valid_ds = TensorDataset(x_valid, y_valid)
valid_dl = DataLoader(valid_ds, batch_size=bs * 2)
def get_data(train_ds, valid_ds, bs):
    return (
        DataLoader(train_ds, batch_size=bs, shuffle=True),
        DataLoader(valid_ds, batch_size=bs * 2),
    )
- 一般在训练模型时加上model.train(),这样会正常使用Batch Normalization和 Dropout
- 测试的时候一般选择model.eval(),这样就不会使用Batch Normalization和 Dropout
import numpy as np
def fit(steps, model, loss_func, opt, train_dl, valid_dl):
for step in range(steps):
model.train() # 训练的时候需要更新权重参数
for xb, yb in train_dl:
loss_batch(model, loss_func, xb, yb, opt)
model.eval() # 验证的时候不需要更新权重参数
with torch.no_grad():
losses, nums = zip(
*[loss_batch(model, loss_func, xb, yb) for xb, yb in valid_dl]
)
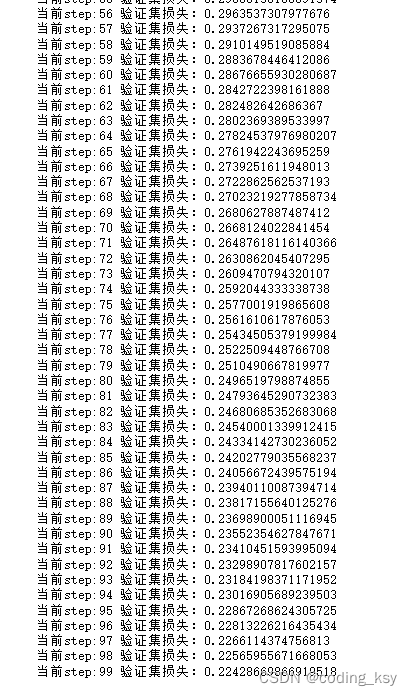
val_loss = np.sum(np.multiply(losses, nums)) / np.sum(nums)
print('当前step:'+str(step), '验证集损失:'+str(val_loss))
zip的用法
a = [1,2,3]
b = [4,5,6]
zipped = zip(a,b)
print(list(zipped))
a2,b2 = zip(*zip(a,b))
print(a2)
print(b2)
from torch import optim
def get_model():
    model = Mnist_NN()
    return model, optim.SGD(model.parameters(), lr=0.001)
def loss_batch(model, loss_func, xb, yb, opt=None):
    loss = loss_func(model(xb), yb)

    if opt is not None:
        loss.backward()
        opt.step()
        opt.zero_grad()

    return loss.item(), len(xb)
三行搞定!
train_dl,valid_dl = get_data(train_ds, valid_ds, bs)
model, opt = get_model()
fit(100, model, loss_func, opt, train_dl, valid_dl)
correct = 0
total = 0
for xb,yb in valid_dl:
    outputs = model(xb)
    _,predicted = torch.max(outputs.data,1)
    total += yb.size(0)
    correct += (predicted == yb).sum().item()
print(f"Accuracy of the network the 10000 test imgaes {

      100*correct/total}")
![在这里插入图片描述](https://img-blog.csdnimg.cn/89e5e749b680426c9700aac9f93bf76a.png
后期有兴趣的小伙伴们可以比较SGD和Adam两种优化器,哪个效果更好一点
-SGD 20epoch 85%
-Adam 20epoch 85%