引言
本篇主要想关于openvino针对于yolov5的一些转换流程,以及会带有查阅资料了解到的openvino的相关demo与一些需要注意到的点进行总结。
openvino介绍
关于openvino,有人说是基于CPU上最快的模型加速套件,这当然是显而易见的,因为在我印象里除了Intel本尊,没有啥企业会做这种事情了,emmm。。。openvino相较于传统的cv pipeline,它具有的优势如下:

不过这对比的对象就有点老了,这里也只是说明,openvino将优化了 OpenCV 中实现的传统计算机视觉算法中的许多调用,结合自己套件的很多东西,达到了1+1>2的目的,另外下面这张图更是说明了openvino所做的优化,即绿色框——model optimizer,官网下有针对它的进一步分析,这里不再引述。

其实如果想更多了解openvino的一些前因后果,可以去报名openvino的初级考试,大概有12次测试,每次10个题,如果是做视频相关的业务,题目都比较简单,常识问题,至于关于openvino本身的,我是看完第一个PPT感觉没啥东西,就跑去官网大致过了一遍,另外,有些题目能从OpenVINO初级认证课程选择题 查到,大概1/2个小时左右,就能拿到证书,但是我是参加的本次联名活动,发现还不如网易云证书,没看见防伪,emmm。。。

openvino安装
这里推荐直接使用官方推荐的一个git开源项目 openvino_notebooks,各种安装方式已经在README.md中提到,如下:
链接为:https://github.com/openvinotoolkit/openvino_notebooks/blob/main/README.md#-installation-guide
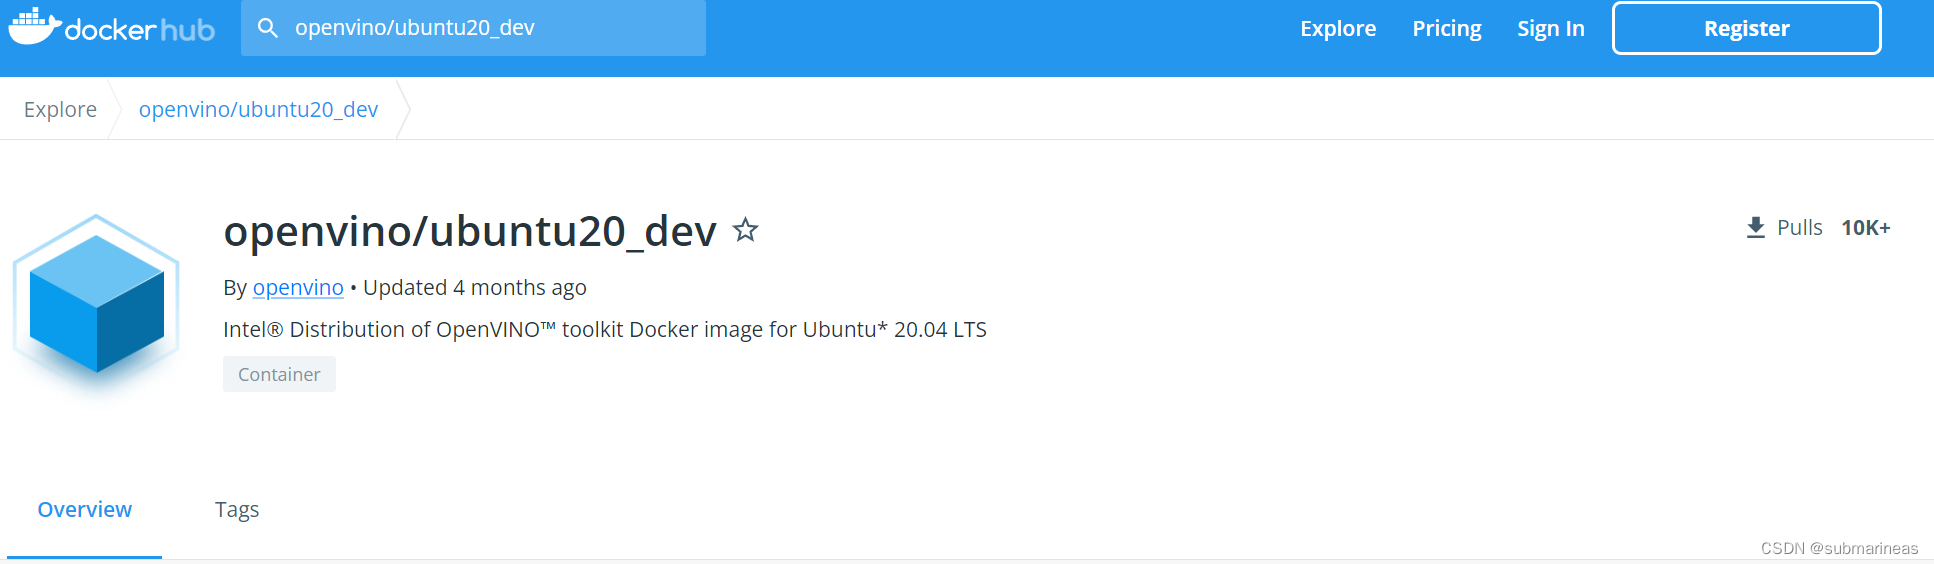
可以选择从安装包开始下载安装,我这里使用的方式是基于docker镜像。
dockerhub中openvino开源了最近更新的docker镜像,我这里直接根据当前系统选择ubuntu 20:
拉下来后,因为系统插的nvidia的卡,所以不需要指定任何东西,可以跟它提示的那样,选择CPU启动:
docker run -it --rm --net=host --name openvino openvino/ubuntu20_dev:latest
这里只需要加net参数,将docker默认的网桥bridge模式改成host,方便后面yolov5进行netron可视化,在宿主机之外能进去。
至此,环境已经部署好,下面就是环境测试。
openvino镜像测试
首先这个镜像有 5.49GB,但是里面还是有很多东西没有,更新apt后安装vim等必备插件,查阅发现pip包匹配到的openvino系环境为:

这里就会发现一个问题,镜像提供的opencv版本并没有经过cmake编译,而是直接pip install的,想要辨别这个问题很简单,进入python命令行:
>>> import cv2
>>> print(cv2.getBuildInformation())
输出数据选取一部分为:
>>> import cv2
>>> print(cv2.getBuildInformation())

General configuration for OpenCV 4.5.5 =====================================
  Version control:               unknown

  Platform:
    Host:                        Linux 5.13.0-1025-azure x86_64
    CMake:                       3.22.5
    CMake generator:             Unix Makefiles
    CMake build tool:            /bin/gmake
    Configuration:               Release

  C/C++:
    Built as dynamic libs?:      NO
    C++ standard:                11
    C++ Compiler:                /usr/lib/ccache/compilers/c++  (ver 10.2.1)
    C++ flags (Release):         -Wl,-strip-all   -fsigned-char -W -Wall -Wreturn-type -Wnon-virtual-dtor -Waddress -Wsequence-point -Wformat -Wformat-security -Wmissing-declarations -Wundef -Winit-self -Wpointer-arith -Wshadow -Wsign-promo -Wuninitialized -Wsuggest-override -Wno-delete-non-virtual-dtor -Wno-comment -Wimplicit-fallthrough=3 -Wno-strict-overflow -fdiagnostics-show-option -Wno-long-long -pthread -fomit-frame-pointer -ffunction-sections -fdata-sections  -msse -msse2 -msse3 -fvisibility=hidden -fvisibility-inlines-hidden -O3 -DNDEBUG  -DNDEBUG
    C++ flags (Debug):           -Wl,-strip-all   -fsigned-char -W -Wall -Wreturn-type -Wnon-virtual-dtor -Waddress -Wsequence-point -Wformat -Wformat-security -Wmissing-declarations -Wundef -Winit-self -Wpointer-arith -Wshadow -Wsign-promo -Wuninitialized -Wsuggest-override -Wno-delete-non-virtual-dtor -Wno-comment -Wimplicit-fallthrough=3 -Wno-strict-overflow -fdiagnostics-show-option -Wno-long-long -pthread -fomit-frame-pointer -ffunction-sections -fdata-sections  -msse -msse2 -msse3 -fvisibility=hidden -fvisibility-inlines-hidden -g  -O0 -DDEBUG -D_DEBUG
    C Compiler:                  /usr/lib/ccache/compilers/cc
    C flags (Release):           -Wl,-strip-all   -fsigned-char -W -Wall -Wreturn-type -Waddress -Wsequence-point -Wformat -Wformat-security -Wmissing-declarations -Wmissing-prototypes -Wstrict-prototypes -Wundef -Winit-self -Wpointer-arith -Wshadow -Wuninitialized -Wno-comment -Wno-strict-overflow -fdiagnostics-show-option -Wno-long-long -pthread -fomit-frame-pointer -ffunction-sections -fdata-sections  -msse -msse2 -msse3 -fvisibility=hidden -O3 -DNDEBUG  -DNDEBUG
    C flags (Debug):             -Wl,-strip-all   -fsigned-char -W -Wall -Wreturn-type -Waddress -Wsequence-point -Wformat -Wformat-security -Wmissing-declarations -Wmissing-prototypes -Wstrict-prototypes -Wundef -Winit-self -Wpointer-arith -Wshadow -Wuninitialized -Wno-comment -Wno-strict-overflow -fdiagnostics-show-option -Wno-long-long -pthread -fomit-frame-pointer -ffunction-sections -fdata-sections  -msse -msse2 -msse3 -fvisibility=hidden -g  -O0 -DDEBUG -D_DEBUG
    Linker flags (Release):      -Wl,--exclude-libs,libippicv.a -Wl,--exclude-libs,libippiw.a -L/root/ffmpeg_build/lib  -Wl,--gc-sections -Wl,--as-needed -Wl,--no-undefined
    Linker flags (Debug):        -Wl,--exclude-libs,libippicv.a -Wl,--exclude-libs,libippiw.a -L/root/ffmpeg_build/lib  -Wl,--gc-sections -Wl,--as-needed -Wl,--no-undefined
    ccache:                      YES
    Precompiled headers:         NO
    Extra dependencies:          /lib64/libopenblas.so Qt5::Core Qt5::Gui Qt5::Widgets Qt5::Test Qt5::Concurrent /usr/local/lib/libpng.so /lib64/libz.so dl m pthread rt
    3rdparty dependencies:       libprotobuf ade ittnotify libjpeg-turbo libwebp libtiff libopenjp2 IlmImf quirc ippiw ippicv

  OpenCV modules:
    To be built:                 calib3d core dnn features2d flann gapi highgui imgcodecs imgproc ml objdetect photo python3 stitching video videoio
    Disabled:                    world
    Disabled by dependency:      -
    Unavailable:                 java python2 ts
    Applications:                -
    Documentation:               NO
    Non-free algorithms:         NO

  Other third-party libraries:
    Intel IPP:                   2020.0.0 Gold [2020.0.0]
           at:                   /io/_skbuild/linux-x86_64-3.6/cmake-build/3rdparty/ippicv/ippicv_lnx/icv
    Intel IPP IW:                sources (2020.0.0)
              at:                /io/_skbuild/linux-x86_64-3.6/cmake-build/3rdparty/ippicv/ippicv_lnx/iw
    VA:                          NO
    Lapack:                      YES (/lib64/libopenblas.so)
    Eigen:                       NO
    Custom HAL:                  NO
    Protobuf:                    build (3.19.1)

  OpenCL:                        YES (no extra features)
    Include path:                /io/opencv/3rdparty/include/opencl/1.2
    Link libraries:              Dynamic load

  Python 3:
    Interpreter:                 /opt/python/cp36-cp36m/bin/python3.6 (ver 3.6.15)
    Libraries:                   libpython3.6m.a (ver 3.6.15)
    numpy:                       /opt/python/cp36-cp36m/lib/python3.6/site-packages/numpy/core/include (ver 1.13.3)
    install path:                python/cv2/python-3

  Python (for build):            /bin/python2.7

  Java:
    ant:                         NO
    JNI:                         NO
    Java wrappers:               NO
    Java tests:                  NO

  Install to:                    /io/_skbuild/linux-x86_64-3.6/cmake-install
-----------------------------------------------------------------
删了基于video请求头,ffmpeg等插件的编译数据,很明显可以看出,Intel做这个环境的时候并没有使用cmake,可能是dockerfile省略了编译过程,为了加速RUN 的时间,那么如果使用这个版本去跑cv2.dnn.readNet是会报错的,因为opencv没加这种东西,从代码角度解决可以使用IECore 代替:
import cv2 as cv

net = cv.dnn.readNet('face-detection-adas-0001.xml','tection-adas-0001.bin')
# Specify target device (CPU)
net.setPreferableTarget(cv.dnn.DNN_TARGET_CPU)

"""替换readNet为read_network"""
from openvino.inference_engine import IECore
ie = IECore()
net = ie.read_network('face-detection-adas-0001.xml', 'face-detection-adas-0001.bin')
跑第一种方式,报错为:
Traceback (most recent call last):
File "facedetection.py", line 16, in
'pruned_mobilenet_reduced_ssd_shared_weights/dldt/face-detection-adas-0001.xml')
cv2.error: OpenCV(4.0.0) /io/opencv/modules/dnn/src/dnn.cpp:2538: error: (-2:Unspecified error) Build OpenCV with Inference Engine to enable loading models from Model Optimizer. in function 'readFromModelOptimizer
不过第二种我测试后发现IECore 只是完成了初始化,后面的写法都跟opencv有很大区别了,具体可以看 Python开发深度学习推理程序OpenCV版和OpenVINO版对比 ,虽然时间都差不多。
如果不想代码全改,可以选用除代码外的第二种方式,卸载掉直接pip安装的opencv,直接安装opencv-python-inference-engine,对于这个包,我也是看openvino的issue的时候发现的,不清楚除了对 pipeline 完善了外,还加了些啥,但再跑cv.dnn.readNet就没有问题了。

这里opencv-python与opencv-python-inference-engine 两个包为我后来安装,并且这俩包是不兼容的,opencv-python 优先级高于后者,因为pip匹配包是根据最小前缀规则,默认刚进去opencv环境就如上图是4.5.5.64,因为openvino 2022需要4.5+的opencv,4.6是不行的,我是因为跑了yolov5项目默认替换的,后面的yolo适配demo就不需要inference-engine这个包了,卸不卸载无所谓。
第三种方式就是根据官方的文档说明,卸载opencv,拉下opencv源码cmake加入-DWITH_INF_ENGINE=ON,这里的cmake数据如果出现正确的数据就能编译了,下列信息引用自issue 94:
https://github.com/openvinotoolkit/open_model_zoo/issues/94
-- Detected InferenceEngine: cmake package
...
--     Inference Engine:            YES (2019010000 / 1.6.0)
--                 libs:            /opt/intel/openvino_2019.1.094/deployment_tools/inference_engine/lib/intel64/libinference_engine.so
--             includes:            /opt/intel/openvino_2019.1.094/deployment_tools/inference_engine/include
关于opencv的编译问题,可以看我之前的笔记,这里就不再详述了:
openvino适配yolov5
这里选用的版本是openvino 2022,yolov5为v6.0版本,主要参考如下两个GitHub项目:
https://github.com/violet17/yolov5_demo
https://github.com/Chen-MingChang/pytorch_YOLO_OpenVINO_demo
首先按照步骤,先搭建yolo环境。
yolov5环境搭建
在 Linux 终端运行以下命令:
$ git clone https://github.com/ultralytics/yolov5
如果没指定,默认拉的是6.1版本的yolov5,这也是我目前适配的。拉下代码后,安装相应的包:
$ cd yolov5/
$ pip install -r requirements.txt
$ pip install onnx
到目前为止,YOLOv5 存储库中有三个标签。而YOLOv5由于主干不同,包括YOLOv5s、YOLOv5m、YOLOv5l和YOLOv5x。这里我们使用标签 v3.0 中的 YOLOv5s 进行描述。运行以下命令下载yolov5s.pt:
$ wget https://github.com/ultralytics/yolov5/releases/download/v6.0/yolov5s.pt
torch权重转换onnx文件
YOLOv5 存储库提供了一个脚本 models/export.py 以将带有扩展名 *.pt 的 Pytorch 权重导出到带有扩展名 *.onnx 的 ONNX 权重。运行该文件,只要没有报错,即成功转换:
$ python models/export.py --weights yolov5-v3/yolov5s.pt --img 640 --batch 1
然后可看到文件夹下存在两个文件,一个yolov5s.onnx,一个yolov5s.torchscript.
将 ONNX 文件转换为 IR 文件
这里需要下载netron包进行可视化网络:
pip install netron
我们在使用模型优化器转换 YOLOv5 模型时需要指定 IR 的输出节点。
比如上一步得到的yolov5s.onnx中有3个输出节点。我们可以使用 Netron 来可视化 yolov5s.onnx。然后我们通过在 Netron 中搜索关键字“Transpose”找到输出节点。之后,我们可以找到标记为椭圆的卷积节点,如下图所示。双击卷积节点后,我们可以看到它的名字“Conv_198”。
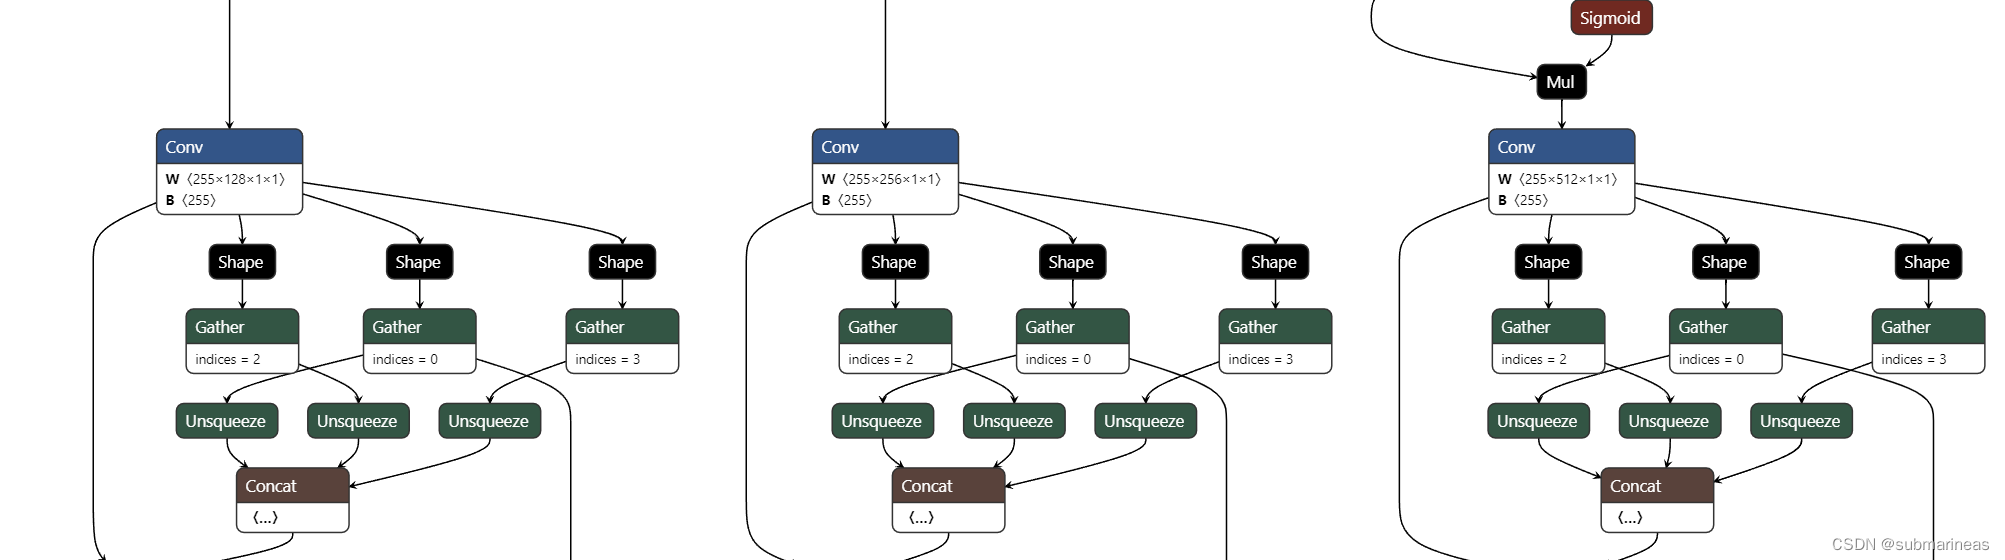
同样,我们可以找到另外两个输出节点“Conv_232”和“Conv_266”。
运行以下命令来生成 YOLOv5 模型的 IR:
$ python3 /opt/intel/openvino_2021.1.110/deployment_tools/model_optimizer/mo.py --input_model yolov5s.onnx -s 255 --reverse_input_channels --output Conv_198,Conv_232,Conv_266
日志为:
nput_channels --output Conv_198,Conv_232,Conv_266
Model Optimizer arguments:
Common parameters:
        - Path to the Input Model:      /home/Download/yolov5/yolov5s.onnx
        - Path for generated IR:        /home/Download/yolov5/.
        - IR output name:       yolov5s
        - Log level:    ERROR
        - Batch:        Not specified, inherited from the model
        - Input layers:         Not specified, inherited from the model
        - Output layers:        Conv_198,Conv_232,Conv_266
        - Input shapes:         Not specified, inherited from the model
        - Source layout:        Not specified
        - Target layout:        Not specified
        - Layout:       Not specified
        - Mean values:  Not specified
        - Scale values:         Not specified
        - Scale factor:         255.0
        - Precision of IR:      FP32
        - Enable fusing:        True
        - User transformations:         Not specified
        - Reverse input channels:       True
        - Enable IR generation for fixed input shape:   False
        - Use the transformations config file:  None
Advanced parameters:
        - Force the usage of legacy Frontend of Model Optimizer for model conversion into IR:   False
        - Force the usage of new Frontend of Model Optimizer for model conversion into IR:      False
OpenVINO runtime found in:      /opt/intel/openvino/python/python3.8/openvino
OpenVINO runtime version:       2022.1.0-7019-cdb9bec7210-releases/2022/1
Model Optimizer version:        2022.1.0-7019-cdb9bec7210-releases/2022/1
[ SUCCESS ] Generated IR version 11 model.
[ SUCCESS ] XML file: /home/Download/yolov5/yolov5s.xml
[ SUCCESS ] BIN file: /home/Download/yolov5/yolov5s.bin
[ SUCCESS ] Total execution time: 0.52 seconds.
[ SUCCESS ] Memory consumed: 127 MB.
It's been a while, check for a new version of Intel(R) Distribution of OpenVINO(TM) toolkit here https://software.intel.com/content/www/us/en/develop/tools/openvino-toolkit/download.html?cid=other&source=prod&campid=ww_2022_bu_IOTG_OpenVINO-2022-1&content=upg_all&medium=organic or on the GitHub*
[ INFO ] The model was converted to IR v11, the latest model format that corresponds to the source DL framework input/output format. While IR v11 is backwards compatible with OpenVINO Inference Engine API v1.0, please use API v2.0 (as of 2022.1) to take advantage of the latest improvements in IR v11.
Find more information about API v2.0 and IR v11 at https://docs.openvino.ai
然后当前目录可以看到三个文件为:

至此,转换成功。至于benchmark,以及还能对模型进行量化成FP 16等等,这些操作可以看官网教程,我这里只是记录一下学习笔记,可能之后会用到。