本篇主要是介绍了yolov5模型的快速部署,使用过yolov5训练过的兄弟都知道,训练完之后,无论你的模型是如何导出的,最后想要使用导出的模型,可能还脱离不了yolov5框架,因为,在使用导出的模型前,yolov5对输入层和输出层都做了较多的图像处理,导致,最后要么是调用yolov5中的detect.py,要么是自己手抠输入层和输出层的算法,这里,我顺便讲解一下后者
1、调用框架算法部署离线模型
先声明一下,这里的算法并不是我本人抠出来的,是我的一个
好兄弟同事(王阔)
抠出来的,下面是由他认真细致的研究代码,最后总结出来的
import os
import time
from io import BytesIO
import torch
import torchvision
import re
import numpy as np
import cv2
from PIL import Image


def padded_resize(im, new_shape=(640, 640), stride=32):
    shape = im.shape[:2]

    r = min(new_shape[0] / shape[0], new_shape[1] / shape[1])
    new_unpad = int(round(shape[1] * r)), int(round(shape[0] * r))
    dw, dh = new_shape[1] - new_unpad[0], new_shape[0] - new_unpad[1]
    # dw, dh = np.mod(dw, stride), np.mod(dh, stride)
    dw /= 2
    dh /= 2
    if shape[::-1] != new_unpad:  # resize
        im = cv2.resize(im, new_unpad, interpolation=cv2.INTER_LINEAR)
    top, bottom = int(round(dh - 0.1)), int(round(dh + 0.1))
    left, right = int(round(dw - 0.1)), int(round(dw + 0.1))
    im = cv2.copyMakeBorder(im, top, bottom, left, right, cv2.BORDER_CONSTANT, value=(114, 114, 114))  # add border
    # Convert
    im = im.transpose((2, 0, 1))[::-1]  # HWC to CHW, BGR to RGB
    im = np.ascontiguousarray(im)
    im = torch.from_numpy(im)
    im = im.float()
    im /= 255
    im = im[None]
    im = im.cpu().numpy()  # torch to numpy
    return im


def xywh2xyxy(x):
    # Convert nx4 boxes from [x, y, w, h] to [x1, y1, x2, y2] where xy1=top-left, xy2=bottom-right
    y = x.clone() if isinstance(x, torch.Tensor) else np.copy(x)
    y[:, 0] = x[:, 0] - x[:, 2] / 2  # top left x
    y[:, 1] = x[:, 1] - x[:, 3] / 2  # top left y
    y[:, 2] = x[:, 0] + x[:, 2] / 2  # bottom right x
    y[:, 3] = x[:, 1] + x[:, 3] / 2  # bottom right y
    return y


def box_iou(box1, box2):
    """
    Return intersection-over-union (Jaccard index) of boxes.
    Both sets of boxes are expected to be in (x1, y1, x2, y2) format.
    Arguments:
        box1 (Tensor[N, 4])
        box2 (Tensor[M, 4])
    Returns:
        iou (Tensor[N, M]): the NxM matrix containing the pairwise
            IoU values for every element in boxes1 and boxes2
    """

    def box_area(box):
        # box = 4xn
        return (box[2] - box[0]) * (box[3] - box[1])

    area1 = box_area(box1.T)
    area2 = box_area(box2.T)

    # inter(N,M) = (rb(N,M,2) - lt(N,M,2)).clamp(0).prod(2)
    inter = (torch.min(box1[:, None, 2:], box2[:, 2:]) - torch.max(box1[:, None, :2], box2[:, :2])).clamp(0).prod(2)
    return inter / (area1[:, None] + area2 - inter)  # iou = inter / (area1 + area2 - inter)


def non_max_suppression(prediction, conf_thres=0.25, iou_thres=0.45, classes=None, agnostic=False, multi_label=False,
                        labels=(), max_det=300):
    """Runs Non-Maximum Suppression (NMS) on inference results

    Returns:
         list of detections, on (n,6) tensor per image [xyxy, conf, cls]
    """

    nc = prediction.shape[2] - 5  # number of classes
    xc = prediction[..., 4] > conf_thres  # candidates

    # Checks
    assert 0 <= conf_thres <= 1, f'Invalid Confidence threshold {

      conf_thres}, valid values are between 0.0 and 1.0'
    assert 0 <= iou_thres <= 1, f'Invalid IoU {

      iou_thres}, valid values are between 0.0 and 1.0'

    # Settings
    min_wh, max_wh = 2, 7680  # (pixels) minimum and maximum box width and height
    max_nms = 30000  # maximum number of boxes into torchvision.ops.nms()
    time_limit = 10.0  # seconds to quit after
    redundant = True  # require redundant detections
    multi_label &= nc > 1  # multiple labels per box (adds 0.5ms/img)
    merge = False  # use merge-NMS

    t = time.time()
    output = [torch.zeros((0, 6), device=prediction.device)] * prediction.shape[0]
    for xi, x in enumerate(prediction):  # image index, image inference
        # Apply constraints
        x[((x[..., 2:4] < min_wh) | (x[..., 2:4] > max_wh)).any(1), 4] = 0  # width-height
        x = x[xc[xi]]  # confidence

        # Cat apriori labels if autolabelling
        if labels and len(labels[xi]):
            lb = labels[xi]
            v = torch.zeros((len(lb), nc + 5), device=x.device)
            v[:, :4] = lb[:, 1:5]  # box
            v[:, 4] = 1.0  # conf
            v[range(len(lb)), lb[:, 0].long() + 5] = 1.0  # cls
            x = torch.cat((x, v), 0)

        # If none remain process next image
        if not x.shape[0]:
            continue

        # Compute conf
        x[:, 5:] *= x[:, 4:5]  # conf = obj_conf * cls_conf

        # Box (center x, center y, width, height) to (x1, y1, x2, y2)
        box = xywh2xyxy(x[:, :4])

        # Detections matrix nx6 (xyxy, conf, cls)
        if multi_label:
            i, j = (x[:, 5:] > conf_thres).nonzero(as_tuple=False).T
            x = torch.cat((box[i], x[i, j + 5, None], j[:, None].float()), 1)
        else:  # best class only
            conf, j = x[:, 5:].max(1, keepdim=True)
            x = torch.cat((box, conf, j.float()), 1)[conf.view(-1) > conf_thres]

        # Filter by class
        if classes is not None:
            x = x[(x[:, 5:6] == torch.tensor(classes, device=x.device)).any(1)]

        # Apply finite constraint
        # if not torch.isfinite(x).all():
        #     x = x[torch.isfinite(x).all(1)]

        # Check shape
        n = x.shape[0]  # number of boxes
        if not n:  # no boxes
            continue
        elif n > max_nms:  # excess boxes
            x = x[x[:, 4].argsort(descending=True)[:max_nms]]  # sort by confidence

        # Batched NMS
        c = x[:, 5:6] * (0 if agnostic else max_wh)  # classes
        boxes, scores = x[:, :4] + c, x[:, 4]  # boxes (offset by class), scores
        i = torchvision.ops.nms(boxes, scores, iou_thres)  # NMS
        if i.shape[0] > max_det:  # limit detections
            i = i[:max_det]
        if merge and (1 < n < 3E3):  # Merge NMS (boxes merged using weighted mean)
            # update boxes as boxes(i,4) = weights(i,n) * boxes(n,4)
            iou = box_iou(boxes[i], boxes) > iou_thres  # iou matrix
            weights = iou * scores[None]  # box weights
            x[i, :4] = torch.mm(weights, x[:, :4]).float() / weights.sum(1, keepdim=True)  # merged boxes
            if redundant:
                i = i[iou.sum(1) > 1]  # require redundancy

        output[xi] = x[i]
        if (time.time() - t) > time_limit:
            break  # time limit exceeded

    return output


def xyxy2xywh(x):
    # Convert nx4 boxes from [x1, y1, x2, y2] to [x, y, w, h] where xy1=top-left, xy2=bottom-right
    y = x.clone() if isinstance(x, torch.Tensor) else np.copy(x)
    y[:, 0] = (x[:, 0] + x[:, 2]) / 2  # x center
    y[:, 1] = (x[:, 1] + x[:, 3]) / 2  # y center
    y[:, 2] = x[:, 2] - x[:, 0]  # width
    y[:, 3] = x[:, 3] - x[:, 1]  # height
    return y


def is_ascii(s=''):
    # Is string composed of all ASCII (no UTF) characters? (note str().isascii() introduced in python 3.7)
    s = str(s)  # convert list, tuple, None, etc. to str
    return len(s.encode().decode('ascii', 'ignore')) == len(s)


def box_label(self, box, label='', color=(128, 128, 128), txt_color=(255, 255, 255)):
    # Add one xyxy box to image with label
    if self.pil or not is_ascii(label):
        self.draw.rectangle(box, width=self.lw, outline=color)  # box
        if label:
            w, h = self.font.getsize(label)  # text width, height
            outside = box[1] - h >= 0  # label fits outside box
            self.draw.rectangle((box[0],
                                 box[1] - h if outside else box[1],
                                 box[0] + w + 1,
                                 box[1] + 1 if outside else box[1] + h + 1), fill=color)
            # self.draw.text((box[0], box[1]), label, fill=txt_color, font=self.font, anchor='ls')  # for PIL>8.0
            self.draw.text((box[0], box[1] - h if outside else box[1]), label, fill=txt_color, font=self.font)
    else:  # cv2
        p1, p2 = (int(box[0]), int(box[1])), (int(box[2]), int(box[3]))
        cv2.rectangle(self.im, p1, p2, color, thickness=self.lw, lineType=cv2.LINE_AA)
        if label:
            tf = max(self.lw - 1, 1)  # font thickness
            w, h = cv2.getTextSize(label, 0, fontScale=self.lw / 3, thickness=tf)[0]  # text width, height
            outside = p1[1] - h - 3 >= 0  # label fits outside box
            p2 = p1[0] + w, p1[1] - h - 3 if outside else p1[1] + h + 3
            cv2.rectangle(self.im, p1, p2, color, -1, cv2.LINE_AA)  # filled
            cv2.putText(self.im, label, (p1[0], p1[1] - 2 if outside else p1[1] + h + 2), 0, self.lw / 3, txt_color,
                        thickness=tf, lineType=cv2.LINE_AA)


cls_labels = eval(open("./models/font_lib.txt", "r", encoding="utf8").read())


def return_coordinates(xyxy, conf, cls):
    conf = float(conf.numpy())
    gain = 1.02
    pad = 10
    xyxy = torch.tensor(xyxy).view(-1, 4)
    b = xyxy2xywh(xyxy)  # boxes
    b[:, 2:] = b[:, 2:] * gain + pad  # box wh * gain + pad
    xyxy = xywh2xyxy(b).long()
    c1, c2 = (int(xyxy[0, 0]) + 6, int(xyxy[0, 1]) + 6), (int(xyxy[0, 2]) - 6, int(xyxy[0, 3]) - 6)
    # print(f"leftTop:{c1},rightBottom:{c2},Confidence:{conf*100}%")
    cls = cls_labels[int(cls.numpy())]
    result_dict = {

    "leftTop": c1, "rightBottom": c2, "Confidence": conf, "Cls": cls}

    return result_dict


def clip_coords(boxes, shape):
    # Clip bounding xyxy bounding boxes to image shape (height, width)
    if isinstance(boxes, torch.Tensor):  # faster individually
        boxes[:, 0].clamp_(0, shape[1])  # x1
        boxes[:, 1].clamp_(0, shape[0])  # y1
        boxes[:, 2].clamp_(0, shape[1])  # x2
        boxes[:, 3].clamp_(0, shape[0])  # y2
    else:  # np.array (faster grouped)
        boxes[:, [0, 2]] = boxes[:, [0, 2]].clip(0, shape[1])  # x1, x2
        boxes[:, [1, 3]] = boxes[:, [1, 3]].clip(0, shape[0])  # y1, y2


def scale_coords(img1_shape, coords, img0_shape, ratio_pad=None):
    # Rescale coords (xyxy) from img1_shape to img0_shape
    if ratio_pad is None:  # calculate from img0_shape
        gain = min(img1_shape[0] / img0_shape[0], img1_shape[1] / img0_shape[1])  # gain  = old / new
        pad = (img1_shape[1] - img0_shape[1] * gain) / 2, (img1_shape[0] - img0_shape[0] * gain) / 2  # wh padding
    else:
        gain = ratio_pad[0][0]
        pad = ratio_pad[1]

    coords[:, [0, 2]] -= pad[0]  # x padding
    coords[:, [1, 3]] -= pad[1]  # y padding
    coords[:, :4] /= gain
    clip_coords(coords, img0_shape)
    return coords
这里的代码大多都是框架里有的,兄弟们仔细找找就能发现,上面的代码包含输入层的尺寸调整,输出层的先验框判断、坐标类别输出等等,那么将以上代码加载保存后,按如下的代码调用就能实现脱离整个yolov5框架,这里我以导出onnx模型距离
导出onnx模型
导出模型,可以参考yolov5,github官方导出链接:https://github.com/ultralytics/yolov5/issues/251

python export.py --weights yolov5s.pt --include torchscript onnx
调用onnx模型
调用模型就很简单了,这里因为导出的是onnx模型,所以加载模型自然也要用到onnxruntime这个库,至于这个库的一些概念,兄弟们可以自行搜索,这里在读取到onnx模型后,将预测结果通过非极大值抑制处理后,就能够直接获取到返回的坐标了,如果有什么报错的话,直接私信博主也可以
import onnxruntime as ort

slider_model = ort.InferenceSession("slider.onnx", providers=['CPUExecutionProvider',])
pred = self.slider_model.run([self.slider_model.get_outputs()[0].name],
                          {

    self.slider_model.get_inputs()[0].name: im})[0]
pred = torch.tensor(pred)
pred = non_max_suppression(pred, conf_thres=0.60, iou_thres=0.60, max_det=1000)
coordinate_list = []
for i, det in enumerate(pred):
    det[:, :4] = scale_coords(im.shape[2:], det[:, :4], img.shape).round()
    for *xyxy, conf, cls in reversed(det):
        # 返回坐标和置信度
        coordinates = return_coordinates(xyxy, conf, cls)
        coordinate_list.append(coordinates)
2、使用fastdeploy快速部署
之前讲述了手抠yolov5中输入层输出层的算法来调用yolov5的模型,上面的代码看似不多,但其实在手抠的过程中非常耗费时间和精力,即使在抠出来后,调用也是一件比较麻烦的事,这里我就讲述另一种方法,使用fastdeploy三行代码就能部署yolov5模型
fast是由百度飞浆paddle发布的一个工具,官方链接https://github.com/PaddlePaddle/FastDeploy,采用fastdeploy部署模型有以下好处
- 低门槛:一行命令下载SDK,一行命令即可体验部署Demo;不同硬件平台一致的代码体验,降低基于业务模型和业务逻辑二次开发难度;经过官方验证,算法模型精度和推理鲁棒性有保证。
- 多场景:支持云、边、端(包括移动端)丰富软硬件环境部署,支持图像、视频流、一键服务化等部署方式,满足不同场景的AI部署诉求。
- 多算法:支持图像分类、目标检测、图像分割、人脸检测、人体关键点检测、文本识别等30多个主流算法模型选型。
fastdeploy安装依赖
- CUDA >= 11.2 、cuDNN >= 8.0 、 Python >= 3.6
- OS: Linux x86_64/macOS/Windows 10
gpu或者cpu安装
pip install fastdeploy-gpu-python -f https://www.paddlepaddle.org.cn/whl/fastdeploy.html
conda安装
conda config --add channels conda-forge && conda install cudatoolkit=11.2 cudnn=8.2
仅cpu安装
pip install fastdeploy-python -f https://www.paddlepaddle.org.cn/whl/fastdeploy.html
那么话不多说,在安装完之后,还是以上面导出的onnx模型举例,这边我们加载一张图片,然后直接使用fastdeploy将预测出来的框画出来
import cv2
import matplotlib.pyplot as plt
import os
import numpy as np
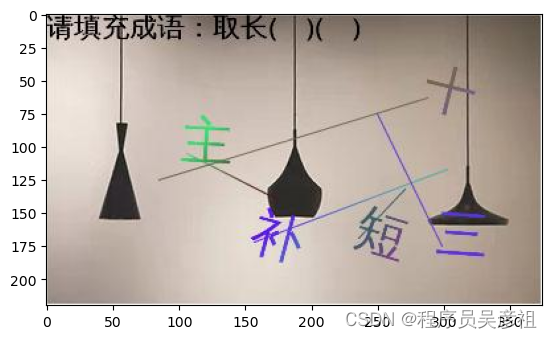
im = cv2.imread("test.png")
show_img = cv2.cvtColor(im, cv2.COLOR_BGR2RGB)
plt.imshow(show_img)
plt.pause(0.001)
导入fastdeploy加载模型并返回预测结果和画框
import fastdeploy as fd
model = fd.vision.detection.YOLOv5("runs/train/textclick_jiangxi3/weights/best.onnx")
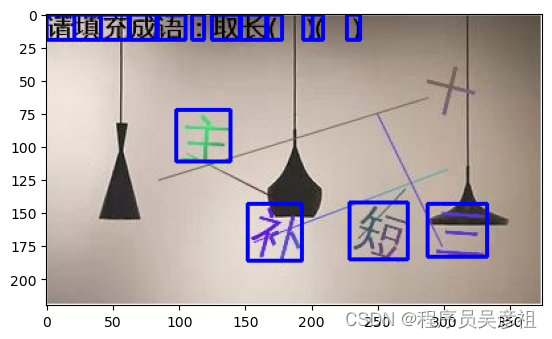
result = model.predict(im)
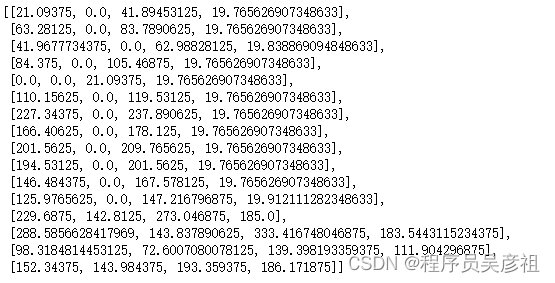
for box in result.boxes:
print(box)
show_img = cv2.rectangle(show_img, (int(box[0]), int(box[1])), (int(box[2]), int(box[3])), (0, 0, 255), 2)
plt.imshow(show_img)
plt.pause(0.001)