首先,编写发布点云数据的python程序,命名为cloud_pub.py。
#! /usr/bin/env python3.8
# encoding: utf-8
import open3d as o3d
import numpy as np
import rospy
from sensor_msgs.msg import PointCloud2, PointField
from sensor_msgs import point_cloud2
from std_msgs.msg import Header

# 类
class PointRead(object):
    def __init__(self):
        self.pcloud = rospy.Publisher('/read_pointcloud', PointCloud2, queue_size=1)
        data = o3d.io.read_point_cloud("./src/data/point_cloud/pointcloud_1.pcd")
        zpath = np.array(data.points)
        points_pcd = o3d.geometry.PointCloud()# 传入3d点云
        points_pcd.points = o3d.utility.Vector3dVector(zpath)
        # publish
        header = Header()
        header.frame_id = "map"
        header.stamp = rospy.Time.now()
        fields = [PointField('x', 0, PointField.FLOAT32, 1),
        PointField('y', 4, PointField.FLOAT32, 1),
        PointField('z', 8, PointField.FLOAT32, 1)
        ]
        rate=rospy.Rate(1)
        pc = point_cloud2.create_cloud(header, fields, points_pcd.points)
        while not rospy.is_shutdown():
            self.pcloud.publish(pc)
            rate.sleep()

# 主函数
if __name__ == "__main__":
    rospy.init_node("select_pc")
    # 发布点云话题
    PointRead()
    rospy.spin()
运行roscore。
roscore运行发布点云。
rosrun <package> cloud_pub.py运行rviz。
rviz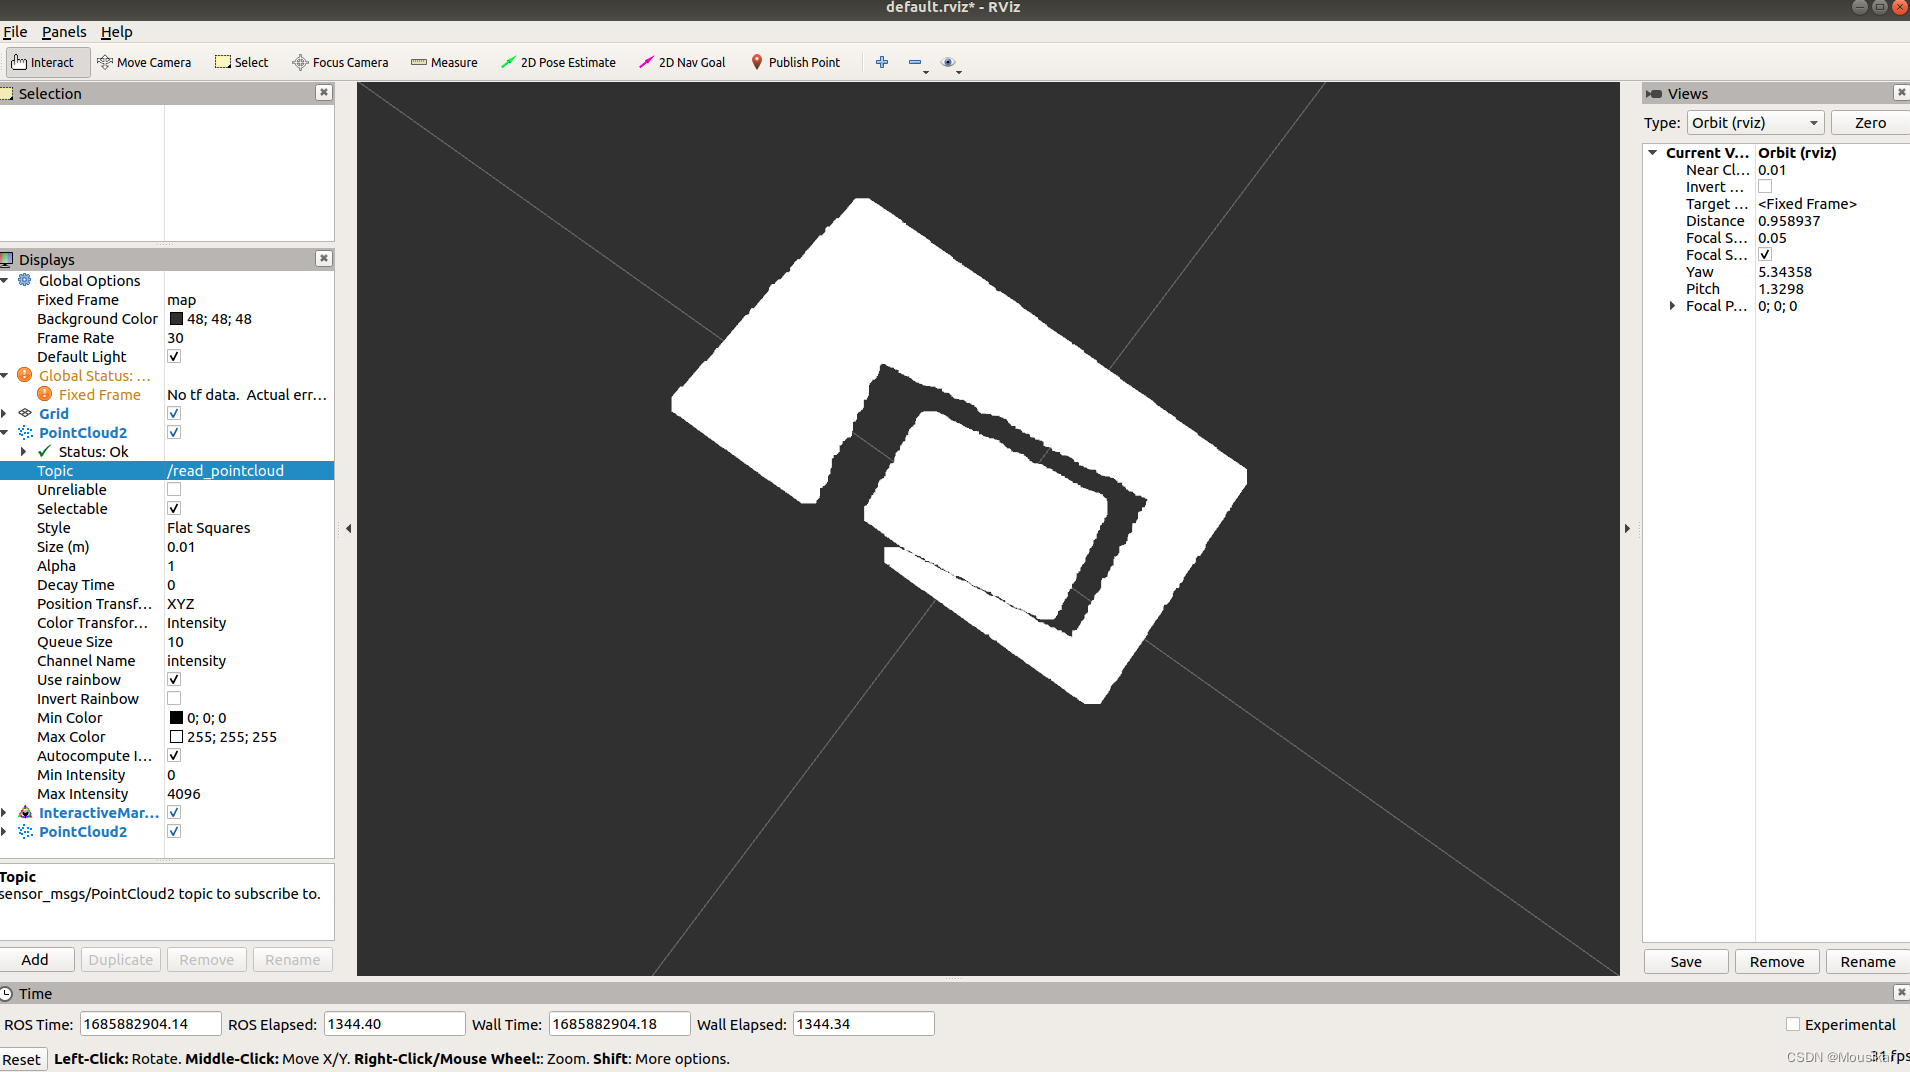
在`rviz`中使用"Select"工具选择点云数据,并将所选数据发布到另一个话题,可以通过编写一个ROS节点来实现。 下面的代码是如何在`rviz`中选择点云数据并将其发布到另一个话题:
import rospy

from sensor_msgs.msg import PointCloud2

from visualization_msgs.msg import InteractiveMarkerFeedback

import sensor_msgs.point_cloud2 as pc2


def marker_feedback_callback(msg):

    if msg.event_type == InteractiveMarkerFeedback.MOUSE_DOWN:

        # 获取点击的点的位置信息

        x = msg.pose.position.x

        y = msg.pose.position.y

        z = msg.pose.position.z


        # 创建点云数据

        fields = [pc2.PointField(name='x', offset=0, datatype=pc2.PointField.FLOAT32, count=1),

                  pc2.PointField(name='y', offset=4, datatype=pc2.PointField.FLOAT32, count=1),

                  pc2.PointField(name='z', offset=8, datatype=pc2.PointField.FLOAT32, count=1)]

        header = rospy.Header(frame_id='base_link')  # 假设点云相对于base_link坐标系

        cloud = pc2.create_cloud_xyz32(header, [[x, y, z]])


        # 发布点云数据到另一个话题

        pub.publish(cloud)


if __name__ == '__main__':

    # 初始化ROS节点

    rospy.init_node('point_cloud_selector', anonymous=True)


    # 创建一个发布器,用于发布所选点云数据

    pub = rospy.Publisher('selected_point_cloud_topic', PointCloud2, queue_size=10)


    # 创建一个订阅器,用于接收InteractiveMarkerFeedback消息

    rospy.Subscriber('/interactive_marker_feedback', InteractiveMarkerFeedback, marker_feedback_callback)


    # 循环等待回调

    rospy.spin()
在上述示例中,我们首先导入所需的ROS消息类型和库。然后,在`marker_feedback_callback`回调函数中,我们检查`InteractiveMarkerFeedback`消息的事件类型,当鼠标按下时执行选择操作。我们从`msg.pose.position`获取选择点的位置信息,并使用`create_cloud_xyz32`函数创建一个包含该点的点云数据。然后,我们通过发布器`pub`将该点云数据发布到`selected_point_cloud_topic`话题中。
要运行上述代码,确保你的ROS环境正确设置,并将代码保存为一个可执行文件。然后,在终端中执行以下命令启动ROS节点:
rosrun <package> interacpy替换<package>和``为包名。执行后,节点将在`rviz`中接收`/interactive_marker_feedback`话题的消息,并根据选择的点将所选的点云数据发布到`selected_point_cloud_topic`话题。
在`rviz`中,你可以添加一个`PointCloud2`显示器来订阅`selected_point_cloud_topic`话题,以查看所选的点云数据。
请注意,在使用"Select"工具之前,确保在`rviz`中启用了交互式标记工具。
要在`rviz`中启用交互式标记工具,你可以按照以下步骤进行操作:
1. 打开`rviz`并加载你的配置文件(如果有)。
2. 在`rviz`的工具栏中,点击"Add"按钮(加号图标)以添加新的可视化工具。
3. 在弹出的对话框中,选择"InteractiveMarkers"(交互式标记)并点击"OK"。
4. 现在,你会看到在`rviz`的工具栏中多了一个"Interact"(交互)按钮。
5. 点击"Interact"按钮来启用交互式标记工具。
6. 现在你可以在`rviz`中与交互式标记进行交互。你可以点击、拖动或旋转标记,触发与标记相关的操作。

最后添加选择的点云话题。

可以得到选择的这部分点云。
