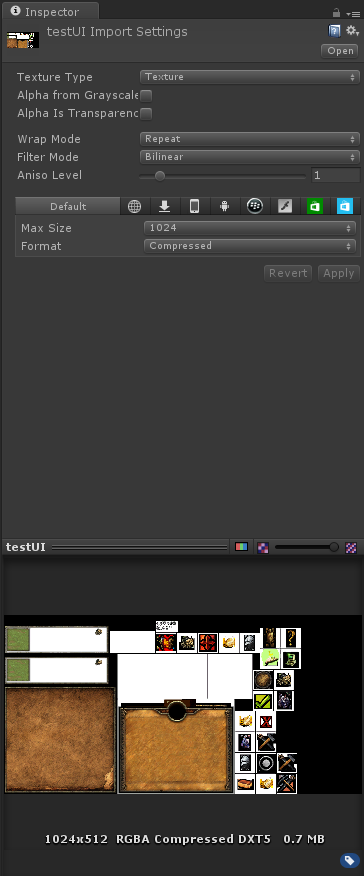
假设有一张png/tga图集,导入到Unity,放置目录"
Assets/Resources/UI
"(UI文件夹可替换成其他的,重要的是要在"Assets/Resources/"路径下)
,默认为如下设置:
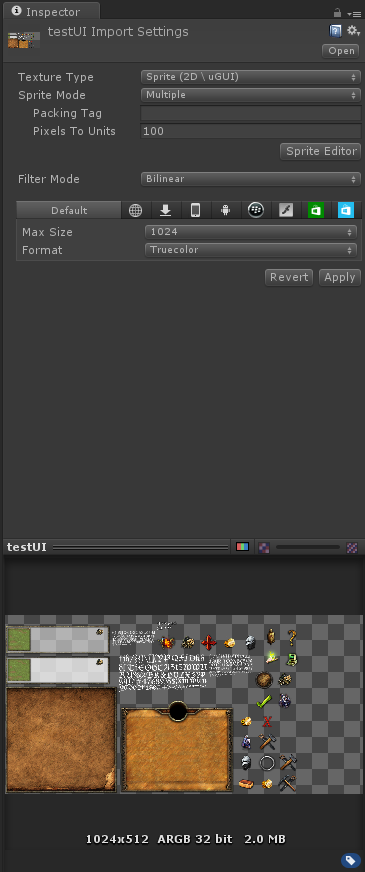
为了可以使用Unity自带的精灵切割,要将纹理类型改成"
Sprite","
Sprite Mode"改成"
Multiple","
Format"改成"
Truecolor",点击"
Apply"按钮进行应用。
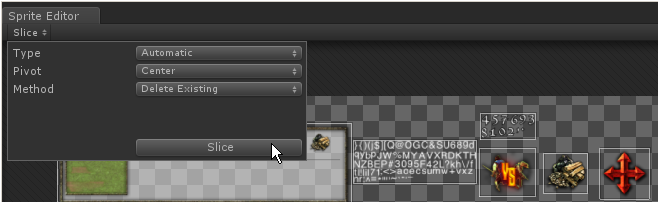
接着,点击"
Sprite Editor"打开精灵编辑器,点击左上角的"
Slice"按钮,弹出切片设置,再次点击里面的
"Slice"按钮,就会自动对图片进行切割,如下图所示:
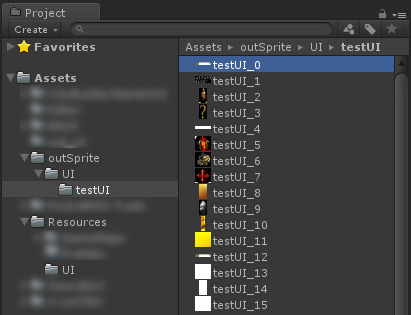
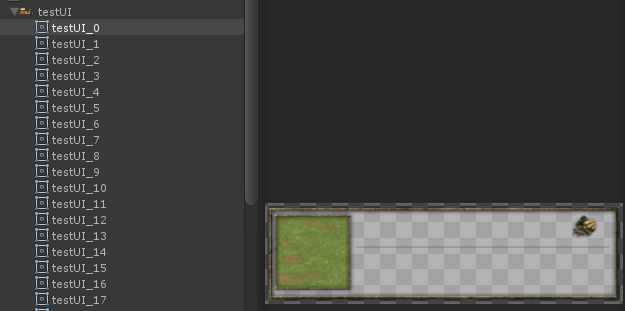
在对切割不完整的地方进行修正后,点击右上角的"
Apply"按钮,进行保存。可以看到Project视图下这个图集,已经被分割出许多小图了,如下图所示:
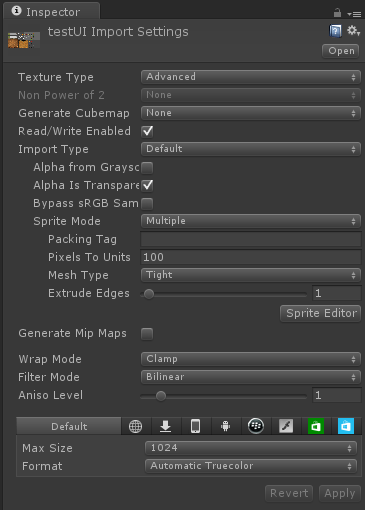
接下来,因为要对图片进行读写操作,要更改图片的属性才能进行,否则会提示如下:
- UnityException: Texture 'testUI' is not readable, the texture memory can not be accessed from scripts. You can make the texture readable in the Texture Import Settings.
将图片纹理类型更改为"
Advanced",将"
Read/Write Enabled"属性进行打勾,如下图所示:
创建一个脚本文件,代码如下:
|
1
2 3 4 5 6 7 8 9 10 11 12 13 14 15 16 17 18 19 20 21 22 23 24 25 26 27 28 29 30 31 32 33 34 35 36 37 38 39 40 41 42 43 44 45 46 47 48 49 50 51 52 |
using UnityEngine;
using UnityEditor; public class TestSaveSprite { [MenuItem( "Tools/导出精灵")] static void SaveSprite() { string resourcesPath = "Assets/Resources/"; foreach (Object obj in Selection.objects) { string selectionPath = AssetDatabase.GetAssetPath(obj); // 必须最上级是"Assets/Resources/" if (selectionPath.StartsWith(resourcesPath)) { string selectionExt = System.IO.Path.GetExtension(selectionPath); if (selectionExt.Length == 0) { continue; } // 从路径"Assets/Resources/UI/testUI.png"得到路径"UI/testUI" string loadPath = selectionPath.Remove(selectionPath.Length - selectionExt.Length); loadPath = loadPath.Substring(resourcesPath.Length); // 加载此文件下的所有资源 Sprite[] sprites = Resources.LoadAll<Sprite>(loadPath); if (sprites.Length > 0) { // 创建导出文件夹 string outPath = Application.dataPath + "/outSprite/" + loadPath; System.IO.Directory.CreateDirectory(outPath); foreach (Sprite sprite in sprites) { // 创建单独的纹理 Texture2D tex = new Texture2D(( int)sprite.rect.width, ( int)sprite.rect.height, sprite.texture.format, false); tex.SetPixels(sprite.texture.GetPixels(( int)sprite.rect.xMin, ( int)sprite.rect.yMin, ( int)sprite.rect.width, ( int)sprite.rect.height)); tex.Apply(); // 写入成PNG文件 System.IO.File.WriteAllBytes(outPath + "/" + sprite.name + ".png", tex.EncodeToPNG()); } Debug.Log( "SaveSprite to " + outPath); } } } Debug.Log( "SaveSprite Finished"); } } |
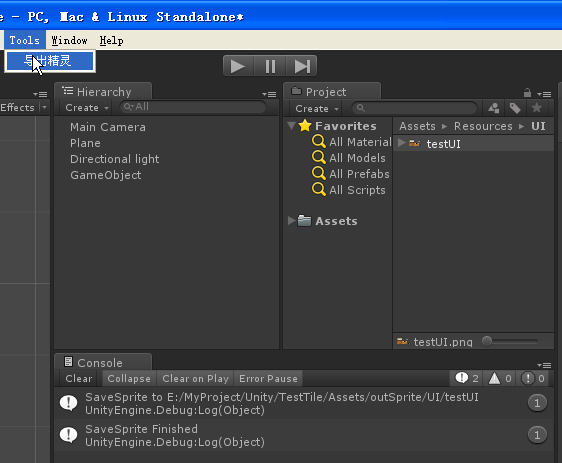
在Unity编辑器将会看到Tools菜单下多了"导出精灵"项,选中图集,然后点击"导出精灵"菜单项,即可导出子图成功。如下图所示: