需求描述:
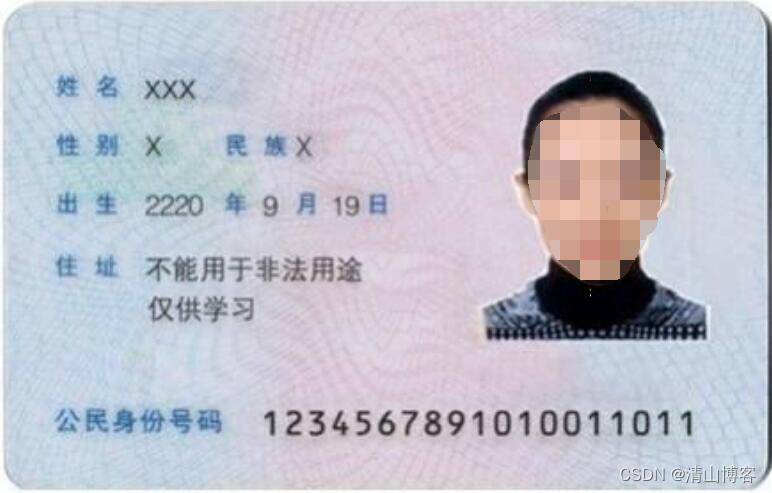
通过OpenCV识别身份证照片上的身份证号码(仅识别身份证号码)
实现思路:
1.将身份证号中的0,1,2,3,4,5,6,7,8,9作为模板,与身份证照片中的身份证号码区域进行模板匹配。
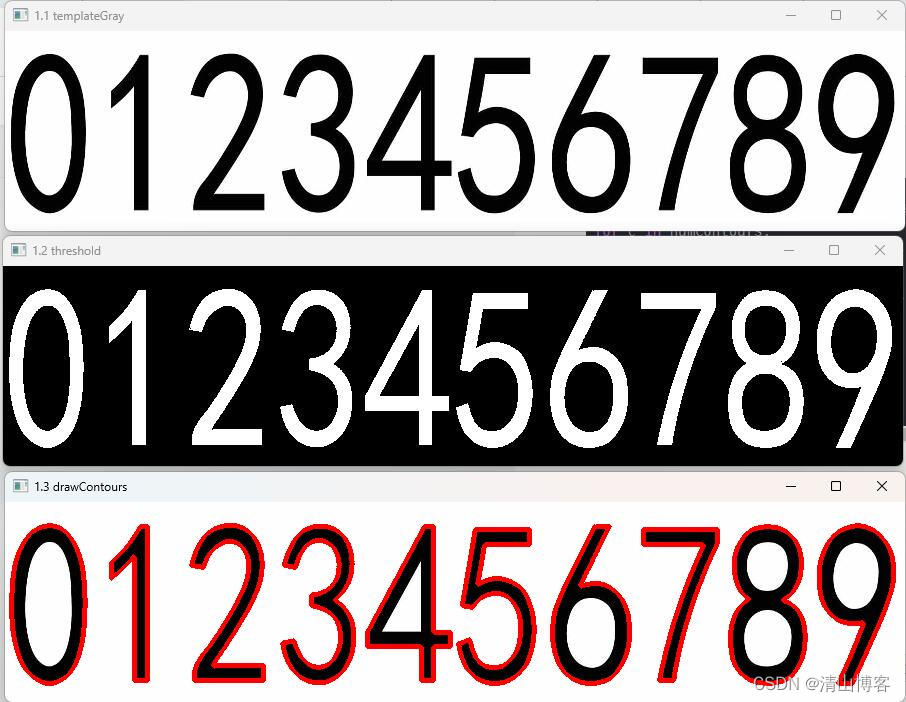
2.先要制作一个身份证号码模板,我这里弄了一个,基本上可以用。

3.识别出身份证照片身份证号区域,进行图像模板匹配。
以下面这样图为例(你也可以替换为你要识别的图片):
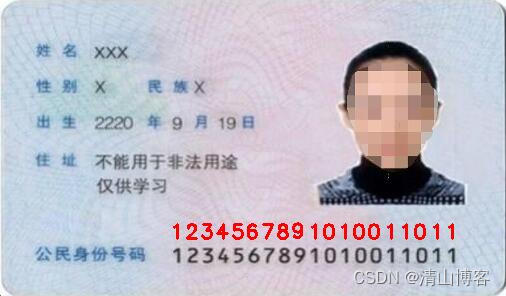
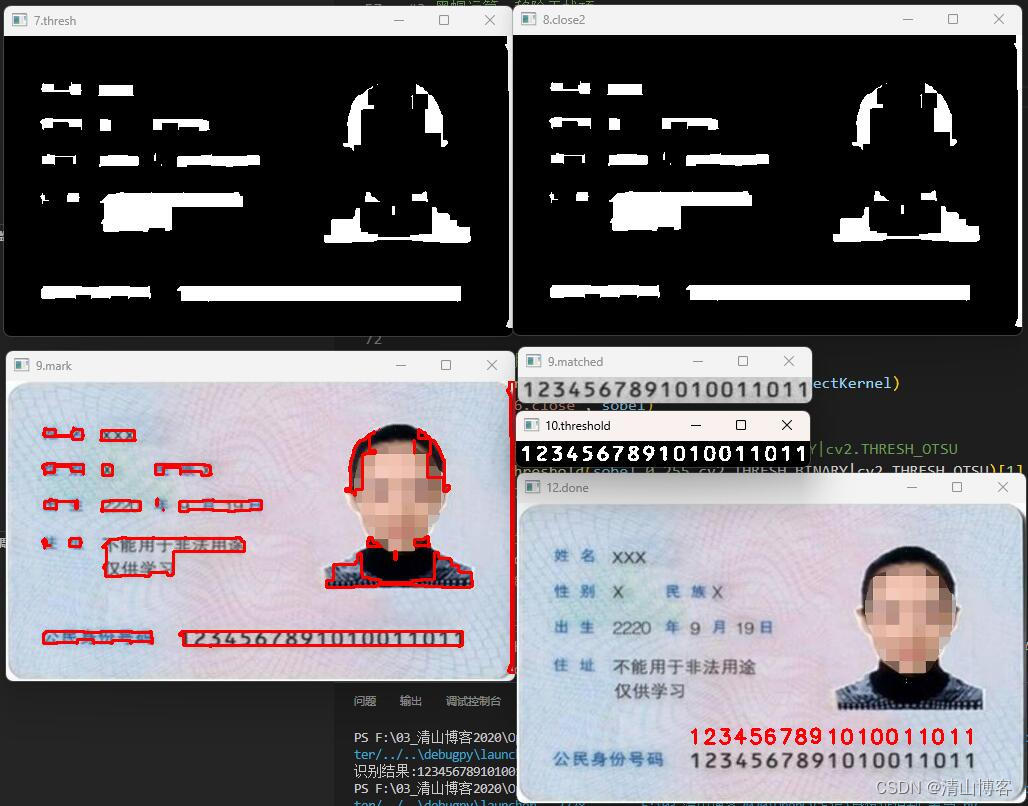
4.识别出身份证号码后,在图中标记出识别结果。
运行效果:
Python源代码(目前只能识别标准角度拍摄照片,拍摄角度变形的无法识别):
import cv2
import numpy as np
rectKernel=cv2.getStructuringElement(cv2.MORPH_RECT,(15,15)) #kernel1 = np.ones((15, 15), np.uint8)
sqKernel=cv2.getStructuringElement(cv2.MORPH_RECT,(5,5))
#轮廓排序
def sort_contours(cnts,method="left-to-right"):
reverse=False
i=0
if method=="right-to-left" or method=="bottom-to-top":
reverse=True
if method=="top-to-bottom" or method=="bottom-to-top":
i=1
boundingBoxes=[cv2.boundingRect(c) for c in cnts] #外接矩形
(cnts,boundingBoxes)=zip(*sorted(zip(cnts,boundingBoxes),key=lambda b:b[1][i],reverse=reverse))
return cnts,boundingBoxes
# 第一步:预处理模板文件
templateImg = cv2.imread("template.jpg") #template.jpg 即为模板文件,上面那张0-9数字图片
templateImg = cv2.resize(templateImg, (900, 200), interpolation=cv2.INTER_CUBIC)
#转灰度图
templateGray=cv2.cvtColor(templateImg,cv2.COLOR_BGR2GRAY)
cv2.imshow("1.1 templateGray",templateGray)
#二值处理
templateGray=cv2.threshold(templateGray,30,255,cv2.THRESH_BINARY_INV)[1]
# cvblackhat = cv2.morphologyEx(templateGray, cv2.MORPH_BLACKHAT, np.ones((50, 50), np.uint8))
# templateGray=cv2.threshold(cvblackhat,0,255,cv2.THRESH_BINARY|cv2.THRESH_OTSU)[1]
cv2.imshow("1.2 threshold",templateGray)
#提取轮廓(10个数字的外部轮廓)
templateContours,hierarchy=cv2.findContours(templateGray.copy(),cv2.RETR_EXTERNAL,cv2.CHAIN_APPROX_SIMPLE)
cv2.drawContours(templateImg,templateContours,-1,(0,0,255),3)
cv2.imshow("1.3 drawContours",templateImg)
templateContours=sort_contours(templateContours,method="left-to-right")[0]
#用于做模板匹配的图像集合
templates={}
for(i,c) in enumerate(templateContours):
(x,y,w,h)=cv2.boundingRect(c) #外接矩形
roi=templateGray[y:y+h,x:x+w]
roi=cv2.resize(roi,(57,88))
templates[i]=roi
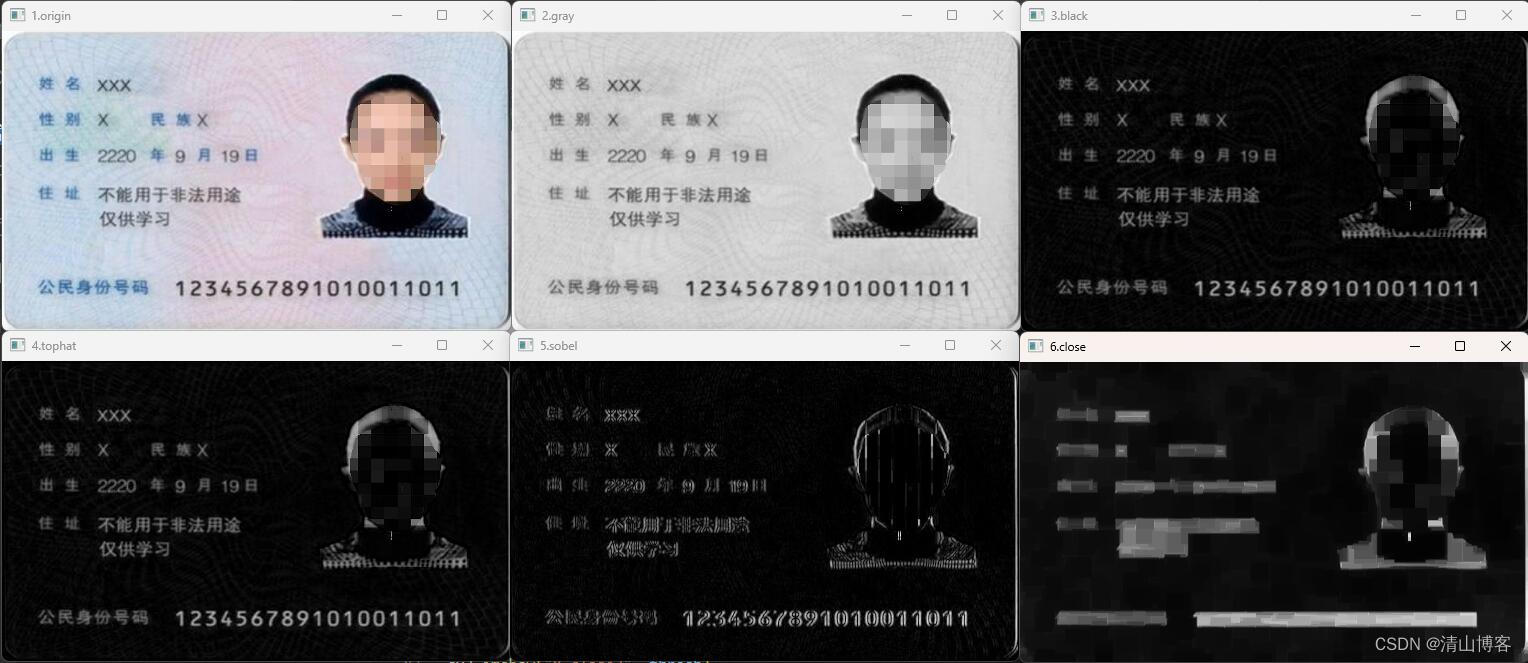
#第二步:处理身份证图片
# 1.读取原图
idimg = cv2.imread("idcard.jpg") #需要进行识别的图片
idimg = cv2.resize(idimg, (509, 300), interpolation=cv2.INTER_CUBIC)
idimgok = idimg.copy()
cv2.imshow("1.origin", idimg)
#2.转灰度图
gray = cv2.cvtColor(idimg, cv2.COLOR_BGR2GRAY)
cv2.imshow("2.gray", gray)
#3.黑帽运算:移除干扰项
cvblackhat = cv2.morphologyEx(gray, cv2.MORPH_BLACKHAT, rectKernel)
cv2.imshow("3.black", cvblackhat)
#4.顶帽运算:突出轮廓
tophat=cv2.morphologyEx(cvblackhat,cv2.MORPH_TOPHAT,rectKernel)
cv2.imshow("4.tophat", tophat)
#5.边缘检测
sobel=cv2.Sobel(tophat,ddepth=cv2.CV_32F,dx=1,dy=0,ksize=-1)
sobel=np.absolute(sobel)
(min,max)=(np.min(sobel),np.max(sobel))
sobel=(255*((sobel-min)/(max-min)))
sobel=sobel.astype("uint8")
cv2.imshow("5.sobel", sobel)
#6.闭操作,先膨胀,再腐蚀
sobel=cv2.morphologyEx(sobel,cv2.MORPH_CLOSE,rectKernel)
cv2.imshow("6.close", sobel)
#7.二值化突出轮廓,自动阈值范围 cv2.THRESH_BINARY|cv2.THRESH_OTSU
thresh=cv2.threshold(sobel,0,255,cv2.THRESH_BINARY|cv2.THRESH_OTSU)[1]
cv2.imshow("7.thresh", thresh)
#8.再闭操作,先膨胀,再腐蚀
thresh=cv2.morphologyEx(thresh,cv2.MORPH_CLOSE,sqKernel)
cv2.imshow("8.close2", thresh)
#9.提取轮廓,并在图上标记轮廓
cnts,hierarchy=cv2.findContours(thresh.copy(),cv2.RETR_EXTERNAL,cv2.CHAIN_APPROX_SIMPLE)
mark=idimg.copy()
cv2.drawContours(mark,cnts,-1,(0,0,255),2)
cv2.imshow("9.mark", mark)
#身份证区域,虽然只有一个轮廓,这里还是用集合来处理
pidArea=[]
for(i,c) in enumerate(cnts):
(x,y,w,h)=cv2.boundingRect(c)
ar=w/float(h)
if ar>12 and ar<40:
pidArea.append((x,y,w,h)) #身份证号区域长宽比比较明显,算是一个比较明显的特征
break
#pidArea=sorted(pidArea,key=lambda x:x[0])#若有多个区域,需进行从左到右排序
#10.模板匹配
output=[]
for(i,(gx,gy,gw,gh)) in enumerate(pidArea):
area=gray[gy-5:gy+gh+5,gx-5:gx+gw+5] #稍微扩展点区域,保证内容都能框住
cv2.imshow("9.matched", area)
#下面操作跟处理模板图像一样:
#先黑帽处理,移除干扰项,再二值化处理(自动阈值)
area = cv2.morphologyEx(area, cv2.MORPH_BLACKHAT, np.ones((10, 10), np.uint8))
area=cv2.threshold(area,0,255,cv2.THRESH_BINARY|cv2.THRESH_OTSU)[1]
cv2.imshow("10.threshold", area)
# 再检测轮廓
numContours,hierarchy=cv2.findContours(area.copy(),cv2.RETR_EXTERNAL,cv2.CHAIN_APPROX_SIMPLE)
#注意:此处需判断轮廓的个数是否是18个,对应18个数字
numContours=sort_contours(numContours,method="left-to-right")[0]
#11.遍历轮廓,并逐个与模板图像进行匹配,将最高得分保留
for c in numContours:
(x,y,w,h)=cv2.boundingRect(c)
roi=area[y:y+h,x:x+w]
roi=cv2.resize(roi,(57,88)) #模板也做了缩放,相同尺寸进行比较
scores=[]
#跟10张模板图片进行模板匹配
for (j,templateROI)in templates.items():
result=cv2.matchTemplate(roi,templateROI,cv2.TM_CCOEFF)
(_,score,_,_)=cv2.minMaxLoc(result)
scores.append(score) #scores中存放了当前轮廓对应0-10中每个数字的概率
#将分值最大的保留下来
num=np.argmax(scores) #np.argmax():获取array的某一个维度中数值最大的那个元素的索引,索引即为对应数字
output.append(str(num))
#12.在原图上绘制识别结果
index=0
(gx,gy,gw,gh)=pidArea[0] #身份证区域位置
for c in numContours:
(x,y,w,h)=cv2.boundingRect(c) #数字轮廓位置
num=output[index]
cv2.putText(idimg,str(num),(gx+x-8 ,gy+y-15),cv2.FONT_HERSHEY_SIMPLEX,0.65,(0,0,255),2)
index=index+1
cv2.imshow("12.done", idimg)
print("识别结果:"+"".join(output))
cv2.waitKey(0)运行结果:
模板处理
图像处理
特别说明:
1.对输入身份证照片有要求,必须是完全的身份证照片,不能有背景,不能变形。
2.只识别了身份证号区域,如需识别其他信息,可以自行修改代码。
3.如无法识别你的图片,请手动调试代码,注释都在代码里,修改对应步骤参数,多试几次。