目录
1.下载ML-Agents
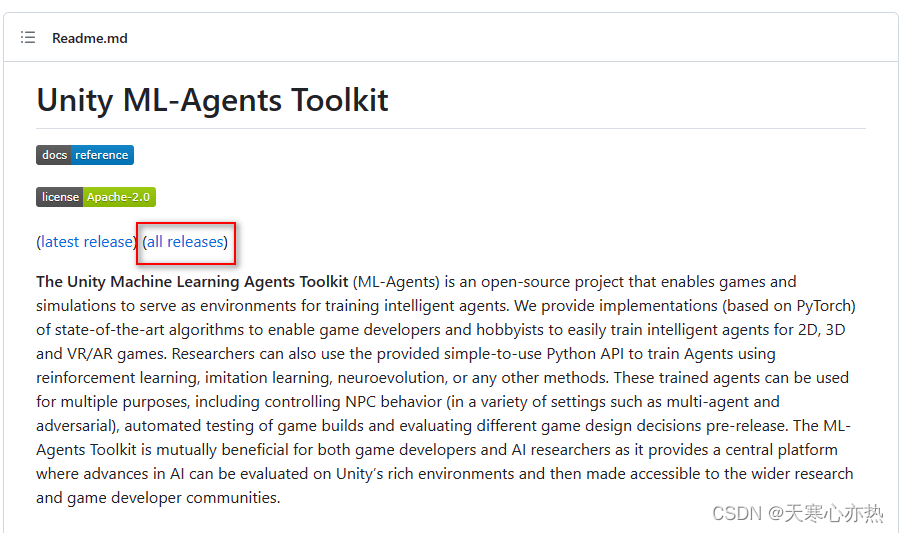
官网下载:https://github.com/Unity-Technologies/ml-agents
1.1 前往官网
注意事项:请看官网的叙述,比如要求的unity的版本等。发行版19要求的unity最低是2020.3
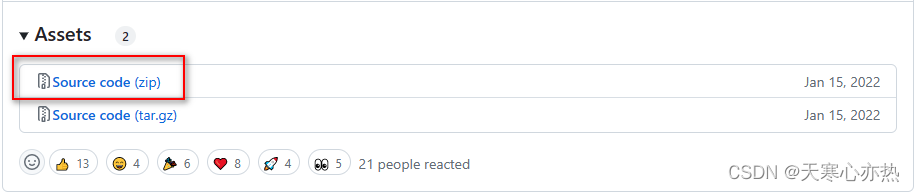
1.2 选择版本

1.3 下载文件
2.下载Anaconda
官网链接:https://www.anaconda.com/
3.虚拟环境
3.1 构建虚拟环境
(base) E:\>conda create -n ML_Agents python=3.8
(base) E:\>conda activate ML_Agents

(ML_Agents) E:\>pip install torch~=1.7.1   # 如果安装很慢的话,可以换镜像源

(ML_Agents) E:\>cd E:\ml-agents-release_19 # 切换到下载ml-agents的路径下,如果不在同一个磁盘,先切换磁盘

(ML_Agents) E:\ml-agents-release_19>pip install -e./ml-agents-envs
(ML_Agents) E:\ml-agents-release_19>pip install -e./ml-agents
问:pip install torch~=1.7.1 中的~什么意思?
在Python中,波浪号(~)通常用于指定包的版本范围。在pip install命令中,~用于指定一个包的兼容版本范围,表示可以安装指定版本的包以及在该版本的最小和最大次要版本之间的所有修订版本。
例如,torch~=1.7.1表示可以安装1.7.1版本的torch包,以及在1.7.1版本的最小和最大次要版本之间的所有修订版本,例如1.7.2、1.7.3等,但不包括1.8.0及以上的版本。
这种方式可以确保包的更新不会破坏现有代码的兼容性,同时可以获取到包的修复和改进的更新版本。
另外推荐安装netron用于查看 onnx 模型结构(pip install netron)
netron在线版本:浏览器中输入链接:https://lutzroeder.github.io/netro/

点击Open Model,打开相应的网络模型文件即可。
参考博客:https://blog.csdn.net/nan355655600/article/details/106245563
windows版本netron下载链接:https://gitcode.net/mirrors/lutzroeder/netron?utm_source=csdn_github_accelerator
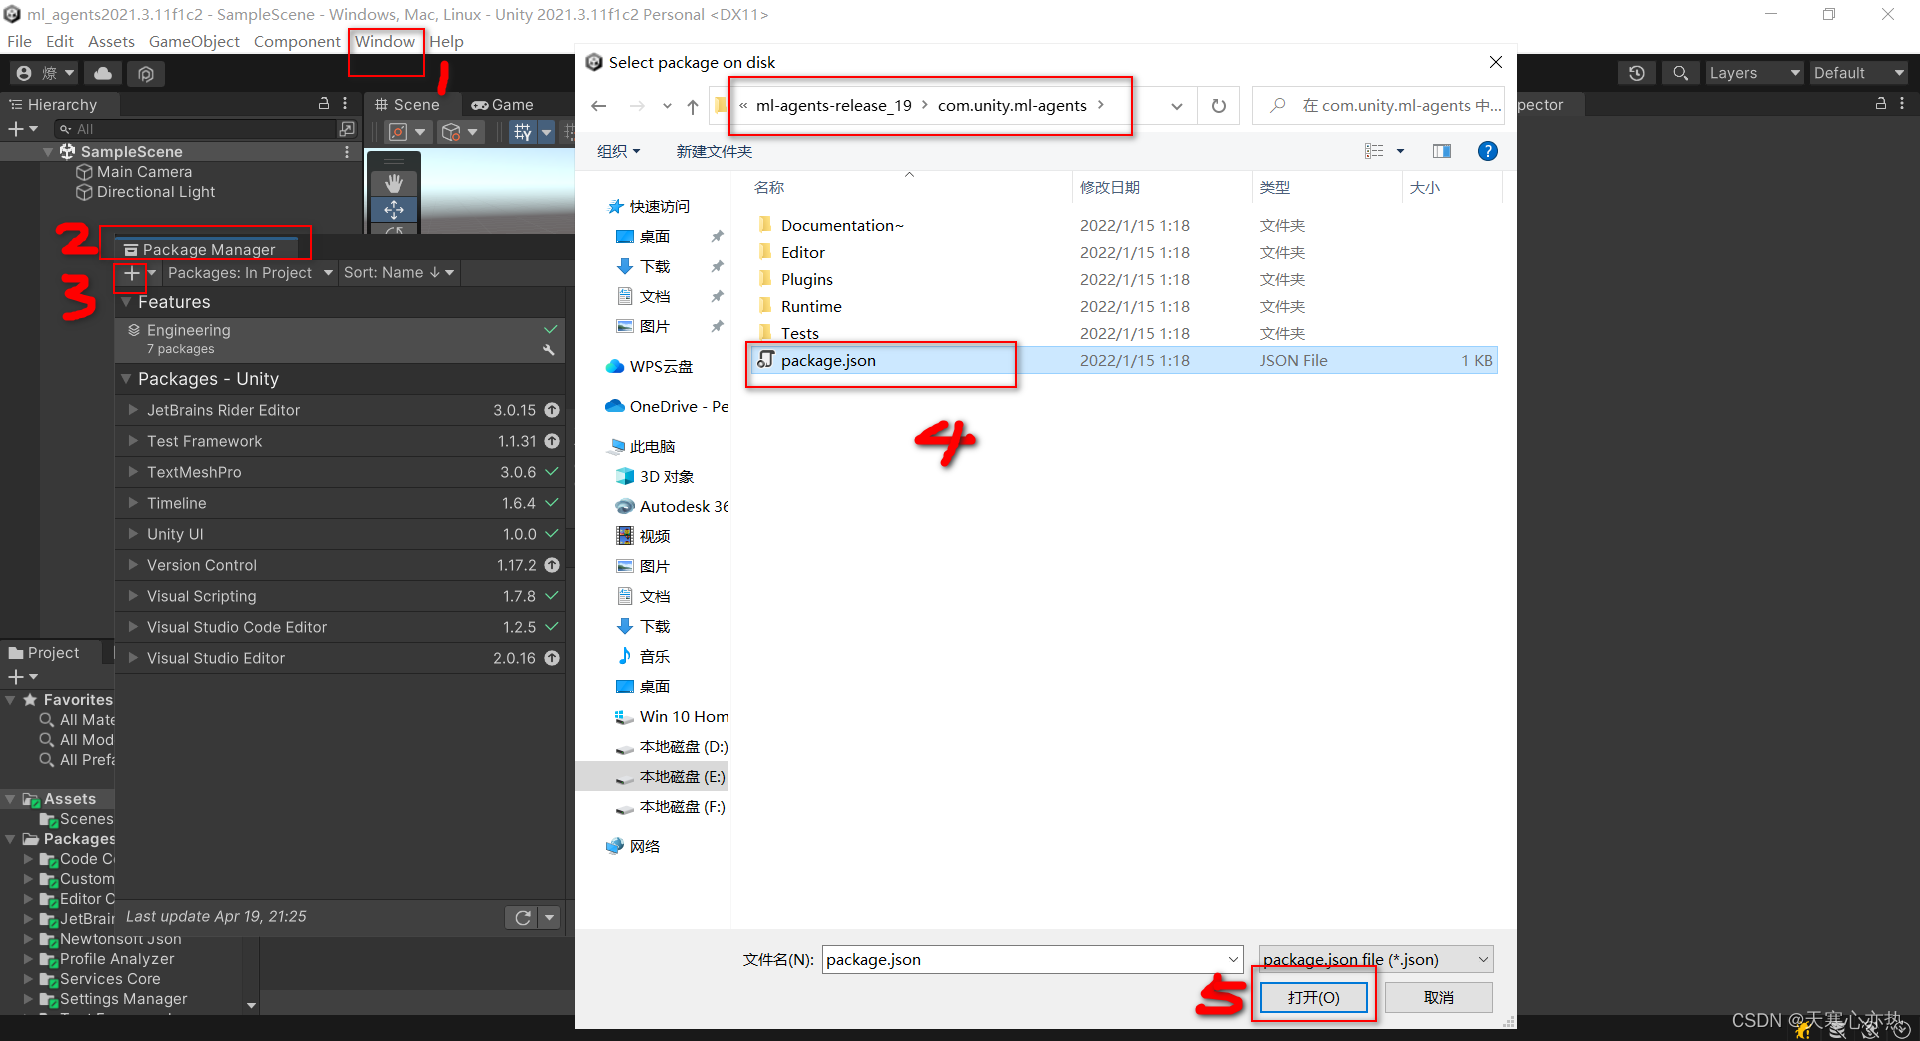
3.2 创建项目,导入package.json
3.2.1 创建项目,导入package.json
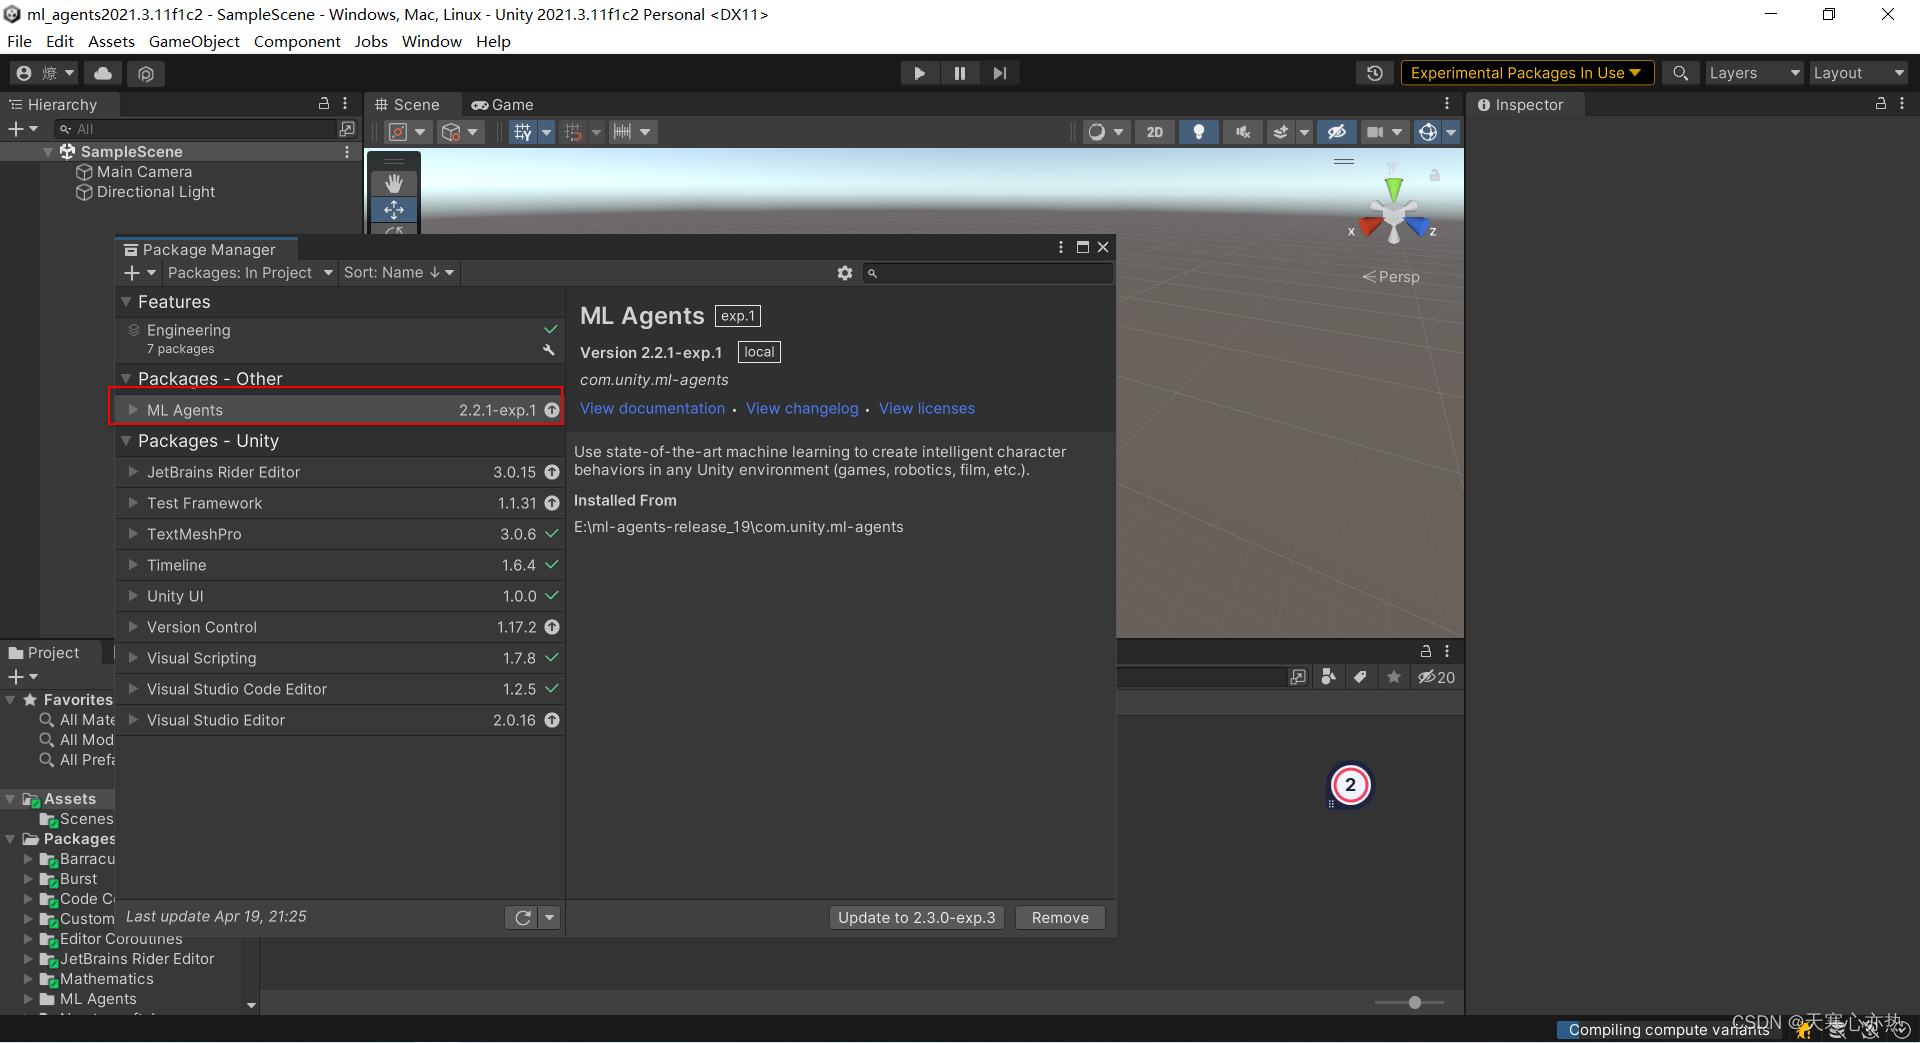
3.2.2 导入成功
3.2.3 将模板项目拖入unity项目中
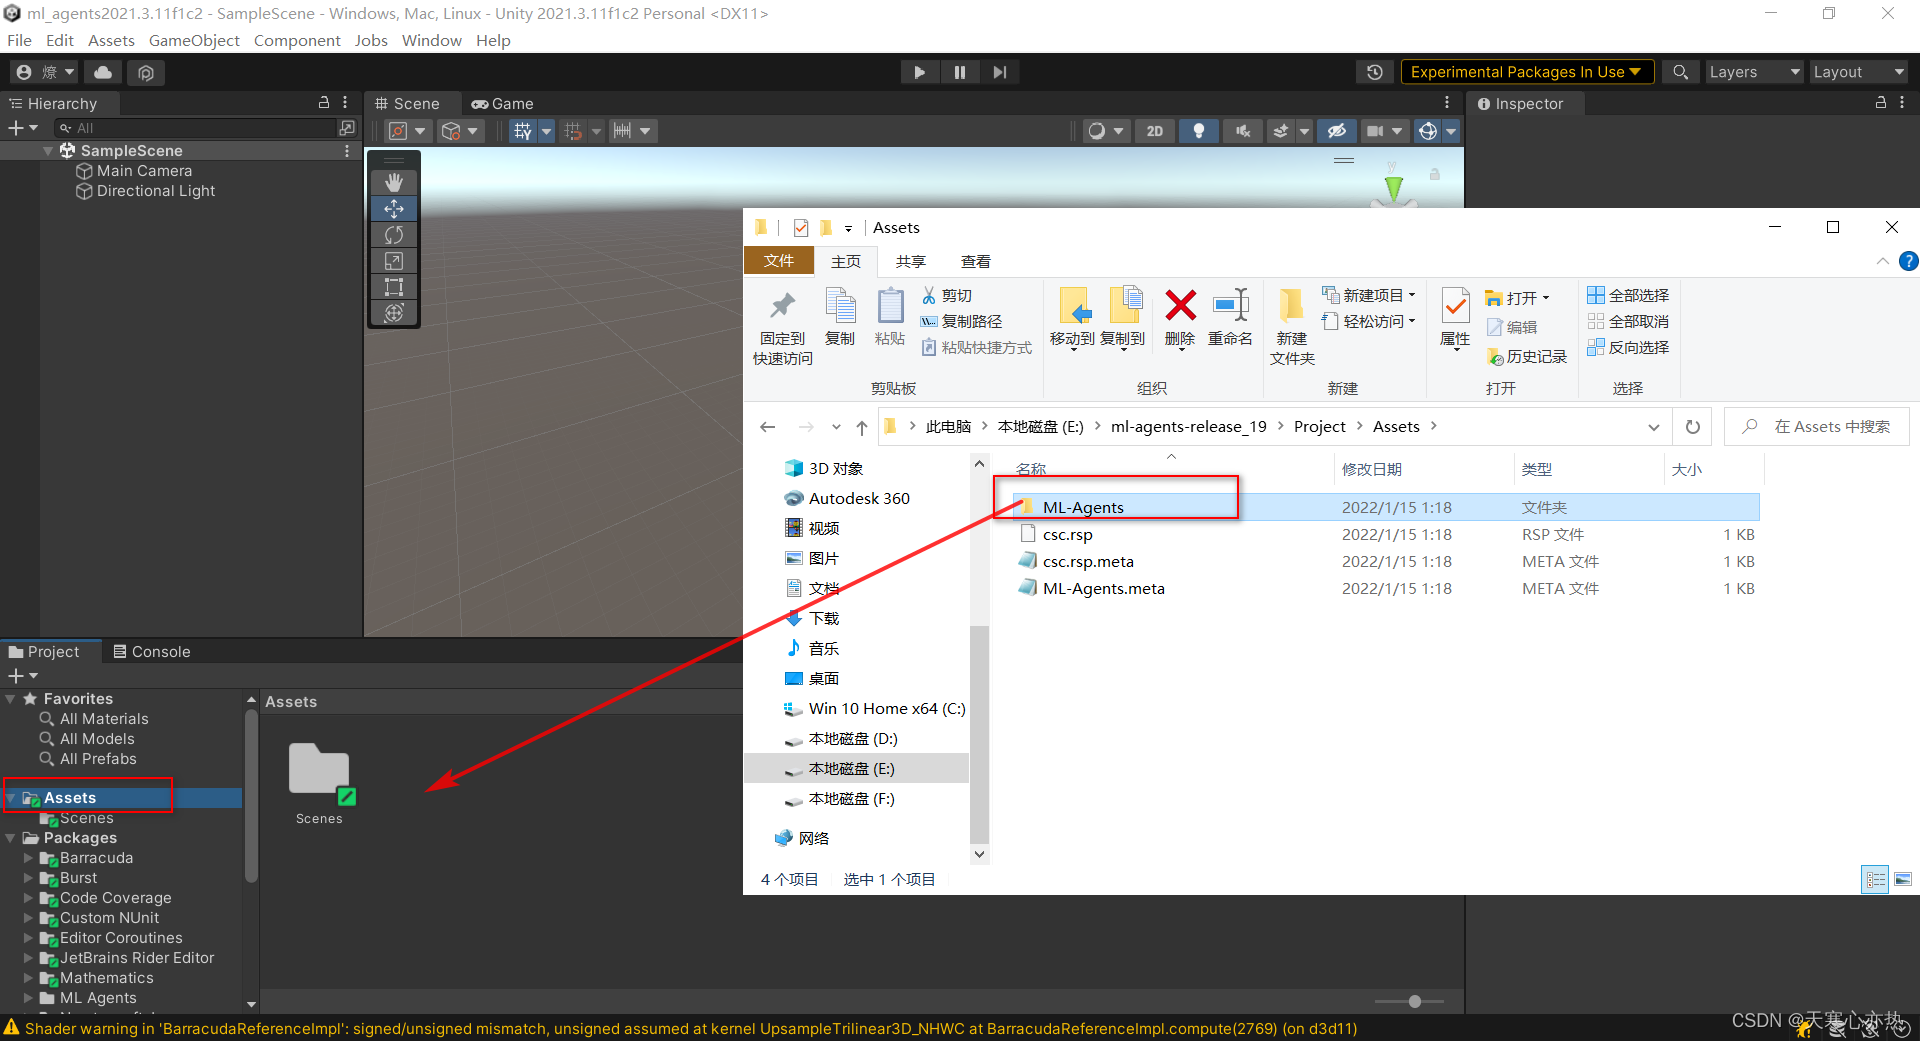
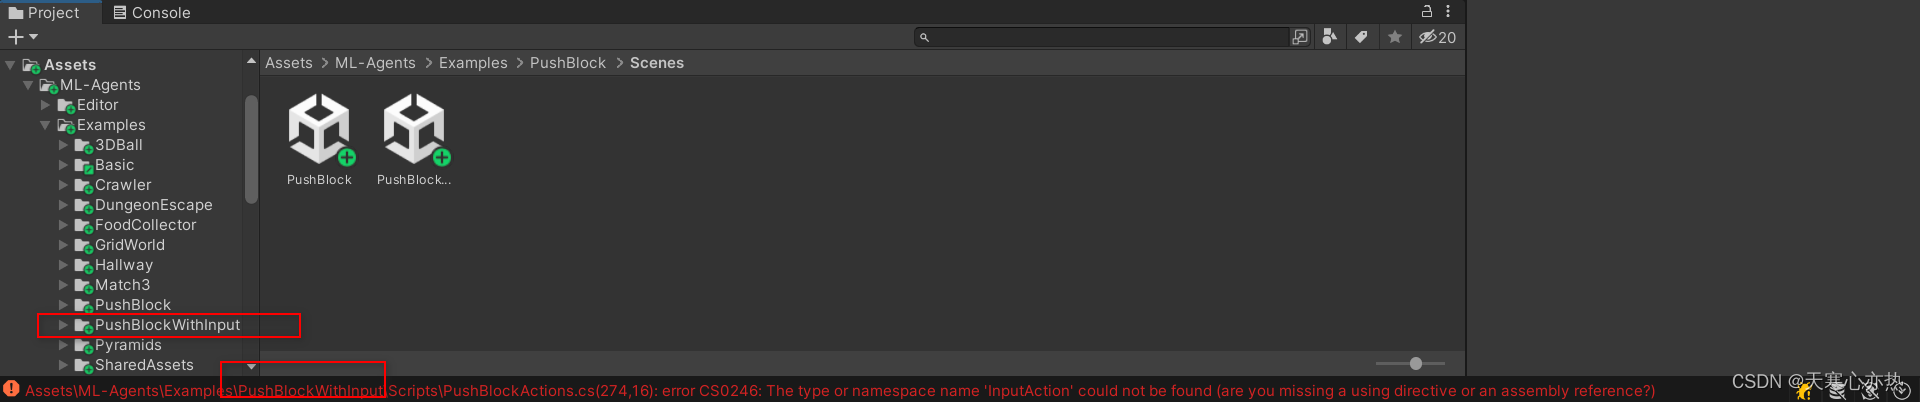
解决报错
注意:原始的包里有PushBlockWithInput这个文件夹,我们要将其删除,因为我们没有导入inputSystemPackagee,所以会报缺失inputSystem的错。
注意:要在拖入后删除,这样不会影响本机文件的完整性。
3.3 开始训练
3.3.1 开始训练
(ML_Agents) E:\ml-agents-release_19>mlagents-learn config/ppo/PushBlock.yaml --run-id=push_block_test_02重点:如果需要换成其他算法,只需将ppo换成poca、sac等即可,也可以修改配置文件里的一些参数,如神经网络的层数和节点数,以及其他超参数等。
配置文件路径在 E:\ml-agents-release_19\config\ppo\PushBlock.yaml
补充-利用可执行文件进行训练:
①官方文档:https://github.com/Unity-Technologies/ml-agents/blob/develop/docs/Learning-Environment-Executable.md
②具体实现方式:参考博客:https://blog.csdn.net/tianjuewudi/article/details/121115480
配置文件内容-PushBlock.yaml
behaviors:
PushBlock:
trainer_type: ppo
hyperparameters:
batch_size: 128
buffer_size: 2048
learning_rate: 0.0003
beta: 0.01
epsilon: 0.2
lambd: 0.95
num_epoch: 3
learning_rate_schedule: linear
network_settings:
normalize: false
hidden_units: 256
num_layers: 2
vis_encode_type: simple
reward_signals:
extrinsic:
gamma: 0.99
strength: 1.0
keep_checkpoints: 5
max_steps: 2000000
time_horizon: 64
summary_freq: 60000这是一个ML-Agents配置文件的示例,以下是其中各个参数的详细的解释:
- behaviors:行为列表,指定了每个行为的训练设置和网络架构。
- PushBlock:行为名称。
- trainer_type:训练器的类型,这里是PPO。
- hyperparameters:超参数,包括以下几个:
- batch_size:每个训练批次的大小。
- buffer_size:经验缓存的大小。
- learning_rate:学习率。
- beta:熵正则化参数。
- epsilon:控制策略更新步长的参数。
- lambd:GAE参数。
- num_epoch:PPO算法中的epoch数。
- learning_rate_schedule:学习率调整策略,这里是线性调整。
- network_settings:神经网络设置,包括以下几个:
- normalize:是否对输入数据进行归一化处理。
- hidden_units:每个隐藏层中神经元的数量。
- num_layers:隐藏层数量。
- vis_encode_type:可视化编码类型,这里是simple。
- reward_signals:奖励信号设置,包括以下几个:
- extrinsic:外部奖励信号,包括以下两个参数:
- gamma:折扣率。
- strength:奖励信号权重。
- keep_checkpoints:保存检查点的数量。
- max_steps:最大训练步数。
- time_horizon:每个训练步长包含的最大时间步数。
- summary_freq:训练日志的记录频率。
参数详情请见:https://blog.csdn.net/aaaccc444/article/details/130300451
解决报错1
这个错误提示显示您的 protobuf 版本过高导致了问题。建议您采取以下措施之一:
- 降低 protobuf 版本,使其小于等于 3.20.x。
- 将环境变量 PROTOCOL_BUFFERS_PYTHON_IMPLEMENTATION 设置为 python。
第一种方法是安装一个旧版本的 protobuf。将protobuf包降级到3.20.x或更低版本,可以使用以下命令卸载当前版本的 protobuf,然后安装一个旧版本:
pip uninstall protobuf
pip install protobuf==3.19.6  # 之所以选择3.19.6这个版本,是结合了tensorboard版本后确定的。因为如果选择3.19.0版本会和tensorboard不兼容
第二种方法是将环境变量 PROTOCOL_BUFFERS_PYTHON_IMPLEMENTATION 设置为 python。这将使用纯 Python 解析,速度会慢一些,但可以解决问题。请注意,如果这个错误是由于你自己生成的代码导致的,则需要使用 protoc >= 3.19.0 重新生成代码。
在命令行中执行以下命令:
set PROTOCOL_BUFFERS_PYTHON_IMPLEMENTATION=python
设置后,再次运行您的命令,应该就不会再遇到此错误了。
解决报错2
(ML_Agents) E:\ml-agents-release_19>mlagents-learn config/ppo/PushBlock.yaml --run-id=push_block_test_02
Traceback (most recent call last):
  File "D:\RuanJianAnZhunangWeiZhi\anaconda\anaconda3\envs\ML_Agents\Scripts\mlagents-learn-script.py", line 33, in <module>
    sys.exit(load_entry_point('mlagents', 'console_scripts', 'mlagents-learn')())
  File "D:\RuanJianAnZhunangWeiZhi\anaconda\anaconda3\envs\ML_Agents\Scripts\mlagents-learn-script.py", line 25, in importlib_load_entry_point
    return next(matches).load()
  File "D:\RuanJianAnZhunangWeiZhi\anaconda\anaconda3\envs\ML_Agents\lib\importlib\metadata.py", line 77, in load
    module = import_module(match.group('module'))
  File "D:\RuanJianAnZhunangWeiZhi\anaconda\anaconda3\envs\ML_Agents\lib\importlib\__init__.py", line 127, in import_module
    return _bootstrap._gcd_import(name[level:], package, level)
  File "<frozen importlib._bootstrap>", line 1014, in _gcd_import
  File "<frozen importlib._bootstrap>", line 991, in _find_and_load
  File "<frozen importlib._bootstrap>", line 975, in _find_and_load_unlocked
  File "<frozen importlib._bootstrap>", line 671, in _load_unlocked
  File "<frozen importlib._bootstrap_external>", line 843, in exec_module
  File "<frozen importlib._bootstrap>", line 219, in _call_with_frames_removed
  File "e:\ml-agents-release_19\ml-agents\mlagents\trainers\learn.py", line 13, in <module>
    from mlagents.trainers.trainer_controller import TrainerController
  File "e:\ml-agents-release_19\ml-agents\mlagents\trainers\trainer_controller.py", line 13, in <module>
    from mlagents.trainers.env_manager import EnvManager, EnvironmentStep
  File "e:\ml-agents-release_19\ml-agents\mlagents\trainers\env_manager.py", line 12, in <module>
    from mlagents.trainers.policy import Policy
  File "e:\ml-agents-release_19\ml-agents\mlagents\trainers\policy\__init__.py", line 1, in <module>
    from mlagents.trainers.policy.policy import Policy  # noqa
  File "e:\ml-agents-release_19\ml-agents\mlagents\trainers\policy\policy.py", line 10, in <module>
    from mlagents.trainers.buffer import AgentBuffer
  File "e:\ml-agents-release_19\ml-agents\mlagents\trainers\buffer.py", line 97, in <module>
    class AgentBufferField(list):
  File "e:\ml-agents-release_19\ml-agents\mlagents\trainers\buffer.py", line 211, in AgentBufferField
    self, pad_value: np.float = 0, dtype: np.dtype = np.float32
  File "D:\RuanJianAnZhunangWeiZhi\anaconda\anaconda3\envs\ML_Agents\lib\site-packages\numpy\__init__.py", line 305, in __getattr__
    raise AttributeError(__former_attrs__[attr])
AttributeError: module 'numpy' has no attribute 'float'.
`np.float` was a deprecated alias for the builtin `float`. To avoid this error in existing code, use `float` by itself. Doing this will not modify any behavior and is safe. If you specifically wanted the numpy scalar type, use `np.float64` here.
The aliases was originally deprecated in NumPy 1.20; for more details and guidance see the original release note at:
    https://numpy.org/devdocs/release/1.20.0-notes.html#deprecations
这个错误信息看起来是在使用 mlagents-learn 命令时出现的。根据错误信息显示的内容,问题可能出现在 NumPy 库版本的兼容性问题上。
具体来说,这里似乎出现了一个 AttributeError 异常,指出 numpy 模块中没有 float 属性。根据 NumPy 的文档,这个错误是因为 np.float 被废弃了,而正确的做法是直接使用 Python 内置的 float 类型。
要解决这个问题,一种方法是升级 NumPy 库到最新版本,然后修改相关代码,用 Python 的 float 类型替换所有使用了 np.float 的地方。另一种方法是降级 NumPy 到旧版本,例如 1.19.x 或更低版本,这个版本中仍然支持 np.float。
因此,您可以尝试通过以下命令降级 NumPy 库到 1.19.x 或更低版本:
pip install numpy==1.19
请注意,这可能会影响其他依赖 NumPy 库的项目,因此请在升级或降级 NumPy 时格外小心,确保您的环境保持稳定。
3.3.2 选择场景
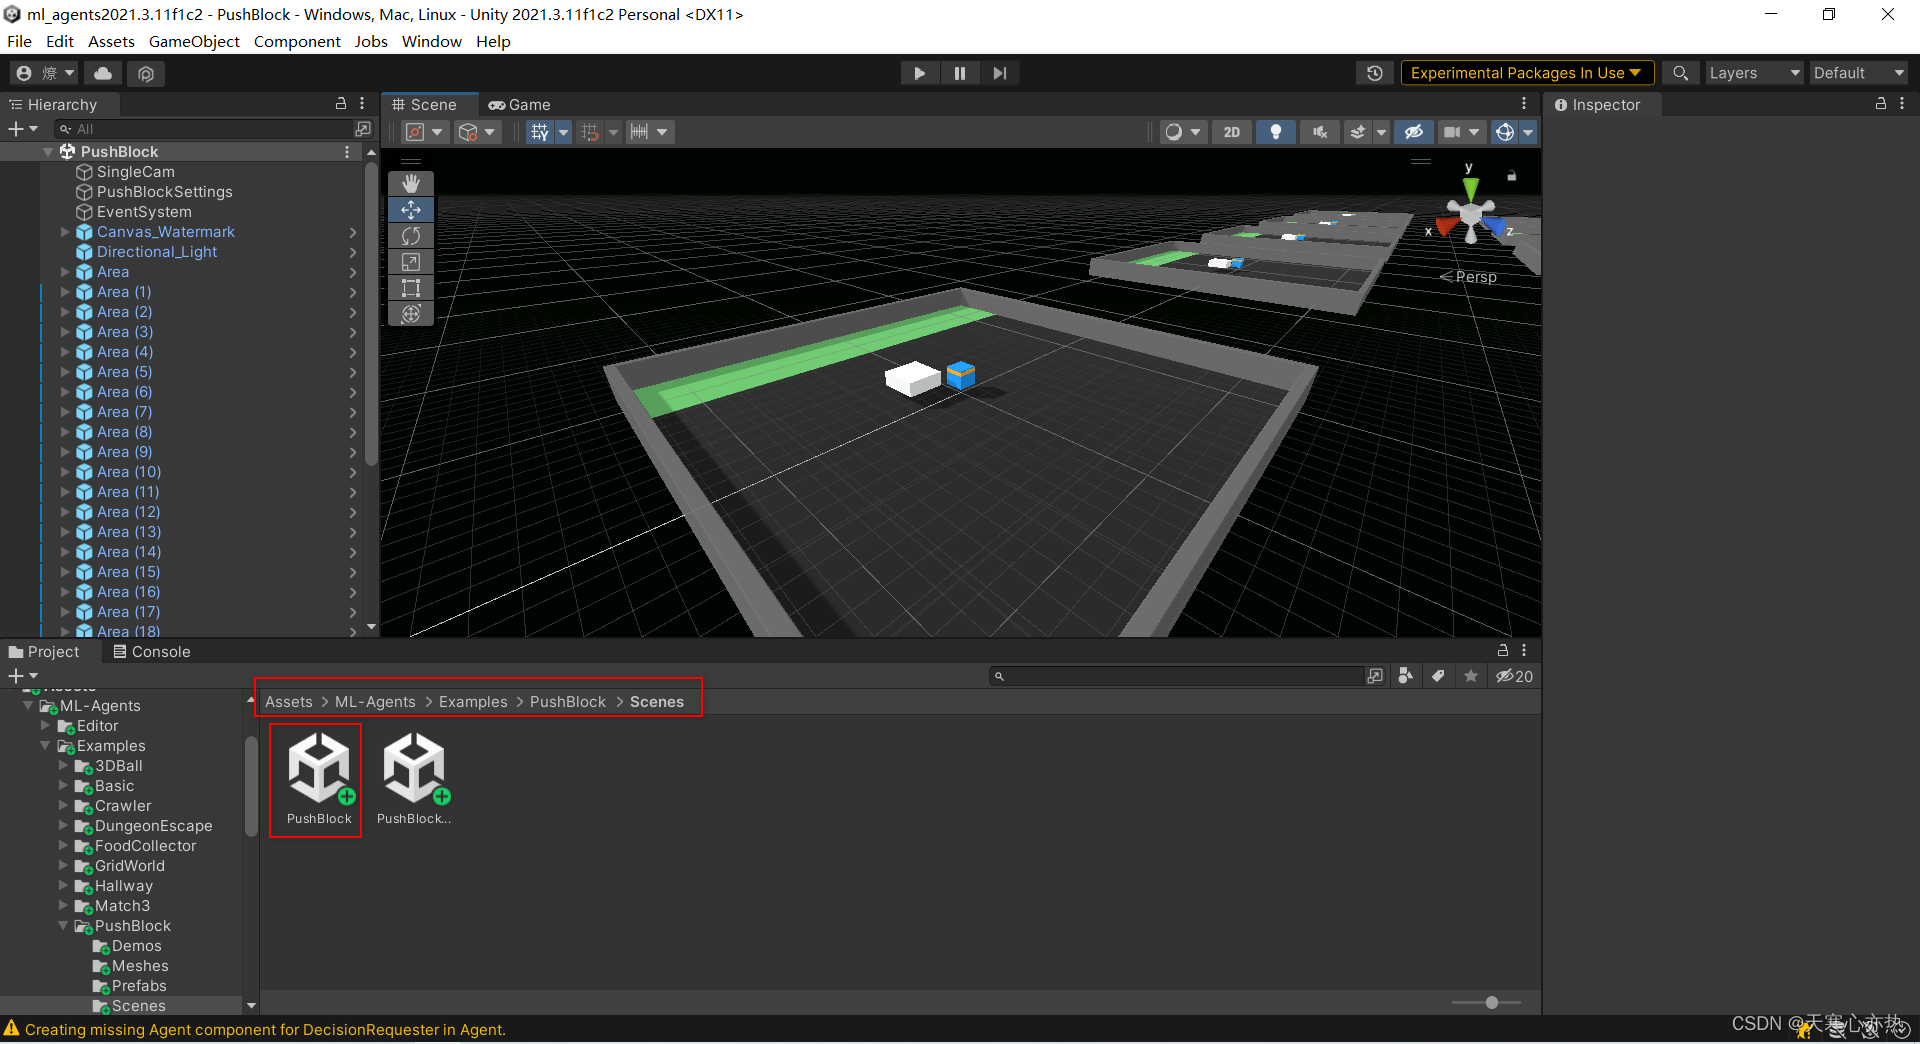
因为之前训练过,会提示是继续训练还是覆盖训练
解决报错
(ML_Agents) E:\ml-agents-release_19>mlagents-learn config/ppo/PushBlock.yaml --run-id=push_block_test_02

            ┐  ╖
        ╓╖╬│╡  ││╬╖╖
    ╓╖╬│││││┘  ╬│││││╬╖
 ╖╬│││││╬╜        ╙╬│││││╖╖                               ╗╗╗
 ╬╬╬╬╖││╦╖        ╖╬││╗╣╣╣╬      ╟╣╣╬    ╟╣╣╣             ╜╜╜  ╟╣╣
 ╬╬╬╬╬╬╬╬╖│╬╖╖╓╬╪│╓╣╣╣╣╣╣╣╬      ╟╣╣╬    ╟╣╣╣ ╒╣╣╖╗╣╣╣╗   ╣╣╣ ╣╣╣╣╣╣ ╟╣╣╖   ╣╣╣
 ╬╬╬╬┐  ╙╬╬╬╬│╓╣╣╣╝╜  ╫╣╣╣╬      ╟╣╣╬    ╟╣╣╣ ╟╣╣╣╙ ╙╣╣╣  ╣╣╣ ╙╟╣╣╜╙  ╫╣╣  ╟╣╣
 ╬╬╬╬┐     ╙╬╬╣╣      ╫╣╣╣╬      ╟╣╣╬    ╟╣╣╣ ╟╣╣╬   ╣╣╣  ╣╣╣  ╟╣╣     ╣╣╣┌╣╣╜
 ╬╬╬╜       ╬╬╣╣      ╙╝╣╣╬      ╙╣╣╣╗╖╓╗╣╣╣╜ ╟╣╣╬   ╣╣╣  ╣╣╣  ╟╣╣╦╓    ╣╣╣╣╣
 ╙   ╓╦╖    ╬╬╣╣   ╓╗╗╖            ╙╝╣╣╣╣╝╜   ╘╝╝╜   ╝╝╝  ╝╝╝   ╙╣╣╣    ╟╣╣╣
   ╩╬╬╬╬╬╬╦╦╬╬╣╣╗╣╣╣╣╣╣╣╝                                             ╫╣╣╣╣
      ╙╬╬╬╬╬╬╬╣╣╣╣╣╣╝╜
          ╙╬╬╬╣╣╣╜
             ╙

 Version information:
  ml-agents: 0.28.0,
  ml-agents-envs: 0.28.0,
  Communicator API: 1.5.0,
  PyTorch: 1.7.1+cpu
Traceback (most recent call last):
  File "D:\RuanJianAnZhunangWeiZhi\anaconda\anaconda3\envs\ML_Agents\Scripts\mlagents-learn-script.py", line 33, in <module>
    sys.exit(load_entry_point('mlagents', 'console_scripts', 'mlagents-learn')())
  File "e:\ml-agents-release_19\ml-agents\mlagents\trainers\learn.py", line 260, in main
    run_cli(parse_command_line())
  File "e:\ml-agents-release_19\ml-agents\mlagents\trainers\learn.py", line 256, in run_cli
    run_training(run_seed, options, num_areas)
  File "e:\ml-agents-release_19\ml-agents\mlagents\trainers\learn.py", line 71, in run_training
    validate_existing_directories(
  File "e:\ml-agents-release_19\ml-agents\mlagents\trainers\directory_utils.py", line 25, in validate_existing_directories
    raise UnityTrainerException(
mlagents.trainers.exception.UnityTrainerException: Previous data from this run ID was found. Either specify a new run ID, use --resume to resume this run, or use the --force parameter to overwrite existing data.
这段错误信息提示你的ML-Agents训练过程出现了问题。具体来说,这个错误信息说先前这个run ID的训练数据已经存在,你需要指定一个新的run ID,使用--resume来恢复这个run ID的训练,或者使用--force参数来覆盖已有的数据。
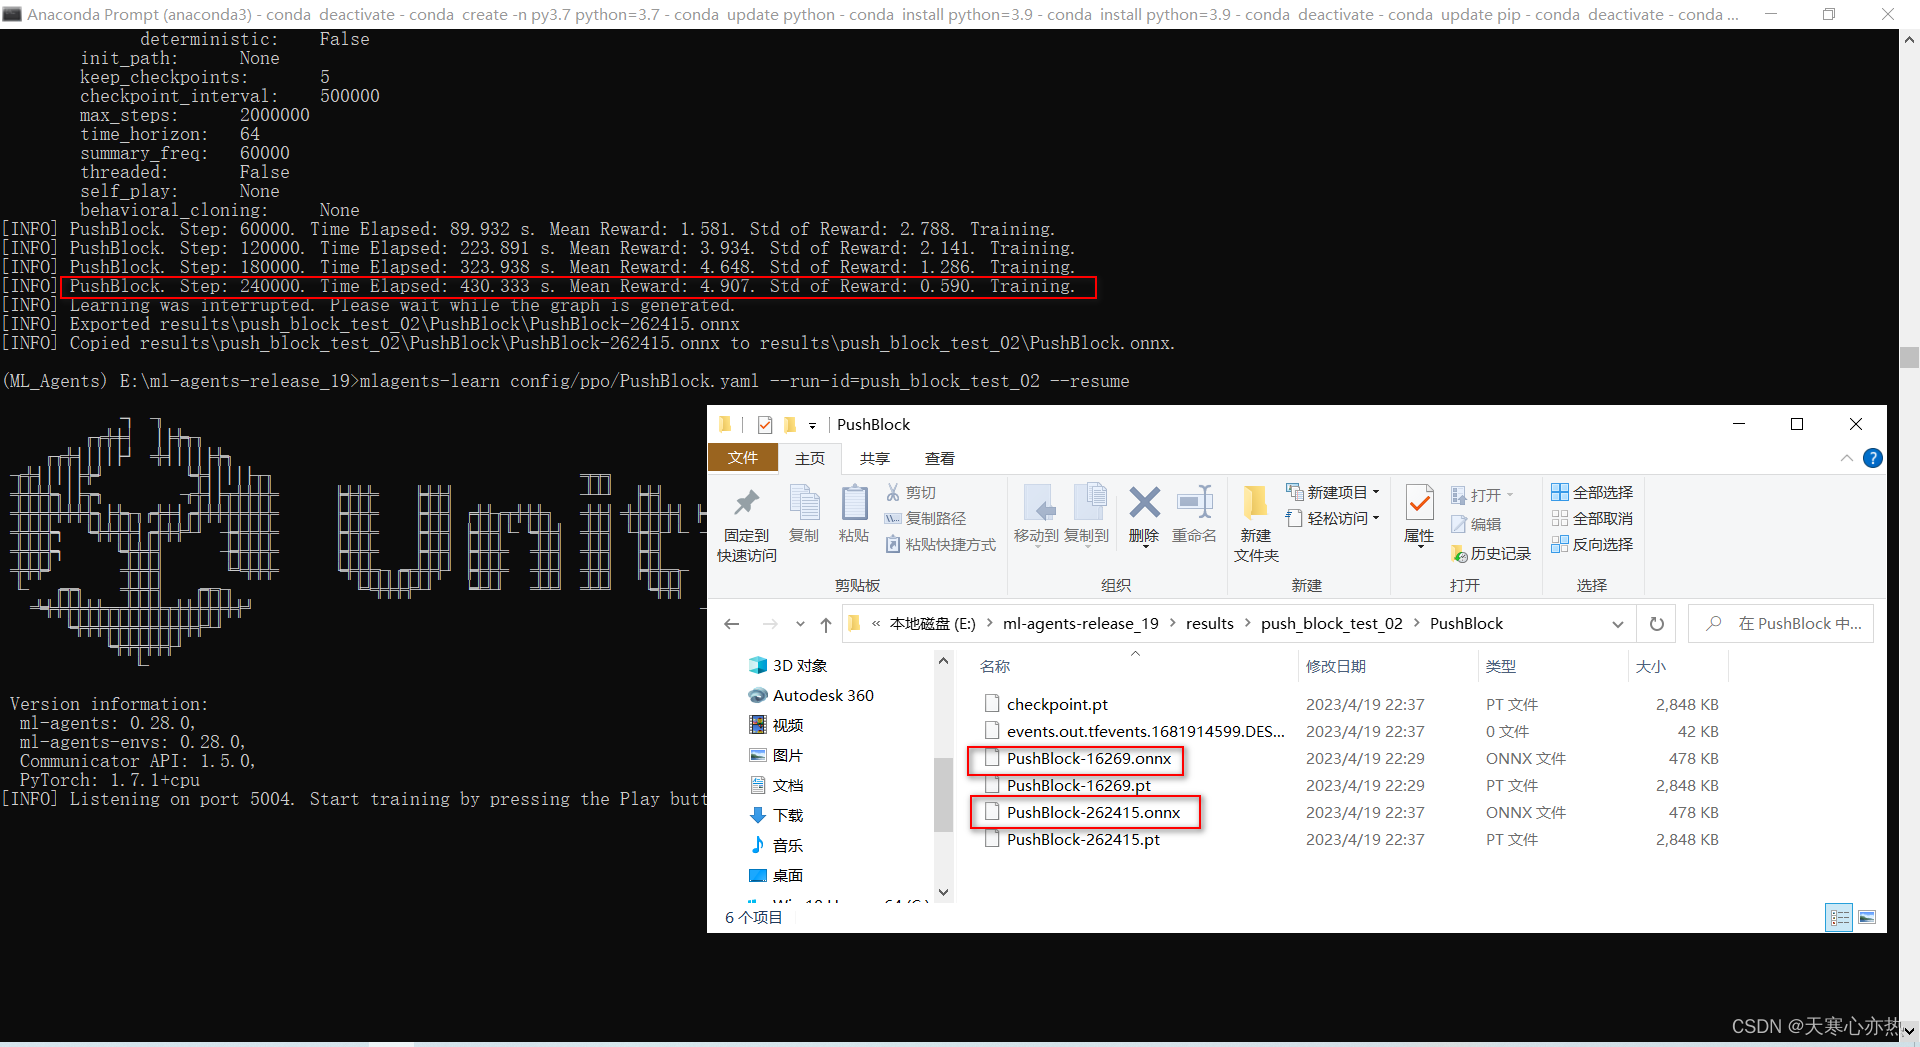
正确训练开始

这是训练262415和16269的结果(注意查找路径),正常是训练2000000步停止训练。
利用ctrl+c终止训练,利用代码:(ML_Agents) E:\ml-agents-release_19>mlagents-learn config/ppo/PushBlock.yaml --run-id=push_block_test_02 --resume 继续训练
这是继续训练后:382252步的结果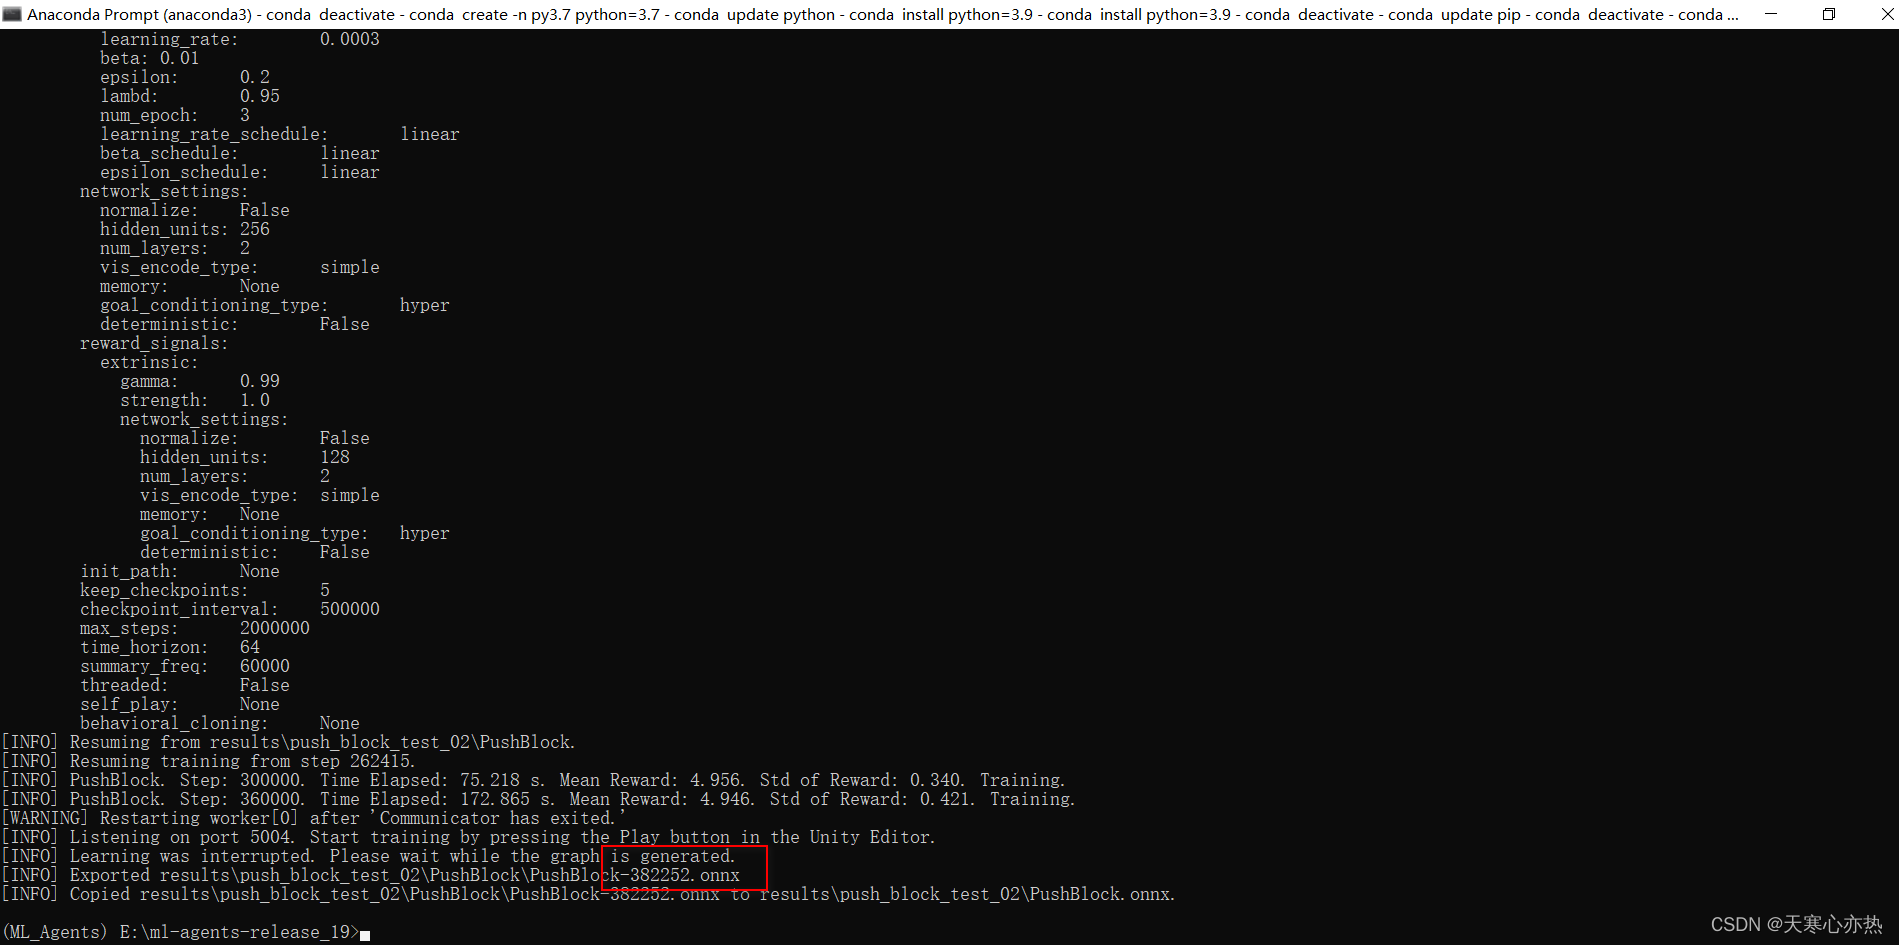
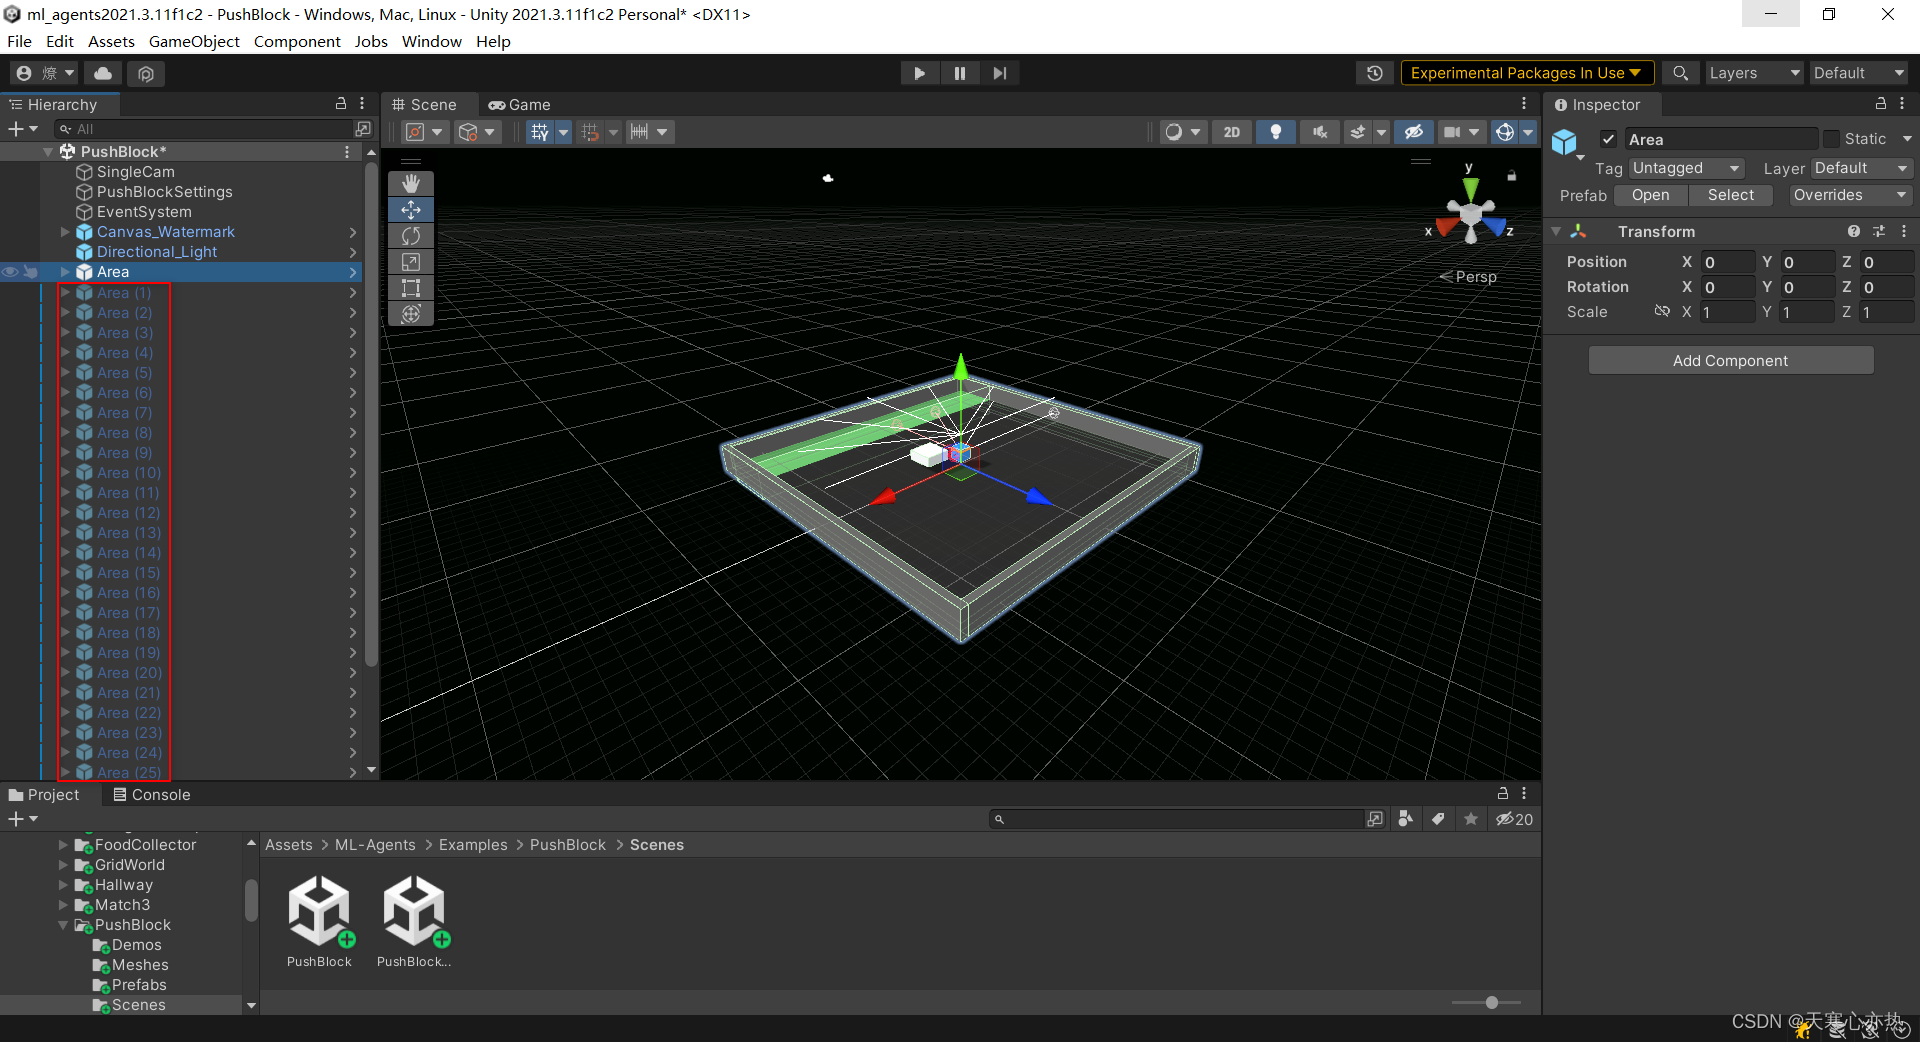
3.3.3 利用训练结果
其他场景先禁用,方便将训练结果拖入Area,不然得重复操作32次
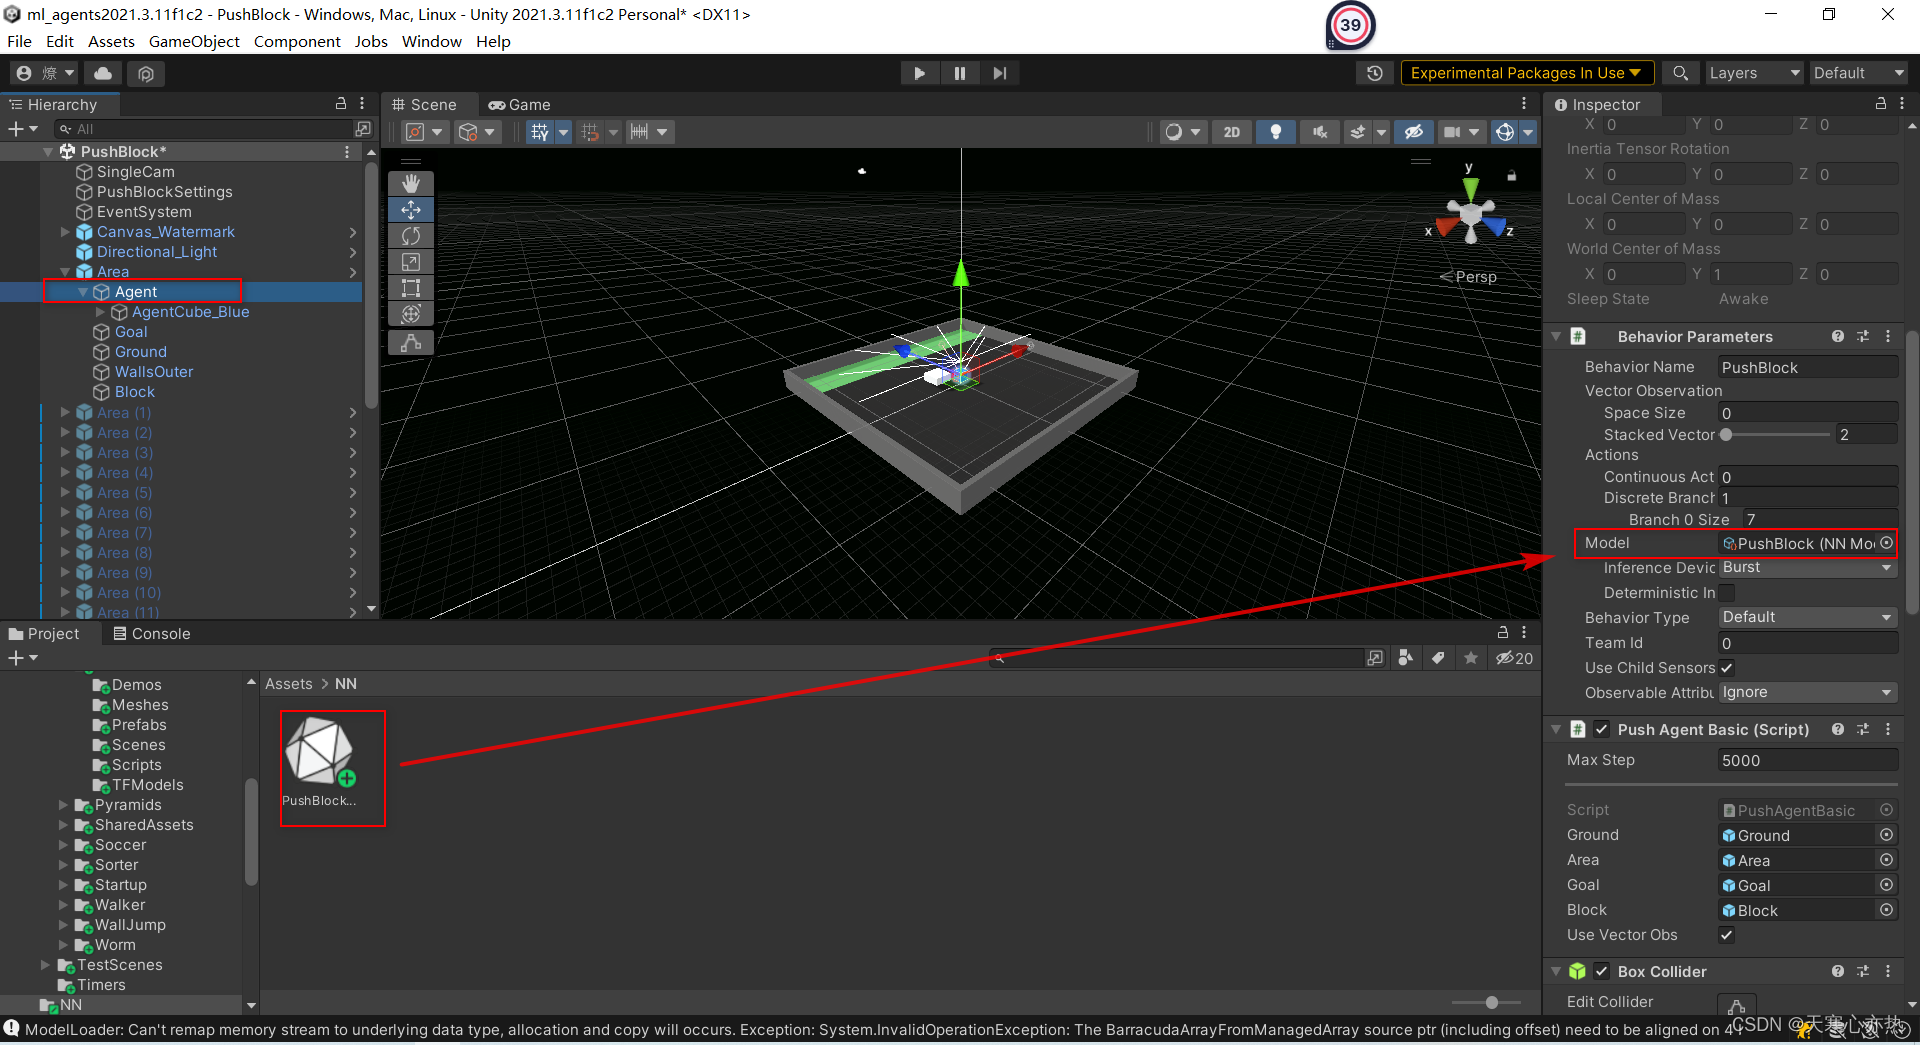
新建一个NN文件夹,把382252步的结果拖入
原先的是自带的网络,更换成我们自己的网络。
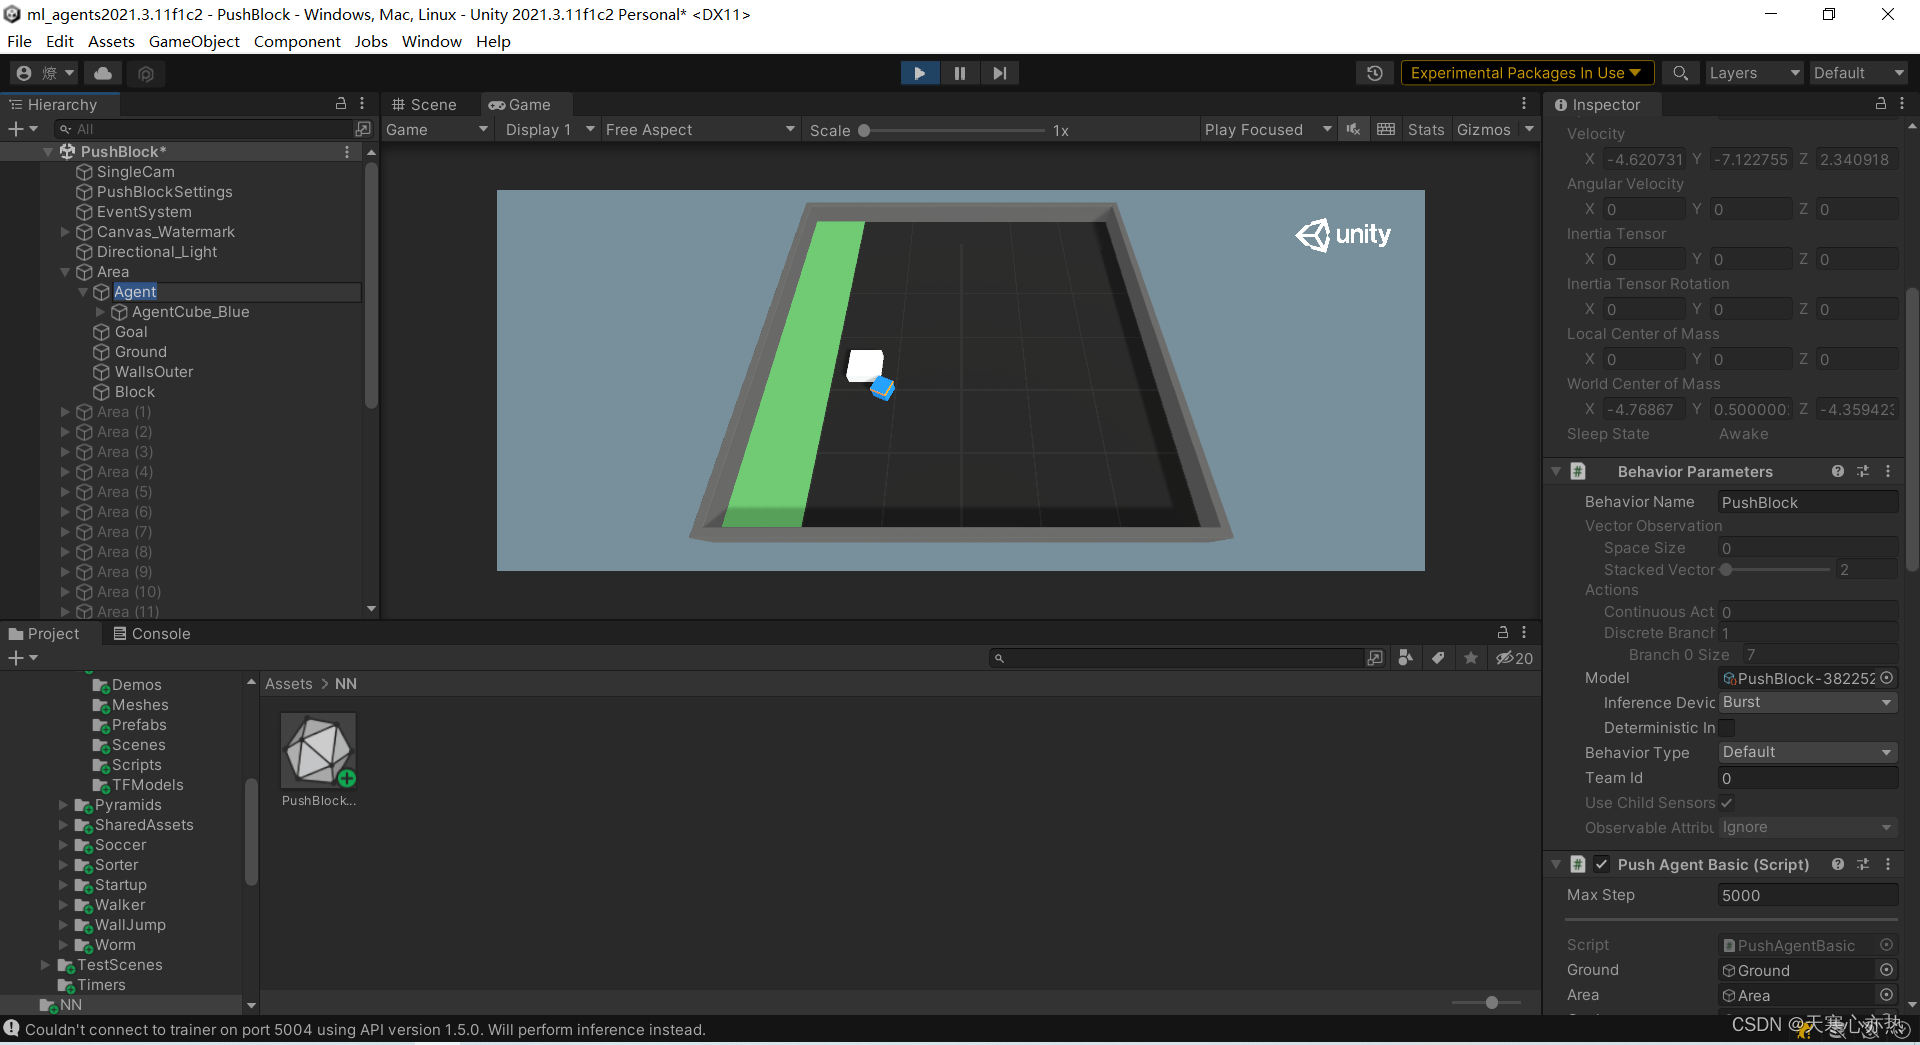
利用训练结果直接完成任务
4. 安装cuda和cudnn
在训练的同时,可以新打开一个命令行窗口,激活环境,安装cuda和cudnn
4.1 安装cudatoolkit
(mlagents) C:\Users\HASEE>conda search cuda

(mlagents) C:\Users\HASEE>conda install cudatoolkit=10.1.243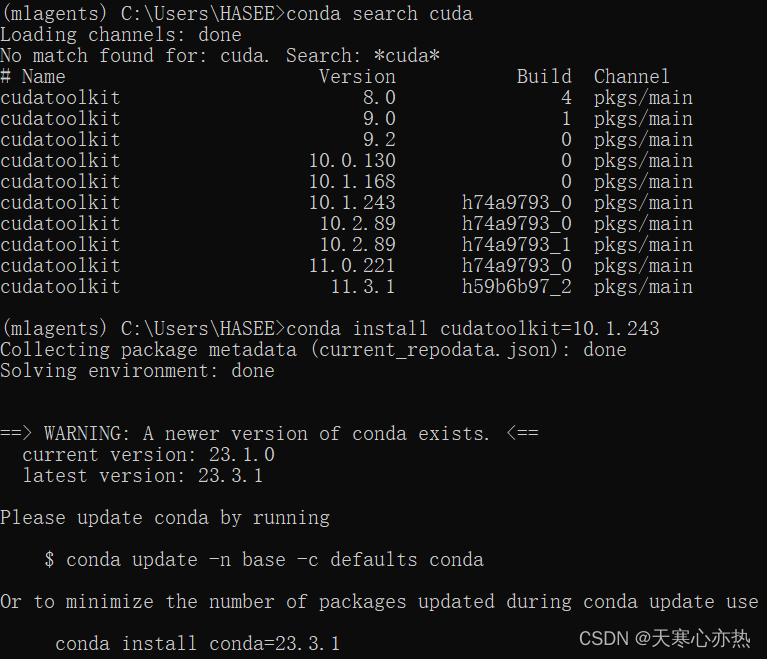
4.2 安装cudnn
(mlagents) C:\Users\HASEE>conda search cudnn

(mlagents) C:\Users\HASEE>conda install cudnn==7.6.5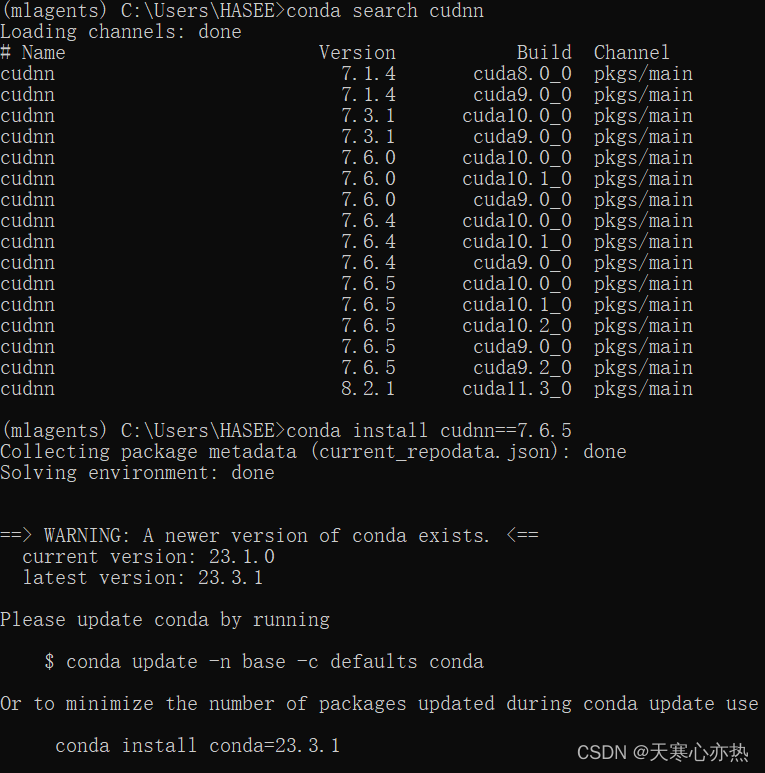
具体的cudatoolkit 与cudnn的版本对应情况暂时没找到之前一篇写的比较好的博客,请等待后续补充。