1 概述
Qt 共提供了 5 种布局管理器,每种布局管理器对应一个类,分别是 QVBoxLayout(垂直布局)、QHBoxLayout(水平布局)、QGridLayout(网格布局)、QFormLayout(表单布局)和 QStackedLayout(分组布局),它们的继承关系如下图所示:
2 BoxLayout
QVBoxLayout:垂直布局
QHBoxLayout:水平布局
官方的例子
创建多个按钮,然后layout添加这些按钮
     QWidget *window = new QWidget;
     QPushButton *button1 = new QPushButton("One");
     QPushButton *button2 = new QPushButton("Two");
     QPushButton *button3 = new QPushButton("Three");
     QPushButton *button4 = new QPushButton("Four");
     QPushButton *button5 = new QPushButton("Five");

     QVBoxLayout *layout = new QVBoxLayout(window);
     layout->addWidget(button1);
     layout->addWidget(button2);
     layout->addWidget(button3);
     layout->addWidget(button4);
     layout->addWidget(button5);

     window->show();
每个layout创建的时候,可以通过如下两种方式绑定其父窗口
//构造时候绑定this
    QVBoxLayout *VLayout1 = new QVBoxLayout(this);
//构造时候不绑定
    QVBoxLayout *VLayout1 = new QVBoxLayout();
    //    QVBoxLayout *VLayout1 = new QVBoxLayout;
   setLayout(VLayout1);
   //函数原型void setLayout(QLayout *);
这是我的demo
    QVBoxLayout *VLayout1 = new QVBoxLayout;
    for(int i = 0;i < 10 ;++i)
    {


        QPushButton *btn = new QPushButton;
        btn->setText(QString::number(i,10));
        VLayout1->addWidget(btn);
    }
    setLayout(VLayout1);//注意这个是QWidget使用的方法
显示结果如下: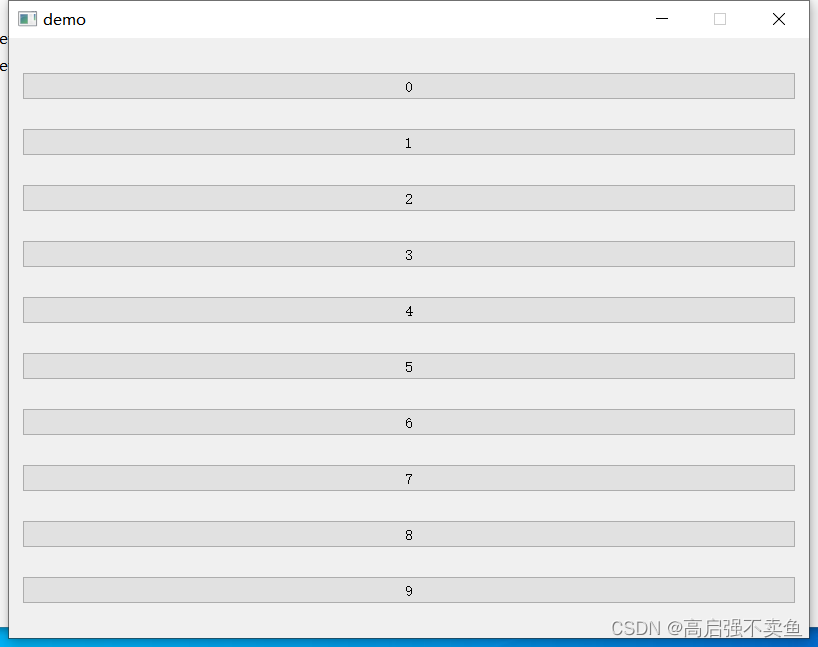
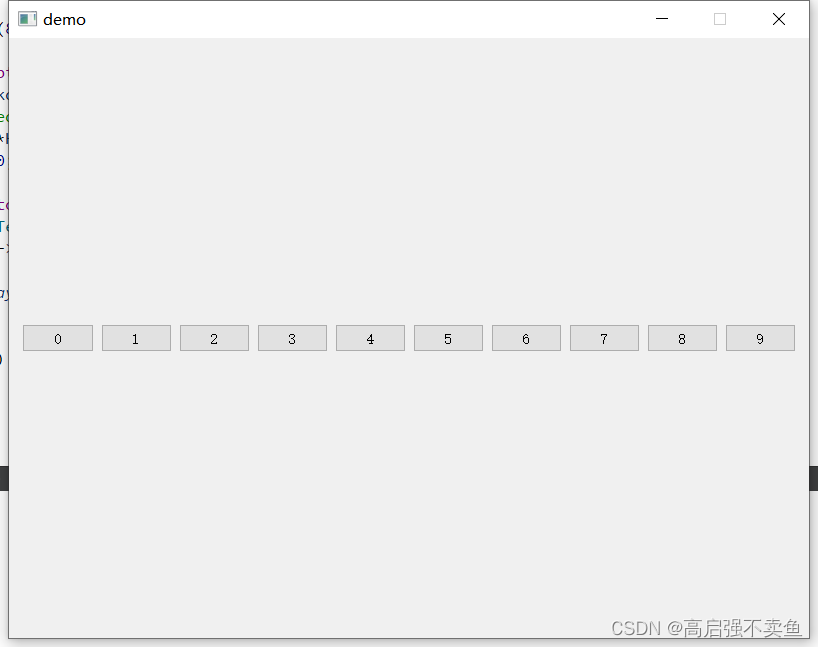
水平布局只要把QVBoxLayout 换成QHBoxLayout
3 QGridLayout
网格布局
网格布局需要设置行和列.不设置行列的话,本质上会垂直填充
//4个 函数原型
inline void addWidget(QWidget *w) {

     QLayout::addWidget(w); }
void addWidget(QWidget *, int row, int column, Qt::Alignment = Qt::Alignment());
void addWidget(QWidget *, int row, int column, int rowSpan, int columnSpan, Qt::Alignment = Qt::Alignment());
void addLayout(QLayout *, int row, int column, Qt::Alignment = Qt::Alignment());
void addLayout(QLayout *, int row, int column, int rowSpan, int columnSpan, Qt::Alignment = Qt::Alignment());
demo代码如下
    QGridLayout *qGridLayout = new QGridLayout;
    for(int i = 0; i < 4;++i)
    {


        for(int j = 0; j < 5;++j)
        {


            QPushButton *btn = new QPushButton;
            QString s = "第"+QString("%1").arg(i)+"行"+"第"+QString("%1").arg(j)+"列";
            btn->setText(s);
            qGridLayout->addWidget(btn,i,j);
        }
    }
    setLayout(qGridLayout);
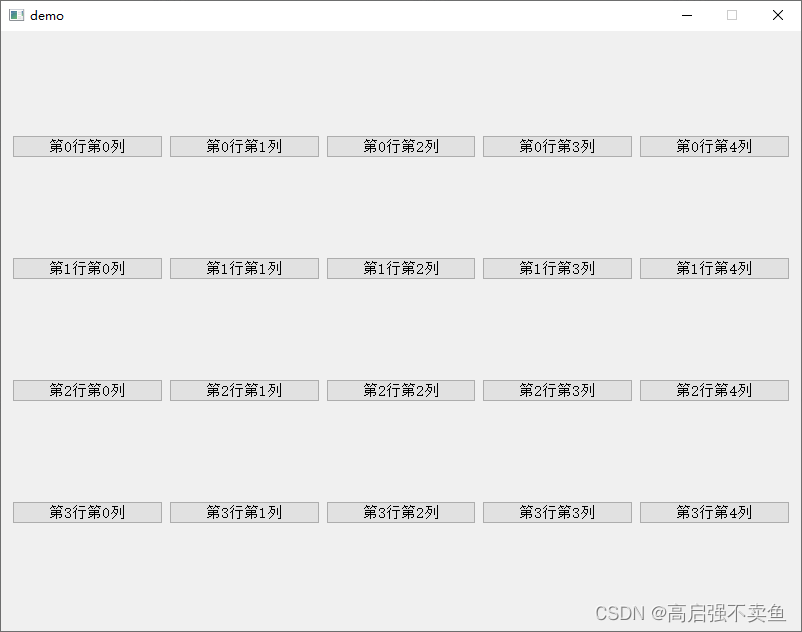
以上布局,你会发现边距会比较大。
可以通过这两个方法来设置 内外边距
    qGridLayout->setMargin(0);//设置外边距
    qGridLayout->setSpacing(0);//设置外边距
4 QFormLayout
表单布局是在网格布局上的优化,直接继承QLayout,官方demo如下
    QFormLayout *qLayout = new QFormLayout;
    QLineEdit *nameLineEdit = new QLineEdit;
    QLineEdit *emailLineEdit = new QLineEdit;
    QLineEdit *ageSpinBox = new QLineEdit;

    qLayout->addRow(tr("&Name:"), nameLineEdit);
    qLayout->addRow(tr("&Email:"), emailLineEdit);
    qLayout->addRow(tr("&Age:"), ageSpinBox);

    setLayout(qLayout);
4 QStackedLayout
QStackedLayout继承自QLayout。
QStackedLayout类提供了多页面切换的布局,一次只能看到一个界面。
直接看官方给的demo,稍微修正了一下,更改内容如下.
    QPushButton *pButton = new QPushButton(this);
    QLabel *pFirstPage= new QLabel(this);
    QLabel *pSecondPage = new QLabel(this);
    QLabel *pThirdPage = new QLabel(this);
    m_pStackedLayout = new QStackedLayout();

    pButton->setText(QStringLiteral("点切换"));
    pFirstPage->setText(QStringLiteral("第一页"));
    pSecondPage->setText(QStringLiteral("第二页"));
    pThirdPage->setText(QStringLiteral("第三页"));

    m_pStackedLayout->addWidget(pFirstPage);
    m_pStackedLayout->addWidget(pSecondPage);
    m_pStackedLayout->addWidget(pThirdPage);

    QVBoxLayout *pLayout = new QVBoxLayout();
    pLayout->addWidget(pButton, 0, Qt::AlignLeft | Qt::AlignVCenter);
    pLayout->addLayout(m_pStackedLayout);
    setLayout(pLayout);

    connect(pButton,&QPushButton::clicked,[&](bool){


        int nCount = m_pStackedLayout->count();
        int nIndex = m_pStackedLayout->currentIndex();

        ++nIndex;

        if (nIndex >= nCount)
            nIndex = 0;
        m_pStackedLayout->setCurrentIndex(nIndex);
    });