1:在tpu-mlir目录下进入docker
docker run --privileged --name tpu-mlir -v $PWD:/workspace -it sophgo/tpuc_dev:v2.2
原因:该镜像已创建,要么重新创建一个新进程,要么杀死老进程;
解决办法如下: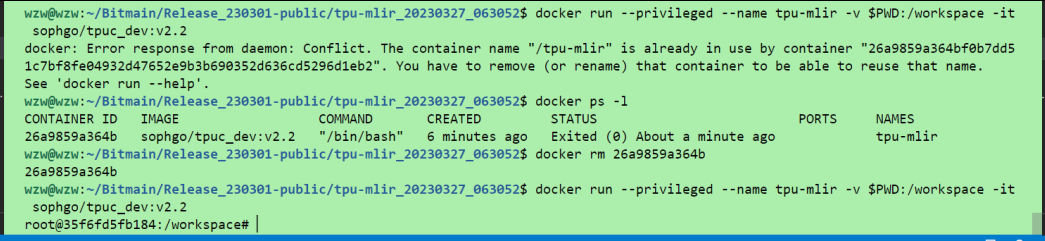
2:接着设置一下环境
source envsetup.sh!!!重要 别忘了
3:进入/workspace/sophon-demo/sample
复制一份YOLOv5并命名为export_model,这里我们将不需要的文件都删除,保留下图文件即可;其中将转化好的onnx模型拷贝一份到以下目录
/workspace/sophon-demo/sample/export_model/models/onnx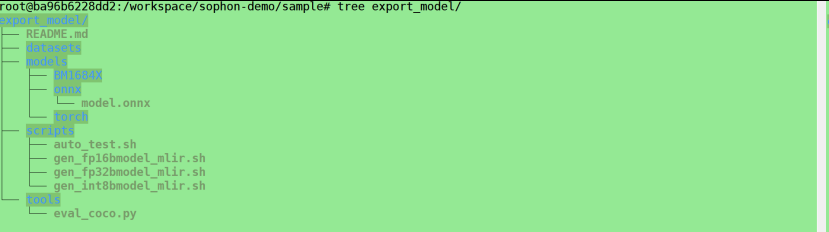
4:转化为fp32格式
cd /workspace/sophon-demo/sample/export_model/scripts
修改gen_fp32bmodel_mlir.sh,主要修改gen_mlir()以及gen_fp32bmodel()
function gen_mlir()
{
    model_transform.py \
        --model_name test_output \
        --model_def ../models/onnx/model.onnx \
        --mlir test_output_$1b.mlir
}

function gen_fp32bmodel()
{
    model_deploy.py \
        --mlir test_output_$1b.mlir \
        --quantize F32 \
        --chip $target \
        --model test_output_fp32_$1b.bmodel

    mv test_output_fp32_$1b.bmodel $outdir/
}
执行 ./gen_fp32bmodel_mlir.sh BM1684X 即可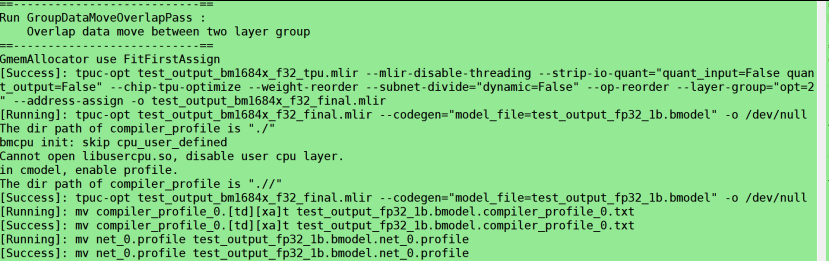
5:转化为fp16
修改gen_fp16bmodel_mlir.sh,主要修改gen_mlir()以及gen_fp16bmodel()
function gen_mlir()
{
    model_transform.py \
        --model_name test_output \
        --model_def ../models/onnx/model.onnx \
        --mlir test_output_$1b.mlir
}


function gen_fp16bmodel()
{
    model_deploy.py \
        --mlir test_output_$1b.mlir \
        --quantize F16 \
        --chip $target \
        --model test_output_fp16_$1b.bmodel

    mv test_output_fp16_$1b.bmodel $outdir/
}
执行./gen_fp16bmodel_mlir.sh BM1684X
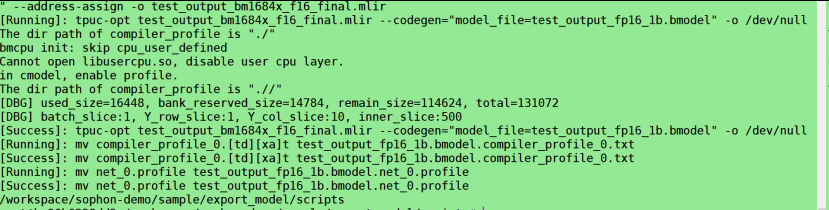
执行成功后可以看到在以下路径生成的bmodel
/workspace/sophon-demo/sample/export_model/models/BM1684X
6:转化为int8
至此,模型转化完成,bmodel主要用于BM1684X的板端推理