学习教材:《Android应用开发范例精解》
(代码稍有改动,不是完全自创,但无转载他人链接,so没办法选转载)
目录
一、FrameLayout
帧式布局/框架布局
所有组件都被固定在界面的左上角。后一个组件会覆盖前一个组件。
二、LinearLayout
流式布局/线性布局
android:orientation 控制组件按某个方向对齐摆放。
三、AbsoluteLayout
绝对布局/坐标布局
可以通过X/Y坐标来定位,该坐标相对于屏幕左上角(0,0)的值。
android:layout_x
android:layout_y
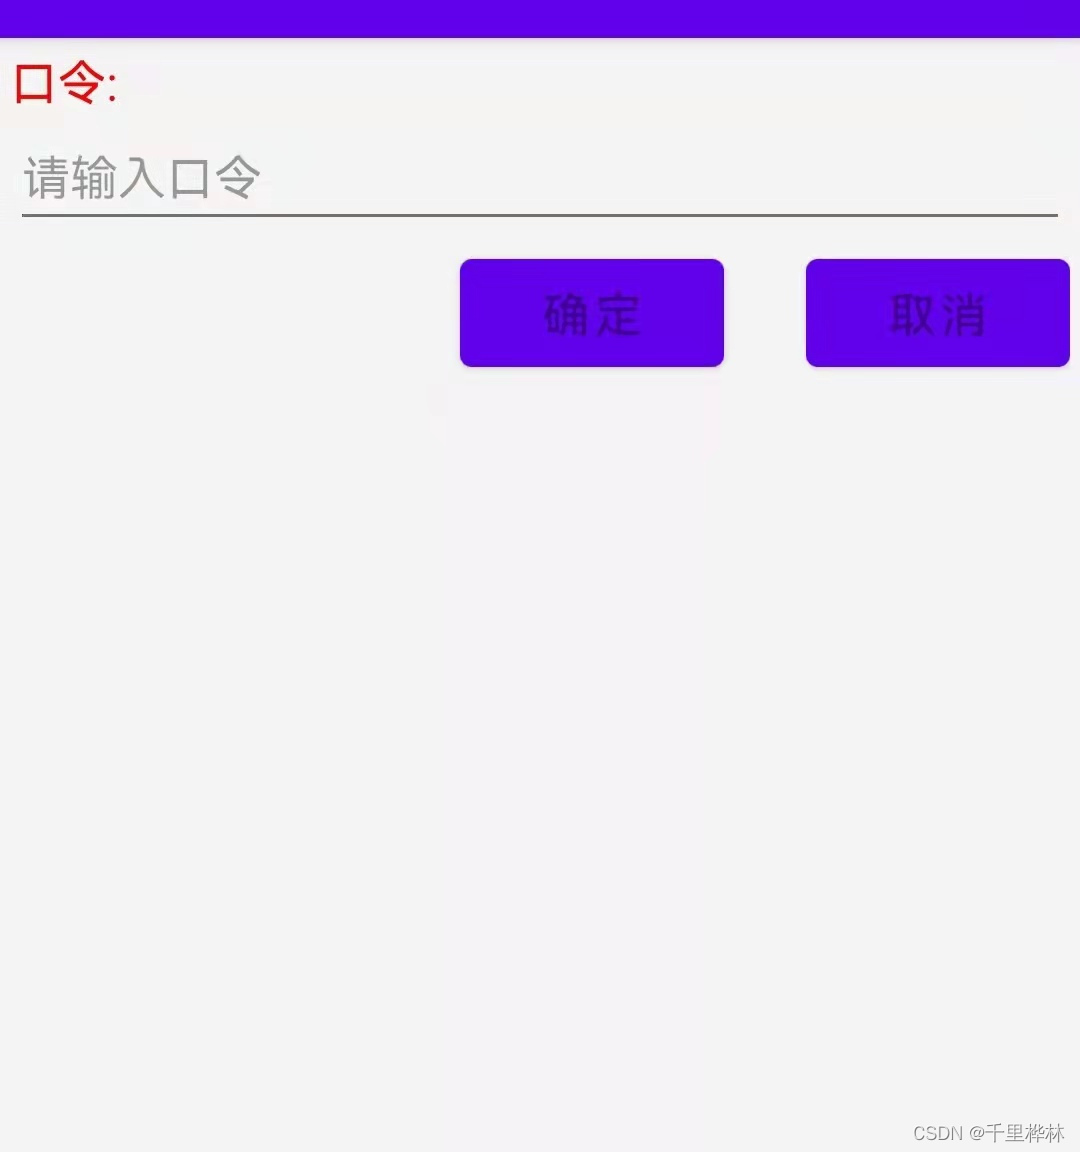
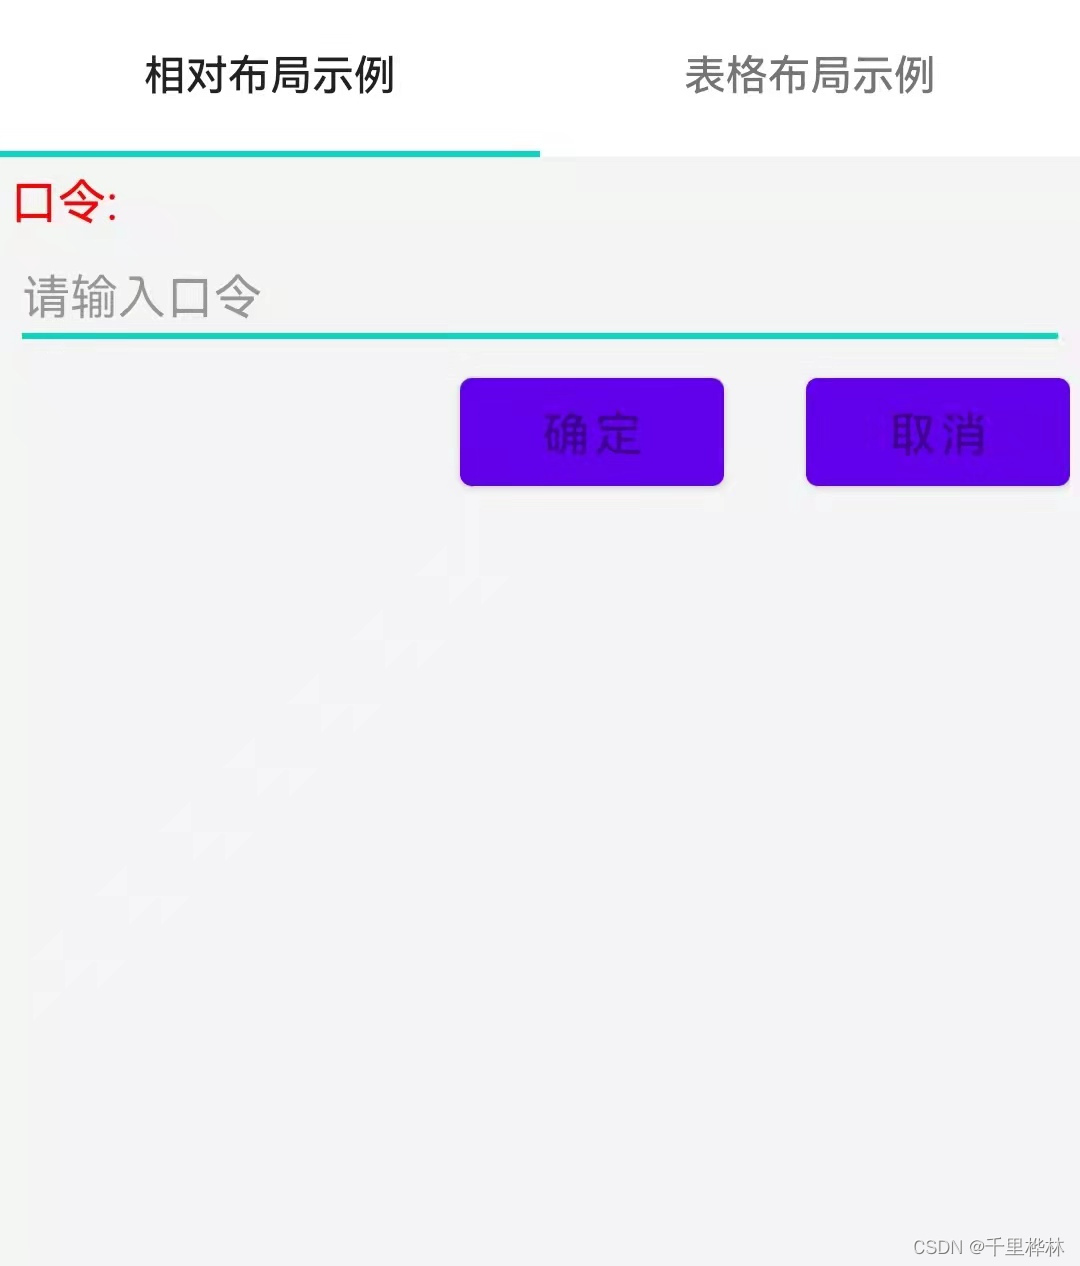
四、 RelativeLayout
相对布局
可设置相对于子元素或者父元素的位置。
栗子:
代码:
<?xml version="1.0" encoding="utf-8"?>
<RelativeLayout xmlns:android="http://schemas.android.com/apk/res/android"
    xmlns:app="http://schemas.android.com/apk/res-auto"
    xmlns:tools="http://schemas.android.com/tools"
    android:layout_width="match_parent"
    android:layout_height="match_parent"
    android:background="#ffF4F4F4"
    android:padding="10px"
    tools:context=".MainActivity">

   <TextView
       android:id="@+id/tips"
       android:layout_width="match_parent"
       android:layout_height="wrap_content"
       android:text="口令:"
       android:textSize="16sp"
       android:textColor="#ffff0000"
       />
   <EditText
      android:id="@+id/tipsEdit"
       android:layout_width="match_parent"
       android:layout_height="wrap_content"
      android:hint="请输入口令"
      android:textSize="16sp"
      android:textColor="#ff0000ff"
      android:layout_below="@+id/tips"/>
   <Button
      android:id="@+id/cancelButton"
       android:layout_width="wrap_content"
       android:layout_height="wrap_content"
      android:hint="取消"
      android:textSize="16sp"
       android:layout_alignParentRight="true"
      android:layout_below="@+id/tipsEdit"
      />
   <Button
       android:id="@+id/okButton"
       android:layout_width="wrap_content"
       android:layout_height="wrap_content"
      android:hint="确定"
      android:textSize="16sp"
      android:layout_alignTop="@+id/cancelButton"
      android:layout_marginLeft="150dp"
      />

</RelativeLayout>
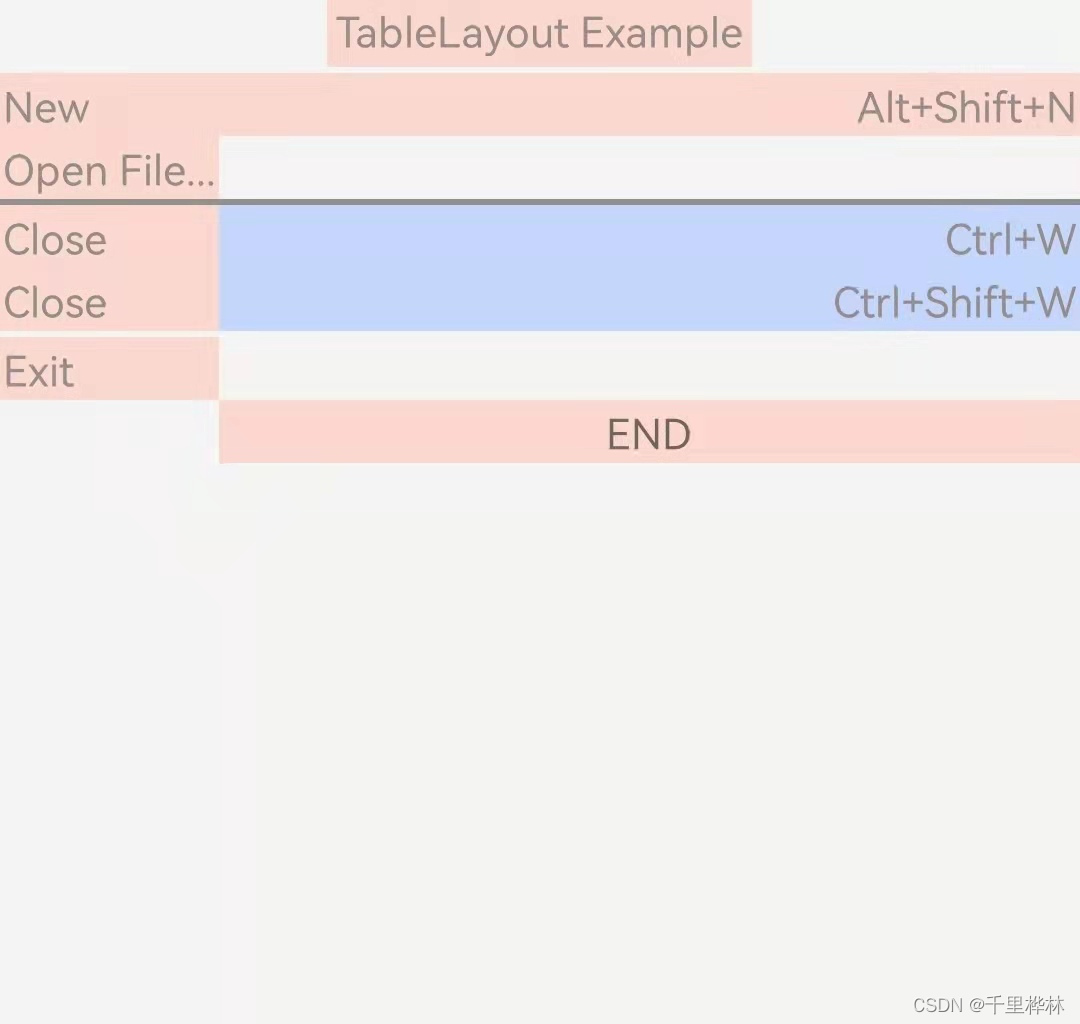
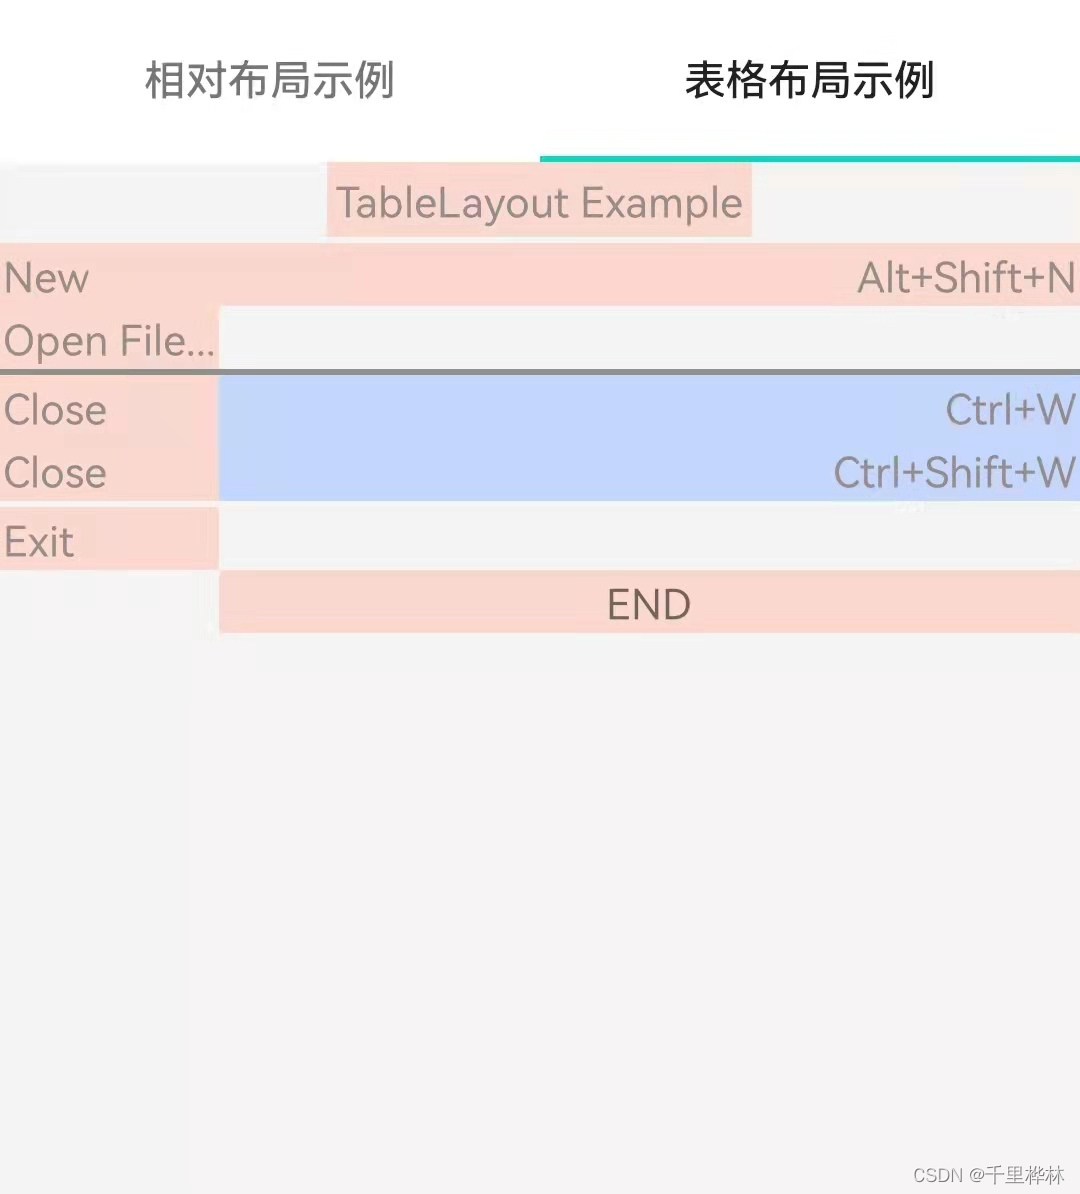
五、TableLayout
将子元素分配到行或列中,TableLayout没有边框,一个TableLayout由多个TableRow组成,每个TableRow中可以有0或者多个单元格。
android:layout_span实现合并单元格,但是不支持跨行合并。
android:layout_column指定组件要显示那个单元格位置,从而跳过一些单元格。
栗子:
界面:
代码:
<?xml version="1.0" encoding="utf-8"?>
<?xml version="1.0" encoding="utf-8"?>
<TableLayout xmlns:android="http://schemas.android.com/apk/res/android"
    xmlns:app="http://schemas.android.com/apk/res-auto"
    xmlns:tools="http://schemas.android.com/tools"
    android:layout_width="match_parent"
    android:layout_height="match_parent"
    android:background="#ffF4F4F4"
    android:stretchColumns="1"
    tools:context=".MainActivity">

    <TableRow>
        <TextView
            android:text="TableLayout Example"
            android:padding="3dp"
            android:textColor="#978C8C"
            android:layout_span="3"
            android:layout_gravity="center"
            android:background="#FAD8CE"
            />
    </TableRow>
    <!--  间隔线  -->
    <View
        android:layout_height="2dip"
        android:textColor="#978C8C" />
    <TableRow>
        <TextView
            android:text="New"
            android:padding="3px"
            android:textColor="#978C8C"
            android:background="#FAD8CE"/>
        <TextView
            android:text="Alt+Shift+N"
            android:gravity="right"
            android:padding="3px"
            android:textColor="#978C8C"
            android:background="#FAD8CE"/>
    </TableRow>

    <TableRow>
        <TextView
            android:text="Open File..."
            android:padding="3px"
            android:textColor="#978C8C"
            android:background="#FAD8CE"/>
    </TableRow>
    <View
        android:layout_height="2dip"
        android:background="#FF909090" />
    <TableRow
        android:layout_width="match_parent">
        <TextView
            android:text="Close"
            android:padding="3px"
            android:textColor="#978C8C"
            android:background="#FAD8CE"/>
        <TextView
            android:text="Ctrl+W"
            android:gravity="right"
            android:padding="3px"
            android:textColor="#978C8C"
            android:background="#C4D6FB"/>
    </TableRow>

    <TableRow>
        <TextView
            android:text="Close"
            android:padding="3px"
            android:textColor="#978C8C"
            android:background="#FAD8CE"/>
        <TextView
            android:text="Ctrl+Shift+W"
            android:gravity="right"
            android:padding="3px"
            android:textColor="#978C8C"
            android:background="#C4D6FB"
            />
    </TableRow>

    <View
        android:layout_height="2dip"
        android:textColor="#978C8C"/>

    <TableRow>
        <TextView
            android:text="Exit"
            android:padding="3px"
            android:textColor="#978C8C"
            android:background="#FAD8CE"/>
    </TableRow>
    <TableRow>
        <TextView
            android:text="END"
            android:padding="3px"
            android:gravity="center"
            android:layout_column="1"
            android:background="#FAD8CE"/>
    </TableRow>

</TableLayout>
注意:
stretchColumns=“1” 表示tableLayout的第二列设为可扩展,如果列数没有布满整个屏幕,则其余空间都被第二列占据,自动拉伸已填充屏幕,就像fill_parent一样。
android:stretchColums="*" 的意思就是每列都拉伸,同 Linearlayout 中的 layout_weight="1"差不多的意思。
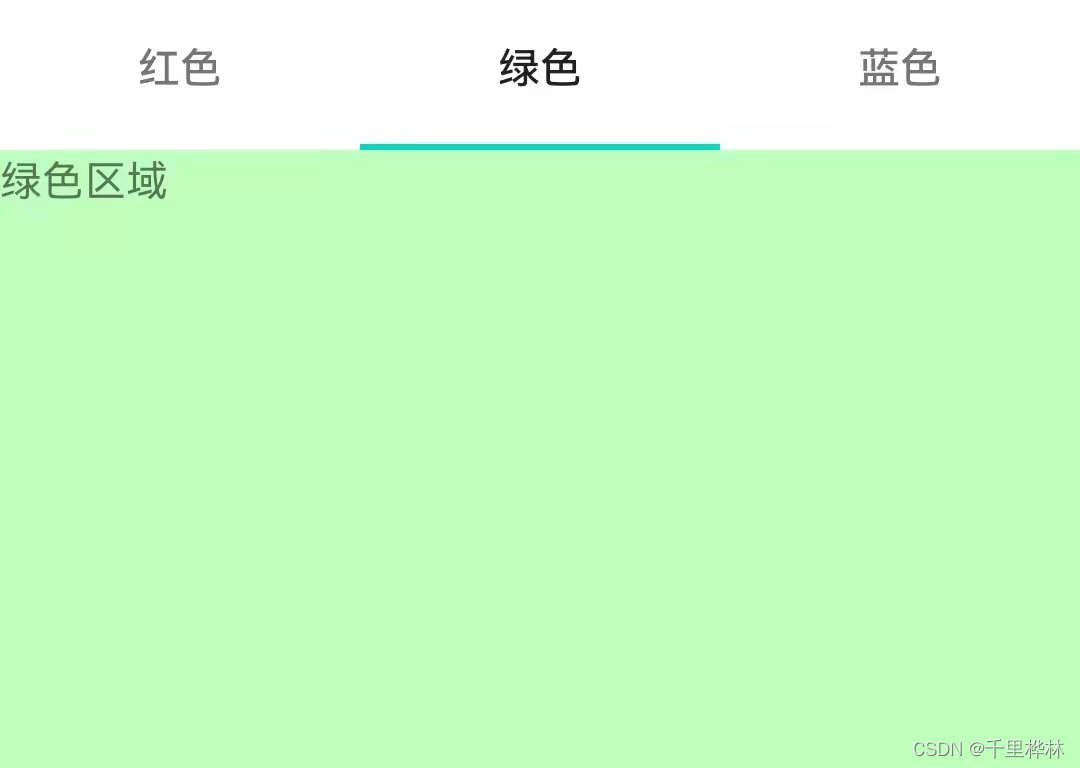
六、使用 TabActivity 和 TabHost 组织视图
TabHost是一个装载Tab的容器,每个Tab项中可以加载一个布局,可以通过 TabActivity 的 getTabHost() 方法获取 TabHost 对象,TabHost 中提供了添加 Tab 页及修改 Tab 页的方法。
栗子:
一开始的页面:

点击“绿色”的Textview组件后页面变成:
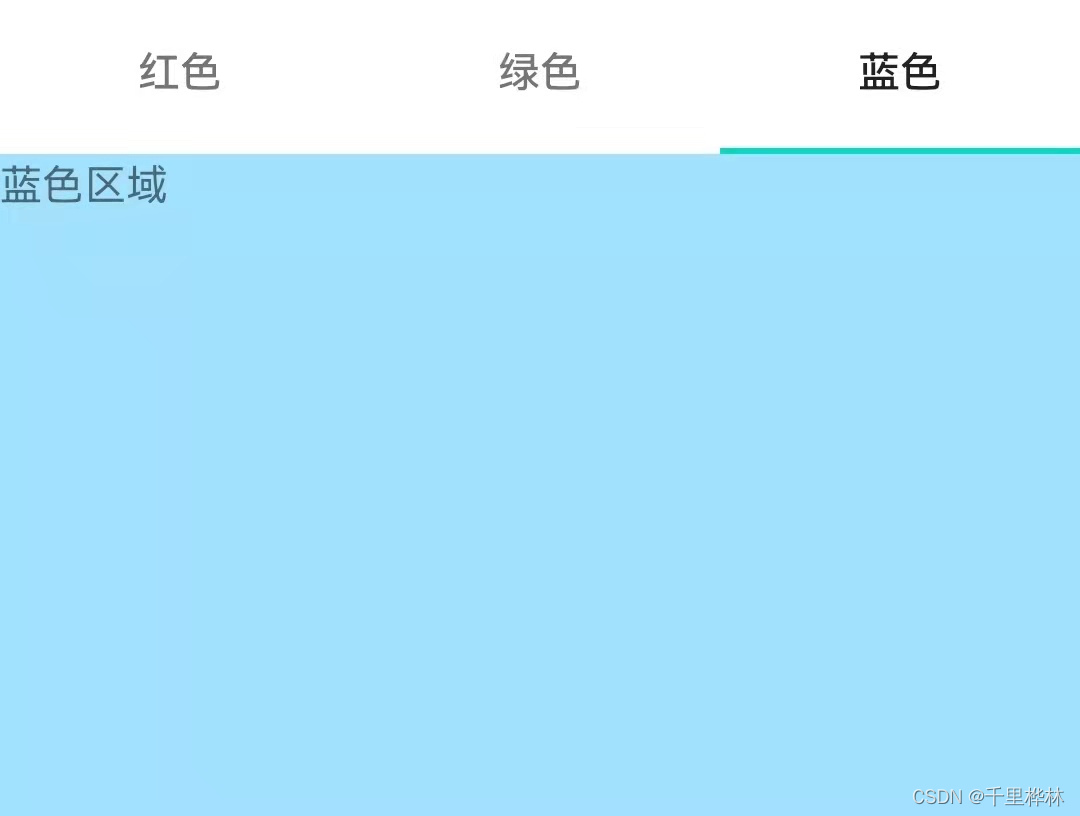
蓝色:
代码:
xml:
<?xml version="1.0" encoding="utf-8"?>
<FrameLayout xmlns:android="http://schemas.android.com/apk/res/android"
    xmlns:app="http://schemas.android.com/apk/res-auto"
    xmlns:tools="http://schemas.android.com/tools"
    android:layout_width="match_parent"
    android:layout_height="match_parent"
    tools:context=".MainActivity">

    <!-- tab1的内容显示区域   -->
    <TextView
        android:id="@+id/view1"
        android:background="#FFB3B3"
        android:layout_width="match_parent"
        android:layout_height="match_parent"
        android:text="红色区域"
        />
    <!-- tab2的内容显示区域   -->
    <TextView
        android:id="@+id/view2"
        android:background="#BEFFBE"
        android:layout_width="match_parent"
        android:layout_height="match_parent"
        android:text="绿色区域"
        />
    <!-- tab3的内容显示区域   -->
    <TextView
        android:id="@+id/view3"
        android:background="#A2E2FF"
        android:layout_width="match_parent"
        android:layout_height="match_parent"
        android:text="蓝色区域"
        />
</FrameLayout>
MainActivity.java:
public class MainActivity extends TabActivity {


    @Override
    protected void onCreate(Bundle savedInstanceState) {


        super.onCreate(savedInstanceState);
        this.setTitle("TabActivity 和 TabHost"); //设置窗体的标题
        TabHost tabHost = this.getTabHost();//从TabActivity上获取TabHost容器
        //LayoutInflater 抽象类,用来实例化 XML布局文件生成对应的 View
        //LayoutInflater.from(this) 获取当前 TabActivity的 LayoutInflater对象
        LayoutInflater.from(this).inflate(R.layout.activity_main,tabHost.getTabContentView(),true);
        //setIndicator(CharSequence label, Drawable icon)在tab按钮上面添加文字和图标
        tabHost.addTab(tabHost.newTabSpec("tab1").setIndicator("红色",
                getResources().getDrawable(R.drawable.homemenu)).
                setContent(R.id.view1)); //setContent()设置View中显示的内容
        tabHost.addTab(tabHost.newTabSpec("tab2").setIndicator("绿色").setContent(R.id.view2));
        tabHost.addTab(tabHost.newTabSpec("tab3").setIndicator("蓝色").setContent(R.id.view3));
    }

}
我在真机上运行时出现了导航栏卡在tab按钮下面的尴尬情况,所以需要去掉导航栏:
消除顶部导航栏:
在value/styles.xml中修改:

结合版栗子:
当想要点击不同的tab显示不同窗体信息,可以在 TabHost.TabSpec类中,提供了一个 setContent(Intent intent) 方法,可以将Intent 作为Tab 的内容。
比如这里可以将前面写过的相对布局和表格布局的页面拿出来再用。我这里起名为:activity_book2_table_layout.xml 和 activity_book2_relativelayout.xml。
运行效果:
修改MainActivity.java:
public class MainActivity extends TabActivity {


    @Override
    protected void onCreate(Bundle savedInstanceState) {


        super.onCreate(savedInstanceState);
        this.setTitle("TabActivity 和 TabHost"); //设置窗体的标题
        TabHost tabHost = this.getTabHost();//从TabActivity上获取TabHost容器
        //LayoutInflater 抽象类,用来实例化 XML布局文件生成对应的 View
        //LayoutInflater.from(this) 获取当前 TabActivity的 LayoutInflater对象
        LayoutInflater.from(this).inflate(R.layout.activity_main,tabHost.getTabContentView(),true);
        //setIndicator(CharSequence label, Drawable icon)在tab按钮上面添加文字和图标
        tabHost.addTab(tabHost.newTabSpec("tab1").setIndicator("相对布局示例",
                getResources().getDrawable(R.drawable.homemenu)).
                setContent(new Intent(this,Book2Relativelayout.class))); //setContent()设置View中显示的内容
        tabHost.addTab(tabHost.newTabSpec("tab2").setIndicator("表格布局示例").
                setContent(new Intent(this, Book2TableLayout.class)));
    }

}
七、布局的嵌套
可以自己先设计好想要的布局有哪些,再考虑一下怎么嵌套。
八、自定义布局
LayoutParams类是用于子视图告诉父视图它的摆放位置的。
不同的ViewGroup提供了不同的LayoutParams子类。
END