自定义播放器系列
第一章 视频渲染(本章)
第二章 音频(push)播放
第三章 音频(pull)播放
第四章 实现时钟同步
第五章 实现通用时钟同步
第六章 实现播放器
前言
使用ffmpeg解码视频并渲染视频到窗口,网上是有不少例子的,但是大部分例子的细节都不是很完善,比如资源释放、flush解码缓存、多线程优化等都没有。特别是想要快速搭建一个demo时,总是要重新编写不少代码,比较不方便,所以在这里提供一个完善的例子,可以直接拷贝拿来使用。
一、ffmpeg解码
ffmpeg解码的流程是比较经典且通用的,基本上是文件、网络流、摄像头都是一模一样的流程。
1、打开输入流
首先需要打开输入流,输入流可以是文件、rtmp、rtsp、http等。
AVFormatContext* pFormatCtx = NULL;
const char* input="test.mp4";
//打开输入流
avformat_open_input(&pFormatCtx, input, NULL, NULL) ;
//查找输入流信息
avformat_find_stream_info(pFormatCtx, NULL) ;
2、查找视频流
因为是渲染视频,所以需要找到输入流中的视频流。通过遍历判断codec_type 为AVMEDIA_TYPE_VIDEO值的视频流。视频流有可能有多个的,这里我们取第一个。
//视频流的下标
int	 videoindex = -1;
for (unsigned i = 0; i < pFormatCtx->nb_streams; i++)
	if (pFormatCtx->streams[i]->codecpar->codec_type == AVMEDIA_TYPE_VIDEO) {
		videoindex = i;
		break;
	}
3、打开解码器
通过输入流的信息获取到解码器参数然后查找到响应解码器,最后打开解码器即可。
AVCodecContext* pCodecCtx = NULL;
const AVCodec* pCodec = NULL;
//初始化解码上下文
pCodecCtx=avcodec_alloc_context3(NULL);
//获取解码参数
avcodec_parameters_to_context(pCodecCtx, pFormatCtx->streams[videoindex]->codecpar)
//查找解码器
pCodec=avcodec_find_decoder(pCodecCtx->codec_id);
//打开解码器
avcodec_open2(pCodecCtx, pCodec, &opts)
打开解码器时可以使用多线程参数优化解码速度。
AVDictionary* opts = NULL;
//使用多线程解码
if (!av_dict_get(opts, "threads", NULL, 0))
	av_dict_set(&opts, "threads", "auto", 0);
4、解码
解码的流程就是读取输入流的包,对包进行解码,获取解码后的帧。
AVPacket packet;
AVFrame* pFrame = av_frame_alloc();
//读取包
while (av_read_frame(pFormatCtx, &packet) == 0)
{   //发送包
	avcodec_send_packet(pCodecCtx, &packet);
	//接收帧
	while (avcodec_receive_frame(pCodecCtx, pFrame) == 0)
	{
	   //取得解码后的帧pFrame

	   av_frame_unref(pFrame);
	}
	av_packet_unref(&packet);
}
解码有个细节是需要注意的,即当av_read_frame到文件尾结束后,需要再次调用avcodec_send_packet传入NULL或者空包flush出里面的缓存帧。下面是完善的解码流程:
while (1)
{
	int gotPacket = av_read_frame(pFormatCtx, &packet) == 0;
	if (!gotPacket || packet.stream_index == videoindex)
		//!gotPacket:未获取到packet需要将解码器的缓存flush,所以还需要进一次解码流程。
	{
		//发送包
		if (avcodec_send_packet(pCodecCtx, &packet) < 0)
		{
			printf("Decode error.\n");
			av_packet_unref(&packet);
			goto end;
		}
		//接收解码的帧
		while (avcodec_receive_frame(pCodecCtx, pFrame) == 0) {
          //取得解码后的帧pFrame

          av_frame_unref(pFrame);
		}
	}
	av_packet_unref(&packet);
	if (!gotPacket)
		break;
}
5、重采样
当遇到像素格式或分辨率与输出目标不一致时,就需要进行重采样了,重采样通常放在解码循环中。
struct SwsContext* swsContext = NULL;
enum AVPixelFormat forceFormat = AV_PIX_FMT_YUV420P;
uint8_t* outBuffer = NULL;
uint8_t* dst_data[4];
int dst_linesize[4];
if (forceFormat != pCodecCtx->pix_fmt)
{
  swsContext = sws_getCachedContext(swsContext, pCodecCtx->width, pCodecCtx->height, pCodecCtx->pix_fmt, pCodecCtx->width, pCodecCtx->height, forceFormat, SWS_FAST_BILINEAR, NULL, NULL, NULL);
  if (!outBuffer)
	  outBuffer = av_malloc(av_image_get_buffer_size(forceFormat, pCodecCtx->width, pCodecCtx->height, 64));
  av_image_fill_arrays(dst_data, dst_linesize, outBuffer, forceFormat, pCodecCtx->width, pCodecCtx->height, 1);
  sws_scale(swsContext, pFrame->data, pFrame->linesize, 0, pFrame->height, dst_data, dst_linesize) ;
}
6、销毁资源
使用完成后需要释放资源。
if (pFrame)
	av_frame_free(&pFrame);
if (pCodecCtx)
{
	avcodec_close(pCodecCtx);
	avcodec_free_context(&pCodecCtx);
}
if (pFormatCtx)
	avformat_close_input(&pFormatCtx);
if (pFormatCtx)
	avformat_free_context(pFormatCtx);
if (swsContext)
	sws_freeContext(swsContext);
av_dict_free(&opts);
if (outBuffer)
	av_free(outBuffer);
二、sdl渲染
1、初始化sdl
使用sdl前需要在最开始初始化sdl,全局只需要初始化一次即可。
if (SDL_Init(SDL_INIT_VIDEO | SDL_INIT_AUDIO | SDL_INIT_TIMER)) {
	printf("Could not initialize SDL - %s\n", SDL_GetError());
	return -1;
}
2、创建窗口
直接调用SDL_CreateWindow即可,需要指定窗口标题、位置大小、以及一些标记,如下面示例是窗口gl窗口。
//创建窗口
SDL_Window* screen = SDL_CreateWindow("video play window", SDL_WINDOWPOS_UNDEFINED, SDL_WINDOWPOS_UNDEFINED,screen_w, screen_h,SDL_WINDOW_OPENGL);
3、创建纹理
先创建窗口的渲染器然后通过渲染器创建后台纹理,纹理的大小与视频大小一致。另外需要指定纹理的像素格式,下列示例的SDL_PIXELFORMAT_IYUV与ffmpeg的AV_PIX_FMT_YUV420P对应
sdlRenderer = SDL_CreateRenderer(screen, -1, 0);
//创建和视频大小一样的纹理
sdlTexture = SDL_CreateTexture(sdlRenderer, SDL_PIXELFORMAT_IYUV, SDL_TEXTUREACCESS_STREAMING, pCodecCtx->width, pCodecCtx->height)
4、渲染
渲染的时候需要指定窗口区域以及视频区域,然后将视频数据更新到后台纹理,后台纹理数据再转换到前台纹理,然后在进行显示。下面是渲染yuv420p的示例。
//窗口区域
SDL_Rect sdlRect;
sdlRect.x = 0;
sdlRect.y = 0;
sdlRect.w = screen_w;
sdlRect.h = screen_h;
//视频区域
SDL_Rect sdlRect2;
sdlRect2.x = 0;
sdlRect2.y = 0;
sdlRect2.w = pCodecCtx->width;
sdlRect2.h = pCodecCtx->height;
//渲染到sdl窗口
SDL_RenderClear(sdlRenderer);
SDL_UpdateYUVTexture(sdlTexture, &sdlRect2, dst_data[0], dst_linesize[0], dst_data[1], dst_linesize[1], dst_data[2], dst_linesize[2]);
SDL_RenderCopy(sdlRenderer, sdlTexture, NULL, &sdlRect);
SDL_RenderPresent(sdlRenderer);
5、销毁资源
使用完成后需要销毁资源,如下所示,SDL_Quit并不是必要的通常是程序退出才需要调用,这个时候调不调已经无所谓了。
if (sdlTexture)
	SDL_DestroyTexture(sdlTexture);
if (sdlRenderer)
	SDL_DestroyRenderer(sdlRenderer);
if (screen)
	SDL_DestroyWindow(screen);
SDL_Quit();
三、完整代码
1、代码
将上述代码合并起来形成一个完整的视频解码渲染流程:
示例的sdk版本:ffmpeg 4.3、sdl2
windows、linux都可以正常运行
#include <stdio.h>
#include <SDL.h>
#include "libavformat/avformat.h"
#include "libavcodec/avcodec.h"
#include "libswscale/swscale.h"
#include "libavutil/imgutils.h"
#undef main
int main(int argc, char** argv) {
	const char* input = "D:\\FFmpeg\\test.mp4";
	enum AVPixelFormat forceFormat = AV_PIX_FMT_YUV420P;
	AVFormatContext* pFormatCtx = NULL;
	AVCodecContext* pCodecCtx = NULL;
	const AVCodec* pCodec = NULL;
	AVDictionary* opts = NULL;
	AVPacket packet;
	AVFrame* pFrame = NULL;
	struct SwsContext* swsContext = NULL;
	uint8_t* outBuffer = NULL;
	int	 videoindex = -1;
	int exitFlag = 0;
	int isLoop = 1;
	double framerate;
	int screen_w = 640, screen_h = 360;
	SDL_Renderer* sdlRenderer = NULL;
	SDL_Texture* sdlTexture = NULL;
	//初始化SDL
	if (SDL_Init(SDL_INIT_VIDEO | SDL_INIT_AUDIO | SDL_INIT_TIMER)) {
		printf("Could not initialize SDL - %s\n", SDL_GetError());
		return -1;
	}
	//创建窗口
	SDL_Window* screen = SDL_CreateWindow("video play window", SDL_WINDOWPOS_UNDEFINED, SDL_WINDOWPOS_UNDEFINED,
		screen_w, screen_h,
		SDL_WINDOW_OPENGL);
	if (!screen) {
		printf("SDL: could not create window - exiting:%s\n", SDL_GetError());
		return -1;
	}
	//打开输入流
	if (avformat_open_input(&pFormatCtx, input, NULL, NULL) != 0) {
		printf("Couldn't open input stream.\n");
		goto end;
	}
	//查找输入流信息
	if (avformat_find_stream_info(pFormatCtx, NULL) < 0) {
		printf("Couldn't find stream information.\n");
		goto end;
	}
	//获取视频流
	for (unsigned i = 0; i < pFormatCtx->nb_streams; i++)
		if (pFormatCtx->streams[i]->codecpar->codec_type == AVMEDIA_TYPE_VIDEO) {
			videoindex = i;
			break;
		}
	if (videoindex == -1) {
		printf("Didn't find a video stream.\n");
		goto end;
	}
	//创建解码上下文
	pCodecCtx = avcodec_alloc_context3(NULL);
	if (pCodecCtx == NULL)
	{
		printf("Could not allocate AVCodecContext\n");
		goto end;
	}
	//获取解码器
	if (avcodec_parameters_to_context(pCodecCtx, pFormatCtx->streams[videoindex]->codecpar) < 0)
	{
		printf("Could not init AVCodecContext\n");
		goto end;
	}
	pCodec = avcodec_find_decoder(pCodecCtx->codec_id);
	if (pCodec == NULL) {
		printf("Codec not found.\n");
		goto end;
	}
	//使用多线程解码
	if (!av_dict_get(opts, "threads", NULL, 0))
		av_dict_set(&opts, "threads", "auto", 0);
	//打开解码器
	if (avcodec_open2(pCodecCtx, pCodec, &opts) < 0) {
		printf("Could not open codec.\n");
		goto end;
	}
	if (pCodecCtx->width == 0 || pCodecCtx->height == 0)
	{
		printf("Invalid video size.\n");
		goto end;
	}
	if (pCodecCtx->pix_fmt == AV_PIX_FMT_NONE)
	{
		printf("Unknown pix foramt.\n");
		goto end;
	}
	pFrame = av_frame_alloc();
	framerate = (double)pFormatCtx->streams[videoindex]->avg_frame_rate.num / pFormatCtx->streams[videoindex]->avg_frame_rate.den;
start:
	while (!exitFlag)
	{
		//读取包
		int gotPacket = av_read_frame(pFormatCtx, &packet) == 0;
		if (!gotPacket || packet.stream_index == videoindex)
			//!gotPacket:未获取到packet需要将解码器的缓存flush,所以还需要进一次解码流程。
		{
			//发送包
			if (avcodec_send_packet(pCodecCtx, &packet) < 0)
			{
				printf("Decode error.\n");
				av_packet_unref(&packet);
				goto end;
			}
			//接收解码的帧
			while (avcodec_receive_frame(pCodecCtx, pFrame) == 0) {
				uint8_t* dst_data[4];
				int dst_linesize[4];
				if (forceFormat != pCodecCtx->pix_fmt)
					//重采样-格式转换
				{
					swsContext = sws_getCachedContext(swsContext, pCodecCtx->width, pCodecCtx->height, pCodecCtx->pix_fmt, pCodecCtx->width, pCodecCtx->height, forceFormat, SWS_FAST_BILINEAR, NULL, NULL, NULL);
					if (!outBuffer)
						outBuffer =(uint8_t*) av_malloc(av_image_get_buffer_size(forceFormat, pCodecCtx->width, pCodecCtx->height, 64));
					av_image_fill_arrays(dst_data, dst_linesize, outBuffer, forceFormat, pCodecCtx->width, pCodecCtx->height, 1);
					if (sws_scale(swsContext, pFrame->data, pFrame->linesize, 0, pFrame->height, dst_data, dst_linesize) < 0)
					{
						printf("Call sws_scale error.\n");
						av_frame_unref(pFrame);
						av_packet_unref(&packet);
						goto end;
					}
				}
				else
				{
					memcpy(dst_data, pFrame->data, sizeof(uint8_t*) * 4);
					memcpy(dst_linesize, pFrame->linesize, sizeof(int) * 4);
				}

				if (!sdlRenderer)
					//初始化sdl纹理
				{
					sdlRenderer = SDL_CreateRenderer(screen, -1, 0);
					if (!sdlRenderer)
					{
						printf("Create sdl renderer error.\n");
						av_frame_unref(pFrame);
						av_packet_unref(&packet);
						goto end;
					}
					//创建和视频大小一样的纹理
					sdlTexture = SDL_CreateTexture(sdlRenderer, SDL_PIXELFORMAT_IYUV, SDL_TEXTUREACCESS_STREAMING, pCodecCtx->width, pCodecCtx->height);
					if (!sdlTexture)
					{
						printf("Create sdl texture error.\n");
						av_frame_unref(pFrame);
						av_packet_unref(&packet);
						goto end;
					}
				}
				//窗口区域
				SDL_Rect sdlRect;
				sdlRect.x = 0;
				sdlRect.y = 0;
				sdlRect.w = screen_w;
				sdlRect.h = screen_h;
				//视频区域
				SDL_Rect sdlRect2;
				sdlRect2.x = 0;
				sdlRect2.y = 0;
				sdlRect2.w = pCodecCtx->width;
				sdlRect2.h = pCodecCtx->height;
				//渲染到sdl窗口
				SDL_RenderClear(sdlRenderer);
				SDL_UpdateYUVTexture(sdlTexture, &sdlRect2, dst_data[0], dst_linesize[0], dst_data[1], dst_linesize[1], dst_data[2], dst_linesize[2]);
				SDL_RenderCopy(sdlRenderer, sdlTexture, NULL, &sdlRect);
				SDL_RenderPresent(sdlRenderer);
				SDL_Delay(1000 / framerate);
				av_frame_unref(pFrame);
				//轮询窗口事件
				SDL_Event sdl_event;
				if (SDL_PollEvent(&sdl_event))
					exitFlag = sdl_event.type == SDL_WINDOWEVENT && sdl_event.window.event == SDL_WINDOWEVENT_CLOSE;
			}
		}
		av_packet_unref(&packet);
		if (!gotPacket)
		{
			//循环播放时flush出缓存帧后需要调用此方法才能重新解码。
			avcodec_flush_buffers(pCodecCtx);
			break;
		}
	}
	if (!exitFlag)
	{
		if (isLoop)
		{
			//定位到起点
			if (avformat_seek_file(pFormatCtx, -1, 0, 0, 0, AVSEEK_FLAG_FRAME) >= 0)
			{
				goto start;
			}
		}
	}
end:
	//销毁资源
	if (pFrame)
		av_frame_free(&pFrame);
	if (pCodecCtx)
	{
		avcodec_close(pCodecCtx);
		avcodec_free_context(&pCodecCtx);
	}
	if (pFormatCtx)
		avformat_close_input(&pFormatCtx);
	if (pFormatCtx)
		avformat_free_context(pFormatCtx);
	if (swsContext)
		sws_freeContext(swsContext);
	av_dict_free(&opts);
	if (outBuffer)
		av_free(outBuffer);
	if (sdlTexture)
		SDL_DestroyTexture(sdlTexture);
	if (sdlRenderer)
		SDL_DestroyRenderer(sdlRenderer);
	if (screen)
		SDL_DestroyWindow(screen);
	SDL_Quit();
	return 0;
}
2、项目
项目为vs2022,目录中包含makefile,windows、linux都可以正常运行。
https://download.csdn.net/download/u013113678/86247877
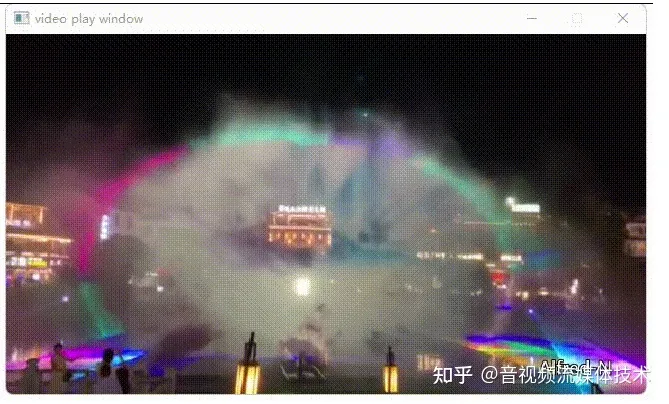
四、效果预览
上述完整代码的运行效果预览。
总结
以上就是今天要讲的内容,总的来说,使用ffmpeg解码sdl渲染视频这套流程是比较简单的,有了上述的代码作为模板,搭建解码和渲染相关的demo就很简单和方便了。
原文 使用ffmpeg解码视频渲染到sdl窗口_CodeOfCC的博客-CSDN博客
★文末名片可以免费领取音视频开发学习资料,内容包括(FFmpeg ,webRTC ,rtmp ,hls ,rtsp ,ffplay ,srs)以及音视频学习路线图等等。
见下方!↓↓↓↓↓↓↓↓↓↓↓↓↓↓↓↓↓↓↓↓↓↓↓↓↓↓↓↓↓↓↓↓↓↓↓↓↓