作业要求
在这部分的课程中,我们将专注于使用光线追踪来渲染图像。在光线追踪中最重要的操作之一就是找到光线与物体的交点。一旦找到光线与物体的交点,就可以执行着色并返回像素颜色。在这次作业中,我们需要实现两个部分:光线的生成和光线与三角的相交。本次代码框架的工作流程为:
1. 从 main 函数开始。我们定义场景的参数,添加物体(球体或三角形)到场景中,并设置其材质,然后将光源添加到场景中。
2. 调用 Render(scene) 函数。在遍历所有像素的循环里,生成对应的光线并将返回的颜色保存在帧缓冲区(framebuffer)中。在渲染过程结束后,帧缓冲区中的信息将被保存为图像。
3. 在生成像素对应的光线后,我们调用 CastRay 函数,该函数调用 trace 来查询光线与场景中最近的对象的交点。
4. 然后,我们在此交点执行着色。我们设置了三种不同的着色情况,并且已经为你提供了代码。你需要修改的函数是:
• Renderer.cpp 中的 Render():这里你需要为每个像素生成一条对应的光线,然后调用函数 castRay() 来得到颜色,最后将颜色存储在帧缓冲区的相应像素中。
• Triangle.hpp 中的 rayTriangleIntersect(): v0, v1, v2 是三角形的三个顶点,orig 是光线的起点,dir 是光线单位化的方向向量。tnear, u, v 是你需要使用我们课上推导的 Moller-Trumbore 算法来更新的参数。
开始编写
在本次作业中,你将使用一个新的代码框架。和之前作业相似的是,你可以选择在自己电脑的系统或者虚拟机上完成作业。请下载项目的框架代码,并使用以下命令像以前一样构建项目:
1$ mkdir b u i l d
2$ cd b u i l d
3$ cmake . .
4$ make
之后,你就可以使用./Raytracing 来运行代码。现在我们对代码框架中的一些类做一下概括性的介绍:
• global.hpp:包含了整个框架中会使用的基本函数和变量。
• Vector.hpp: 由于我们不再使用 Eigen 库,因此我们在此处提供了常见的向量操作,例如:dotProduct,crossProduct,normalize。
• Object.hpp: 渲染物体的父类。Triangle 和 Sphere 类都是从该类继承的。
• Scene.hpp: 定义要渲染的场景。包括设置参数,物体以及灯光。
• Renderer.hpp: 渲染器类,它实现了所有光线追踪的操作。
代码
Render()
生成光线,我们需要的是找到这些像素在栅格空间(raster space)中的坐标与在世界空间(world space)中表达的相同像素的坐标之间的关系。具体原理可见,改博主写的非常清除。
void Renderer::Render(const Scene& scene)
{
std::vector<Vector3f> framebuffer(scene.width * scene.height);
float scale = std::tan(deg2rad(scene.fov * 0.5f));
float imageAspectRatio = scene.width / (float)scene.height;
// Use this variable as the eye position to start your rays.
Vector3f eye_pos(0);
int m = 0;
for (int j = 0; j < scene.height; ++j)
{
for (int i = 0; i < scene.width; ++i)
{
// generate primary ray direction
float x = (2*((float(i)+0.5)/scene.width)-1)*scale*imageAspectRatio;
float y = (1 - 2*((float(j)+0.5)/scene.height))*scale;
// TODO: Find the x and y positions of the current pixel to get the direction
// vector that passes through it.
// Also, don't forget to multiply both of them with the variable *scale*, and
// x (horizontal) variable with the *imageAspectRatio*
Vector3f dir = normalize(Vector3f(x, y, -1)); // Don't forget to normalize this direction!
framebuffer[m++] = castRay(eye_pos, dir, scene, 0);
}
UpdateProgress(j / (float)scene.height);
}
// save framebuffer to file
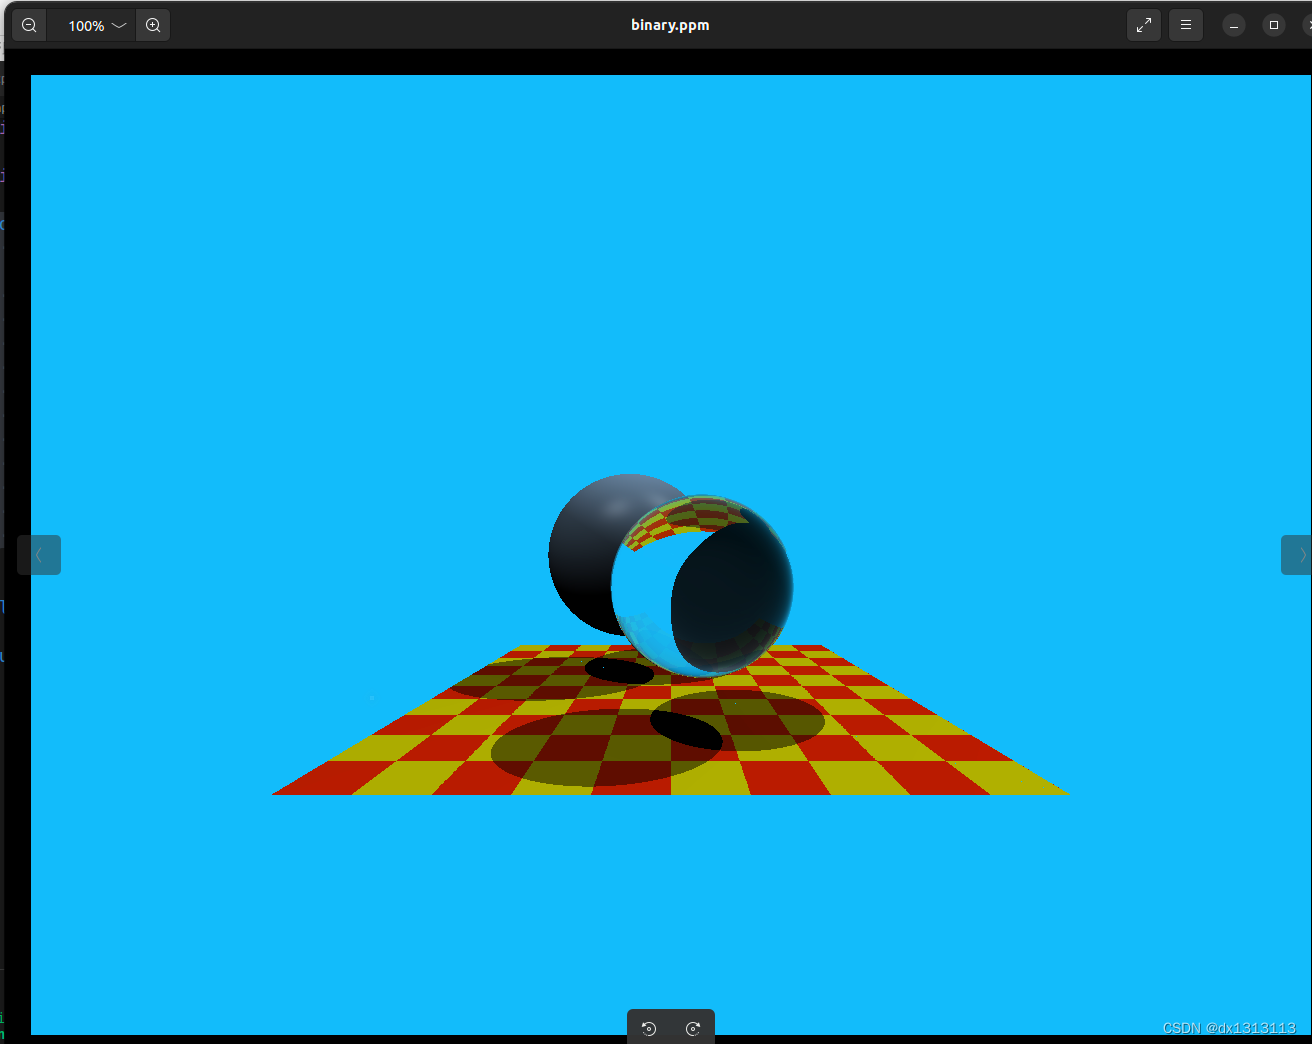
FILE* fp = fopen("binary.ppm", "wb");
(void)fprintf(fp, "P6\n%d %d\n255\n", scene.width, scene.height);
for (auto i = 0; i < scene.height * scene.width; ++i) {
static unsigned char color[3];
color[0] = (char)(255 * clamp(0, 1, framebuffer[i].x));
color[1] = (char)(255 * clamp(0, 1, framebuffer[i].y));
color[2] = (char)(255 * clamp(0, 1, framebuffer[i].z));
fwrite(color, 1, 3, fp);
}
fclose(fp);
}rayTriangleIntersect(...)
这一部分是判断光线是否与三角形相交,具体用的是Möller–Trumbore 算法。
bool rayTriangleIntersect(const Vector3f& v0, const Vector3f& v1, const Vector3f& v2, const Vector3f& orig,
                          const Vector3f& dir, float& tnear, float& u, float& v)
{
    auto E1=v1-v0,E2=v2-v0,S=orig-v0,S1=crossProduct(dir,E2),S2=crossProduct(S,E1);
    tnear=dotProduct(S2,E2)/dotProduct(S1,E1);
    u=dotProduct(S1,S)/dotProduct(S1,E1);
    v=dotProduct(S2,dir)/dotProduct(S1,E1);
    if(tnear>=0 && u>=0 && v>=0 && (1.0f-u-v)>=0 )
        return true;
    // TODO: Implement this function that tests whether the triangle
    // that's specified bt v0, v1 and v2 intersects with the ray (whose
    // origin is *orig* and direction is *dir*)
    // Also don't forget to update tnear, u and v.
    return false;
}
结果
运行完 ./RayTracing 后,结果为在build文件夹下的binary.ppm文件,vscode可能会打不开,需要手动在文件管理器中打开。