1、项目配置
后端接口
http://192.168.xx.xx:8080/api/xxxxx
使用/api是为了统一接口管理
前端配置
在vite.config.js中
export default defineConfig({
  plugins: [vue()],
  base: '', // 添加这个属性  ./   或者  /
 }),
base用于整理文件,跨域代理基本没有关系,这里不讲了
2、打包程序
前端
npm run build打包之后打开index.html文件,如下图所示,代表资源没有问题,可以放到nginx部署

,springboot使用maven打包工具自动打包,生成jar包,导入到linux系统中,要在第三步完成后再对springboot打包。
3、安装linux宝塔
自己安装吧,教程很多,安装完成之后导入数据库,用navicat连接数据库(或者其他工具),如果连接不成功看看端口是否开发之类的配置。
3、1springboot配置
修改springboot连接的数据库,检查两者是否连通
3、2导入jar,dist文件
使用xshell连接虚拟机,导入jar包
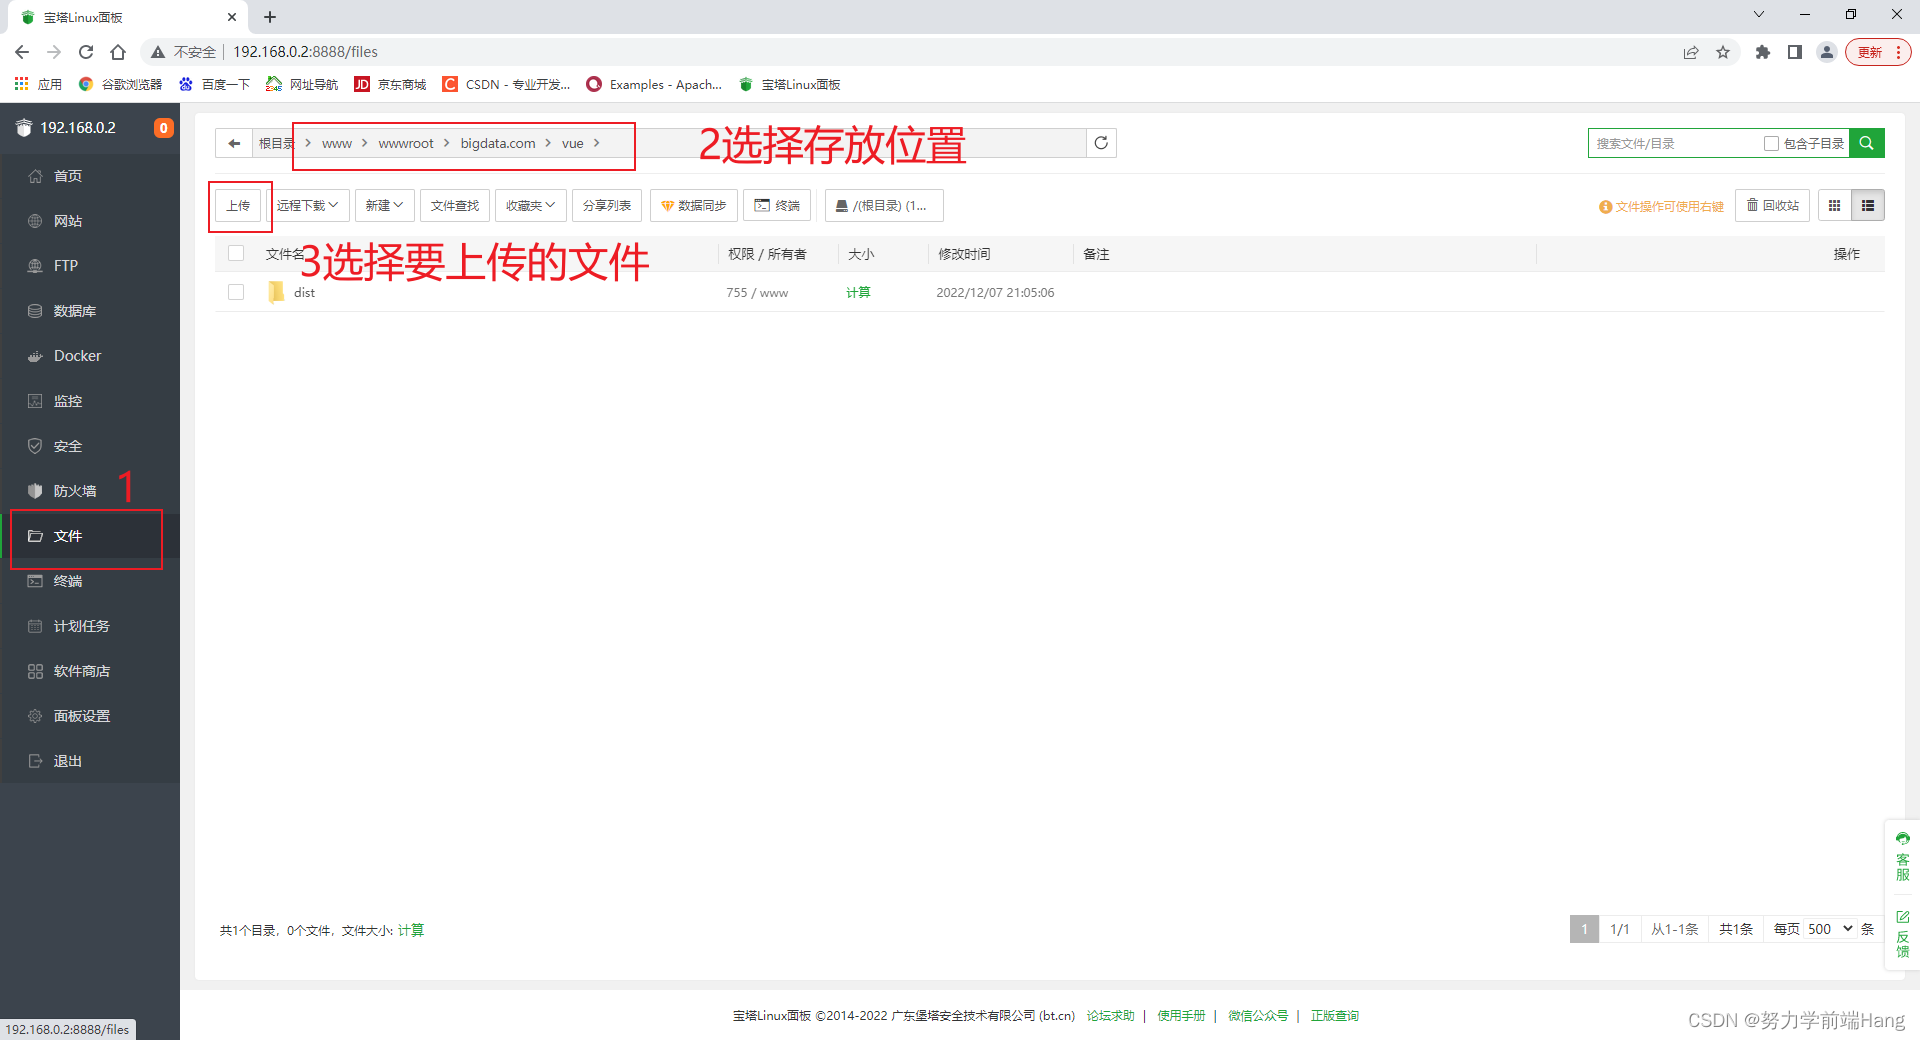
在宝塔页面导入dist(前端打包好的文件)
3、3配置代理
网站配置反向代理
配置nginx反向代理
在宝塔商店中找到nginx,进入设置,配置修改
server
    {
        listen 888;//前端端口,随意,进入这个端口看页面
        server_name localhost;//随意,最好是这个
        index index.html index.htm index.php;
        root  /www/wwwroot/bigdata.com/vue/dist;//dist目录的地方

        #error_page   404   /404.html;
        include enable-php.conf;

        location ~ .*\.(gif|jpg|jpeg|png|bmp|swf)$
        {
            expires      30d;
        }

        location ~ .*\.(js|css)?$
        {
            expires      12h;
        }

        location ~ /\.
        {
            deny all;
        }
        //除了接口,其他一样
        location /api {
           proxy_pass http://192.168.0.2:8088;//后端接口
           proxy_set_header Host $host;
    proxy_set_header X-Real-IP $remote_addr;
    proxy_set_header X-Forwarded-For $proxy_add_x_forwarded_for;
    proxy_set_header REMOTE-HOST $remote_addr;

    add_header X-Cache $upstream_cache_status;

    #Set Nginx Cache

    	add_header Cache-Control no-cache;

        }

        access_log  /www/wwwlogs/access.log;
    }
include /www/server/panel/vhost/nginx/*.conf;
}
配置完成!!!
4、注意点
宝塔的防火墙要关掉
把需要的端口开放
后端接口为
http://192.168.xxx.xxx:8080/api/xxx/xxx(端口号随意,后面的配置要对的上)
前端的访问路径(去访问接口的axios请求路径)
http://192.168.xxx.xxx:8080/api/xxx/xxx