最近在温习 Tensorflow,写了一篇笔记,记录了使用 Tensorflow 训练一个猫狗图像分类器的模型并在安卓应用上使用的全过程。
一、数据集准备
1.1 数据集来源
我采用的是微软的猫狗数据集,链接:Download Kaggle Cats and Dogs Dataset from Official Microsoft Download Center Download Kaggle Cats and Dogs Dataset from Official Microsoft Download Center
1.2 数据集查看
下载数据集后,解压如下:
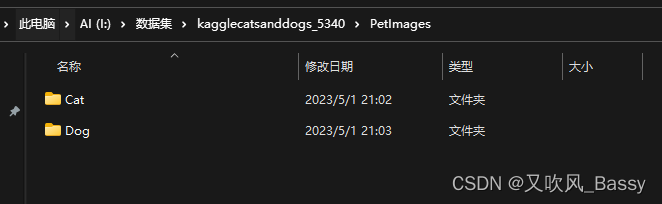
Cat 数据如下:

Dog数据集如下:

1.3 删除脏数据
这个数据集有一些文件是有问题的,需要删除掉:
import os
from PIL import Image

# Set the directory to search for corrupted files
directory = 'path/to/directory'

# Loop through all files in the directory
for filename in os.listdir(directory):

    # Check if file is an image
    if filename.endswith('.jpg') or filename.endswith('.png'):

        # Attempt to open image with PIL
        try:
            img = Image.open(os.path.join(directory, filename))
            img.verify()
            img.close()
        except (IOError, SyntaxError) as e:
            print(f"Deleting {filename} due to error: {e}")
            os.remove(os.path.join(directory, filename))
说明:上面的python代码会把目录下的文件给删除掉
二、训练模型
下面是完整代码,包括数据集划分、数据增强、模型训练、模型评估、模型保存等。
2.1 数据准备
import tensorflow as tf
from tensorflow.keras.preprocessing.image import ImageDataGenerator

# 定义数据集路径
dataset_dir = 'I:/数据集/kagglecatsanddogs_5340/PetImages'
img_height, img_width = 224, 224
batch_size = 32
2.2 数据集划分
将数据集划分为训练集、测试集、验证集:
# 将数据集分为训练集、测试集、验证集
import os
import shutil
import numpy as np

train_dir = os.path.join(os.path.dirname(dataset_dir), 'PetImages_train')
val_dir = os.path.join(os.path.dirname(dataset_dir), 'PetImages_validation')
test_dir = os.path.join(os.path.dirname(dataset_dir), 'PetImages_test')

if not os.path.exists(train_dir):
    train_ratio = 0.7  # 训练集比例
    val_ratio = 0.15   # 验证集比例
    test_ratio = 0.15  # 测试集比例

    classfiers = ['Cat', 'Dog']
    for cls in classfiers:
        # 获取数据集中所有文件名
        filenames = os.listdir(os.path.join(dataset_dir, cls))

        # 计算拆分后的数据集大小
        num_samples = len(filenames)
        num_train = int(num_samples * train_ratio)
        num_val = int(num_samples * val_ratio)
        num_test = num_samples - num_train - num_val

        # 将文件名打乱顺序
        shuffle_indices = np.random.permutation(num_samples)
        filenames = [filenames[i] for i in shuffle_indices]

        os.makedirs(os.path.join(train_dir, cls), exist_ok=True)
        os.makedirs(os.path.join(val_dir, cls), exist_ok=True)
        os.makedirs(os.path.join(test_dir, cls), exist_ok=True)

        # 拆分数据集并复制文件到相应目录
        for i in range(num_train):
            src_path = os.path.join(dataset_dir, cls, filenames[i])
            dst_path = os.path.join(train_dir, cls, filenames[i])
            shutil.copy(src_path, dst_path)

        for i in range(num_train, num_train+num_val):
            src_path = os.path.join(dataset_dir, cls, filenames[i])
            dst_path = os.path.join(val_dir, cls, filenames[i])
            shutil.copy(src_path, dst_path)

        for i in range(num_train+num_val, num_samples):
            src_path = os.path.join(dataset_dir, cls, filenames[i])
            dst_path = os.path.join(test_dir, cls, filenames[i])
            shutil.copy(src_path, dst_path)
2.3 数据加载和增强处理
# 数据增强处理
train_datagen = ImageDataGenerator(rescale=1./255,
                                   shear_range=0.2,
                                   zoom_range=0.2,
                                   horizontal_flip=True)

# 加载数据集
train_generator = train_datagen.flow_from_directory(train_dir,
                                                    target_size=(img_height, img_width),
                                                    batch_size=batch_size,
class_mode='binary')这段代码是用于图像分类模型训练的数据预处理部分。其中,ImageDataGenerator类是Keras中用于数据增强的工具,可以对图像进行一系列随机变换来扩充训练集,以提高模型泛化能力。
在这里,train_datagen对象将使用以下三个参数进行数据增强处理:
- rescale:将图像像素值缩放到0-1之间,加速模型收敛;
- shear_range:随机剪切变换范围;
- zoom_range:随机缩放变换范围;
- horizontal_flip:随机水平翻转。
然后通过调用 flow_from_directory 方法来生成一个 train_generator 对象,它会从指定的 train_dir 文件夹中动态生成包含批次大小为 batch_size 的训练数据样本,并将其转成二进制标签格式(class_mode='binary')。同时,所有图像都将被调整为指定的 img_height 和 img_width 大小,以保证输入神经网络的数据形状相同。
代码输出:Found 17498 images belonging to 2 classes.
2.4 模型定义
# 定义模型结构
model = tf.keras.models.Sequential([
    tf.keras.layers.Conv2D(32, (3,3), activation='relu', input_shape=(img_height, img_width, 3)),
    tf.keras.layers.MaxPooling2D(2,2),
    tf.keras.layers.Conv2D(64, (3,3), activation='relu'),
    tf.keras.layers.MaxPooling2D(2,2),
    tf.keras.layers.Conv2D(128, (3,3), activation='relu'),
    tf.keras.layers.MaxPooling2D(2,2),
    tf.keras.layers.Flatten(),
    tf.keras.layers.Dense(128, activation='relu'),
    tf.keras.layers.Dense(1, activation='sigmoid')
])
这段代码是用于构建卷积神经网络模型的部分,使用了Keras中的Sequential模型,该模型按照一定顺序堆叠不同类型的层。
具体而言,这个模型包含了如下一系列层:
- Conv2D层:使用32个3x3的滤波器进行二维卷积,激活函数为ReLU;
- MaxPooling2D层:使用大小为2x2的窗口进行最大池化操作;
- 再次添加一个 Conv2D 层:使用64个3x3的滤波器进行卷积,激活函数为ReLU;
- 再次添加一个 MaxPooling2D 层;
- 再次添加一个 Conv2D 层:使用128个3x3的滤波器进行卷积,激活函数为ReLU;
- 再次添加一个 MaxPooling2D 层;
- Flatten 层:将卷积部分输出的特征图展平成一维向量,以便后续连接全连接层;
- 全连接 Dense 层:包含128个神经元,激活函数为ReLU;
- 输出层 Dense:只有一个神经元,用Sigmoid激活函数输出二分类结果。
这个模型的输入形状是(img_height, img_width, 3),其中3表示RGB图像的三个通道。第一层 Conv2D 和池化层之后,每个卷积层和池化层都会减小特征图的空间大小,并增加滤波器数量来提取更高层次的特征。最后使用全连接层对特征进行分类。输出层仅有一个神经元,用于二分类任务的概率输出。
2.4 编译模型与训练
编译模型:
# 编译模型
model.compile(optimizer='adam',
              loss='binary_crossentropy',
              metrics=['accuracy'])
在这里,使用了Adam优化器(optimizer='adam'),它是一种自适应学习率的优化方法,能够有效解决梯度消失和梯度爆炸问题,加快收敛速度。同时,使用了二元交叉熵作为损失函数(loss='binary_crossentropy'),也是常见的用于二分类问题的损失函数。最后,使用准确率(accuracy)作为评价指标(metrics=['accuracy']),用于评估模型预测的准确性。
训练模型:
# 训练模型
model.fit(train_generator,
          epochs=15)
我电脑用的是魔改版 2080Ti 22GB,训练的时候显存占用为 21GB,每一个 epoch 约 2分钟,全部跑完大约30分钟。
代码输出:
Epoch 1/15
547/547 [================] - 121s 220ms/step - loss: 0.6190 - accuracy: 0.6480
Epoch 2/15
547/547 [================] - 120s 220ms/step - loss: 0.5057 - accuracy: 0.7540
Epoch 3/15
547/547 [================] - 120s 220ms/step - loss: 0.4398 - accuracy: 0.7949
Epoch 4/15
547/547 [================] - 120s 220ms/step - loss: 0.4021 - accuracy: 0.8180
Epoch 5/15
547/547 [================] - 120s 219ms/step - loss: 0.3753 - accuracy: 0.8302
Epoch 6/15
547/547 [================] - 120s 220ms/step - loss: 0.3512 - accuracy: 0.8435
Epoch 7/15
547/547 [================] - 120s 220ms/step - loss: 0.3256 - accuracy: 0.8580
Epoch 8/15
547/547 [================] - 155s 283ms/step - loss: 0.3046 - accuracy: 0.8677
Epoch 9/15
547/547 [================] - 127s 233ms/step - loss: 0.2897 - accuracy: 0.8764
Epoch 10/15
547/547 [================] - 122s 224ms/step - loss: 0.2705 - accuracy: 0.8861
Epoch 11/15
547/547 [================] - 120s 220ms/step - loss: 0.2519 - accuracy: 0.8930
Epoch 12/15
547/547 [================] - 122s 223ms/step - loss: 0.2363 - accuracy: 0.9011
Epoch 13/15
...
Epoch 14/15
547/547 [================] - 121s 221ms/step - loss: 0.2154 - accuracy: 0.9144
Epoch 15/15
547/547 [================] - 121s 221ms/step - loss: 0.1986 - accuracy: 0.9200
2.5 模型准确率测试
# 测试模型准确率
test_datagen = ImageDataGenerator(rescale=1./255)
test_generator = test_datagen.flow_from_directory(test_dir,
                                                  target_size=(img_height, img_width),
                                                  batch_size=batch_size,
                                                  class_mode='binary')
test_loss, test_acc = model.evaluate(test_generator)
print('Test accuracy:', test_acc)
代码输出:
Found 3752 images belonging to 2 classes.
40/118 [=========>....................] - ETA: 3s - loss: 0.3541 - accuracy: 0.8672
118/118 [==============================] - 6s 47ms/step - loss: 0.3433 - accuracy: 0.8681 Test accuracy: 0.8680703639984131
2.6 模型验证
# 验证模型准确率、损失
val_datagen = ImageDataGenerator(rescale=1./255)
val_generator = val_datagen.flow_from_directory(val_dir,
                                                  target_size=(img_height, img_width),
                                                  batch_size=batch_size,
                                                  class_mode='binary')
val_loss, val_acc = model.evaluate(val_generator)
print('Validation accuracy:', val_acc)
print('Validation loss:', val_loss)
代码输出:
Found 3748 images belonging to 2 classes. 118/118 [==============================] - 6s 46ms/step - loss: 0.3384 - accuracy: 0.8714 Validation accuracy: 0.8713980913162231 Validation loss: 0.338356614112854
2.6 模型保存
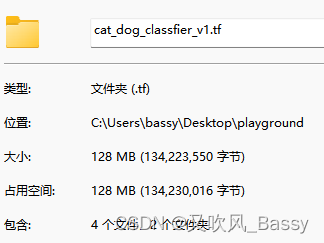
2.6.1 保存为 tf 格式
# save model
model.save('cat_dog_classfier_v1.tf', overwrite=True, include_optimizer=True)
tf格式是一个文件夹,该文件夹里面包含了计算图结构、模型元数据信息、模型参数等。
2.6.2 保存为 tflite 格式
这种格式可以在移动端上运行:
# 导出TensorFlow Lite模型
covertor = tf.lite.TFLiteConverter.from_keras_model(model)
covertor.optimizations = [tf.lite.Optimize.DEFAULT]
tflife_model = covertor.convert()

with open('cat_dog_classfier_v1.tflite', 'wb') as f:
  f.write(tflife_model)
tflite 格式大小约为 10.6MB;

三、将tflite模型应用在安卓App上
启动 Android Studio,打开一个工程。
然后右击 app 模块,在弹出的右键菜单中选择 “New” - “Other” - "TensorFlow Lite Model",如下图所示:

接着,选中模型:

导入之后,如下图所示:
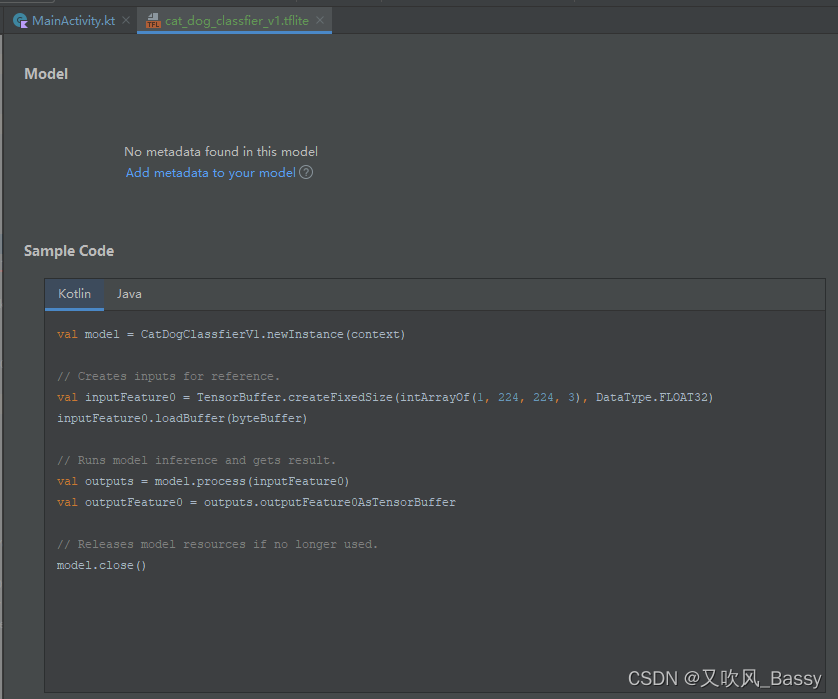
Android Studio 会自动生成调用该模型的相关代码了。
接下来我们就调用就可以了。
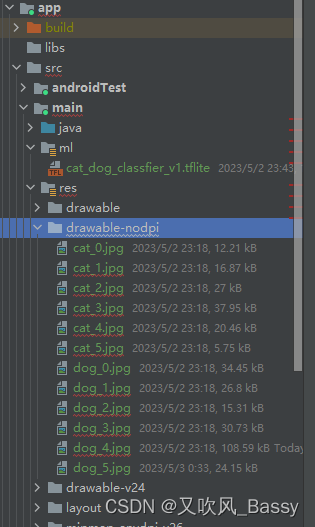
先准备一些猫狗图片,

放到 drawable-nodpi 目录下:
接着开始写代码,以下代码写在 MainActivity 中:
override fun onCreate(savedInstanceState: Bundle?) {
    super.onCreate(savedInstanceState)
    setContentView(R.layout.activity_main)

    val map = mapOf(
        R.drawable.cat_0 to "R.drawable.cat_0",
        R.drawable.cat_1 to "R.drawable.cat_1",
        R.drawable.cat_2 to "R.drawable.cat_2",
        R.drawable.cat_3 to "R.drawable.cat_3",
        R.drawable.cat_4 to "R.drawable.cat_4",
        R.drawable.cat_5 to "R.drawable.cat_5",
        R.drawable.dog_0 to "R.drawable.dog_0",
        R.drawable.dog_1 to "R.drawable.dog_1",
        R.drawable.dog_2 to "R.drawable.dog_2",
        R.drawable.dog_3 to "R.drawable.dog_3",
        R.drawable.dog_4 to "R.drawable.dog_4",
        R.drawable.dog_5 to "R.drawable.dog_5"
    )
    val model = CatDogClassfierV1.newInstance(this)
    map.forEach {
        doit(model, it.key, it.value)
    }
    model.close()
}


private fun doit(model: CatDogClassfierV1, id: Int, name: String) {
        // Load the input image from resources
        val bmp = BitmapFactory.decodeResource(resources, id)

        // Resize the input image to 224x224
        val resizedBmp = Bitmap.createScaledBitmap(bmp, 224, 224, true)

        // Convert the resized bitmap to a ByteBuffer
        val byteBuffer = ByteBuffer.allocateDirect(4 * resizedBmp.width * resizedBmp.height * 3)
        byteBuffer.order(ByteOrder.nativeOrder())
        val pixels = IntArray(resizedBmp.width * resizedBmp.height)
        resizedBmp.getPixels(pixels, 0, resizedBmp.width, 0, 0, resizedBmp.width, resizedBmp.height)
        var pixel = 0
        for (i in 0 until 224) {
            for (j in 0 until 224) {
                val pixelValue = pixels[pixel++]
                byteBuffer.putFloat(((pixelValue shr 16) and 0xFF) / 255.0f)
                byteBuffer.putFloat(((pixelValue shr 8) and 0xFF) / 255.0f)
                byteBuffer.putFloat((pixelValue and 0xFF) / 255.0f)
            }
        }

        // Creates inputs for reference.
        val inputFeature0 = TensorBuffer.createFixedSize(intArrayOf(1, 224, 224, 3), DataType.FLOAT32)
        inputFeature0.loadBuffer(byteBuffer)

        // Runs model inference and gets result.
        val outputs = model.process(inputFeature0)
        val outputFeature0 = outputs.outputFeature0AsTensorBuffer

        // Get the index of the predicted class
        val probabilities = outputFeature0.floatArray
        val predictedClassIndex = probabilities.indices.maxByOrNull { probabilities[it] } ?: -1

        // Map the predicted class index to "Cat" or "Dog"
        val predictedClass = if (predictedClassIndex == 0) "Cat" else if (predictedClassIndex == 1) "Dog" else "Unknown"

        Log.i("MainActivity", "$name, probabilities=${probabilities.joinToString()}")
        Log.i("MainActivity", "$name, ${if(probabilities[0] < 0.5) '猫' else '狗'}")
        // Releases model resources if no longer used.
    }
运行起来看日志输出:

四、总结
以上是如何使用 tensorflow 训练一个猫狗分类器、并在移动端上部署的完整过程。
tensorflow 已经很完备了。在项目上可以多思考一下怎么应用。