目录
五、使用方式4:用Input Action Asset生成C#代码获取输入
一、导入Input System包
打开包管理器,搜索Input System,点击右下角安装。

安装完成会弹出警告框,点击Yes
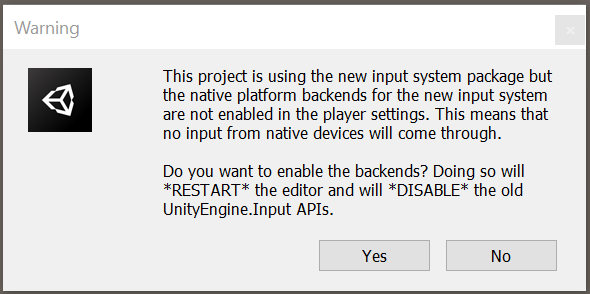
这一步会重启编译器并禁用旧的Input Manager,如果想重新启用Input Manager,可以在项目管理->Player->活动输入处理中进行选择:
- 选择输入管理器(旧)代表仅启用Input Manager
- 选择输入系统包(新)代表仅启用Input System
- 选择两个代表同时启用Input System及Input Manager
二、使用方式1:直接从输入设备对应类中获取输入
注意需要使用UnityEngine.InputSystem命名空间。
常用的输入设备:
- 手柄——>Gamepad类(Gamepad.current获取当前手柄)
- 键盘——>Keyboard类(Keyboard.current获取当前键盘)
- 鼠标——>Mouse类(Mouse.current获取当前鼠标)
using UnityEngine;
using UnityEngine.InputSystem;

public class M1_DirectlyFromInputDevice : MonoBehaviour
{
    private Vector2 dir;
    //用一个枚举类来切换设备类型
    public DeviceType type;
    void Update()
    {
        //1.Gamepad:
        if (type == DeviceType.Gamepad)
        {
            //获取当前Gamepad
            var gamepad = Gamepad.current;
            //gamepad为空则代表没有Gamepad连接
            if (gamepad == null)
            {
                return;
            }
            //获取左摇杆的方向
            dir = gamepad.leftStick.ReadValue();
            //移动
            transform.Translate(new Vector3(dir.x, dir.y, 0) * Time.deltaTime);
        }
        //2.Keyboard:
        else if(type == DeviceType.Keyboard)
        {
            var keyboard = Keyboard.current;
            if (keyboard == null)
            {
                return;
            }
            //跳跃
            if (keyboard.spaceKey.isPressed)
            {
                GetComponent<Rigidbody>().AddForce(Vector3.up * 10f);
            }
        }
        //3.Mouse:
        else
        {
            var mouse = Mouse.current;
            if(mouse == null)
            {
                return;
            }
            //跳跃
            if (mouse.leftButton.isPressed)
            {
                GetComponent<Rigidbody>().AddForce(Vector3.up * 10f);
            }
        }
    }

    public enum DeviceType
    {
        Gamepad,
        Keyboard,
        Mouse,
    }
}
三、使用方式2:用代码创建InputAction获取输入
注意需要使用UnityEngine.InputSystem命名空间。
增加按键绑定有两种方法:
- AddBinding()
- AddCompositeBinding()
其中AddCompositeBinding请查阅:Input Bindings | Input System | 1.3.0 (unity3d.com)
注意这种方式下,创建的Action必须手动在代码里面Enable
using System.Collections;
using System.Collections.Generic;
using UnityEngine;
using UnityEngine.InputSystem;

public class M2_CreateInputActionThroughScripts : MonoBehaviour
{
    public InputAction moveAction;
    public InputAction jumpAction;
    private Vector2 dir;
    void Start()
    {
        //增加2D Vector:WASD绑定
        moveAction.AddCompositeBinding("2DVector(mode=2)")
            .With("Up", "<Keyboard>/w")
            .With("Down", "<Keyboard>/s")
            .With("Left", "<Keyboard>/a")
            .With("Right", "<Keyboard>/d");
        //增加单个按键:Space绑定
        jumpAction.AddBinding("<Keyboard>/space");
        //需要手动启用Action
        moveAction.Enable();
        //需要手动启用Action
        jumpAction.Enable();
    }

    void Update()
    {
        //获取输入
        dir = moveAction.ReadValue<Vector2>();
        //移动
        transform.Translate(new Vector3(dir.x, dir.y, 0) * Time.deltaTime);
        //跳跃
        if (jumpAction.ReadValue<float>() >= 1)
        {
            GetComponent<Rigidbody>().AddForce(Vector3.up * 10f);
        }
    }
}
AddCompositeBinding的Mode有三种:
请查阅:Enum Vector3Composite.Mode | Input System | 1.3.0 (unity3d.com)
- Analog(当mode=2),默认,每个按键以浮点值0~1表示
- Digital(当mode=1),每个按键只有0和1两种状态
- DigitalNormalized(当mode=0),每个按键只有0和1两种状态,当返回是一个Vector类型的值时,会将向量长度标准化为1,方向不变
四、使用方式3:用Player Input组件获取输入
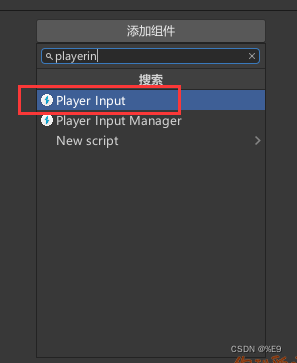
第一步:添加PlayerInput组件
第二步:点击Player Input组件中的Create Actions创建Input Action Asset

第三步:设置Input Action Asset
新建出来的是默认配置,可以按自己的需求修改

其中:
- 最左边的模块ActionMaps是Actions的分组,默认配置的ActionMaps有Player和UI两个分组。
- 中间的模块Actions显示选中分组下的所有Actions,在这里可以对Action进行设置。
- 最右边的模块Properties是Action或者Bindings的属性设置。
- 最上方的All Control Scheme可以对Bindings进行筛选,比如选中Gamepad就只会显示Gamepad的Bindings。
- 最上方的Save Asset用来手动保存,关闭时,未保存的修改会丢失,也可以勾选上Auto Save来自动保存
第四步:设置Player Input组件中的Behavior
请查阅:GameObject components for input | Input System | 1.3.0 (unity3d.com)

1>Send Messages
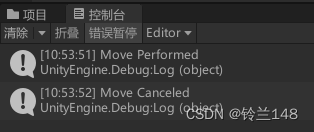
通过调用Gameobject的SendMessages()方法来调用OnXXX方法,比如当Move Action触发时,会调用OnMove方法,具体方法名可以看Behavior下面的说明

通过测试发现每一次触发都会调用方法至少两次,Performed状态时调用,Canceled状态时也会调用
public void OnMove()
{

    Debug.Log("Move " + GetComponent<PlayerInput>().actions["Move"].phase.ToString());
}
2>Broadcast Messages
与Send Messages类似,但不同的是,Broadcast Messages还可以调用子物体孙物体上挂载的对应方法
3>Invoke Unity Events
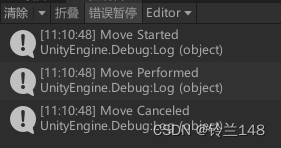
需要在事件中手动关联触发时需要调用的方法,注意Started、Performed、Canceled状态时都会各调用一次方法

using UnityEngine;
using UnityEngine.InputSystem;

public class M3_UsePlayerInputComponent : MonoBehaviour
{
    public void OnMove()
    {

        Debug.Log("Move " + GetComponent<PlayerInput>().actions["Move"].phase.ToString());
    }
}
4>Invoke CSharp Events
有三个设定好的事件C#事件:
- onActionTriggered
- onDeviceLost
- onDeviceRegained
using UnityEngine;
using UnityEngine.InputSystem;

public class M3_UsePlayerInputComponent : MonoBehaviour
{
    private void Start()
    {
        GetComponent<PlayerInput>().onActionTriggered += OnActionTriggered;
    }

    public void OnActionTriggered(InputAction.CallbackContext context)
    {
        Debug.Log(context.action + ":" + context.action.phase.ToString());
    }
}
注意Started、Performed、Canceled三个状态都会触发事件
五、使用方式4:用Input Action Asset生成C#代码获取输入
注意这种方式下,必须手动在代码里面Enable
请查阅:Input Action Assets | Input System | 1.3.0 (unity3d.com)
第一步:可以按上面的方法用PlayerInput组件创建一个默认的Input Action Asset文件,然后可以移除PlayerInput组件
第二步:找到创建出来的Input Action Asset文件,点击该文件,勾选检查器里面的Generate C# Class,点击应用

第三步:在代码中创建上面的类的实例,并从该实例获取输入
using UnityEngine;
using UnityEngine.InputSystem;

public class M4_GenerateScripts : MonoBehaviour
{
    private MyAction inputActions;
    void Start()
    {
        //创建一个实例
        inputActions = new MyAction();
        //启用Player分组里面的Actions
        inputActions.Player.Enable();
        //事件
        inputActions.Player.Fire.performed += Fire_performed;
    }

    private void Fire_performed(InputAction.CallbackContext obj)
    {
        Debug.Log("Fire");
    }
}