前言
Counting-Aware Network(CAN)-手写数学公式识别网络是好未来与白翔团队一起发布的一篇2022年的被ECCV收录的论文,该论文旨在缓解目前大部分基于注意力机制的手写数学公式识别算法在处理较长或者空间结构较复杂的数学公式时,容易出现的注意力不准确的情况。该论文通过将符号计数任务和手写数学公式识别任务联合优化来增强模型对于符号位置的感知,并验证了联合优化和符号计数结果都对公式识别准确率的提升有贡献,代码官方地址GitHub地址
代码结构概览
下载官方代码,解压一看,整体代码结构比较清晰,也比较简单
整个代码主要包含训练代码train.py,数据load的代码dataset.py,模型代码主要在models文件夹下,以及模型推理代码inference.py
首先来看一下数据load代码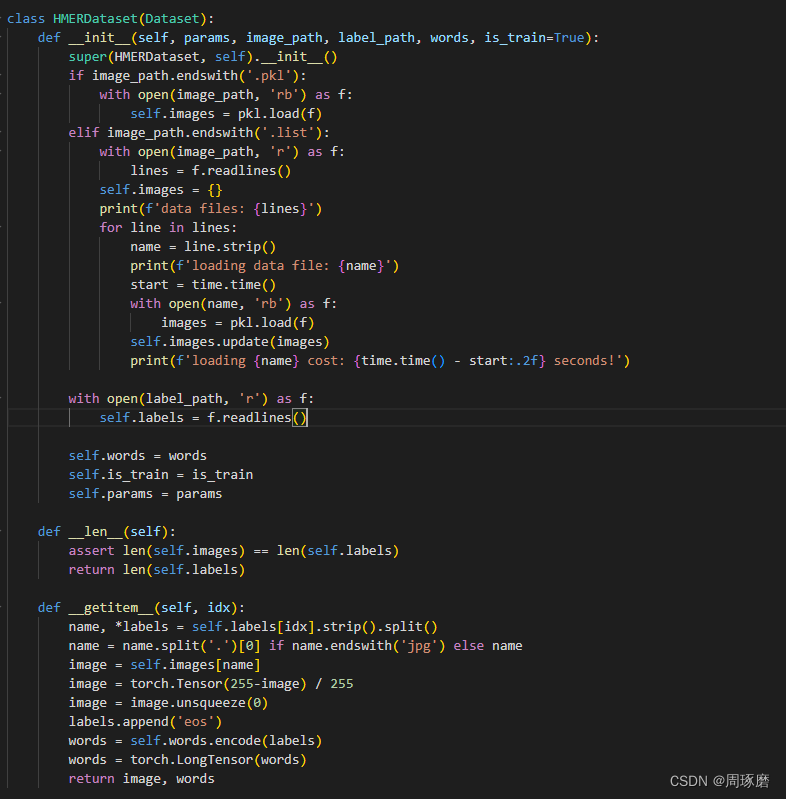
数据load代码最主要的就是这个HMERDataset类,默认是通过读取存有图像矩阵的pkl文件和存有图像名字和标签的文本文件,然后再 getitem(self, idx)函数通过读取标签的文本行,同时获取图像矩阵,再对图像做一个简单的归一化处理,转变成tensor,具体代码如下:
    def __getitem__(self, idx):
        name, *labels = self.labels[idx].strip().split()
        name = name.split('.')[0] if name.endswith('jpg') else name
        image = self.images[name]
        image = torch.Tensor(255-image) / 255
        image = image.unsqueeze(0)
        labels.append('eos')
        words = self.words.encode(labels)
        words = torch.LongTensor(words)
        return image, words
接着就是将读取图像和标签的HMERDataset类做一个shuffle,再传到pytorch的DataLoader类中。需要注意的是,将HMERDataset类传递给DataLoader时,还增加了一个回调函数,这个函数主要就是增加了一个图像和标签的mask,这个mask基本上就都是由0组成,尺寸和图片以及标签的尺寸一致。得到的mask后面在模型训练的时候作为输入传入,具体代码如下:
def collate_fn(batch_images):
    max_width, max_height, max_length = 0, 0, 0
    batch, channel = len(batch_images), batch_images[0][0].shape[0]
    proper_items = []
    for item in batch_images:
        if item[0].shape[1] * max_width > 1600 * 320 or item[0].shape[2] * max_height > 1600 * 320:
            continue
        max_height = item[0].shape[1] if item[0].shape[1] > max_height else max_height
        max_width = item[0].shape[2] if item[0].shape[2] > max_width else max_width
        max_length = item[1].shape[0] if item[1].shape[0] > max_length else max_length
        proper_items.append(item)

    images, image_masks = torch.zeros((len(proper_items), channel, max_height, max_width)), torch.zeros((len(proper_items), 1, max_height, max_width))
    labels, labels_masks = torch.zeros((len(proper_items), max_length)).long(), torch.zeros((len(proper_items), max_length))

    for i in range(len(proper_items)):
        _, h, w = proper_items[i][0].shape
        images[i][:, :h, :w] = proper_items[i][0]
        image_masks[i][:, :h, :w] = 1
        l = proper_items[i][1].shape[0]
        labels[i][:l] = proper_items[i][1]
        labels_masks[i][:l] = 1
    return images, image_masks, labels, labels_masks
模型整体代码
模型整体代码还是比较清晰整洁的,入口函数是can.py,打开可以看到:
整个模型基本上主要包含cnn特征提取模块,2个counting_decoder模块(即论文中提到的多尺度计数模块MSCM),一个decoder模块(即结合计数的注意力解码器CCAD)。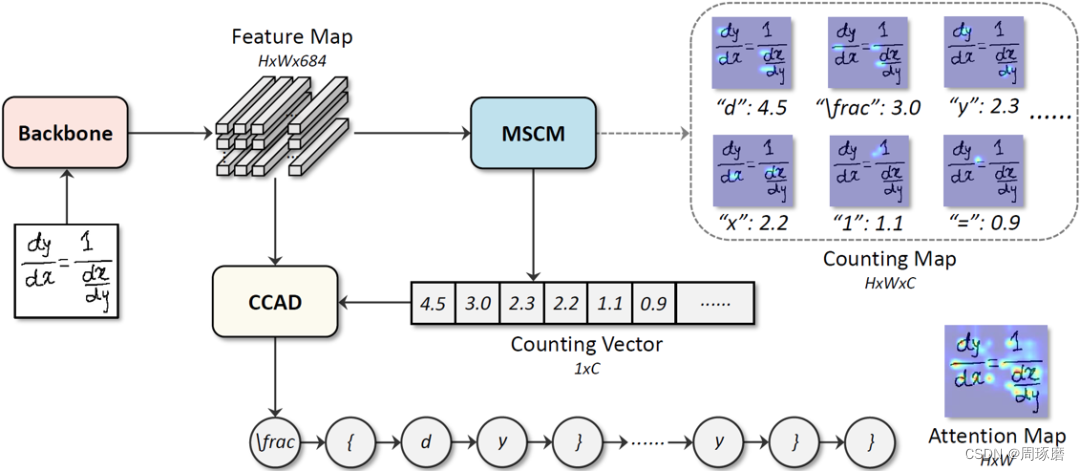
cnn特征提取模块,在densenet.py文件中,没有太多可说的,就是一个densenet,输入一张图片,输出684个feature map。
多尺度计数模块MSCM,在counting.py文件中,这个模块也相对比较简单,模块输入是cnn提取的feature,先做一个trans_layer运算(先做卷积、batchNorm),再做一个channel_att运算(先做一个AdaptiveAvgPool2d, 然后做两个全连接乘积+激活操作,最后将输入 * 运算后的feature map),最后做一个卷积+激活操作,将feature map尺寸进行变换,返回。
class CountingDecoder(nn.Module):
    def __init__(self, in_channel, out_channel, kernel_size):
        super(CountingDecoder, self).__init__()
        self.in_channel = in_channel
        self.out_channel = out_channel
        self.trans_layer = nn.Sequential(
            nn.Conv2d(self.in_channel, 512, kernel_size=kernel_size, padding=kernel_size//2, bias=False),
            nn.BatchNorm2d(512))
        self.channel_att = ChannelAtt(512, 16)
        self.pred_layer = nn.Sequential(
            nn.Conv2d(512, self.out_channel, kernel_size=1, bias=False),
            nn.Sigmoid())

    def forward(self, x, mask):
        b, c, h, w = x.size()
        x = self.trans_layer(x)
        x = self.channel_att(x)
        x = self.pred_layer(x)
        if mask is not None:
            x = x * mask
        x = x.view(b, self.out_channel, -1)
        x1 = torch.sum(x, dim=-1)
        return x1, x.view(b, self.out_channel, h, w)
结合计数的注意力解码器CCAD模块相对来说比较复杂,主要实现在decoder.py中,其架构如下
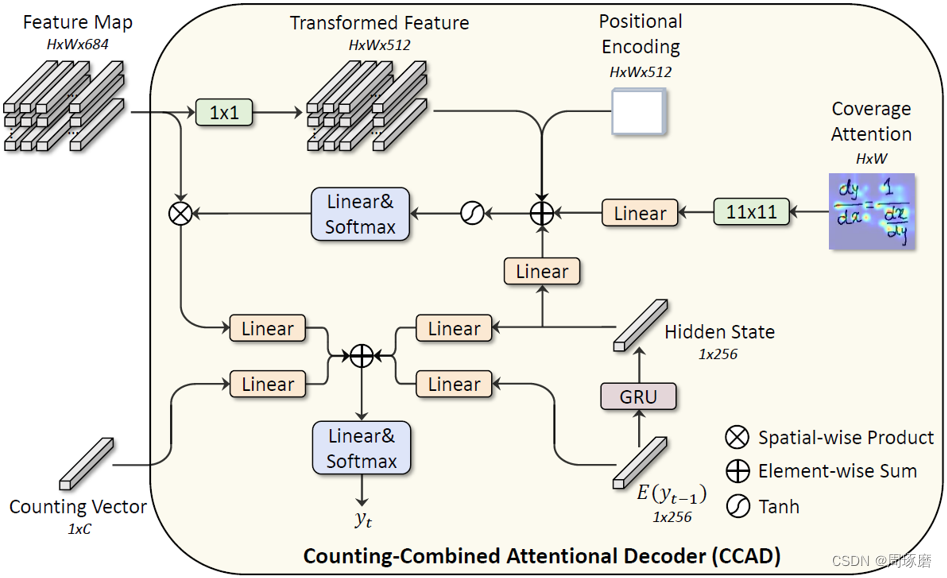
这个模块的输入主要包含densenet提取出来的feature map(以下都叫着cnn_features),多尺度计数模块MSCM的Counting Vector,位置编码信息,上一个step的预测信息等,输出就是则是当前状态的yt。
其中当前状态yt是由四个输入相加,再做一个全连接层+激活函数得到,这就是代码中这部分内容:
if self.params['dropout']:
	word_out_state = self.dropout(current_state + word_weighted_embedding + word_context_weighted + counting_context_weighted)
else:
   	word_out_state = current_state + word_weighted_embedding + word_context_weighted + counting_context_weighted
word_prob = self.word_convert(word_out_state)
current_state是上一个输出状态的经过gru模块,得到hidden state,再经过Linear层得到;
word_weighted_embedding 是上一个输出状态,经过Linear层得到;
counting_context_weighted 是 多尺度计数模块MSCM输出的Counting Vector,经过Linear层得到;
word_context_weighted最为麻烦,是经过一个word_attention模块得到的输出,而这个word attetion的输入则包含cnn_features、cnn_features经过encoder和位置编码乘积之后相加得到的cnn_features_trans、gru输出的hidden state和上一个状态输出的coverage Atention(代码中用word_alpha_sum表示),这部分代码如下:
word_context_vec, word_alpha, word_alpha_sum = self.word_attention(cnn_features, cnn_features_trans, hidden, word_alpha_sum, images_mask)
训练和loss函数模块
训练模块比较常规,基本可以忽略。
该模型的损失函数包括对MSCM模块输出的counting_preds进行监督的counting_loss,这个loss函数是一个Smooth的L1损失,主要对三个counting_preds1, counting_preds2,counting_preds进行计算,然后求和得到。
counting_preds1, _ = self.counting_decoder1(cnn_features, counting_mask)
counting_preds2, _ = self.counting_decoder2(cnn_features, counting_mask)
counting_preds = (counting_preds1 + counting_preds2) / 2
counting_loss = self.counting_loss(counting_preds1, counting_labels) + self.counting_loss(counting_preds2, counting_labels) \
                        + self.counting_loss(counting_preds, counting_labels)
模型的另外一个损失函数则是交叉熵损失,是计算模型预测的字符和标签之间的差值,然后求平均
word_loss = self.cross(word_probs.contiguous().view(-1, word_probs.shape[-1]), labels.view(-1))
word_average_loss = (word_loss * labels_mask.view(-1)).sum() / (labels_mask.sum() + 1e-10) if self.use_label_mask else word_loss
模型总的loss是将counting_loss与word_average_loss相加得到。
训练自己的数据集
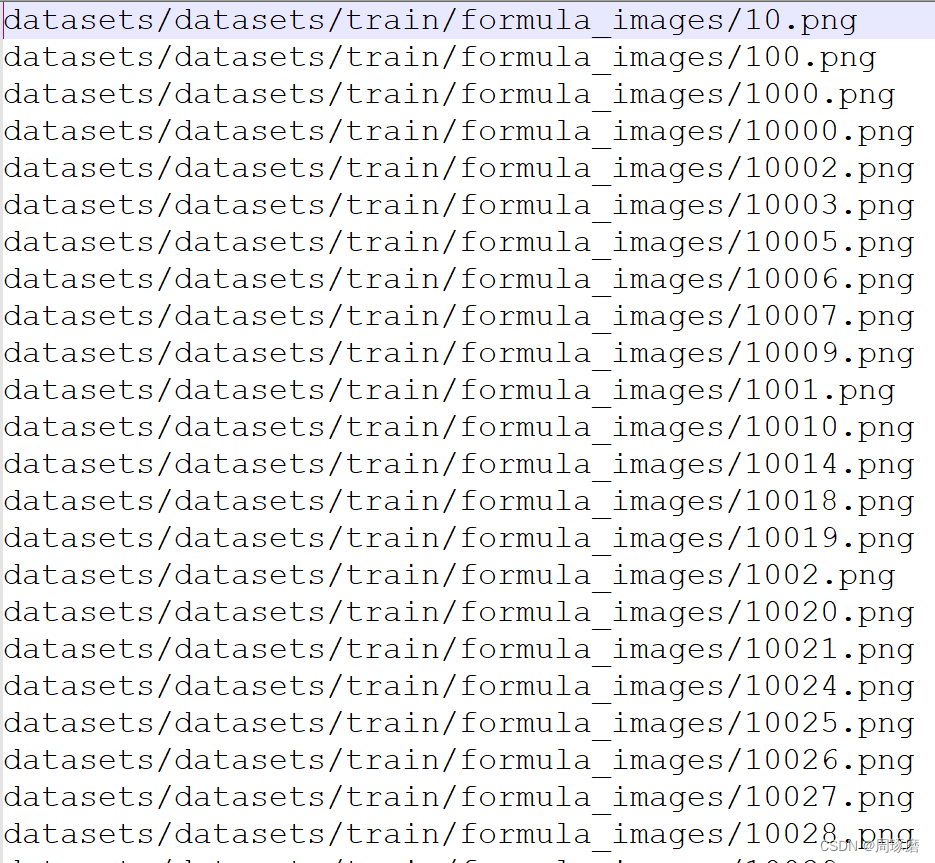
了解完整个模型的大致结构之后,要在这个模型上训练自己的数据集也比较简单,主要有两种方式(1)将自己的数据集的图片读取之后,存为pkl格式的,标签也很原模型的一样格式,是一个多行的txt文件,每行是图片名字+label;(2)如果不想将图片转为pkl格式,则需要生成一个list文件,将训练集中的图片地址存储在这个list中,像如下所示:
标签也是一个文本文件,其实内容样式如下:
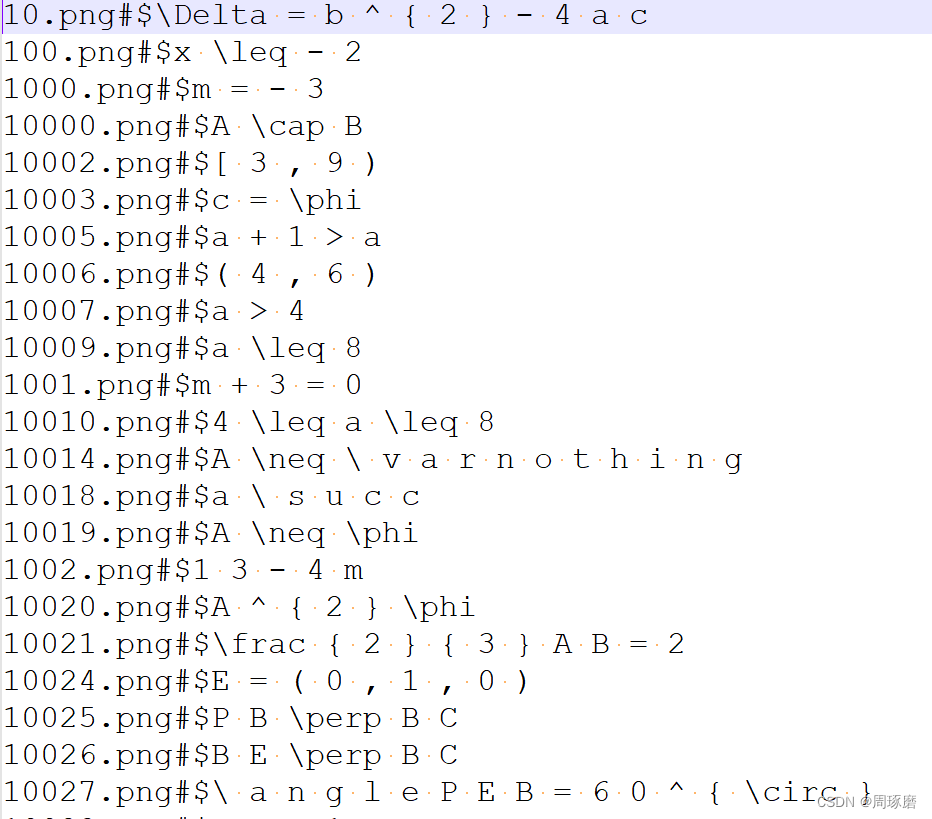
这里有一个小技巧,因为手写公式的标签每个字符之间是使用空格隔开的,那图片名字和标签则使用一个特殊字符隔开,以做区别,我这里选用的是“#$”符号隔开图片名字和标签,当然,用空格隔开也没有什么问题,也可以正常使用。
准备好上述两个文件之后,对代码进行简单的修改,即可正常训练自己的数据集了

最后
这篇论文设计了一种新颖的多尺度计数模块,该计数模块能够在只使用公式识别原始标注(即LaTeX序列)而不使用符号位置标注的情况下进行多类别符号计数。通过将该符号计数模块插入到现有的基于注意力机制的编码器-解码器结构的公式识别网络中,能够提升现有模型的公式识别准确率。此外,文中还验证了公式识别任务也能通过联合优化来提升符号计数的准确率。
另外,训练手写公式识别模型的数据,笔者使用的是自己制作的真实数据(大概有7w左右),如有需要的话,可以私信联系我。少量数据样式,可以在我的资源中下载查看。