[本文出自天外归云的博客园]
Windows下Anaconda+Tensorflow环境部署
1. 安装Anaconda。
2. 开始菜单 > 所有程序 > Anaconda 3 (64-bit) > Anaconda Prompt > 执行命令:
conda create -n tensorflow python=3.5
至此创建了一个名字叫做tensorflow的虚拟环境,并指定了这个虚拟环境的python为3.5版本。
3. 激活虚拟环境,执行命令:
activate tensorflow
4. 安装CPU版本的tensorflow,执行命令:
pip install --ignore-installed --upgrade https://storage.googleapis.com/tensorflow/windows/cpu/tensorflow-1.2.1-cp35-cp35m-win_amd64.whl
必须用这个whl结尾的https地址,用其他地址安装一会儿在python环境中import tensorflow都会报错。
至此环境部署完成。
使用方法
要运行一个tensorflow机器学习脚本,首先创建一个test.py文件,包含以下内容:
import numpy as np
import tensorflow as tf

# Model parameters
W = tf.Variable([.3], dtype=tf.float32)
b = tf.Variable([-.3], dtype=tf.float32)
# Model input and output
x = tf.placeholder(tf.float32)
linear_model = W * x + b
y = tf.placeholder(tf.float32)
# loss
loss = tf.reduce_sum(tf.square(linear_model - y))  # sum of the squares
# optimizer
optimizer = tf.train.GradientDescentOptimizer(0.01)
train = optimizer.minimize(loss)
# training data
x_train = [1, 2, 3, 4]
y_train = [0, -1, -2, -3]
# training loop
init = tf.global_variables_initializer()
sess = tf.Session()
sess.run(init)  # reset values to wrong
for i in range(1000):
    sess.run(train, {x: x_train, y: y_train})

# evaluate training accuracy
curr_W, curr_b, curr_loss = sess.run([W, b, loss], {x: x_train, y: y_train})
print("W: %s b: %s loss: %s" % (curr_W, curr_b, curr_loss))
然后打开Anaconda Prompt,激活在我们刚才创建的tensorflow虚拟环境,并在其中执行上面的test.py文件,得到下面的运行结果:
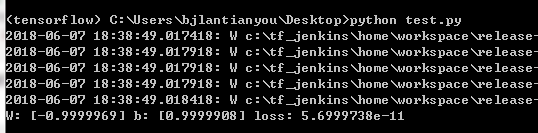
这就是tensorflow机器学习脚本在Anaconda Prompt中的使用方法。