Stanford UE4 & UE5 C++ 开发 课程笔记(一)添加角色与镜头
课程链接
虚幻5教程 斯坦福专用课程 UE4 & C++ 专业游戏开发教程
项目环境
Win11 + Unreal Engine 5.0.3 + Rider 2022.2 IDE(推荐Rider,更好的代码补全并且自带全局搜索)
设置角色
1. Unreal C++中的AActor类的继承关系
首先需要了解Actor, Pawn和Character这三个类的区别,可以简单概括为:

我们需要创建的是能够让玩家操控、可以移动并具有骨骼的类型,所以这里我们选择创建Character
2. 角色创建
点击左上方 工具 -> 新建C++类
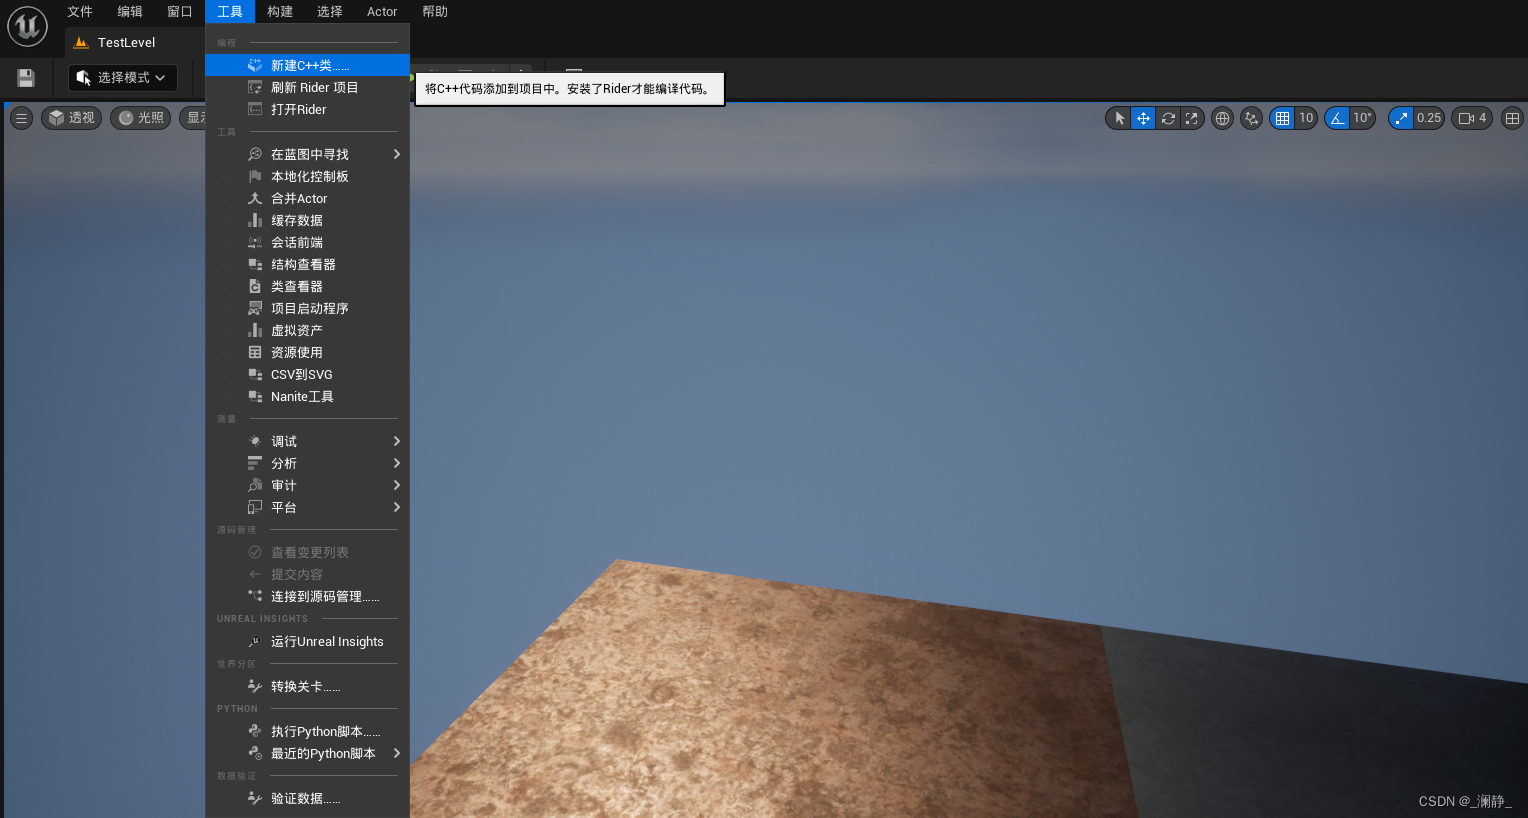
选择 角色(Character) -> 下一步

点击 公共, 自由命名后创建类

3. 创建角色所需的组件
第三人称视角中,Character所需的组件为弹簧臂(USpringArmComponent)和摄像机(UCameraComponent),在.h头文件的protected修饰符下编写:
protected:

	UPROPERTY(VisibleAnywhere)
	USpringArmComponent * SpringArmComponent;

	UPROPERTY(VisibleAnywhere)
	UCameraComponent * CameraComponent;

	// Called when the game starts or when spawned
	virtual void BeginPlay() override;
UPROPERTY是Unreal引擎自定义的宏,属于Unreal Property System,主要的作用有三个:
- 将属性暴露给UE编辑器和其他的蓝图类,让编辑器和蓝图可以访问该属性
- 将属性暴露给网络模块,可以用于多客户端数据共享等场景
- 将属性暴露给内存管理模块,用于垃圾回收
VisibleAnywhere可以理解为该属性会显示在编辑器和蓝图类中,但是不能编辑。
头文件编写完成后,在构造函数中完成组件的创建和设置
ALCharacter::ALCharacter()
{


 	// Set this character to call Tick() every frame.  You can turn this off to improve performance if you don't need it.
	PrimaryActorTick.bCanEverTick = true;

	SpringArmComponent = CreateDefaultSubobject<USpringArmComponent>("SpringArmComponent");
	// SpringArmComponent实际控制相机方向,尽量让Pawn/Character控制旋转,即角色朝哪边,相机就朝向哪边
	SpringArmComponent->bUsePawnControlRotation = true;
	SpringArmComponent->SetupAttachment(RootComponent); // RootComponent没有兄弟组件

	CameraComponent = CreateDefaultSubobject<UCameraComponent>("CameraComponent");
	CameraComponent->SetupAttachment(SpringArmComponent); // 相机附在弹簧臂末端

	GetCharacterMovement()->bOrientRotationToMovement = true; // 保证人物朝向始终与当前移动的方向保持一致

	bUseControllerRotationYaw = false; // 保证角色平滑地向控制器的旋转方向旋转
}
4. 添加角色移动和旋转
第三人称视角中,角色和镜头需要具有根据鼠标移动绕轴旋转的功能。这里可以直接调用Pawn类自带的根据输入改变自身方向的函数
添加角色与镜头旋转
void ALCharacter::SetupPlayerInputComponent(UInputComponent* PlayerInputComponent)
{


	Super::SetupPlayerInputComponent(PlayerInputComponent);

	// 视角旋转
	PlayerInputComponent->BindAxis("Turn", this, &APawn::AddControllerYawInput); // Yaw绕Z轴转动
	PlayerInputComponent->BindAxis("Lookup", this, &APawn::AddControllerPitchInput); // Pitch绕Y轴转动
}
添加角色移动
创建MoveForward与MoveRight函数,分别对应前后和左右移动
protected:

	UPROPERTY(VisibleAnywhere)
	USpringArmComponent * SpringArmComponent;

	UPROPERTY(VisibleAnywhere)
	UCameraComponent * CameraComponent;

	// Called when the game starts or when spawned
	virtual void BeginPlay() override;

	void MoveForward(float value);

	void MoveRight(float value);
在SetupPlayerInputComponent中绑定对应的函数
void ALCharacter::SetupPlayerInputComponent(UInputComponent* PlayerInputComponent)
{


	Super::SetupPlayerInputComponent(PlayerInputComponent);

	// 上下左右移动
	PlayerInputComponent->BindAxis("MoveForward", this, &ALCharacter::MoveForward);
	PlayerInputComponent->BindAxis("MoveRight", this, &ALCharacter::MoveRight);

	// 视角旋转
	PlayerInputComponent->BindAxis("Turn", this, &APawn::AddControllerYawInput); // Yaw绕Z轴转动
	PlayerInputComponent->BindAxis("Lookup", this, &APawn::AddControllerPitchInput); // Pitch绕Y轴转动
}
实现MoveForward与MoveRight函数
void ALCharacter::MoveForward(float value)
{


	// 获取当前相机的方向和角度
	FRotator ControlRotation = GetControlRotation();
	// 我们必须保证人物的移动是在XY水平面上,而不是逐渐向上或向下走
	ControlRotation.Roll = 0.0f;
	ControlRotation.Pitch = 0.0f;
	// 通过指定相机的视角方向,以及前进速度(-1到1之间),移动Character
	AddMovementInput(ControlRotation.Vector(), value);
}

void ALCharacter::MoveRight(float value)
{


	// 或许当前相机的方向和角度
	FRotator ControlRotation = GetControlRotation();
	// 我们必须保证人物的移动是在XY水平面上,而不是逐渐向上或向下走
	ControlRotation.Roll = 0.0f;
	ControlRotation.Pitch = 0.0f;
	// 通过当前相机的方向,判断出正确的左和右(Y轴对应左右)
	const FVector RightVector = FRotationMatrix(ControlRotation).GetScaledAxis(EAxis::Y);
	AddMovementInput(RightVector, value);
}
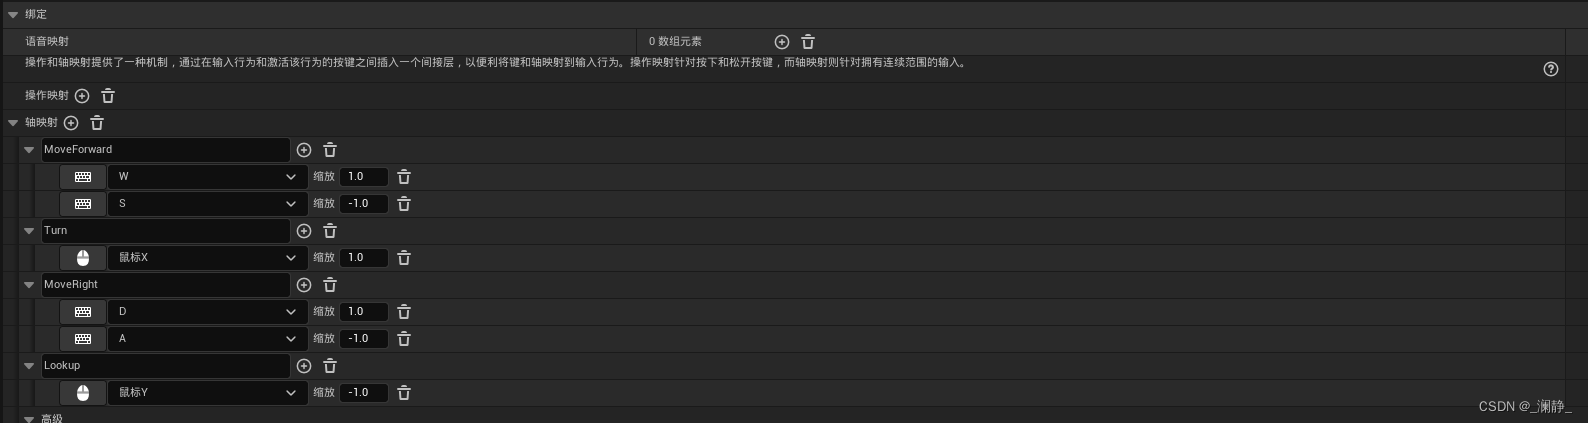
输入绑定
在Unreal编辑器的项目设置中绑定输入
5. 代码编译
Unreal引擎在4.22版本后引入了Live Coding功能,这是一个还在实验中的功能,可能未来会替换热重载。这个功能目前对代码编译有三点限制:
- 如果代码中任何.h头文件发生改动,那么编译时必须关闭Unreal编辑器才能顺利编译!
- 如果代码中任何构造函数发生改动,那么编译时必须关闭Unreal编辑器才能顺利编译!
- 在Unreal编辑器打开的情况下,使用IDE(VS, Rider)的编译按钮可能不成功,需要使用编辑器中的编译按钮才可以。
其他代码改动的情况,可以直接在编辑器中点击编译即可,无需关闭编辑器。但是,本次还是要先关闭Unreal编辑器再通过Rider/VS进行编译。同时,在编译失败的情况下尝试打开编辑器可能出现原有功能缺失的问题。

新版编辑器的编译按钮在右下角。
6. 将角色放入场景中
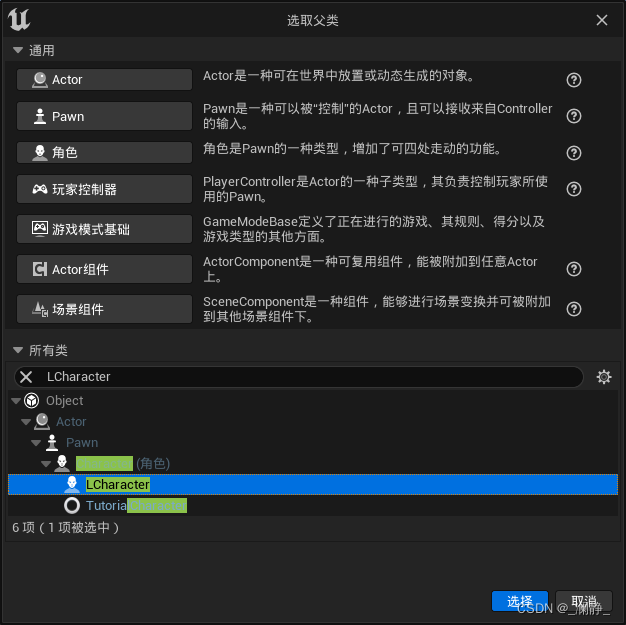
创建派生蓝图类
为了将角色顺利地放入场景中,需要从C++角色类中派生出一个蓝图类。根据名称查找自己创建的C++类作为父类:
获取人物模型与动画
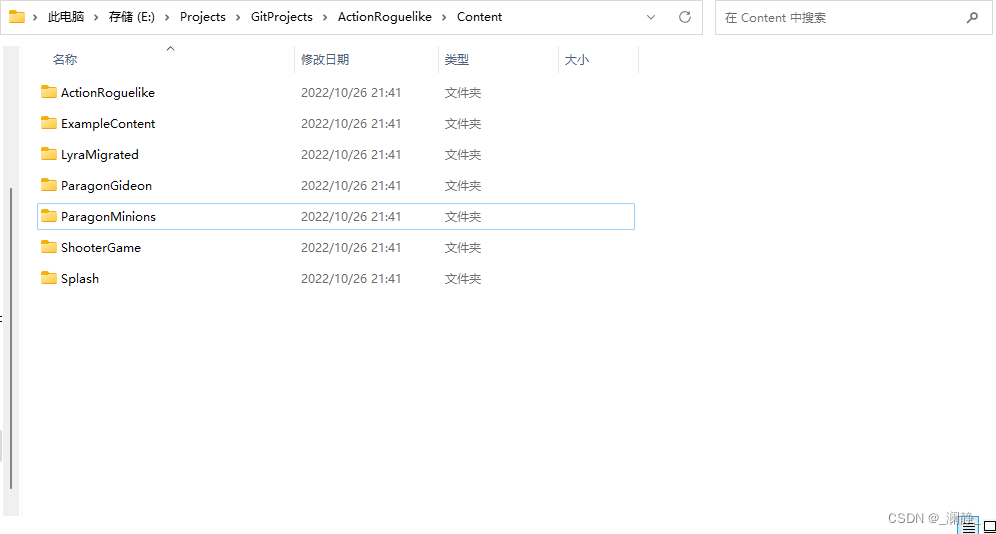
git clone https://github.com/tomlooman/ActionRoguelike
进入Content文件夹中,将ExampleContent,ParagonGideon和ParagonMinions文件夹复制到Unreal项目对应的Content目录下。
但是,课程中所用的Gideon配套材质和动画出现错误,所以只能去虚幻商城中重新下载。在虚幻商城界面搜索Gideon:
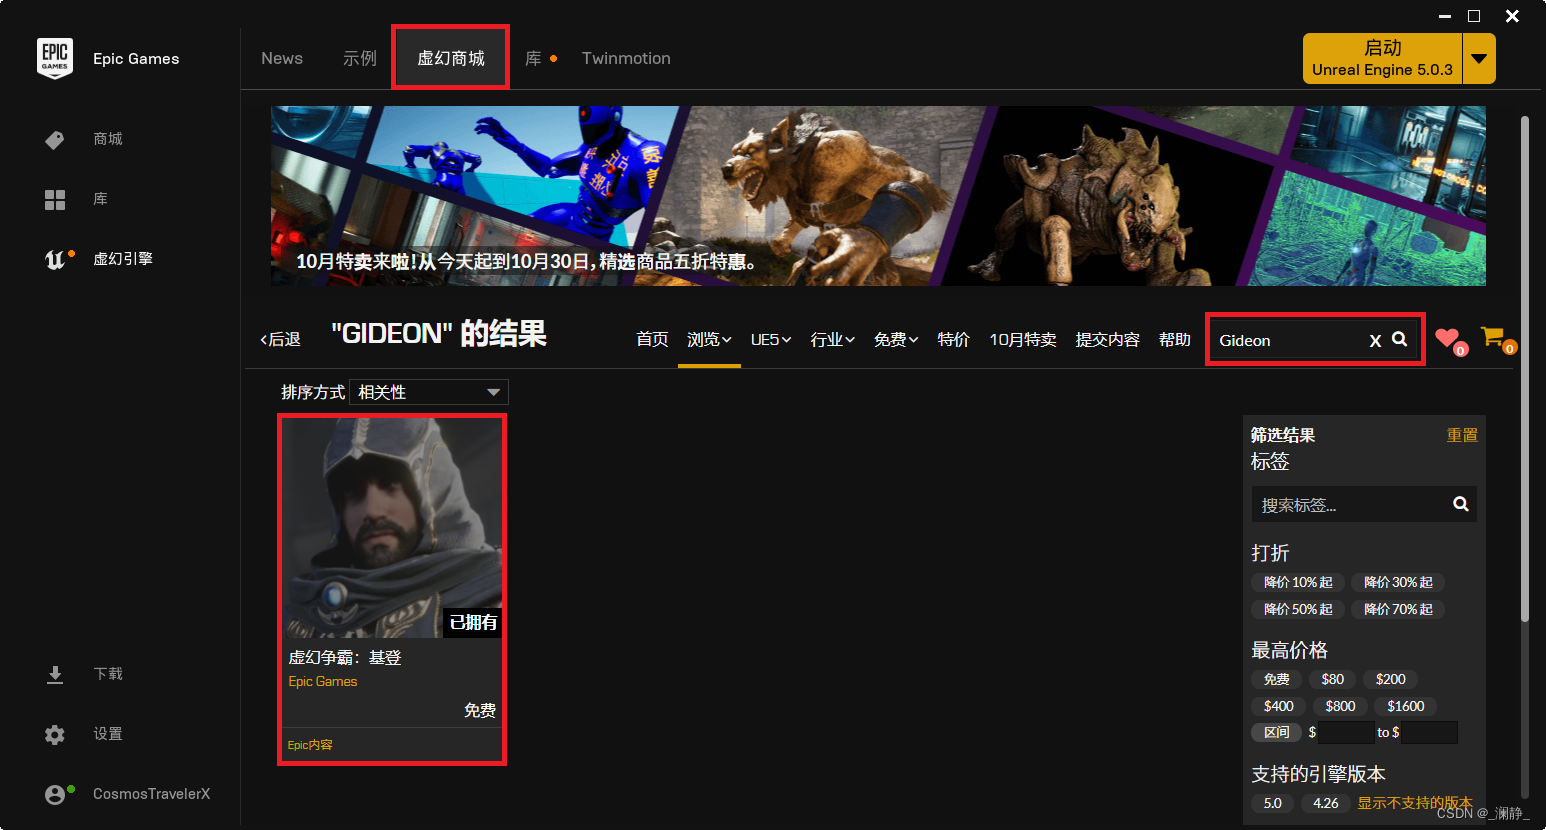
下载完成后将其添加到当前工程中:

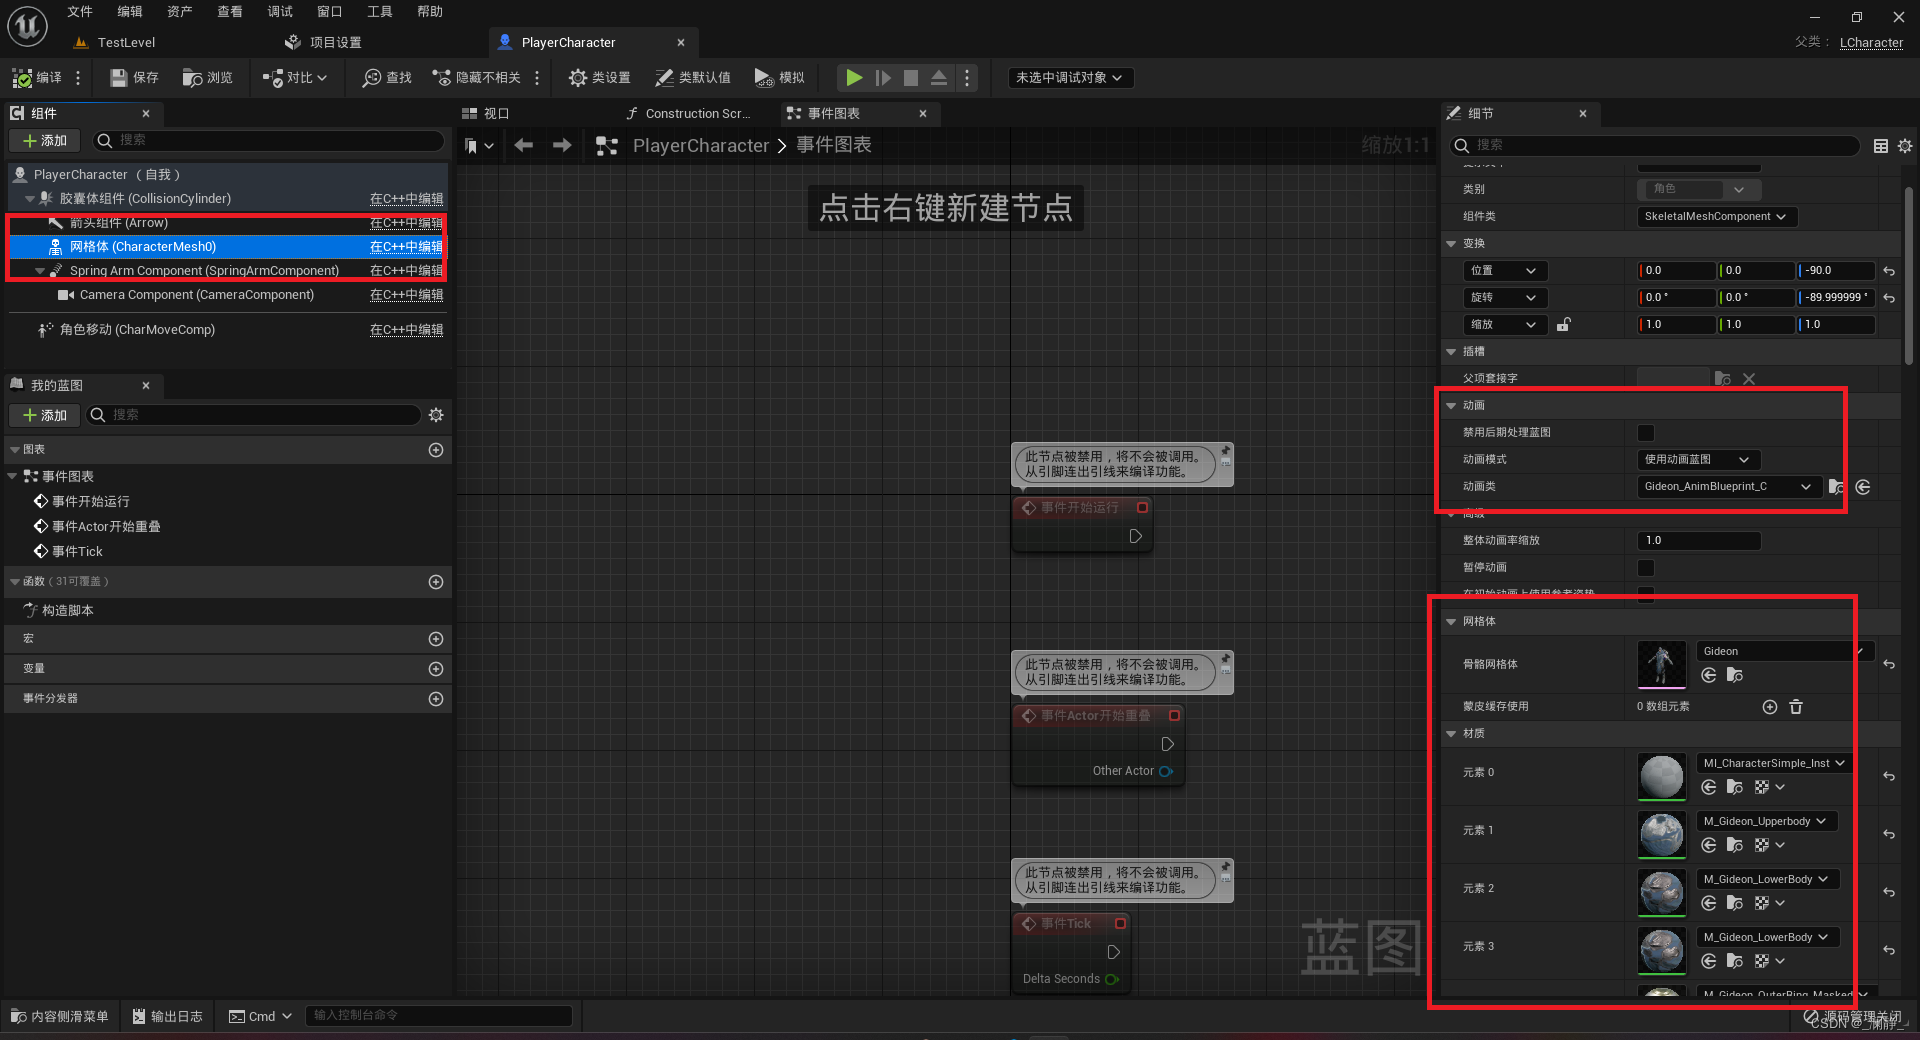
在蓝图类中设置骨骼与动画
打开蓝图类,在左侧选择Gideon,并修改右侧对应属性。
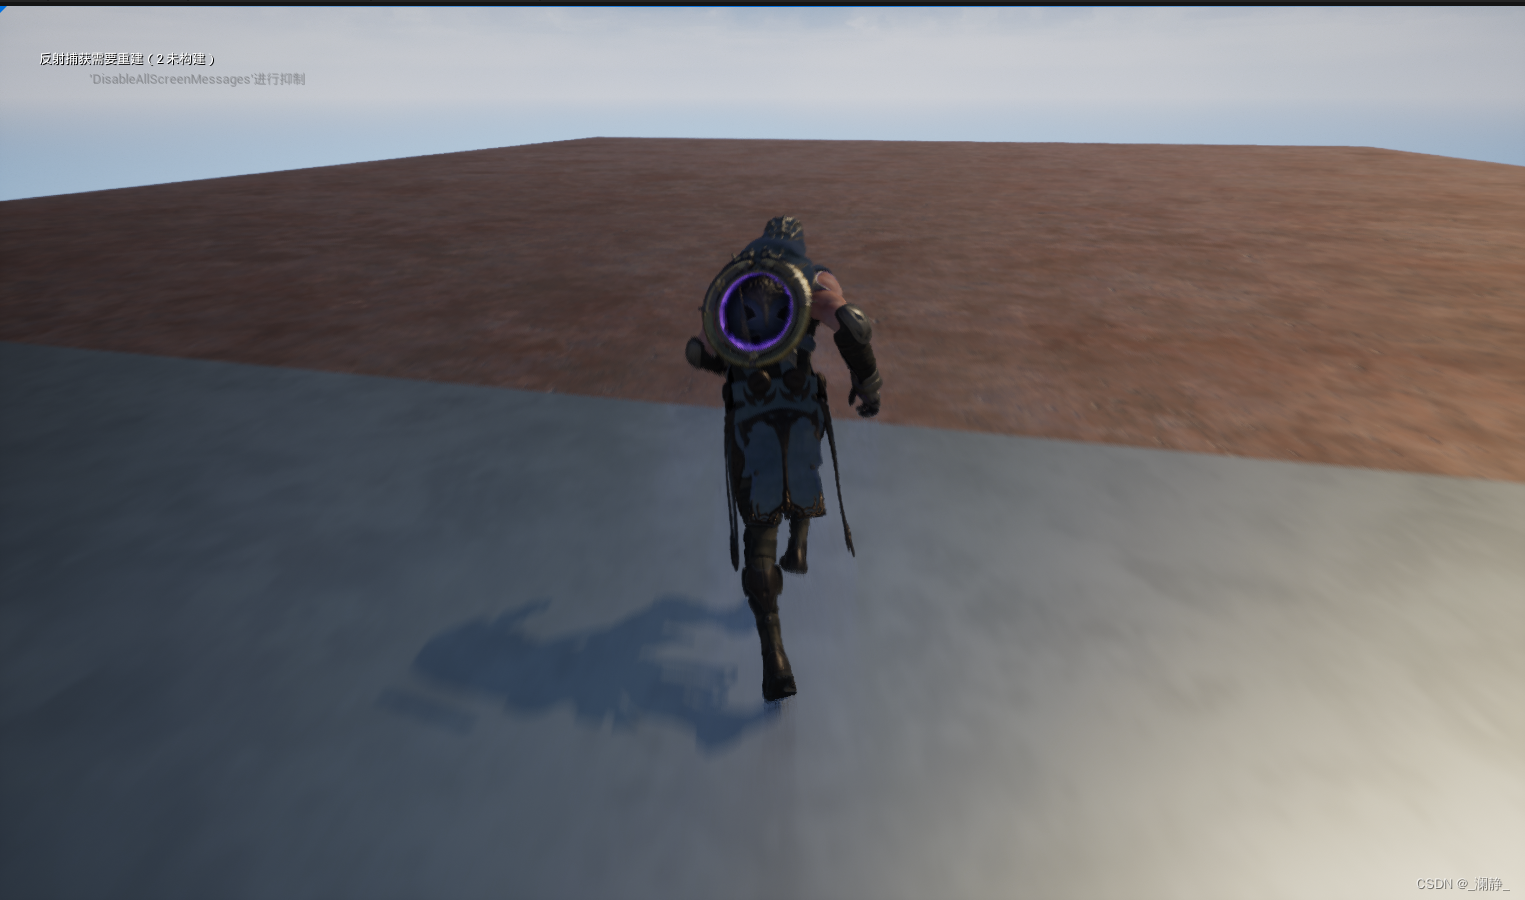
最终结果
在场景中创建角色,完成角色的创建与设置。