素材均来自于Brackeys
各位可以到Youtube支持他,他的视频底下有他个人的网站,各位可以从他拿素材。

像我这样的菜鸡,在我看codeMonkey零零散散的制作视频而不知所措时,Brackeys出现了,他耐心教导,他真的是太温柔了,我哭死。
另外该游戏,他是用JS写的游戏脚本,而我改用C#,接下来我会完整地展现如何制作这款简单的游戏,以便各位像我一样的初学者熟悉unity的操作,不过我不会像他的视频一样冗长。
游戏效果
玩法
就两个玩家互相对撞,碰球,计分产生音效等等。
下载链接
链接:https://pan.baidu.com/s/1BFLubNjFuGdtBEV66pYUSw
提取码:gbjr
Unity的操作
创建C# 代码
接下来由chatGpt讲解它们的一个实现逻辑。

BallControl.cs
让球在等待几秒后,随机以任意方向抛出,控制随着到player的不同,碰撞后反弹的影响。
using System.Collections;
using System.Collections.Generic;
using UnityEngine;

public class BallControl : MonoBehaviour
{


    public float ballSpeed = 100f;
    private float xVel;
    void Start()
    {


        StartCoroutine(WaitAndGoBall(2f));
    }

    void Update()
    {


        xVel = GetComponent<Rigidbody2D>().velocity.x;
        //Debug.Log("Velocity:" + xVel);
        if(xVel <18f && xVel > -18f && xVel!=0)
        {


            if(xVel > 0)
            {


                GetComponent<Rigidbody2D>().velocity = new Vector2(20f, GetComponent<Rigidbody2D>().velocity.y);
            }
            else
            {


                GetComponent<Rigidbody2D>().velocity = new Vector2(-20f, GetComponent<Rigidbody2D>().velocity.y);
            }
            //Debug.Log("Velocity Before " + xVel);
            //Debug.Log("Velocity after " + GetComponent<Rigidbody2D>().velocity.x);
        }
    }

    void OnCollisionEnter2D(Collision2D colInfo)
    {


        //CompareTag 不能 == ,因为tag属性不能被检查
        if (colInfo.collider.CompareTag("Player"))
        {


            GetComponent<Rigidbody2D>().velocity = new Vector2(
            GetComponent<Rigidbody2D>().velocity.x,
            GetComponent<Rigidbody2D>().velocity.y / 2 + colInfo.collider.GetComponent<Rigidbody2D>().velocity.y / 3
            );
            GetComponent<AudioSource>().pitch = Random.Range(0.8f, 1.2f);
            GetComponent<AudioSource>().Play();
        }
    }

    void GoBall()
    {


        float randomNumber = Random.Range(0f, 1f);
        if (randomNumber <= 0.5f)
        {


            GetComponent<Rigidbody2D>().AddForce(new Vector2(ballSpeed, 10f));
        }
        else
        {


            GetComponent<Rigidbody2D>().AddForce(new Vector2(-1* ballSpeed, -10f));
        }
    }

    void ResetBall()
    {


        GetComponent<Rigidbody2D>().velocity = Vector2.zero;
        transform.position = Vector2.zero;
        StartCoroutine(WaitAndGoBall(0.5f));
    }

    IEnumerator WaitAndGoBall(float waitTime)
    {


        yield return new WaitForSeconds(waitTime);
        GoBall();
    }
}
GameManager.cs
设置GUI,计分
using System.Collections;
using System.Collections.Generic;
using UnityEngine;

public class GameManager : MonoBehaviour
{


    public static int playerScore01 = 0;
    public static int playerScore02 = 0;

    public GUISkin theSkin;

    private Transform theBall;

    void Start()
    {


        theBall = GameObject.FindGameObjectWithTag("Ball").transform;
    }

    public static void Score(string wallName)
    {


        if (wallName == "rightWall")
        {


            playerScore01 += 1;
        }
        else
        {


            playerScore02 += 1;
        }
        //Debug.Log("Player Score 1 is " + playerScore01);
        //Debug.Log("Player Score 2 is " + playerScore02);
    }

    void OnGUI()
    {


        GUI.skin = theSkin;
        GUI.Label(new Rect(Screen.width / 2 - 150-18, 25, 100, 100), "" + playerScore01);
        GUI.Label(new Rect(Screen.width / 2 + 150-18, 25, 100, 100), "" + playerScore02);

        if(GUI.Button(new Rect(Screen.width / 2 -121/2, 35, 121, 53), "RESET"))
        {


            playerScore01 = 0;
            playerScore02 = 0;

            theBall.gameObject.SendMessage("ResetBall");
        }
    }

}
GameSetup.cs
固定player位置和设定边界
using System.Collections;
using System.Collections.Generic;
using UnityEngine;

public class GameSetup : MonoBehaviour
{


    //Reference the camera
    public Camera mainCam;

    //Reference the colliders we are going to adjust
    public BoxCollider2D topWall;
    public BoxCollider2D bottomWall;
    public BoxCollider2D leftWall;
    public BoxCollider2D rightWall;

    //Reference the players
    public Transform Player01;
    public Transform Player02;

    //check
    public float po = 180f;
    void Start ()
    {


        //Only set this to Update if you know the screen size can change during a playsession.
        //Move each wall to its edge location:
        topWall.size = new Vector2 (mainCam.ScreenToWorldPoint (new Vector3 (Screen.width * 2f, 0f, 0f)).x, 1f);
        topWall.offset = new Vector2 (0f, mainCam.ScreenToWorldPoint (new Vector3 (0f, Screen.height, 0f)).y + 0.5f);

        bottomWall.size = new Vector2 (mainCam.ScreenToWorldPoint (new Vector3 (Screen.width * 2, 0f, 0f)).x, 1f);
        bottomWall.offset = new Vector2 (0f, mainCam.ScreenToWorldPoint (new Vector3(0f, 0f, 0f)).y - 0.5f);

        leftWall.size = new Vector2(1f, mainCam.ScreenToWorldPoint(new Vector3(0f, Screen.height*2f, 0f)).y);
        leftWall.offset = new Vector2(mainCam.ScreenToWorldPoint(new Vector3(0f, 0f, 0f)).x - 0.5f, 0f);

        rightWall.size = new Vector2(1f, mainCam.ScreenToWorldPoint(new Vector3(0f, Screen.height*2f, 0f)).y);
        rightWall.offset = new Vector2(mainCam.ScreenToWorldPoint(new Vector3(Screen.width, 0f, 0f)).x + 0.5f, 0f);

        //Move the players to a fixed distance from the edges of the screen:
        Player01.position = new Vector3(mainCam.ScreenToWorldPoint (new Vector3 (po, 0f, 0f)).x, Player01.position.y, Player01.position.z);
        Player02.position = new Vector3(mainCam.ScreenToWorldPoint (new Vector3 (Screen.width -po, 0f, 0f)).x, Player02.position.y, Player02.position.z);
    }
}
PlayerController.cs
控制移动方向与速度
using System.Collections;
using System.Collections.Generic;
using UnityEngine;

public class PlayerController : MonoBehaviour
{


    public KeyCode moveUp;
    public KeyCode moveDown;
    public float speed = 10f;

    private Rigidbody2D rb2D;

    // Start is called before the first frame update
    void Start()
    {


        rb2D =  GetComponent<Rigidbody2D>();
    }

    // Update is called once per frame
    void Update()
    {


        if (Input.GetKey(moveUp))
        {


            rb2D.velocity = new Vector2(0, speed);
        }else if (Input.GetKey(moveDown))
        {


            rb2D.velocity = new Vector2(0, speed*-1);
        }
        else
        {


            rb2D.velocity = Vector2.zero;
        }
    }
}
SideWall.cs
using System.Collections;
using System.Collections.Generic;
using UnityEngine;

public class SideWall : MonoBehaviour
{


    void OnTriggerEnter2D(Collider2D hitInfo)
    {


        if (hitInfo.name == "Ball")
        {


            string wallName = transform.name;
            GameManager.Score(wallName);
            GetComponent<AudioSource>().Play();
            //发送消息
            hitInfo.gameObject.SendMessage("ResetBall");
        }
    }
}
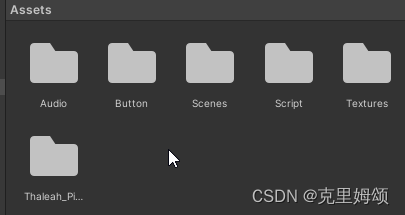
创建目录
-
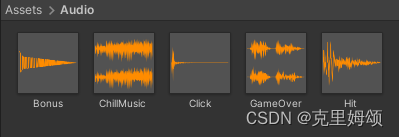
Audio:音频文件(Brackeys的素材)
-
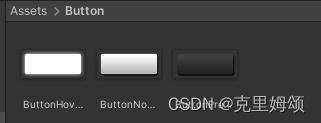
Button:
RESET的按钮效果(Brackeys的素材)
-
Scenes:unity自带
-
Script:C#脚本存放位置
-
Textures:贴图,存放游戏两块白小板和背景图(Brackeys的素材)
-
Thaleah-PixelFont:unity素材商城导入的字体文件(免费)
sorting Layer(目的:避免背景遮挡操控的游戏对象)

将他们拖入到Scene中。
调整
命名GameObject
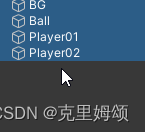
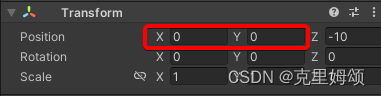
调整 GameObject的BG、Ball、Main Camera的位置如下,以便让摄像头可以居中显示。
设定图层
点击任意一个对象,到该Sprite组件(没有的话,就Add Component该组件)
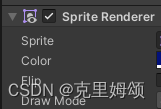
在该组件下的操作界面点击Add Sorting Layer。
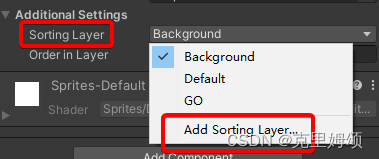
创建Layers的排序如下

后面让背景的sortings layer成Background就行了,而玩家要操作的player1和player2的图层则为GO。
另外让Inspector检查背景对象的Layer,当然由于弄的并不是太过于复杂,其他的GameObject并不需要这样干,默认即可。

player01和player02
加上Tag,没有就自己在Add Tag找位置加入

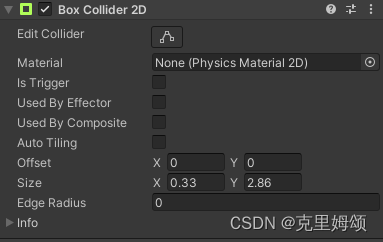
碰撞效果
Size这样设置,才方便设定球Ball能够撞击到player的范围多大为有效。
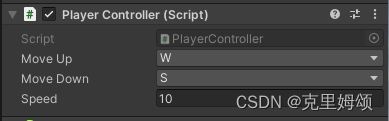
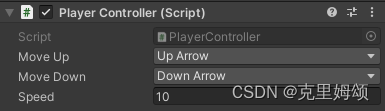
移动按钮与移动速度
将PlayerController.cs拉进去,分别设置如下
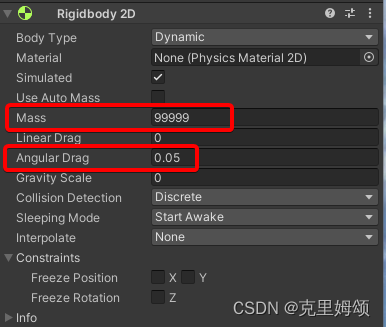
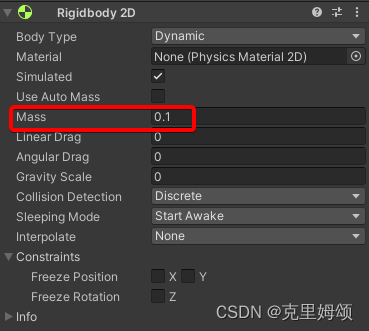
设定质量和惯性之类
mass设置的足够大,这样可以让ball碰到player时,不至于让player发生旋转或者位移的情况(相当于固定在X轴了)。
Ball
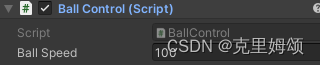
拉入脚本BallControl.cs先,调速度。
打上标签,方便程序识别

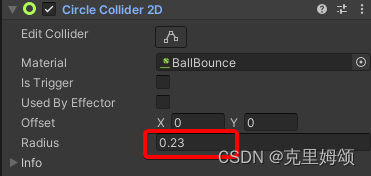
添加碰撞组件
碰撞还要能反弹到一定的距离
在Projects栏中的Assets/Textures,右键
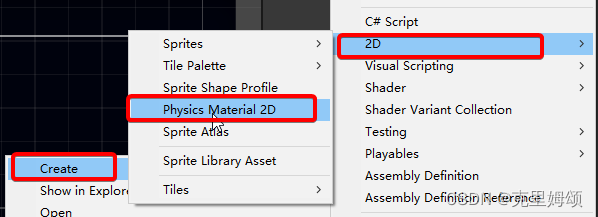
命名如下,设置的参数可以自己调。
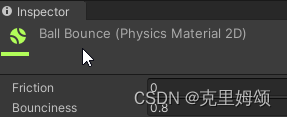
起碰撞的区域是有多大也自己调
碰撞音效
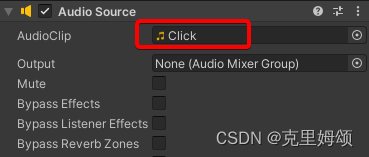
Mass自行调整
越小,受反弹后的速度的变化越快。
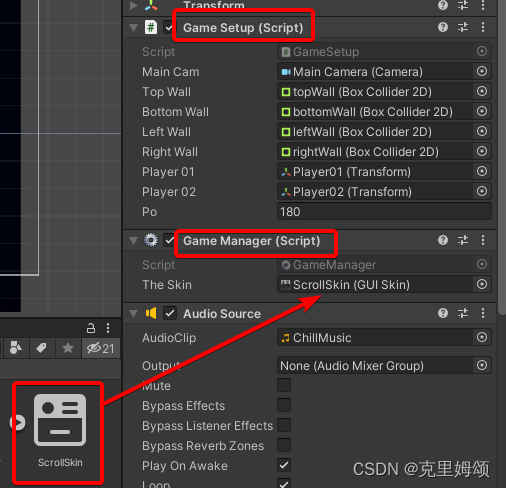
游戏管理器_GM(判断游戏输赢或者重开?)
鼠标右键,创建名为_GM的GameObject

设置ScrollSkin
在Project栏的Assets/Textures文件目录中,右键
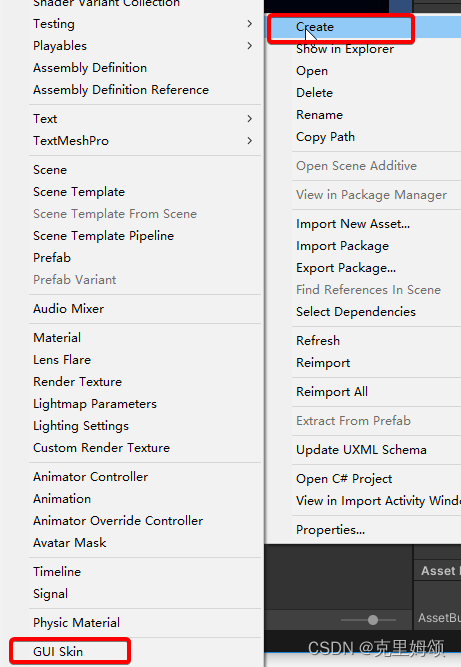
命名为ScrollSkin,接着如下图设置,定义字体、字体大小、按钮点击效果等。

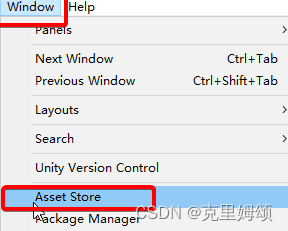
字体font则是在商场中,导入的文件获取的,自己登录搜索查找即可。
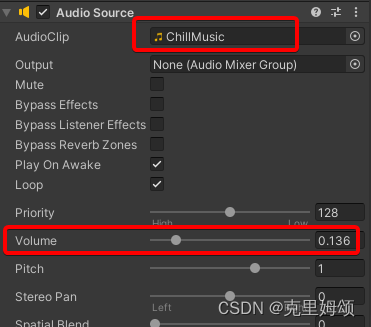
背景音乐
注意不能太大和尖锐,需要自己调
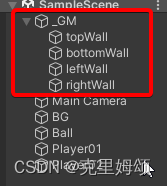
创建边界
同样地创建四个GameObject,分别代表上下左右边界,拉入到_GM对象
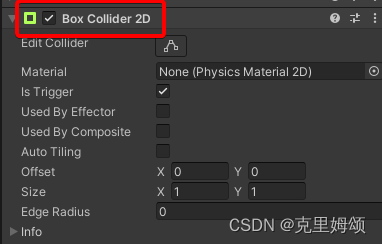
Add Component组件,表示成能够被碰撞的物体。
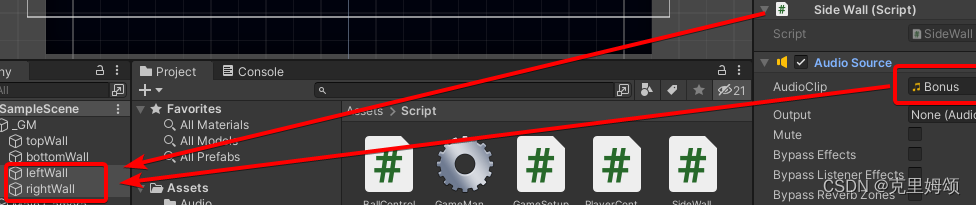
将C#脚本SideWall拉入到leftWall和rightWall,同时创建Audio Source组件,音源是Audio文件夹下的Bonus,用来判断谁胜谁败了,以便之后让游戏管理的脚步计分。
将GameSetup.cs和GameManager.cs拉入到_GM的Inspector栏,设置如下。
这样在游戏运行时,就能看到顶部的RESET按钮的点击效果和点击Gizmos时显示边框效果

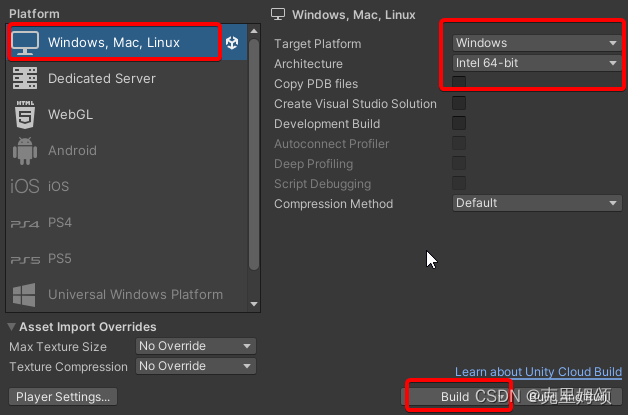
打包游戏
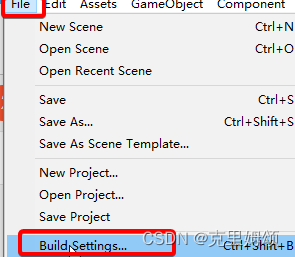
如果是switch选项的话,就照点,加载后再点击Build选择。
问题
打包的版本问题
尽管我看了不少Youtube的视频创作者都推荐跟它的版本一样,但是谁管呢?
我用的版本是
- Unity 2021.3.20f1c1
当然不听老人言,吃亏在眼前,我也遇到了麻烦:
- 操作界面的位置发生变化
- 新版去掉了分辨率选择窗口
重启按钮
重启只是让球回到了原来的位置,但是没有改变player