一、使用说明
模型:YOLOv5
软件:pycharm
python版本:3.7
opencv版本:4.7.0.68
是否使用了GPU版本:是
二、美化框角
我们打开yolo项目下的plots.py文件
yolov5-master/utils/plots.py2、我们首先在第96行代码下进行添加一些内容
corner_color = (0, 255, 0)
# Top Left
cv2.line(self.im, (int(box[0]), int(box[1])), (int(box[0]) + 20, int(box[1])), corner_color, thickness=3)
cv2.line(self.im, (int(box[0]), int(box[1])), (int(box[0]), int(box[1]) + 20), corner_color, thickness=3)
# Top Right
cv2.line(self.im, (int(box[2]), int(box[1])), (int(box[2]) - 20, int(box[1])), corner_color, thickness=3)
cv2.line(self.im, (int(box[2]), int(box[1])), (int(box[2]), int(box[1]) + 20), corner_color, thickness=3)
# Bottom Left
cv2.line(self.im, (int(box[0]), int(box[3])), (int(box[0]) + 20, int(box[3])), corner_color, thickness=3)
cv2.line(self.im, (int(box[0]), int(box[3])), (int(box[0]), int(box[3]) - 20), corner_color, thickness=3)
# Bottom Right
cv2.line(self.im, (int(box[2]), int(box[3])), (int(box[2]) - 20, int(box[3])), corner_color, thickness=3)
cv2.line(self.im, (int(box[2]), int(box[3])), (int(box[2]), int(box[3]) - 20), corner_color, thickness=3)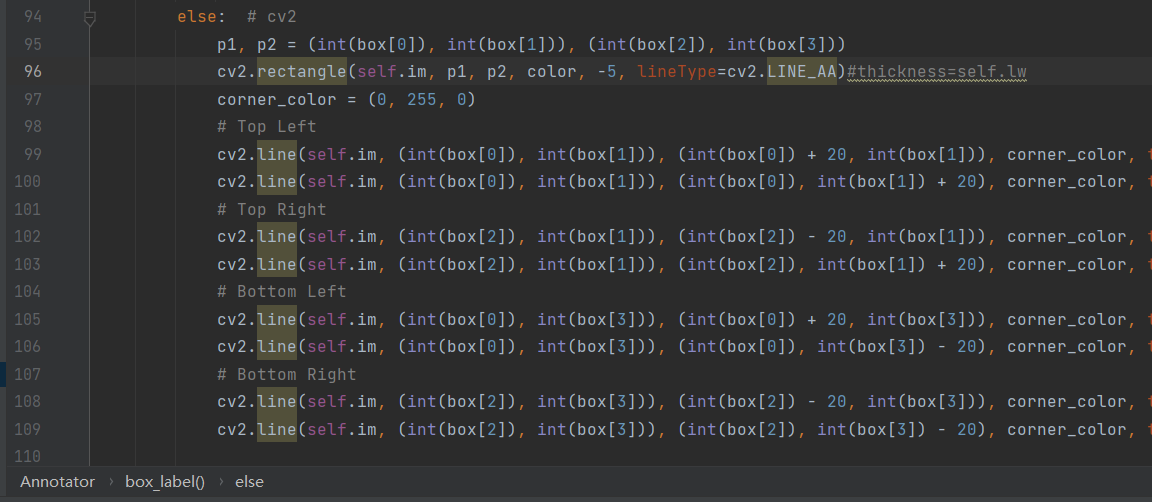
3、我们对代码的细节进行说明一下
corner_color = (0, 255, 0)#这是根据RGB的值进行设置的绿色
cv2.line()#这里用的是opencv里面的划线函数,并带有以下五个参数
#img:要划的线所在的图像;
#pt1:直线起点
#pt2:直线终点 (坐标分别为宽、高,opencv中图像的坐标原点在左上角)
#color:直线的颜色
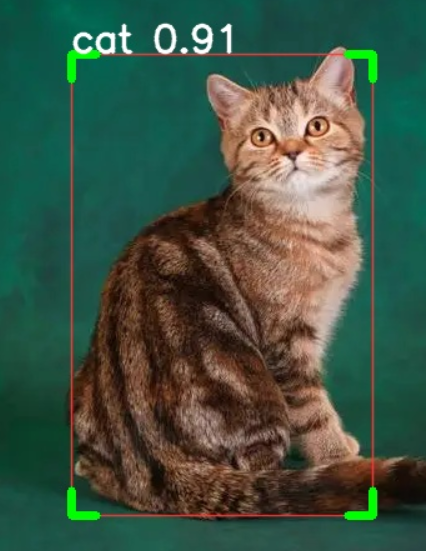
#thickness=1:线条粗细,默认是1.如果一个闭合图形设置为-1,那么整个图形就会被填充4、我们运行一下detect.py看一下效果,我这里是使用的一个对猫识别的模型进行的测试。
5、效果说明:我们对边框的四个角进行了添加绿色标定。
三、美化标签
对YOLO标签进行透明化处理
我们还是打开刚刚的plots.py文件,找到116行,然后我们直接给他注释掉。

运行detect.py展示一下效果
效果说明,透明化标签处理,显得比原版的模型标签更清晰一点。
四、美化线条
对YOLO的线条框进行美化
我们还是打开刚刚的plots.py文件,找到96行,然后改成以下内容
cv2.rectangle(self.im, p1, p2, color, 1, lineType=cv2.LINE_AA)#thickness=self.lw原理就是无视掉YOLO的划线规则,我们直接对线条框的粗细进行设置(我这里直接改成默认值1)
看一下效果
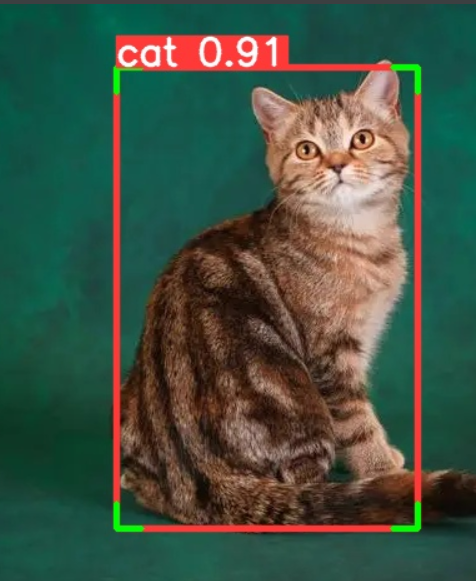
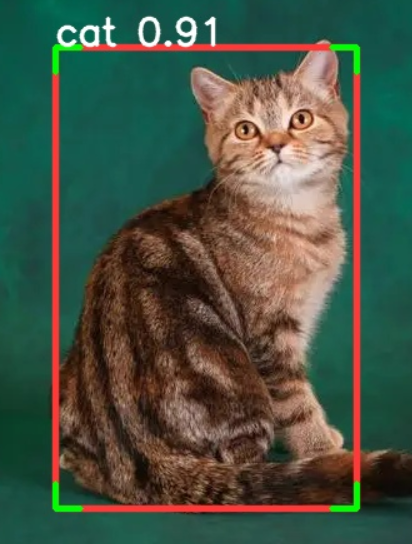
五、美化准星
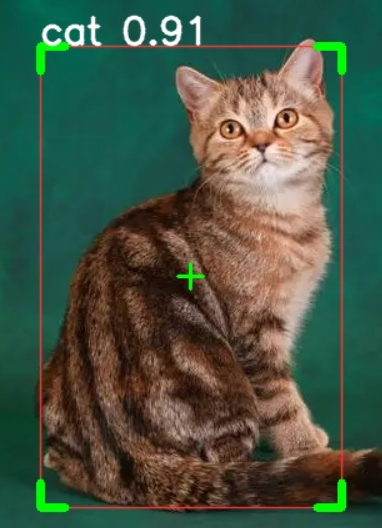
1.在plots.py文件的第109行,我们再接着插入以下代码
#Aim
p5 = (int((int(box[0])+int(box[2]))/2)-10, int((int(box[1])+int(box[3]))/2))
p6 = (int((int(box[0])+int(box[2]))/2)+10, int((int(box[1])+int(box[3]))/2))
p7 = (int((int(box[0]) + int(box[2])) / 2) , int((int(box[1]) + int(box[3])) / 2)+10)
p8 = (int((int(box[0]) + int(box[2])) / 2) , int((int(box[1]) + int(box[3])) / 2)-10)
cv2.line(self.im, p5, p6, corner_color, thickness=2)
cv2.line(self.im, p7, p8, corner_color, thickness=2)
2.看一下运行效果
六、显示统计
1.如何对YOLO识别到的物体进行计数,这部分需要进行修改一下detect.py部分的代码
找到第216行,在下面加上以下代码。
注意:网上有很多博客教人在if save_img: 这个代码下面改,但是新版的YOLOv5有一个打印函数,我在打印函数下改就可以了,在if save_img代码下改有些版本会报错(如果用的还是老版本,按照网上这个改还是没问题的)。
cv2.putText(im0, 'QLU_Adam_vision:'f"{n} {names[int(c)]}{'s' * (n > 1)}", (5, 25), cv2.FONT_HERSHEY_SIMPLEX, 1,(0, 0, 255), 2)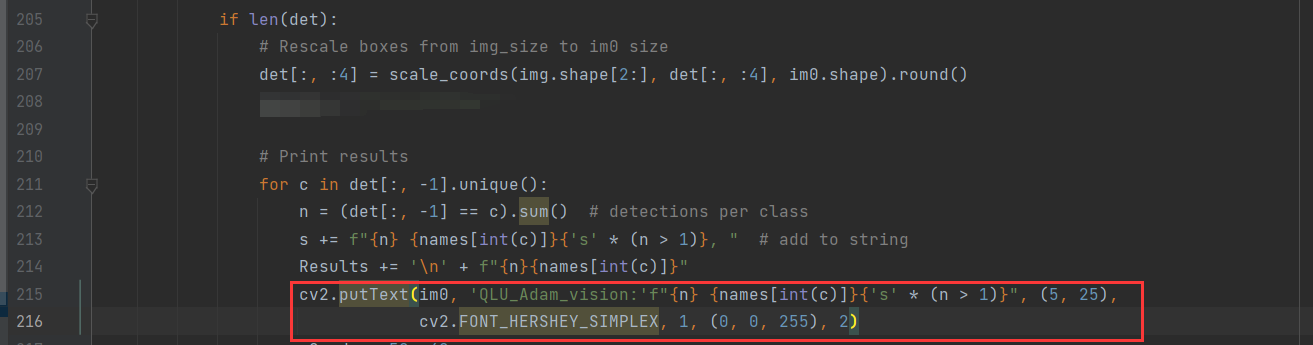
2.展示一下效果
3.说明,上述代码只是适用于只有一个物体的目标检测模型。
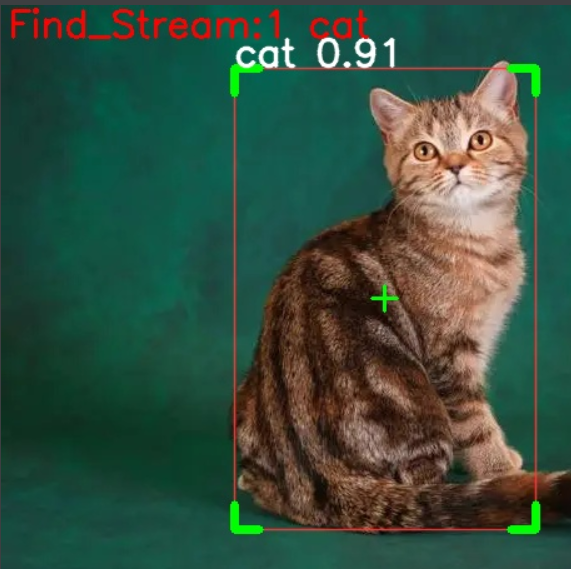
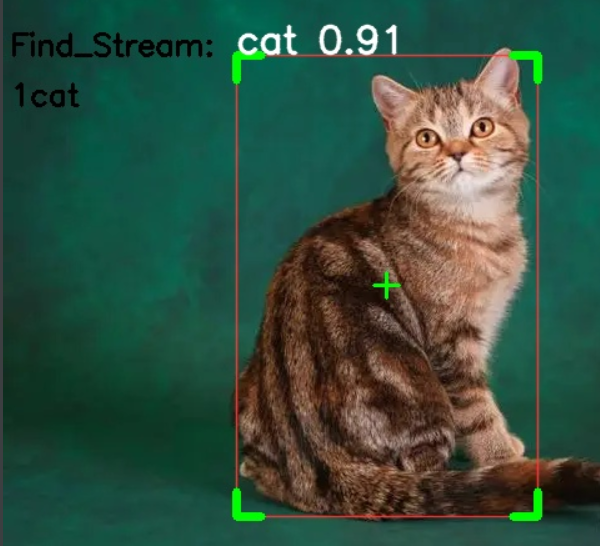
4.接着,如果是多个物体的检测,我们可以这样修改
if len(det):
    # Rescale boxes from img_size to im0 size
    det[:, :4] = scale_coords(img.shape[2:], det[:, :4], im0.shape).round()
    Results = "Find_Stream:"

    # Print results
    for c in det[:, -1].unique():
        n = (det[:, -1] == c).sum()  # detections per class
        s += f"{n} {names[int(c)]}{'s' * (n > 1)}, "  # add to string
        Results += '\n' + f"{n}{names[int(c)]}"
        cv2.putText(im0, 'QLU_Adam_vision:'f"{n} {names[int(c)]}{'s' * (n > 1)}", (5, 25),
        cv2.FONT_HERSHEY_SIMPLEX, 1, (0, 0, 255), 2)
        y0, dy = 50, 40
        for i, txt in enumerate(Results.split('\n')):
            y = y0 + dy * i
            cv2.putText(im0, txt, (5, y), cv2.FONT_HERSHEY_SIMPLEX, 0.8, (0, 0, 0), 2)
就是在下面这样修改。
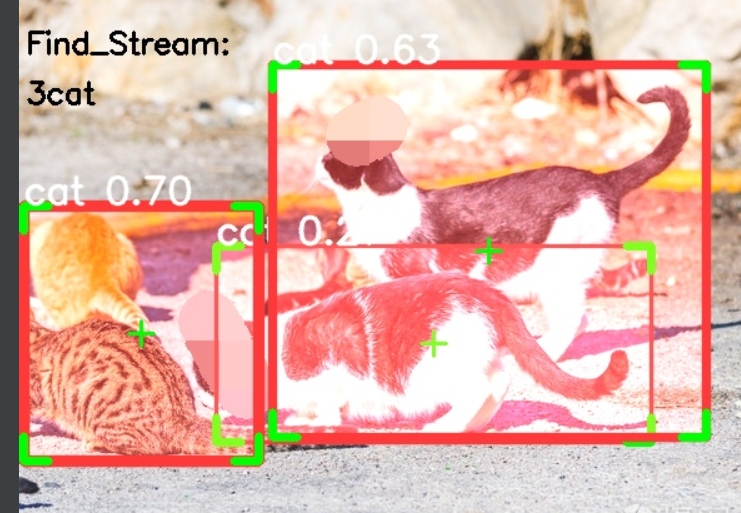
5.我们看一下效果,因为手上没有了其他模型,我就先用原来的猫模型再跑一下。
七、透明方框
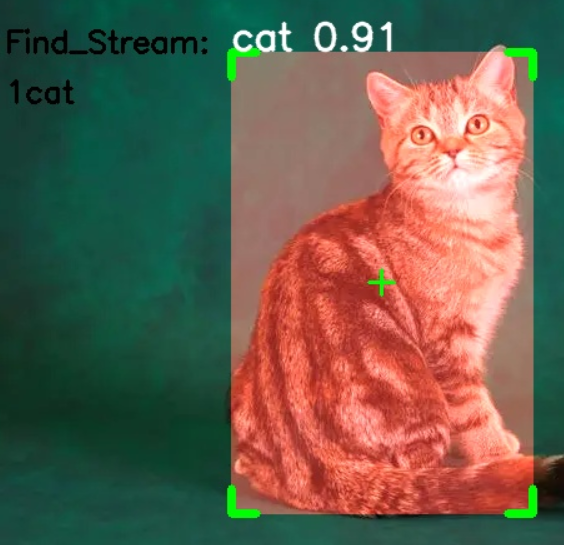
1.我们在plots.py文件下再加入下面这三行代码
            blk = np.zeros(self.im.shape, np.uint8)
            cv2.rectangle(blk, p1, p2, color, -1)
            self.im = cv2.addWeighted(self.im, 1.0, blk, 0.5, 1)
2.效果展示
八、置信收缩
1.我们对置信度的大小进行对框的线条粗细进行修改
我们在plots.py的第97行左右的代码修改一行
cv2.rectangle(self.im, p1, p2, color,int(label[-2:-1]), lineType=cv2.LINE_AA)#thickness=self.lw
2.效果图如下
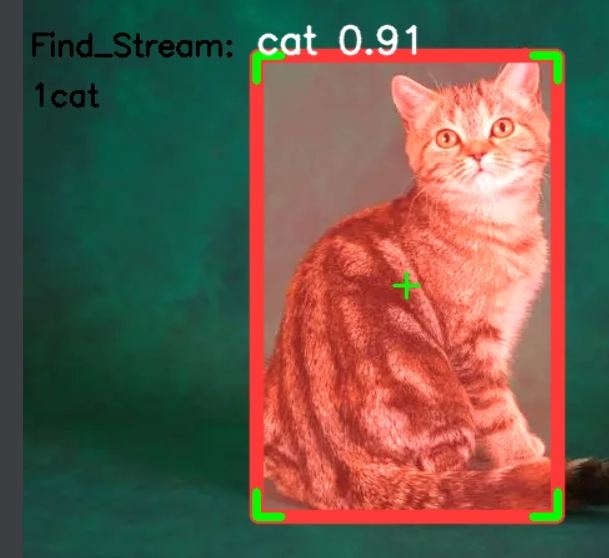
我们接下来在测试一下多只不同置信度的猫。