文章目录
前言
一、AppBar 是什么?
顶部状态栏的快速实现。默认新建的时候有一个标题。
二、使用步骤
1.布局如图
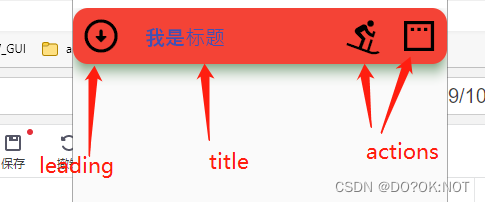
2.参数说明
- centerTitle: true, 标题是否居中,ios 和android 风格不一样
- shadowColor: Colors.green, 阴影的颜色
- // surfaceTintColor: Colors.red,
- backgroundColor: Colors.red, //背景颜色
- foregroundColor: Colors.indigo, //应用程序栏中[Text]和[Icon]的默认颜色,如果没有设置就会使用该颜色
- elevation: 10, //阴影
- iconTheme: const IconThemeData(
size: 40, color: Colors.black), //app bar 所有的里面的图标主题设置 - shape: const RoundedRectangleBorder(
borderRadius: BorderRadius.all(Radius.circular(15))), //设置形状 - leading: const Icon(Icons.arrow_circle_down_rounded),
- automaticallyImplyLeading: false,
- actions: [
IconButton(onPressed: () {}, icon: const Icon(Icons.downhill_skiing)),
IconButton(onPressed: () {}, icon: const Icon(Icons.padding)),
], - // flexibleSpace: Container(
// height: 20,
// color: Colors.red,
// ), - title: const Text(“我是标题”), //标题*
代码如下(示例):
import 'package:flutter/material.dart';
void main() {
runApp(const MyApp());
}
class MyApp extends StatelessWidget {
const MyApp({
super.key});
// This widget is the root of your application.
Widget build(BuildContext context) {
return MaterialApp(
debugShowCheckedModeBanner: false,
title: 'Flutter Demo',
theme: ThemeData(
primarySwatch: Colors.blue,
),
home: const MyHomePage(title: 'Flutter Demo Home Page'),
);
}
}
class MyHomePage extends StatefulWidget {
const MyHomePage({
super.key, required this.title});
final String title;
State<MyHomePage> createState() => _MyHomePageState();
}
class _MyHomePageState extends State<MyHomePage> with TickerProviderStateMixin {
int _counter = 0;
void _incrementCounter() {
setState(() {
_counter++;
});
}
Widget build(BuildContext context) {
return Scaffold(
appBar: AppBar(
centerTitle: true,
shadowColor: Colors.green,
// surfaceTintColor: Colors.red,
backgroundColor: Colors.red, //背景颜色
foregroundColor: Colors.indigo, //应用程序栏中[Text]和[Icon]的默认颜色,如果没有设置就会使用该颜色
elevation: 10,
iconTheme: const IconThemeData(
size: 40, color: Colors.black), //app bar 所有的里面的图标主题设置
shape: const RoundedRectangleBorder(
borderRadius: BorderRadius.all(Radius.circular(15))), //设置形状
leading: const Icon(Icons.arrow_circle_down_rounded),
automaticallyImplyLeading: false,
actions: [
IconButton(onPressed: () {
}, icon: const Icon(Icons.downhill_skiing)),
IconButton(onPressed: () {
}, icon: const Icon(Icons.padding)),
],
// flexibleSpace: Container(
// height: 20,
// color: Colors.red,
// ),
title: const Text("我是标题"), //标题
),
body: Center(
child: Column(
mainAxisAlignment: MainAxisAlignment.center,
children: <Widget>[
const Text(
'You have pushed the button this many times:',
),
Text(
'$_counter',
style: Theme.of(context).textTheme.headline4,
),
],
),
),
floatingActionButton: FloatingActionButton(
onPressed: _incrementCounter,
tooltip: 'Increment',
child: const Icon(Icons.add),
), // This trailing comma makes auto-formatting nicer for build methods.
);
}
}
2.特别的bottom
1.PreferredSize
在appbar 下面的botton 可以作为顶部导航栏的功能实现,他看也是一个widget:
      appBar: AppBar(
        centerTitle: true,

        title: const Text("我是标题"), //标题
        bottom: const PreferredSize(
            child: Text('PreferredSize'), preferredSize: Size(10, 10)),
      ),

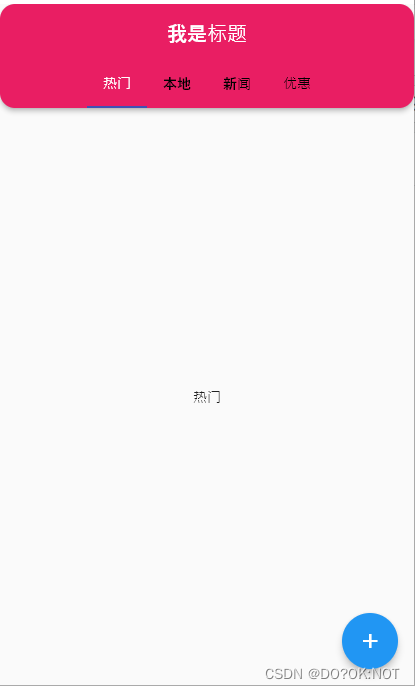
2.作为顶部导航栏
TabBar 和 TabBarView 配合使用,lenth两个要一致不然会报错,然后需要TabController
import 'package:flutter/material.dart';
void main() {
runApp(const MyApp());
}
class MyApp extends StatelessWidget {
const MyApp({
super.key});
// This widget is the root of your application.
Widget build(BuildContext context) {
return MaterialApp(
debugShowCheckedModeBanner: false,
title: 'Flutter Demo',
theme: ThemeData(
primarySwatch: Colors.blue,
),
home: const MyHomePage(title: 'Flutter Demo Home Page'),
);
}
}
class MyHomePage extends StatefulWidget {
const MyHomePage({
super.key, required this.title});
final String title;
State<MyHomePage> createState() => _MyHomePageState();
}
class _MyHomePageState extends State<MyHomePage>
with SingleTickerProviderStateMixin {
int _counter = 0;
void _incrementCounter() {
setState(() {
_counter++;
});
}
final tabNameList = ["热门", "本地", "新闻", "优惠"];
late TabController _tabController;
void initState() {
// TODO: implement initState
super.initState();
_tabController = TabController(length: tabNameList.length, vsync: this);
}
Widget build(BuildContext context) {
return Scaffold(
appBar: AppBar(
backgroundColor: Colors.pink,
shape: RoundedRectangleBorder(
borderRadius: BorderRadius.all(Radius.circular(15))),
centerTitle: true,
title: const Text("我是标题"), //标题
bottom: TabBar(
controller: _tabController,
isScrollable: true, //可滚动
indicatorColor: Colors.indigo, //指示器的颜色
labelColor: Colors.white, //选中文字颜色
unselectedLabelColor: Colors.black, //没有选中文字颜色
tabs: <Widget>[
for (int i = 0; i < tabNameList.length; i++)
Tab(text: tabNameList[i])
]),
),
body: TabBarView(
controller: _tabController,
children: tabNameList
.map((e) => Center(
child: Text(e),
))
.toList()),
floatingActionButton: FloatingActionButton(
onPressed: _incrementCounter,
tooltip: 'Increment',
child: const Icon(Icons.add),
), // This trailing comma makes auto-formatting nicer for build methods.
);
}
}
3.其他 AppBar 可以设置透明?
在scaffold下面:设置颜色等
但是其他事不需要设置透明,直接去掉,然后自己新建widget。完美
extendBody: true, //底部NavigationBar透明
extendBodyBehindAppBar: true,//顶部Bar透明
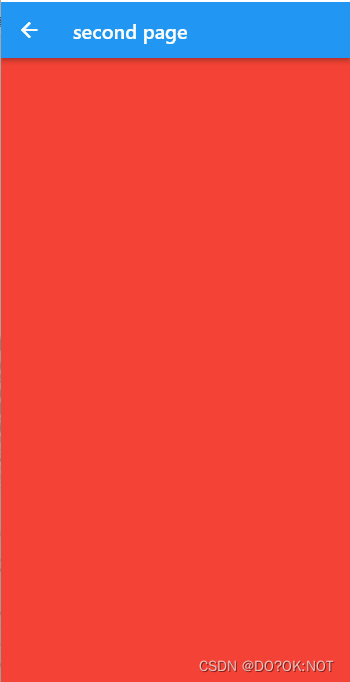
3.backbutton
如果构建了appbar,并且不是在主页面的情况,会自动生成backbutton 按键,点击默认靠右返回到上一个页面.
第二个页面,点击floatbutton 跳转到第二个页面
class SecondPage extends StatefulWidget {
const SecondPage({
Key? key}) : super(key: key);
_SecondPageState createState() => _SecondPageState();
}
class _SecondPageState extends State<SecondPage> {
Widget build(BuildContext context) {
return Scaffold(
appBar: AppBar(
title: const Text('second page'),
),
body: Container(
color: Colors.red,
),
);
}
}
总结
欢迎关注,留言,咨询,交流!