Shader中采样器的使用(Using sampler states)
合并的贴图和采样器(Coupled textures and samplers)
大部分时候我们在Shader里采样贴图的时候,都是像下面这样子声明
sampler2D _MainTex;

......

half4 color = tex2D(_MainTex, uv);
这样采样贴图的具体方式来自贴图上的设置,实际上这是贴图和采样器合并在一起了(我们是可以单独声明采样器的)。我们可以使用sampler2D, sampler3D, samplerCUBE 这些HLSL的关键字来声明不同类型的贴图和采样器。
这种声明方式是旧的图形API唯一支持的一种设置(OpenGL ES)
独立的贴图和采样器(Separate textures and samplers)
上述的合并的贴图和采样器无法支持更复杂的情形,而现在许多图形API和GPU都允许采样器数量少于贴图数量,例如,Direct3D 11允许在一个shader中最多使用128张贴图,但是最多只允许使用16个采样器。
Unity支持使用DX11的HLSL语法来声明不同的贴图和采样器,采样器设置是"sampler"+贴图名称的组合,这样子获取到的是这张贴图的采样设置,如下所示,我们重写上面的那段代码
Texture2D _MainTex;
SamplerState sampler_MainTex;  //"sampler"+"_MainTex"的组合
//...
half4 color = _MainTex.Sample(sampler_MainTex, uv)
但是使用了独立的采样器之后,我们就可以复用这个采样器。如下所示
Texture2D _MainTex;
Texture2D _SecondTex;
Texture2D _ThirdTex;
SamplerState sampler_MainTex;  //"sampler"+"_MainTex"的组合
//...
half4 color = _MainTex.Sample(sampler_MainTex, uv)
color += _SecondTex.Sample(sampler_MainTex, uv)
color += _ThirdTex.Sample(sampler_MainTex, uv)
但是,这种语法是DX11的HLSL语法,一些老的平台无法支持(比如OpenGL ES 2.0),我们可能需要指定#pragma target 3.5 来避免老平台的问题。
Unity提供了几个宏定义来帮助我们定义贴图和采样器,并且能够兼容所有平台
UNITY_DECLARE_TEX2D(_MainTex);
UNITY_DECLARE_TEX2D_NOSAMPLER(_SeconedTex);
UNITY_DECLARE_TEX2D_NOSAMPLER(_ThirdTex);
//...
half4 color = UNITY_SAMPLE_TEX2D(_MainTex, uv);
color += UNITY_SAMPLE_TEX2D_SAMPLER(_SecondTex, _MainTex, uv);
color += UNITY_SAMPLE_TEX2D_SAMPLER(_ThirdTex, _MainTex, uv);
我们可以看下这些宏定义,在不支持的平台上实际上是回到使用合并的贴图和采样器的语法
HLSLSupport.cginc
// Macros to declare textures and samplers, possibly separately. For platforms
// that have separate samplers & textures (like DX11), and we'd want to conserve
// the samplers.
//  - UNITY_DECLARE_TEX*_NOSAMPLER declares a texture, without a sampler.
//  - UNITY_SAMPLE_TEX*_SAMPLER samples a texture, using sampler from another texture.
//      That another texture must also be actually used in the current shader, otherwise
//      the correct sampler will not be set.
#if defined(SHADER_API_D3D11) || defined(SHADER_API_XBOXONE) || defined(UNITY_COMPILER_HLSLCC) || defined(SHADER_API_PSSL) || (defined(SHADER_TARGET_SURFACE_ANALYSIS) && !defined(SHADER_TARGET_SURFACE_ANALYSIS_MOJOSHADER))
    // DX11 style HLSL syntax; separate textures and samplers
    //
    // Note: for HLSLcc we have special unity-specific syntax to pass sampler precision information.
    //
    // Note: for surface shader analysis, go into DX11 syntax path when non-mojoshader part of analysis is done,
    // this allows surface shaders to use _NOSAMPLER and similar macros, without using up a sampler register.
    // Don't do that for mojoshader part, as that one can only parse DX9 style HLSL.
    #define UNITY_SEPARATE_TEXTURE_SAMPLER
    // 2D textures
    #define UNITY_DECLARE_TEX2D(tex) Texture2D tex; SamplerState sampler##tex
    #define UNITY_DECLARE_TEX2D_NOSAMPLER(tex) Texture2D tex
    #define UNITY_DECLARE_TEX2D_NOSAMPLER_INT(tex) Texture2D<int4> tex
    #define UNITY_DECLARE_TEX2D_NOSAMPLER_UINT(tex) Texture2D<uint4> tex
    #define UNITY_SAMPLE_TEX2D(tex,coord) tex.Sample (sampler##tex,coord)
    #define UNITY_SAMPLE_TEX2D_LOD(tex,coord,lod) tex.SampleLevel (sampler##tex,coord, lod)
    #define UNITY_SAMPLE_TEX2D_SAMPLER(tex,samplertex,coord) tex.Sample (sampler##samplertex,coord)
    #define UNITY_SAMPLE_TEX2D_SAMPLER_LOD(tex, samplertex, coord, lod) tex.SampleLevel (sampler##samplertex, coord, lod)

//......


#else
    // DX9 style HLSL syntax; same object for texture+sampler
    // 2D textures
    #define UNITY_DECLARE_TEX2D(tex) sampler2D tex
    #define UNITY_DECLARE_TEX2D_HALF(tex) sampler2D_half tex
    #define UNITY_DECLARE_TEX2D_FLOAT(tex) sampler2D_float tex
    #define UNITY_DECLARE_TEX2D_NOSAMPLER(tex) sampler2D tex
    #define UNITY_DECLARE_TEX2D_NOSAMPLER_HALF(tex) sampler2D_half tex
    #define UNITY_DECLARE_TEX2D_NOSAMPLER_FLOAT(tex) sampler2D_float tex
    #define UNITY_SAMPLE_TEX2D(tex,coord) tex2D (tex,coord)
    #define UNITY_SAMPLE_TEX2D_SAMPLER(tex,samplertex,coord) tex2D (tex,coord)
组合的采样器设置(Inline sampler states)
除了上述的"sampler"+贴图名称这样子来获得采样器设置外,我们还可以通过直接定义采样器的设置组合来获取独立的采样器设置,也就是可以在shader直接通过硬编码的方式声明我们想要的采样器设置。如下
Texture2D _MainTex;
SamplerState my_point_clamp_sampler;
//...
half4 color = _MainTex.Sample(my_point_clamp_sampler, uv);
my_point_clamp_sampler这样子的组合对应的就是,贴图重采样(texture filtering) 使用Point(nearest),贴图平铺方式(texture wrapping mode)使用拉伸(Clamp,超出的部分使用边缘像素)
这样子声明的采样器状态名称会被识别为组合的采样器状态设置(inline sampler states),可设置的项有下面这些:
贴图重采样模式(Texture filtering mode):必须项,有"Point", “Linear”, “Trilinear”
贴图的平铺方式(Texture wrap mode):必须项,有"Clamp", “Repeat”, “Mirror”, “MirrorOnce”, 还支持指定单独的轴(UVW), 比如:“ClampU_RepeatV”
深度对比(depth comparison) :可选项,“Compare”,用于深度的对比采样,这种需要使用对应的SmaplerComparisonState和SampleCmp / SampleCmpLevelZero方法,在阴影贴图采样时会用到
各向异性: 可选项,“AnisoX”(X可以是2/4/8/16,比如Ansio8),用于增加各向异性的重采样(filtering)
同样的,组合的采样器状态设置在一些平台上也是不支持的,目前支持的有Direct3D 11/12,PS4,XboxOne和Metal
需要特别注意的是"MirrorOnce"这种模式在大部分的移动GPU和图形API上是不支持的,不支持的时候会被转为"Mirror"模式
效果测试
我们写个简单的Shader测试各种组合效果
Shader "Unlit/SamplerStateTest"
{


    Properties
    {


        _MainTex ("Texture", 2D) = "white" {

    }
    }
    SubShader
    {


        Tags {

     "RenderType"="Opaque" }
        LOD 100
        Pass
        {


            CGPROGRAM
            #pragma vertex vert
            #pragma fragment frag
            #include "UnityCG.cginc"
            struct appdata
            {


                float4 vertex : POSITION;
                float2 uv : TEXCOORD0;
            };
            struct v2f
            {


                float2 uv : TEXCOORD0;
                float4 vertex : SV_POSITION;
            };
            // sampler2D _MainTex;
            Texture2D _MainTex;
            // SamplerState sampler_MainTex;
            // SamplerState my_point_clamp_sampler;
            // SamplerState sampler_linear_repeat;
            // SamplerState sampler_point_repeat;
            // SamplerState SmpClampPoint;
            // SamplerState SmpRepeatPoint;
            // SamplerState SmpMirrorPoint;
            // SamplerState SmpMirrorOncePoint;
            SamplerState Smp_ClampU_RepeatV_Point;
            float4 _MainTex_ST;
            v2f vert (appdata v)
            {


                v2f o;
                o.vertex = UnityObjectToClipPos(v.vertex);
                o.uv = TRANSFORM_TEX(v.uv, _MainTex);
                return o;
            }
            fixed4 frag (v2f i) : SV_Target
            {


                // fixed4 col = tex2D(_MainTex, i.uv);
                // fixed4 col = _MainTex.Sample(sampler_MainTex, i.uv);
                // fixed4 col = _MainTex.Sample(my_point_clamp_sampler, i.uv);
                // fixed4 col = _MainTex.Sample(sampler_linear_repeat, i.uv);
                // fixed4 col = _MainTex.Sample(sampler_point_repeat, i.uv);
                // fixed4 col = _MainTex.Sample(SmpClampPoint, i.uv);
                // fixed4 col = _MainTex.Sample(SmpRepeatPoint, i.uv);
                // fixed4 col = _MainTex.Sample(SmpMirrorPoint, i.uv);
                // fixed4 col = _MainTex.Sample(SmpMirrorOncePoint, i.uv);
                fixed4 col = _MainTex.Sample(Smp_ClampU_RepeatV_Point, i.uv);
                return col;
            }
            ENDCG
        }
    }
}
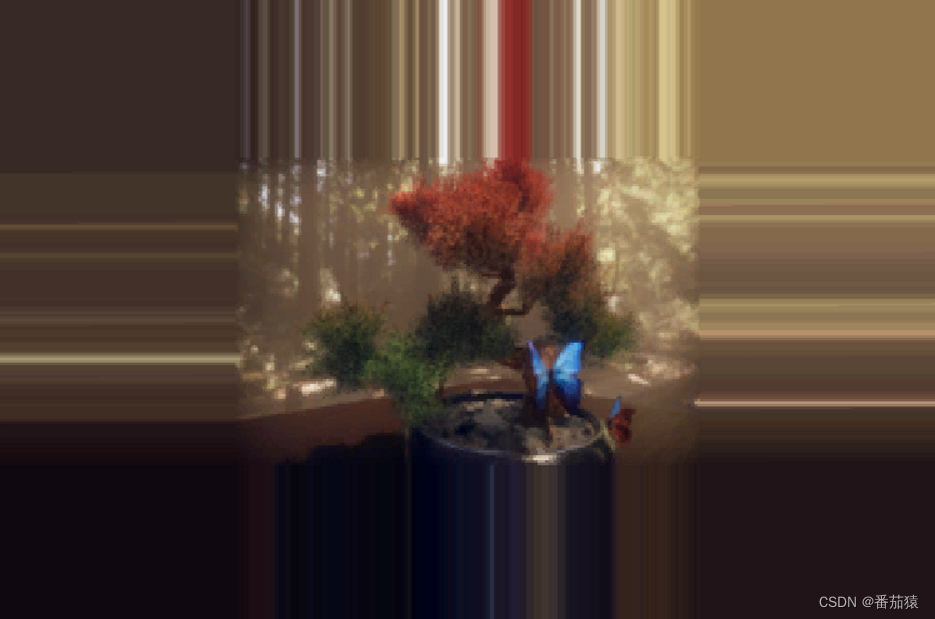
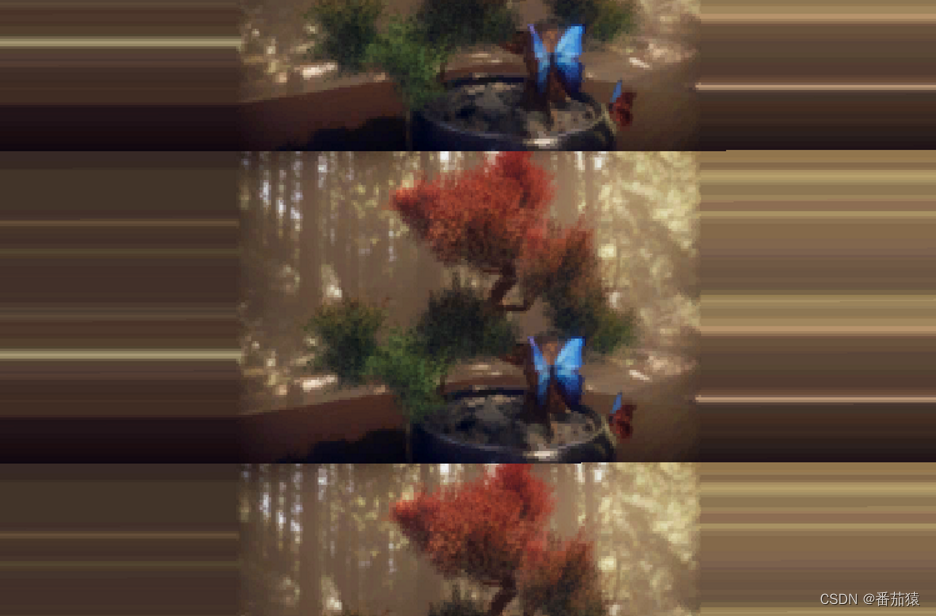
下面是各种组合的测试效果
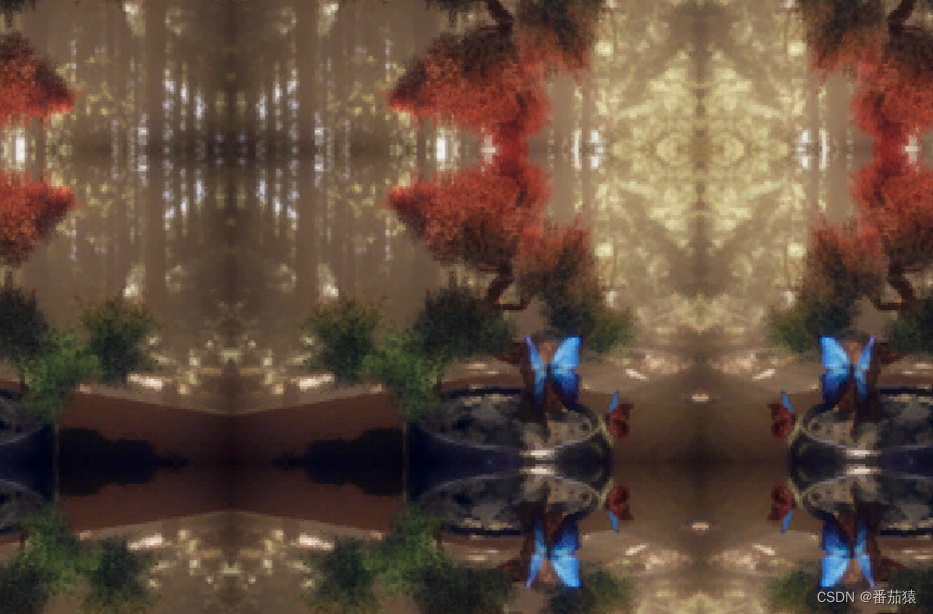
sampler_MainTex

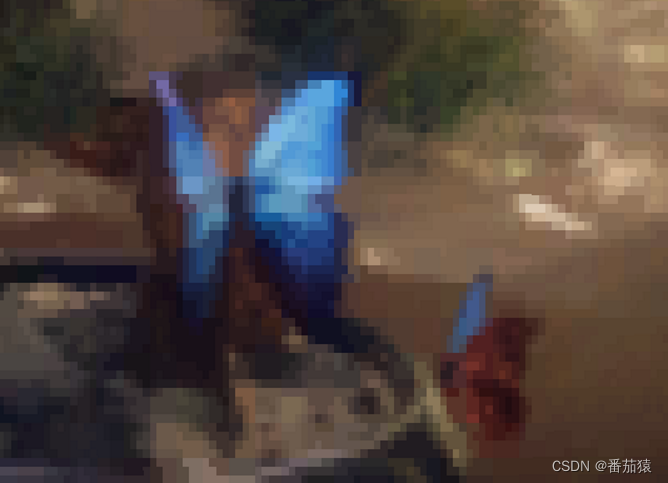
my_point_clamp_sampler
sampler_linear_repeat
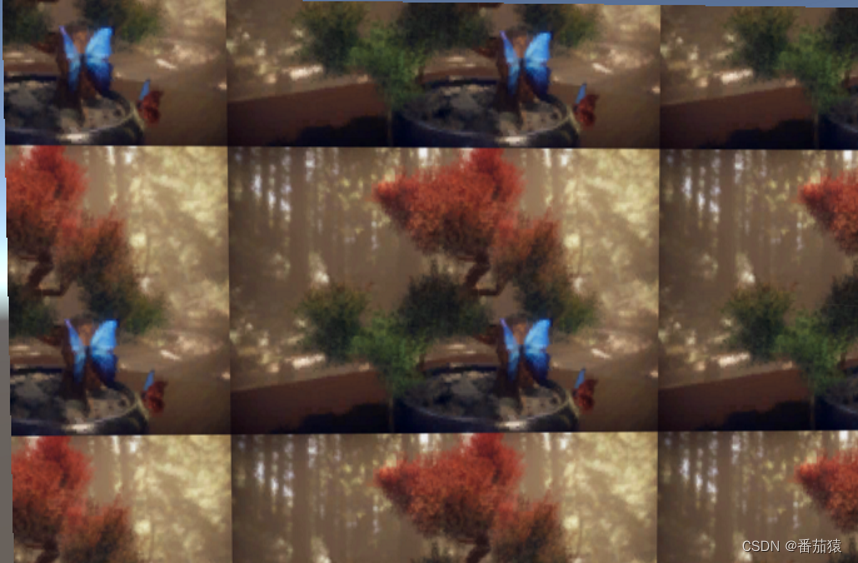
sampler_point_repeat
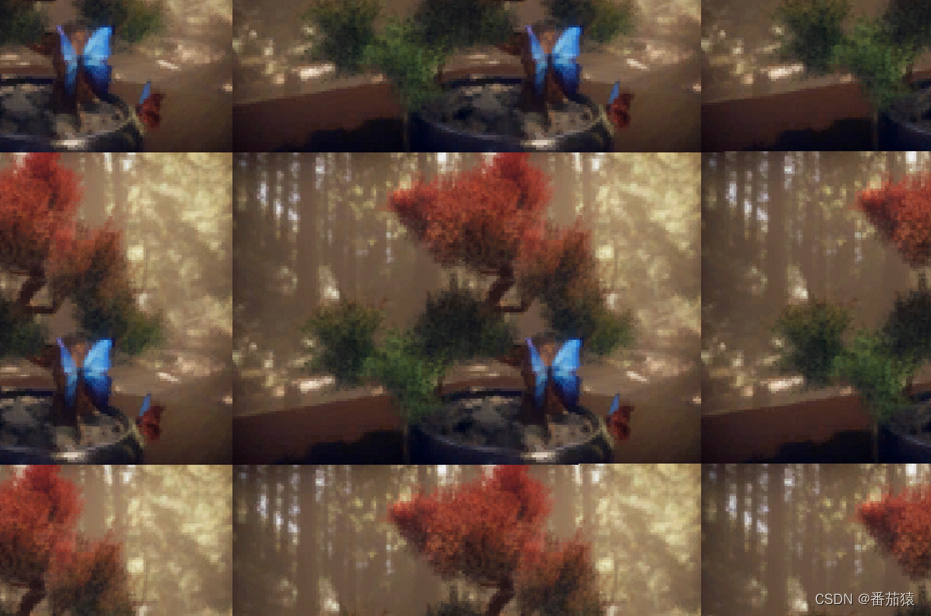
SmpClampPoint
SmpRepeatPoint
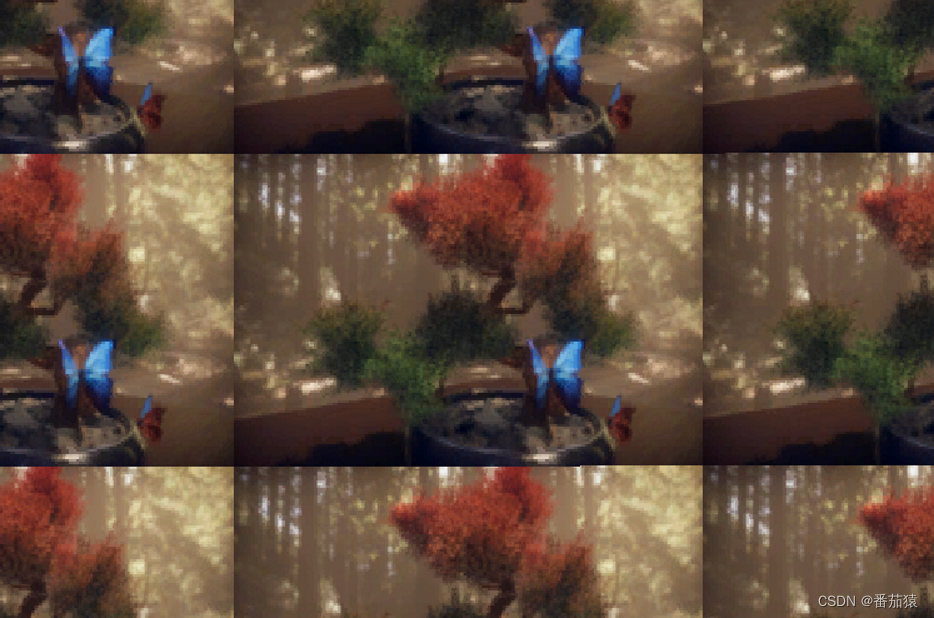
SmpMirrorPoint

SmpMirrorOncePoint

Smp_ClampU_RepeatV_Point
参考
https://docs.unity3d.com/2019.4/Documentation/Manual/SL-SamplerStates.html