简介
- 利用opencv中训练好的模型来识别人脸
- 利用openvino中的预训练的模型来检测表情
环境准备
-
安装openvino
由于openvino最新版只支持到python3.9大版本,所以如果python版本为3.10,请再安装3.9版本,两个python版本可以共存。也可以配置到虚拟环境,不再赘述
-
在控制台中输入以下命令, 升级pip 版本
python -m pip install --upgrade pip -
安装 openvino-dev
pip install openvino-dev -
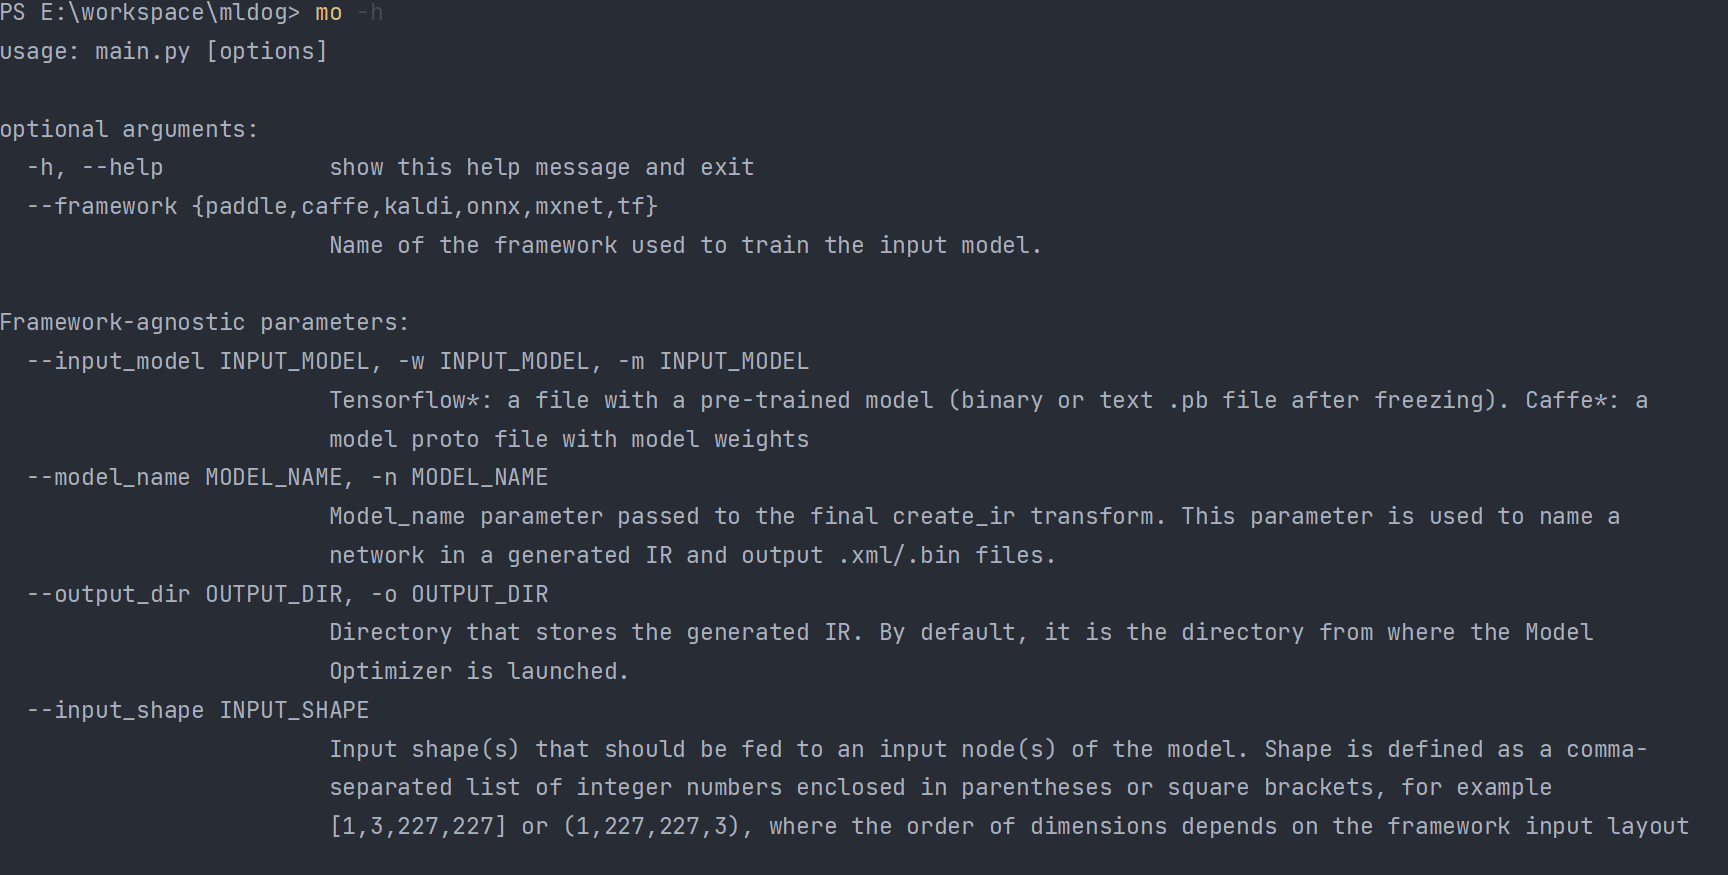
验证安装是否成功
mo -h应该看到以下图片

这时候相关依赖(例如opencv、numpy等)应该已经都装好,可以通过pip list 查看,若缺少相应依赖,则继续通过pip安装
-
代码
首先导入刚刚的模型以及相关库
import cv2 as cv
import numpy as np
from openvino.inference_engine import IECore

# 人脸检测模型
weight_pb = "./cv_model/opencv_face_detector_uint8.pb"
config_text = "./cv_model/opencv_face_detector.pbtxt"

# 加载表情识别模型并设置输入与输出
model_xml = "./intel/emotions-recognition-retail-0003/FP32/emotions-recognition-retail-0003.xml"
model_bin = "./intel/emotions-recognition-retail-0003/FP32/emotions-recognition-retail-0003.bin"
接着设置表情识别模型
labels = ['neutral', 'happy', 'sad', 'surprise', 'anger']

ie = IECore()
emotion_net = ie.read_network(model=model_xml, weights=model_bin)

input_blob = next(iter(emotion_net.input_info))

exec_net = ie.load_network(network=emotion_net, device_name="CPU", num_requests=2)
定义表情识别方法
# 读取人脸检测模型
net = cv.dnn.readNetFromTensorflow(weight_pb, config=config_text)
# 人脸检测&表情识别
def emotion_detect(frame):
    h, w, c = frame.shape
    blobImage = cv.dnn.blobFromImage(frame, 1.0, (300, 300), (104.0, 177.0, 123.0), False, False)
    net.setInput(blobImage)
    cvOut = net.forward()

    # 绘制检测矩形
    for detection in cvOut[0, 0, :, :]:
        score = float(detection[2])
        if score > 0.5:
            left = detection[3] * w
            top = detection[4] * h
            right = detection[5] * w
            bottom = detection[6] * h

            # roi 和 关键点检测
            y1 = np.int32(top) if np.int32(top) > 0 else 0
            y2 = np.int32(bottom) if np.int32(bottom) < h else h - 1
            x1 = np.int32(left) if np.int32(left) > 0 else 0
            x2 = np.int32(right) if np.int32(right) < w else w - 1
            roi = frame[y1:y2, x1:x2, :]
            image = cv.resize(roi, (64, 64))
            image = image.transpose((2, 0, 1))  # Change data layout from HWC to CHW
            res = exec_net.infer(inputs={

    input_blob: [image]})
            prob_emotion = res['prob_emotion']
            probs = np.reshape(prob_emotion, 5)
            txt = labels[np.argmax(probs)]
            cv.putText(frame, txt, (np.int32(left), np.int32(top)), cv.FONT_HERSHEY_SIMPLEX, 1.0, (255, 0, 0), 2)
            cv.rectangle(frame, (np.int32(left), np.int32(top)),
                         (np.int32(right), np.int32(bottom)), (0, 0, 255), 2, 8, 0)
最后调用摄像头或者视频等
if __name__ == "__main__":

    # 调用摄像头
    # capture = cv.VideoCapture(0)
    # 读取视频
    path = "./dataset/video/smile.mp4"
    capture = cv.VideoCapture(path)

    while True:
        ret, frame = capture.read()
        if ret is not True:
            break
        emotion_detect(frame)
        cv.imshow("emotion-detect-demo", frame)
        # 按Q 退出 waitKey控制播放速度
        if cv.waitKey(1) & 0xFF == ord('q'):
            break
PS:此文也更新于个人博客